UV Mapping
Recap:
- The 3D Process Large Scale, Indie and Individual
- Boolean Modeling
- Topology Reduction
- Flow of Topology
- Importing Images
- Modeling complex models from Images
Plan:
- What are UVs and what is UV unwrapping
- How to unwrap and clean up UVs in Maya
What are UVs
For a brief explanation of what UVs are, and why we need to use them when producing 3D models for renders, animations, and games, check out this video:
UV mapping, in short, is a way to transfer a 3D model into a 2D space so that we might be able to apply textures to that model.
UVs and Maya
In Maya, we can create UVs using the UV Editor and a variety of tools associated with it.
There are many complex ways to produce UVs in Maya.
We will be using an extremely simple workflow that allows for easy UV creation.
This workflow uses the following steps:
- Separate objects by material.
- Clear all existing UVs
- Identify seam edges and cut.
- Unfold UVs using Unfold
- Use Layout, Straighten, Rotate, Move and Scale as necessary to create UV layout
Creating Materials
The best first step to unwrapping our model is deciding which material our model will be made out of. This will help in guiding where the seams of our model will go. If our model only has one material, we can just apply a single material to the whole model.
To apply separate materials to different parts of our model:
- Select the faces where we want our material to be applied.
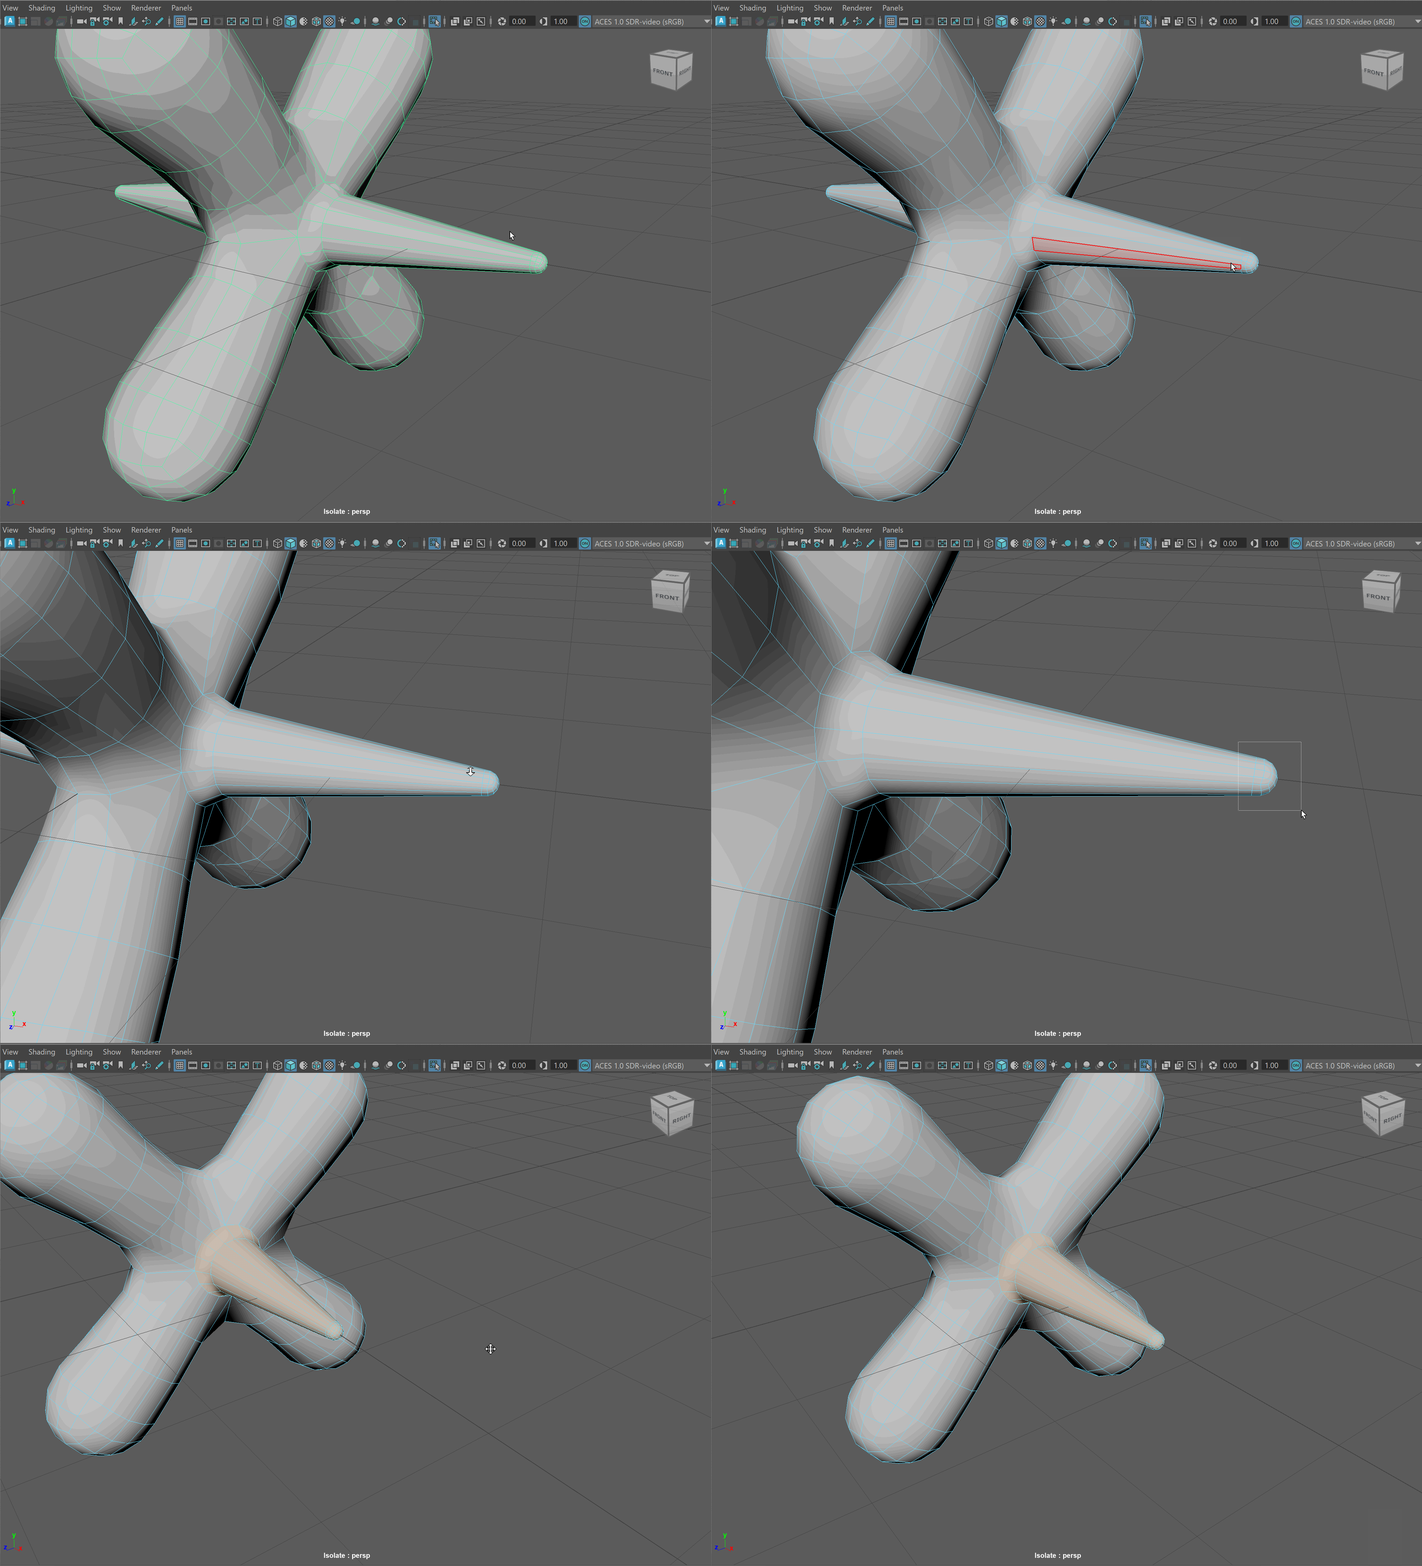
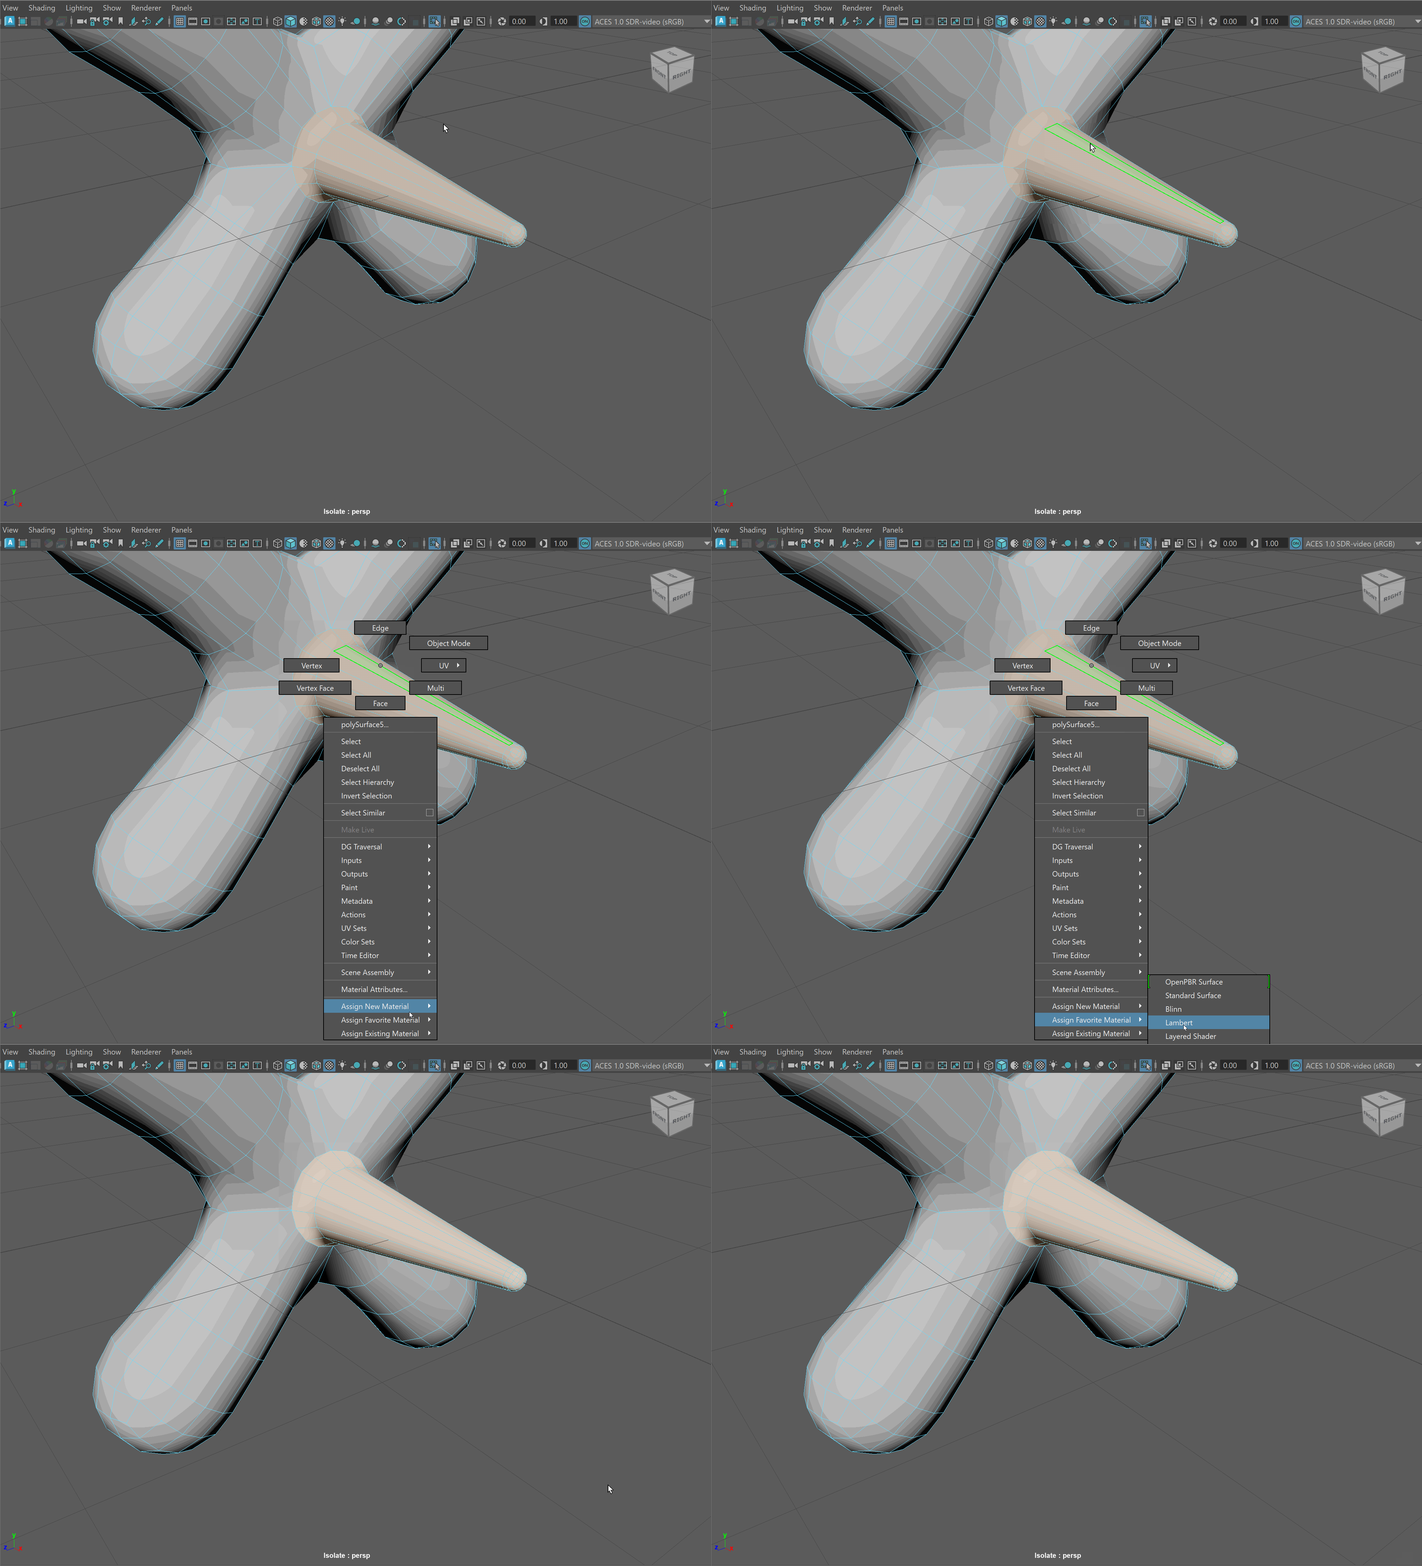
- Right Click on the faces > Assign Favorite Material > Lambert
- In the Attribute Editor, select the tab of the newly created material.
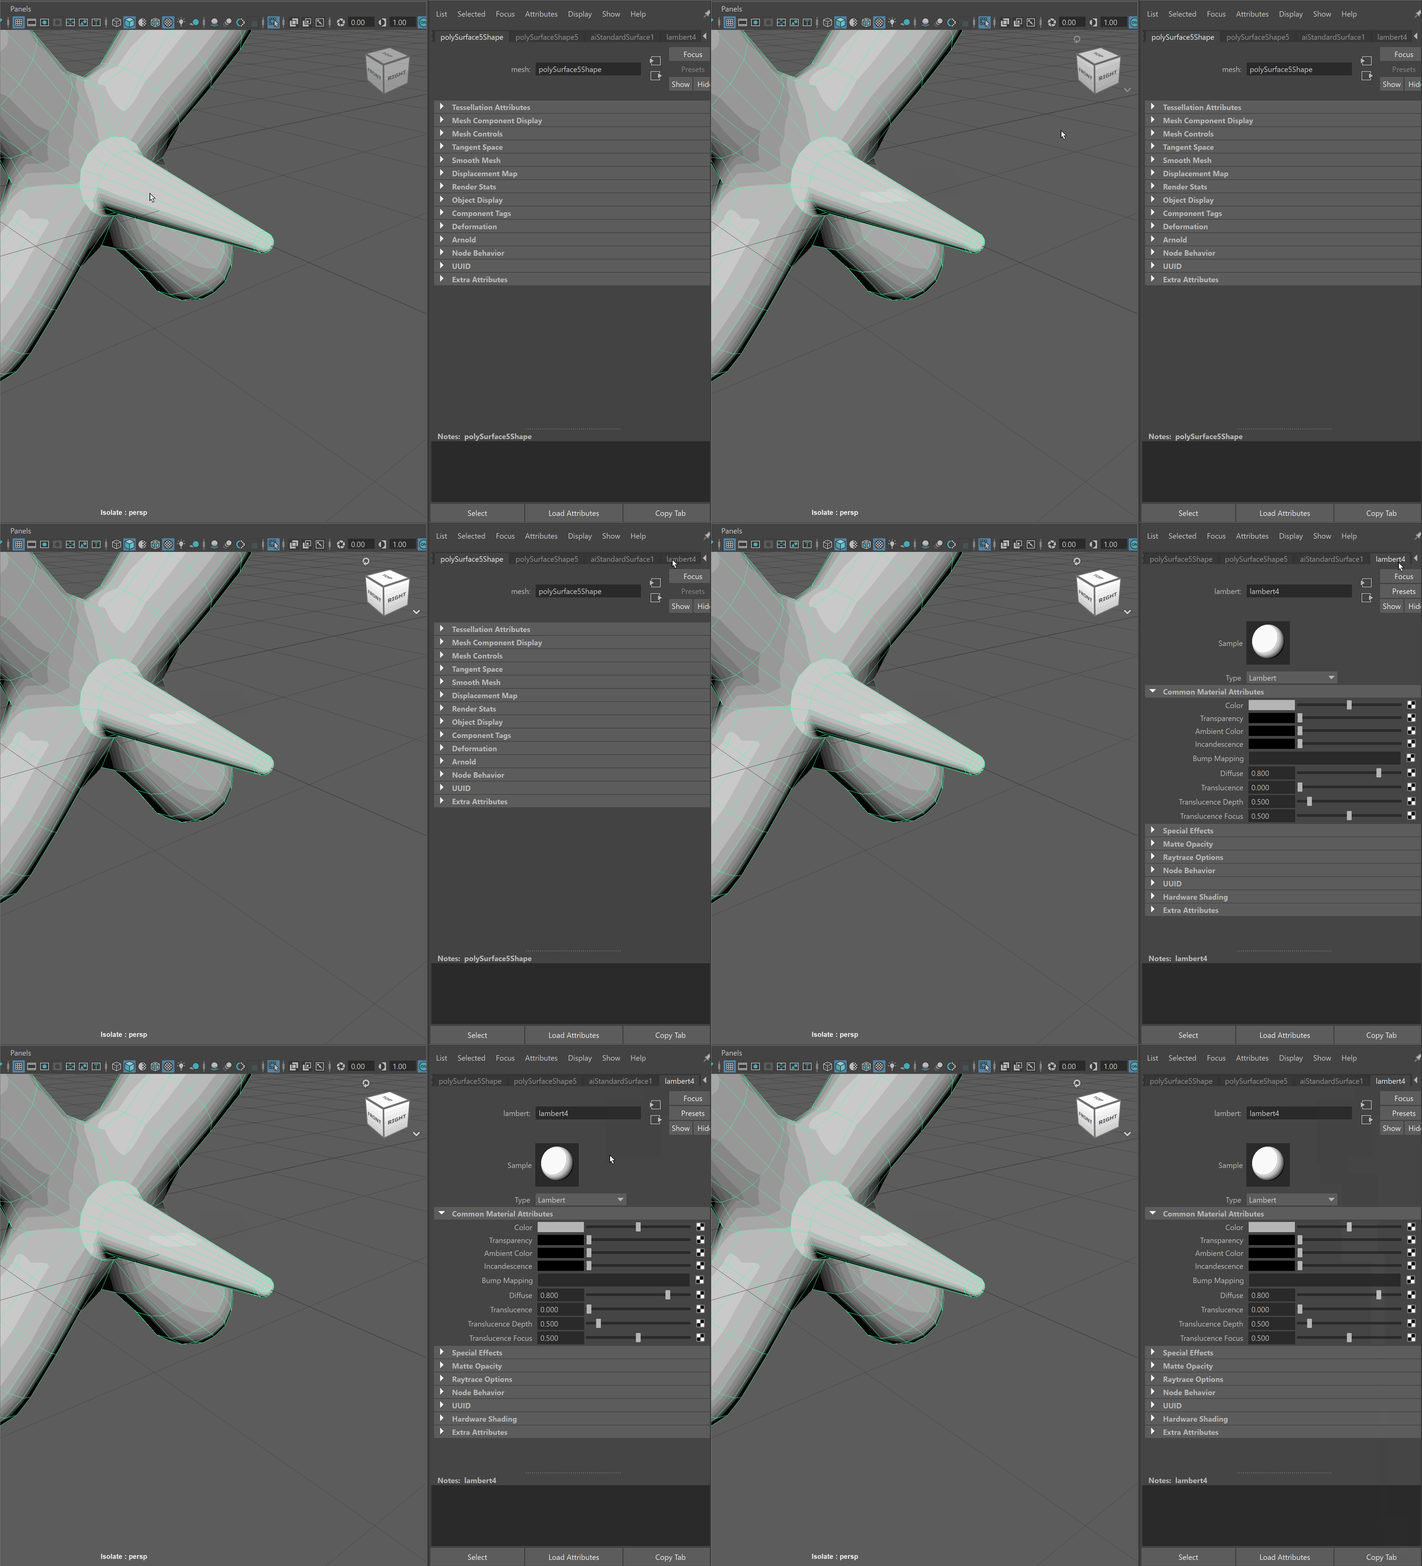
- Change Type to Ai Standard Surface
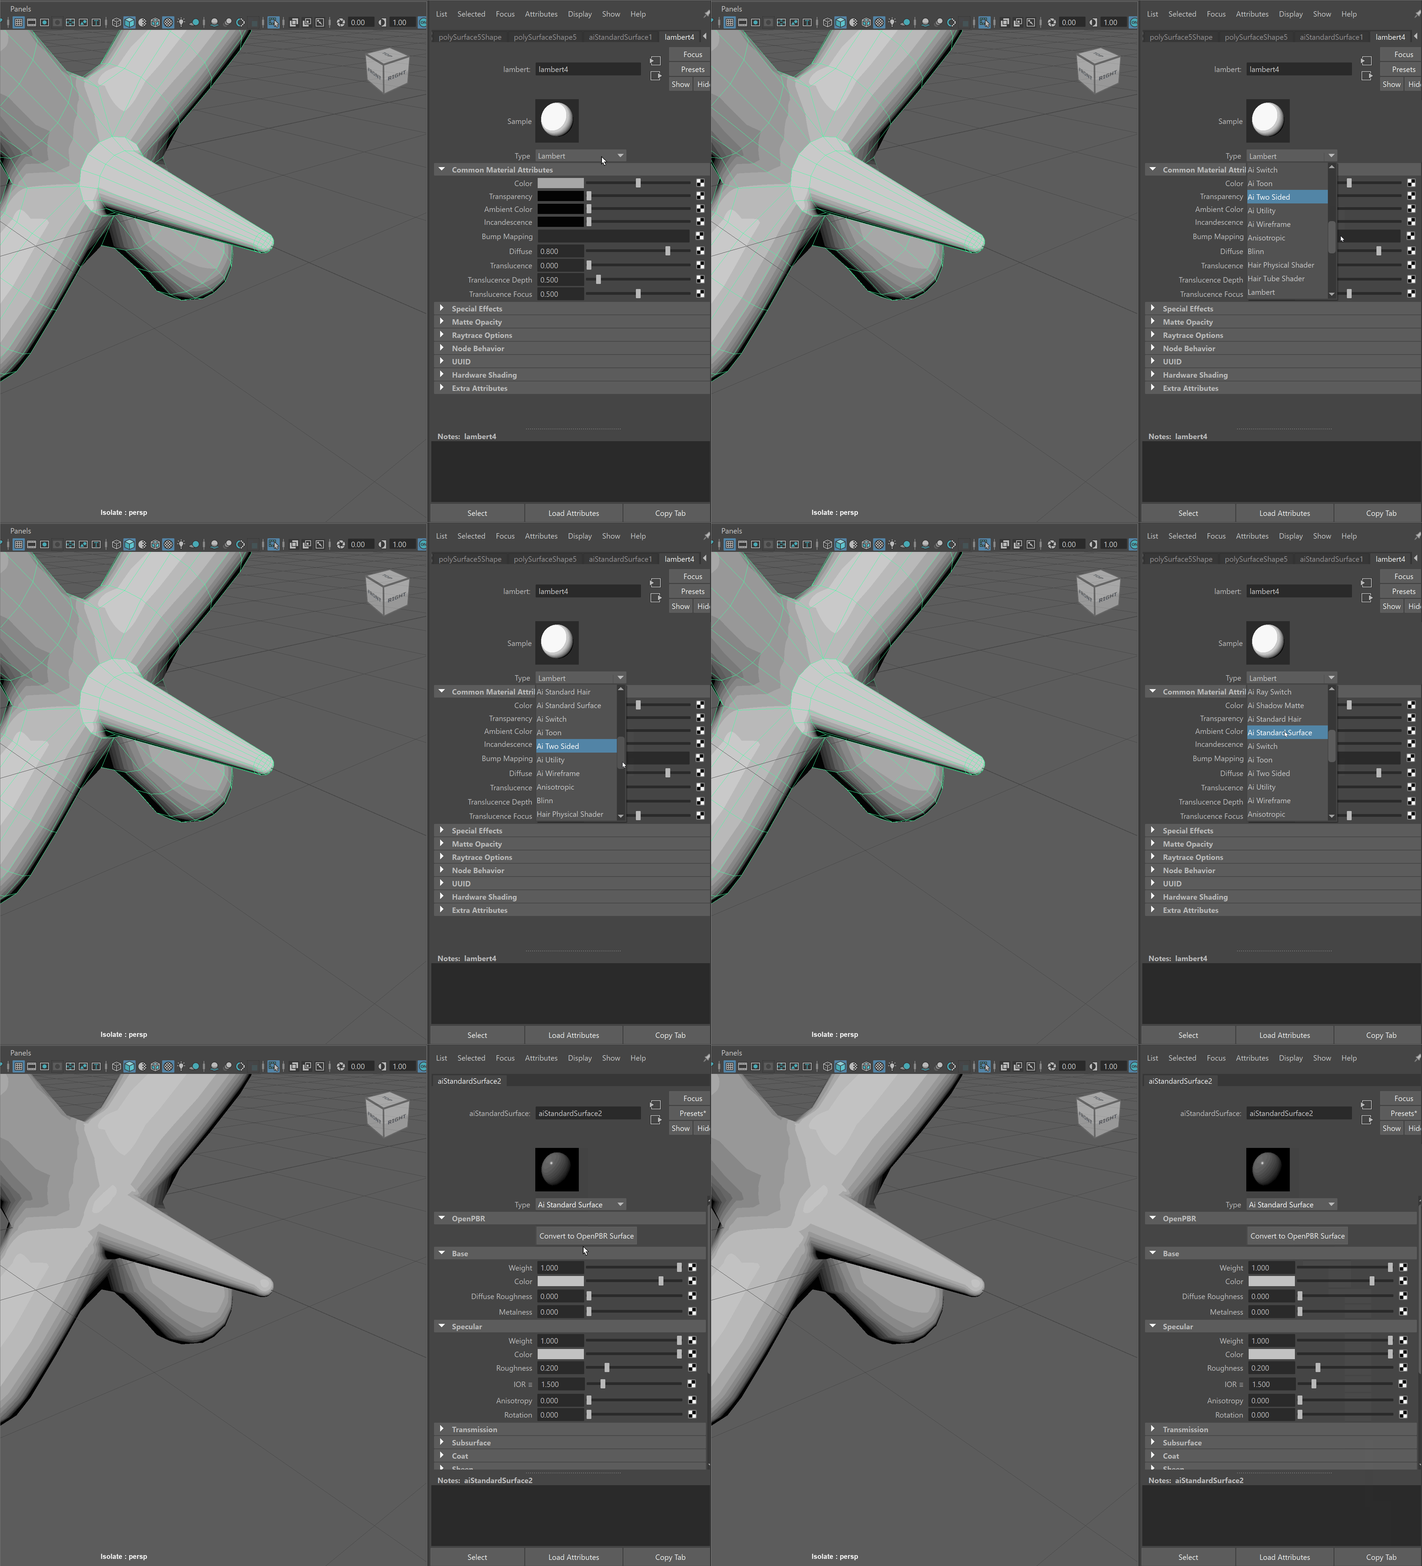
- Name your material.
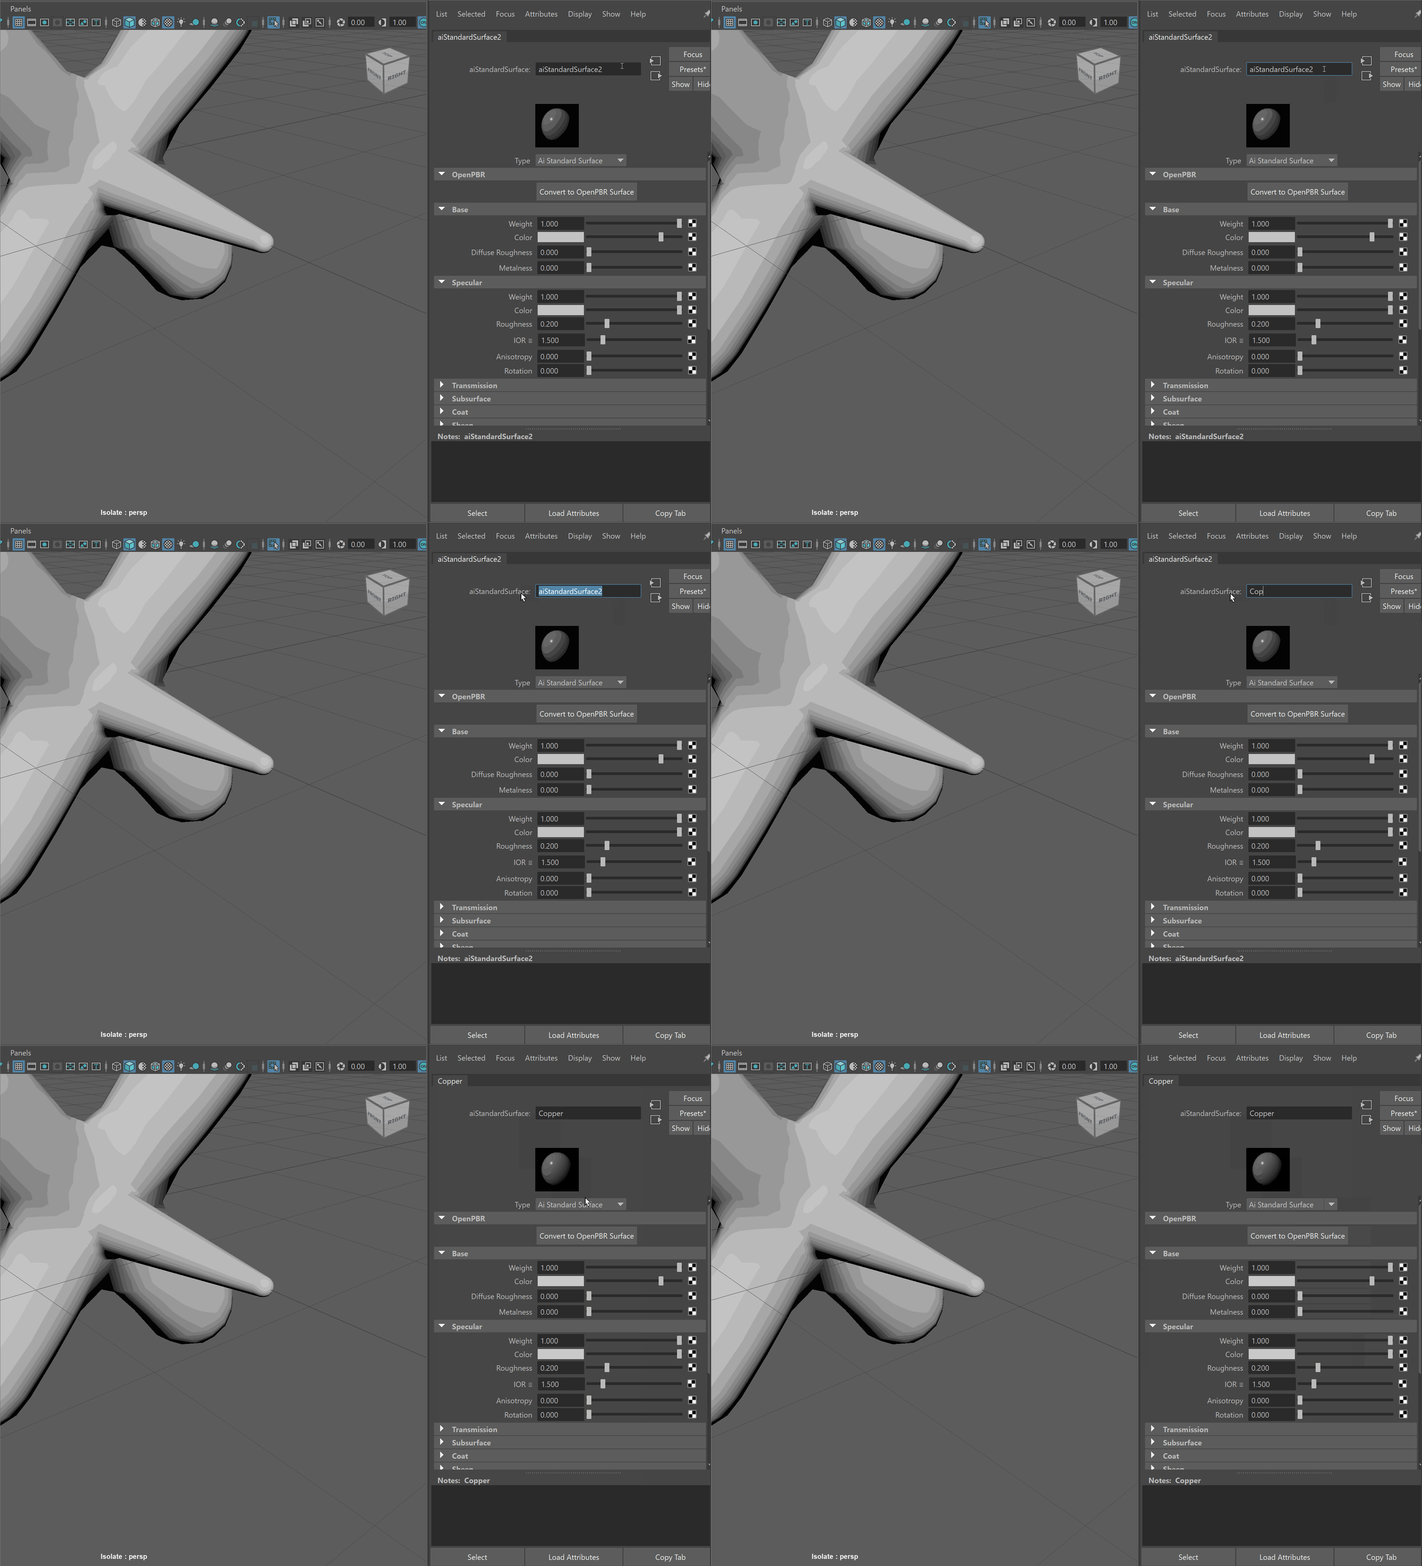
- Change the color value to a unique color to distinguish it from other materials
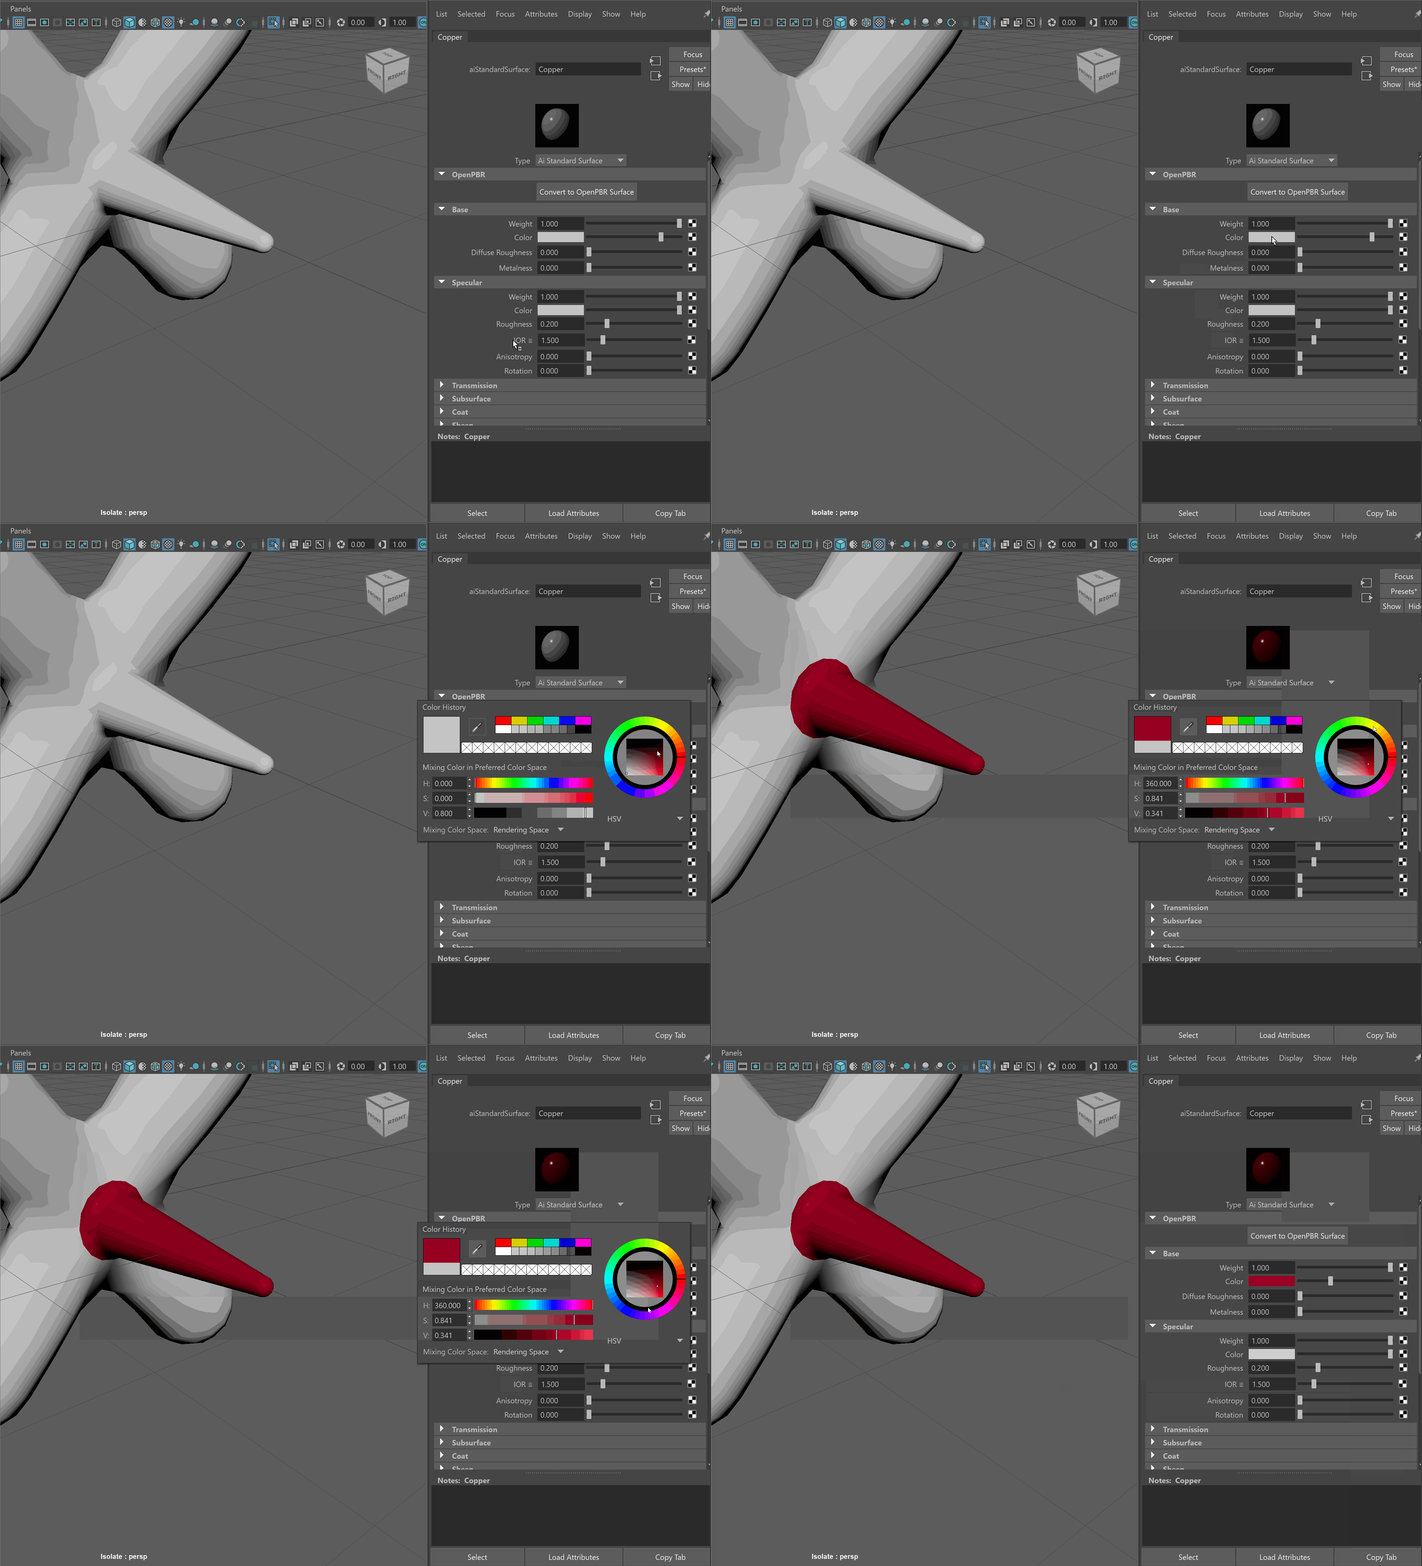
If you need to apply that same material to other parts of your model:
- Select the faces where we want our material to be applied.
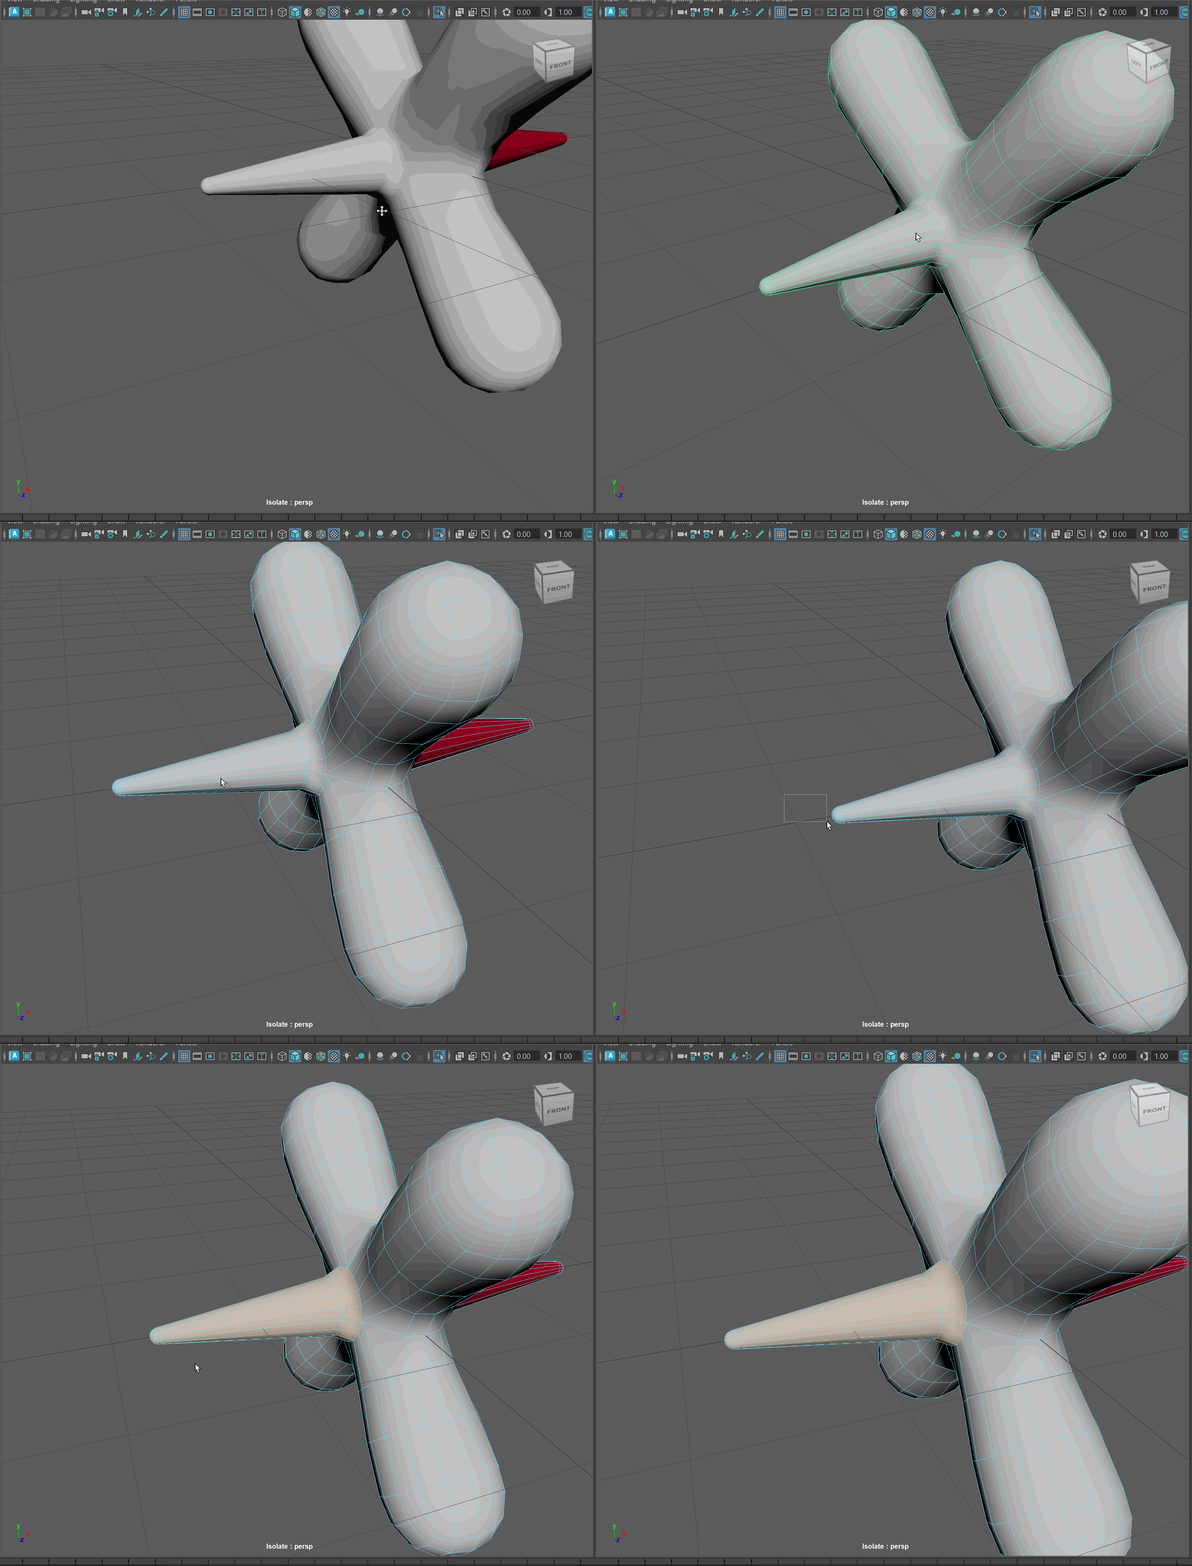
- Right Click on the faces > Assign Existing Material> Name of your material
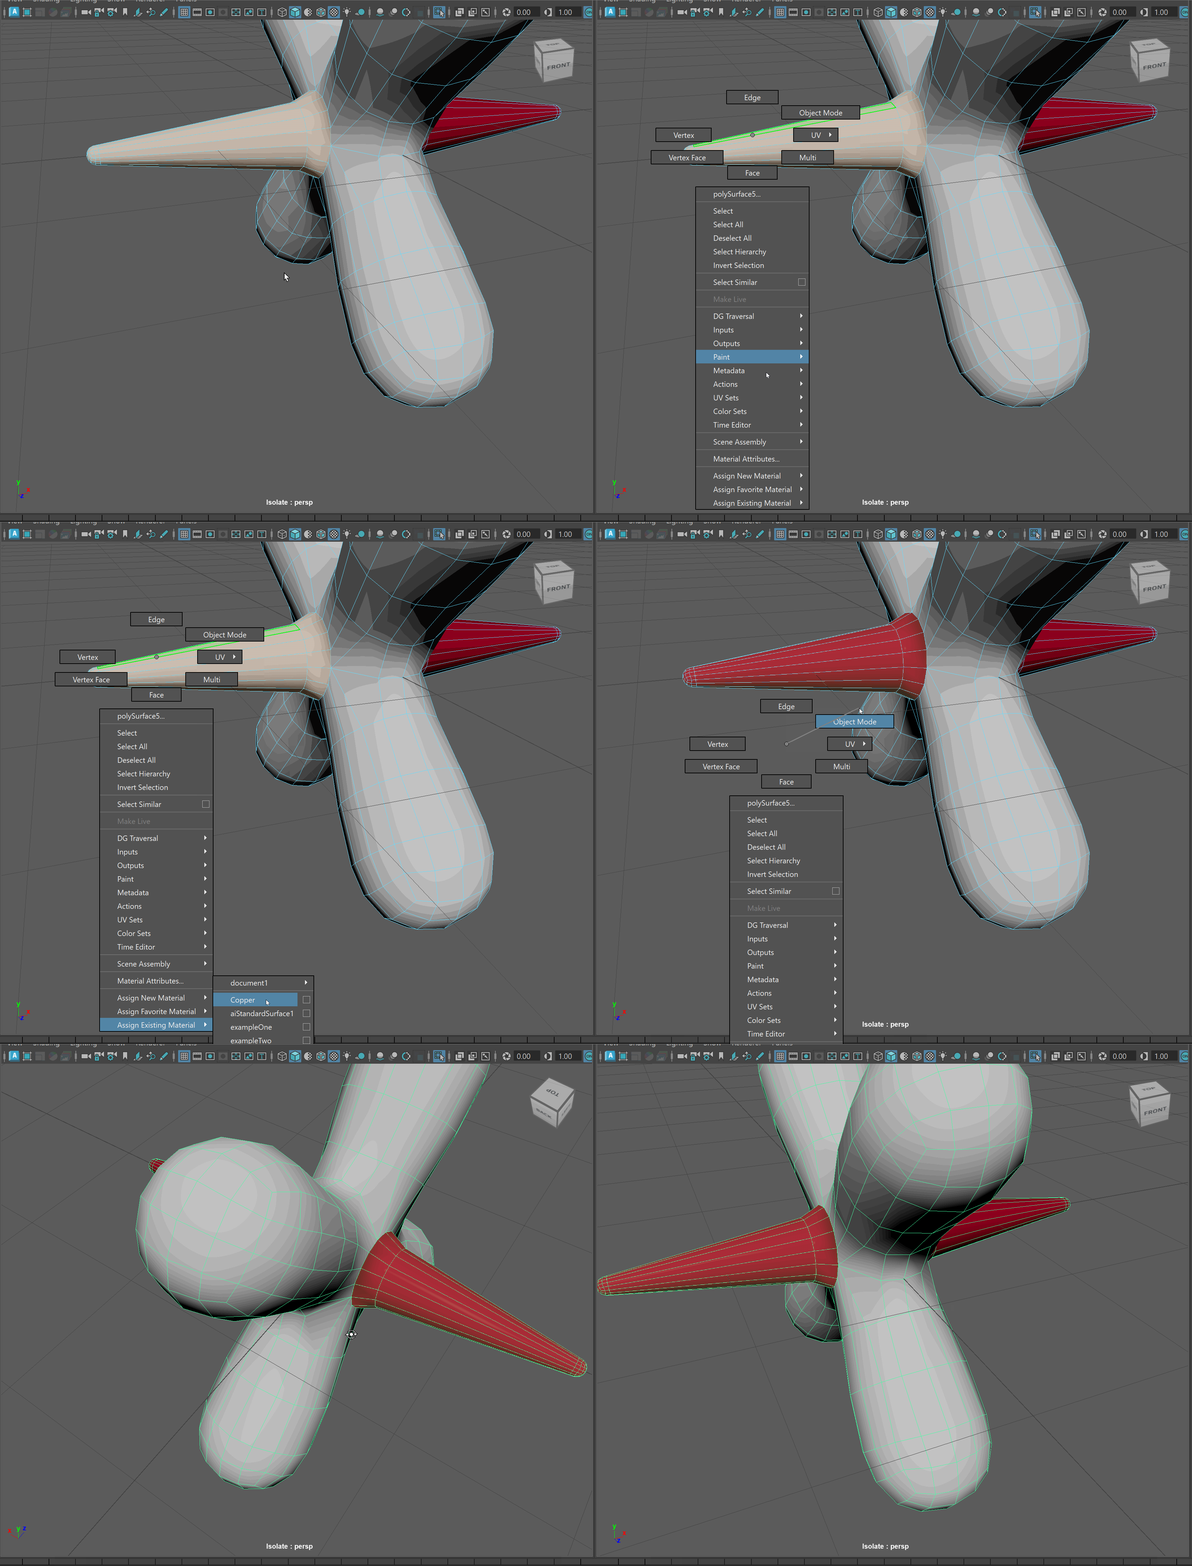
Make sure to assign materials to all parts of your model.
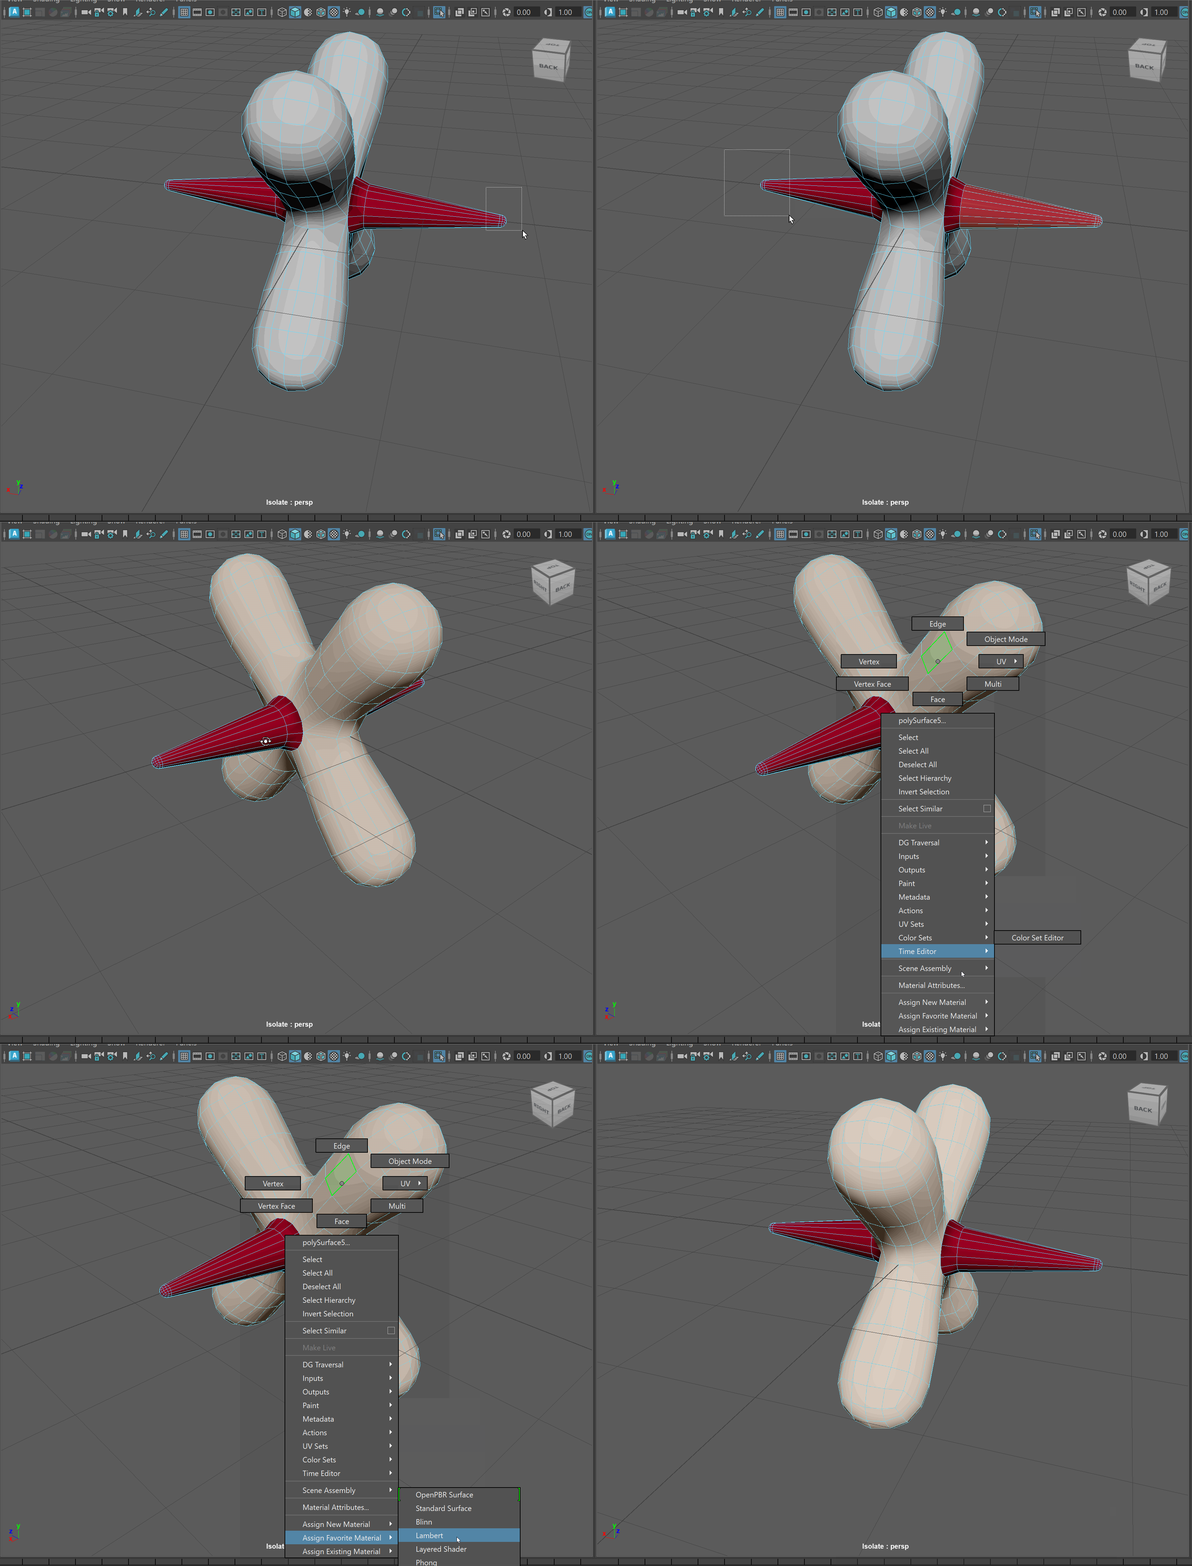
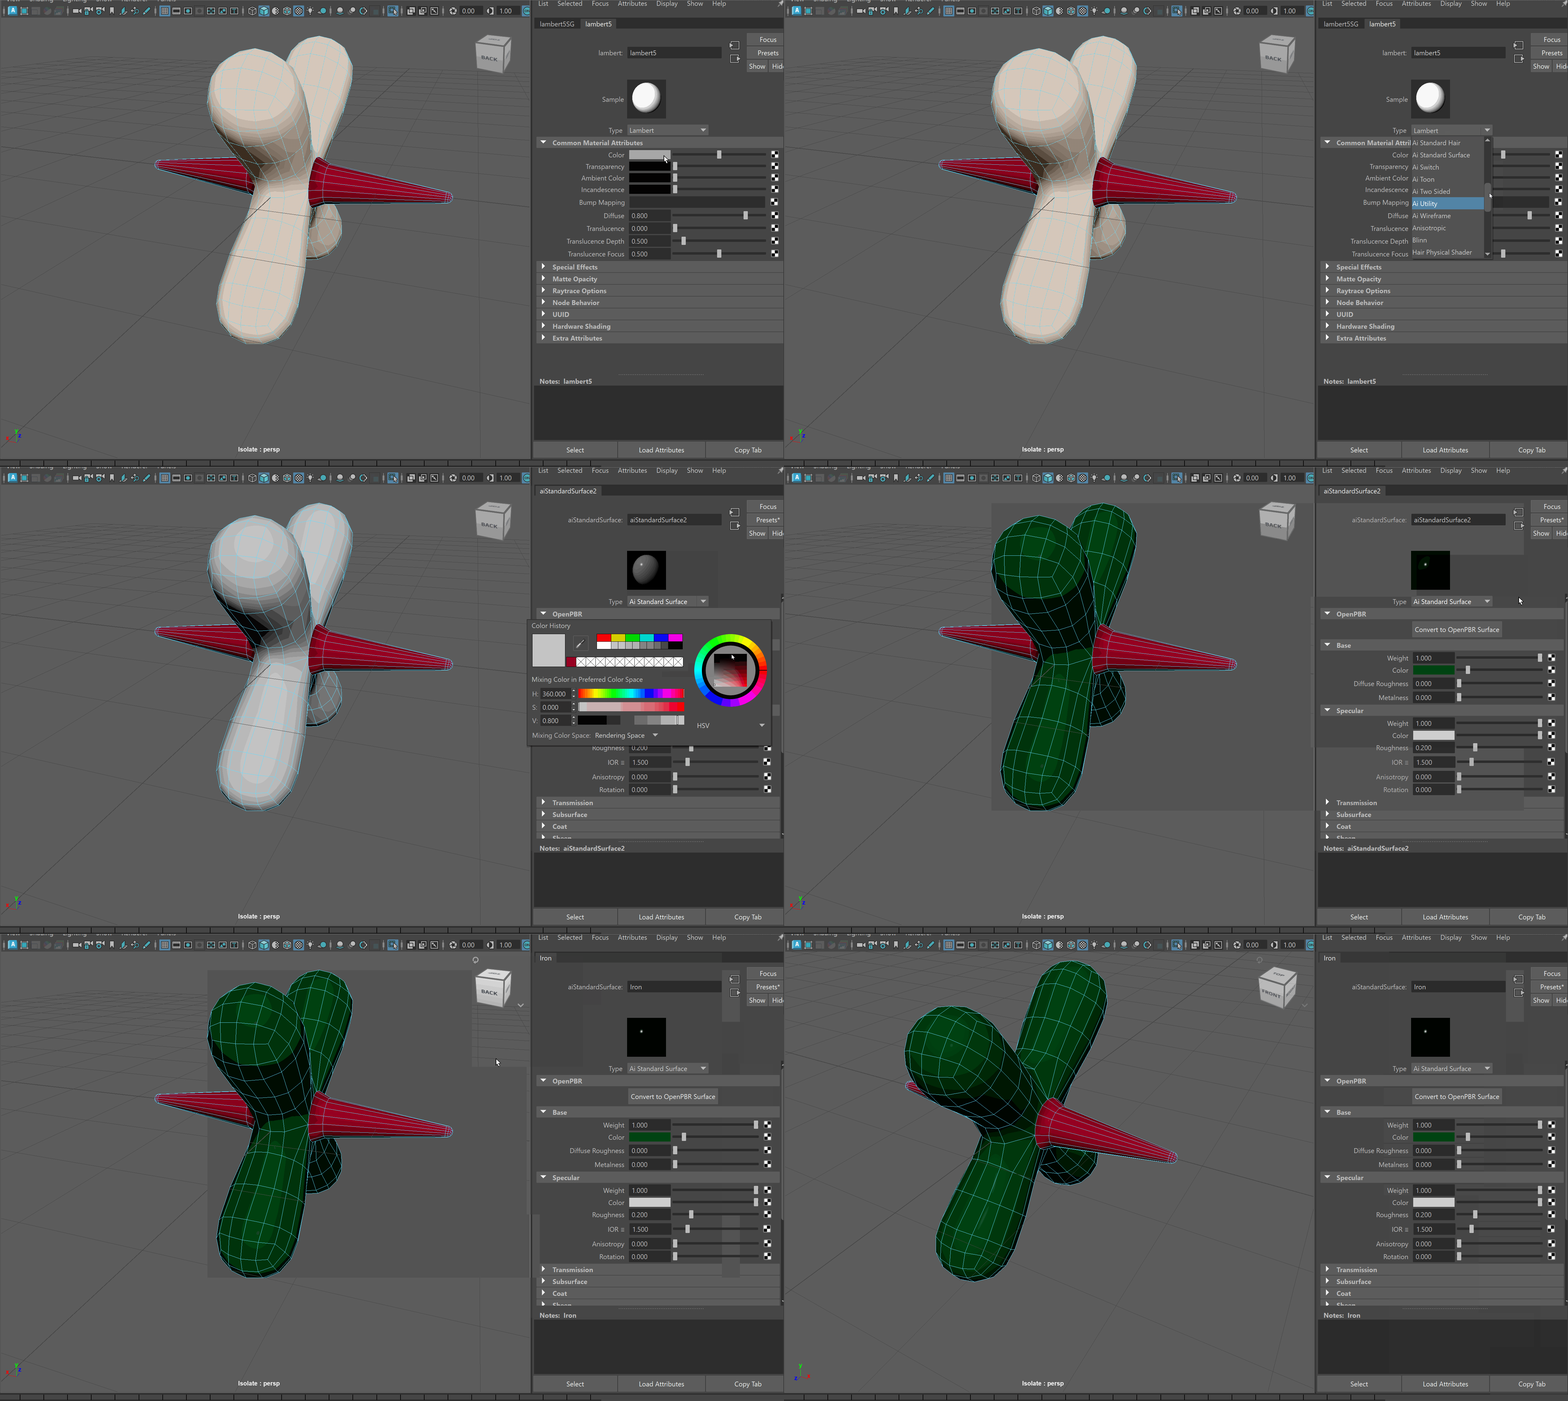
The main reason we are assigning materials as our first step, is that we will be using a program called Substance Painter to create our textures and materials. Substance Painter identifies different parts of our model by the different materials they contain. It will also help us see more clearly where we can place seam lines on our model.
UV Editor Workspace
To enter the UV Editing workspace within Maya:
- Navigate to the Workspace drop down in the upper right corner of the UI
- From the dropdown, select UV Editing
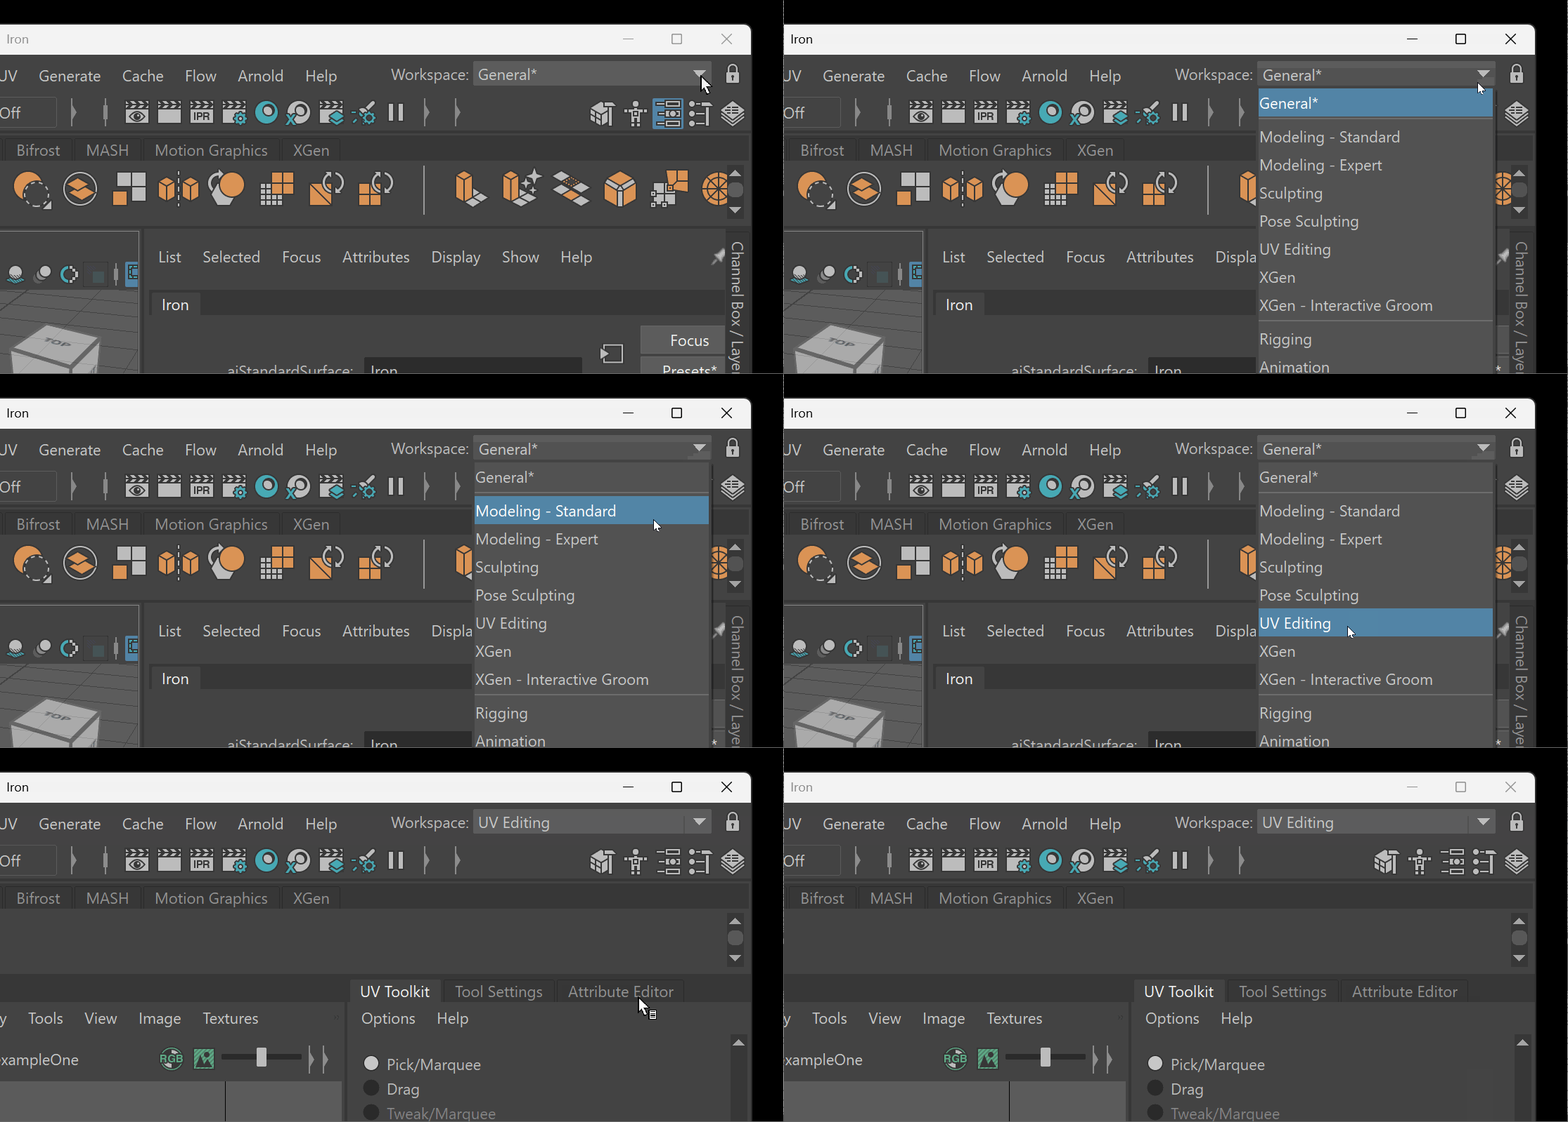
The UV Editing workspace will bring up the UV Editor and the UV Toolkit.
Clear Existing UVs
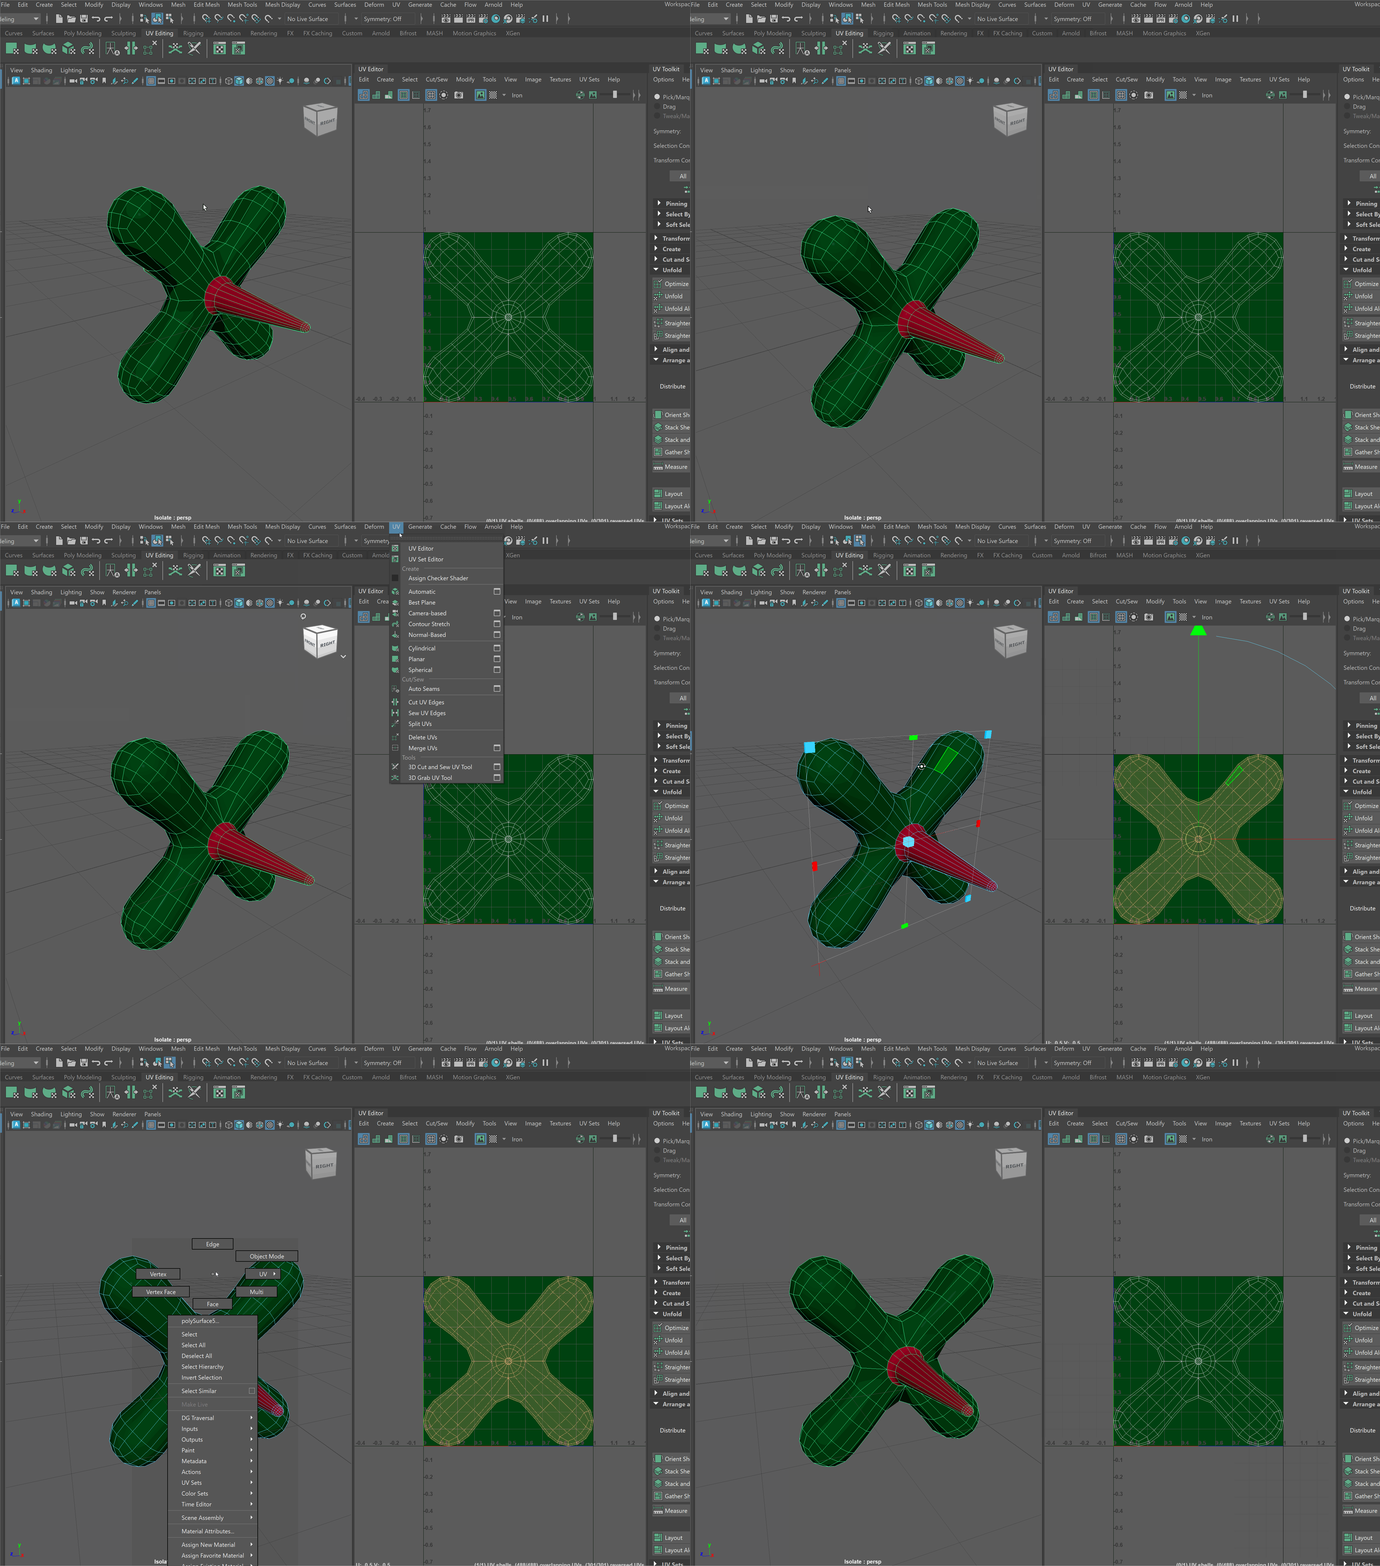
The easiest way to clear existing UVs is to apply a Planar UV to our model. A Planar UV will use a plane to project onto our model, creating a flat set of UVs.
- Select your object
- Navigate to UV > Planar
Identify and Cut Seams
The best place to cut seams is where they might exist naturally on our model. This might be the seam lines of clothes, where two metal panels meet, or along the edge where two bits of plastic are attached together. This will vary greatly depending on the type of model that you are building.
As an example:
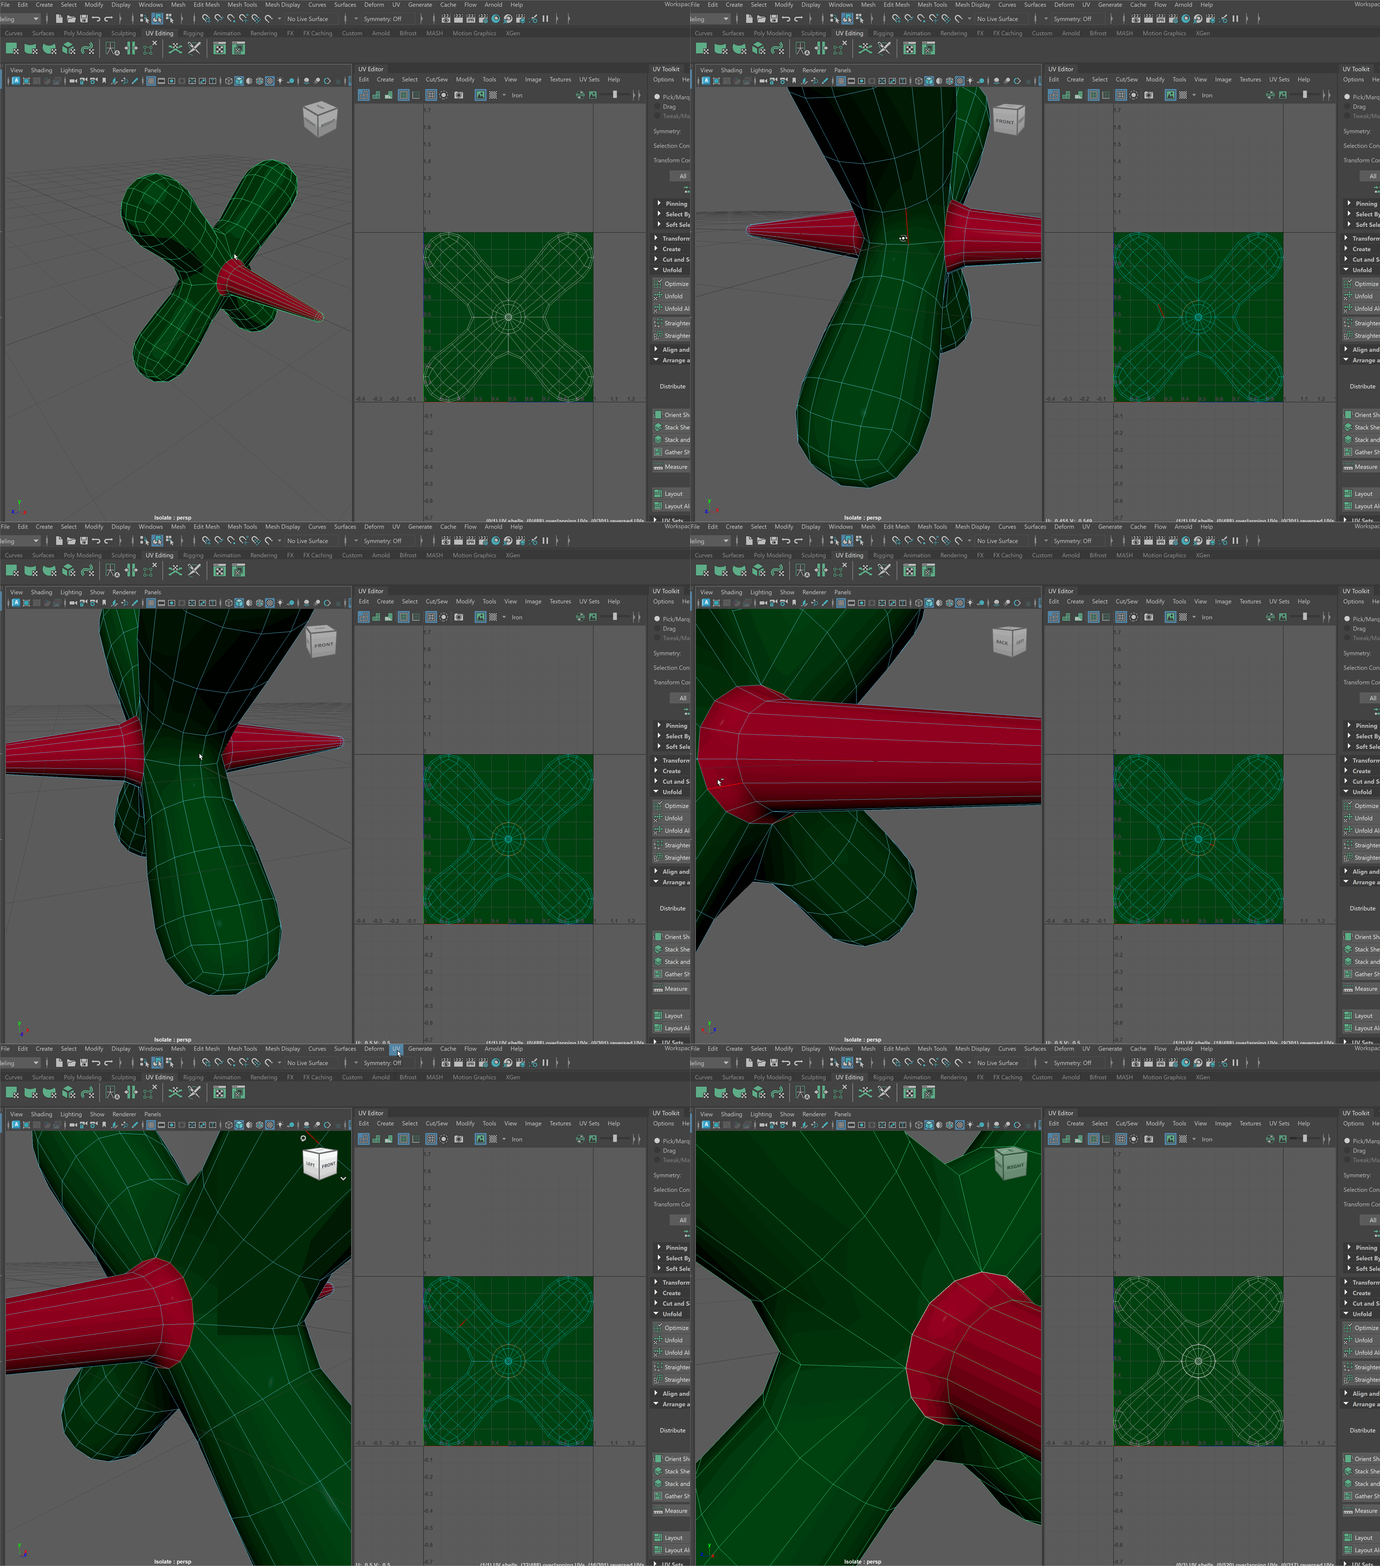
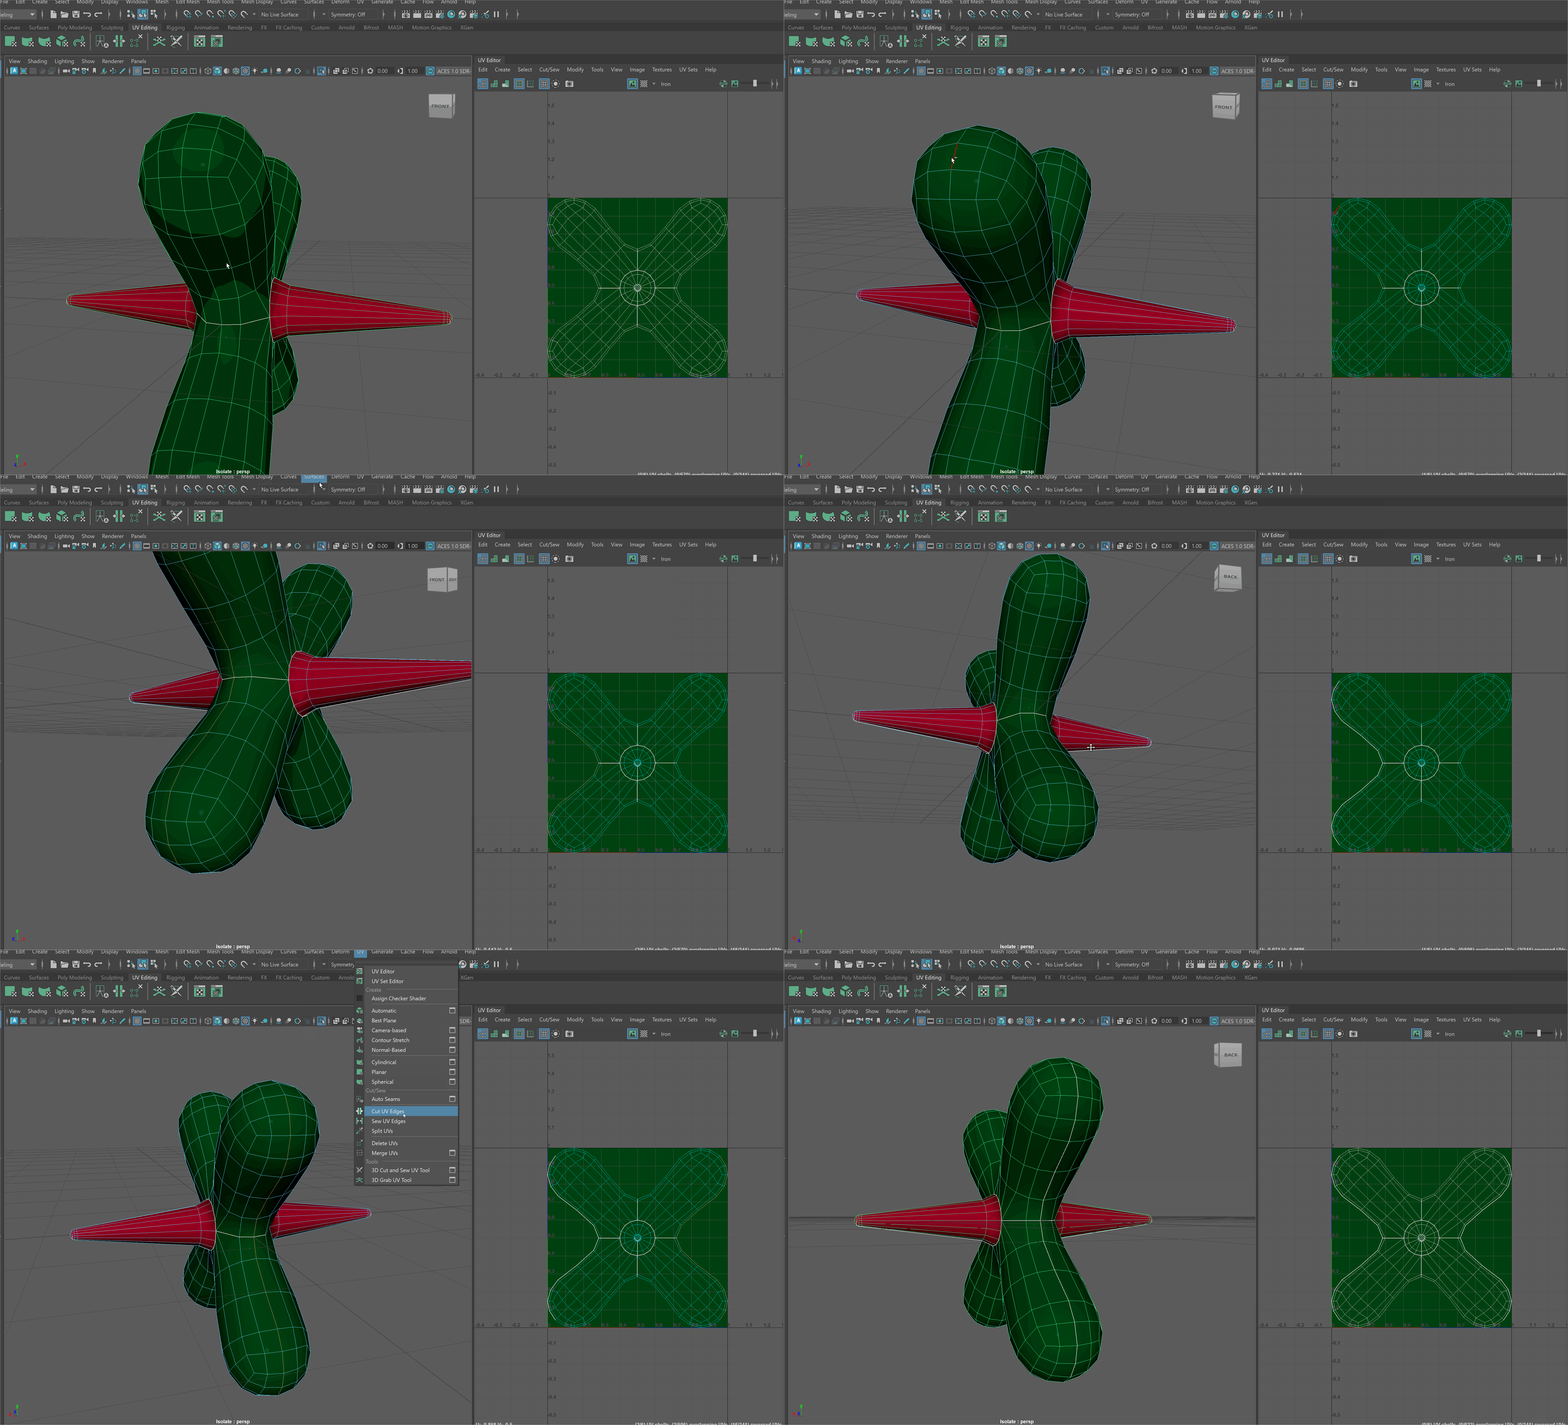
Using this Jack as my model, I would first cut seams along the separating edge between the two materials.
To cut a seam:
- Select all the edges I want to cut.
- Navigate to UV > Cut UV Edges (If I need to un-cut an edge, I can use UV > Sew UV edges)
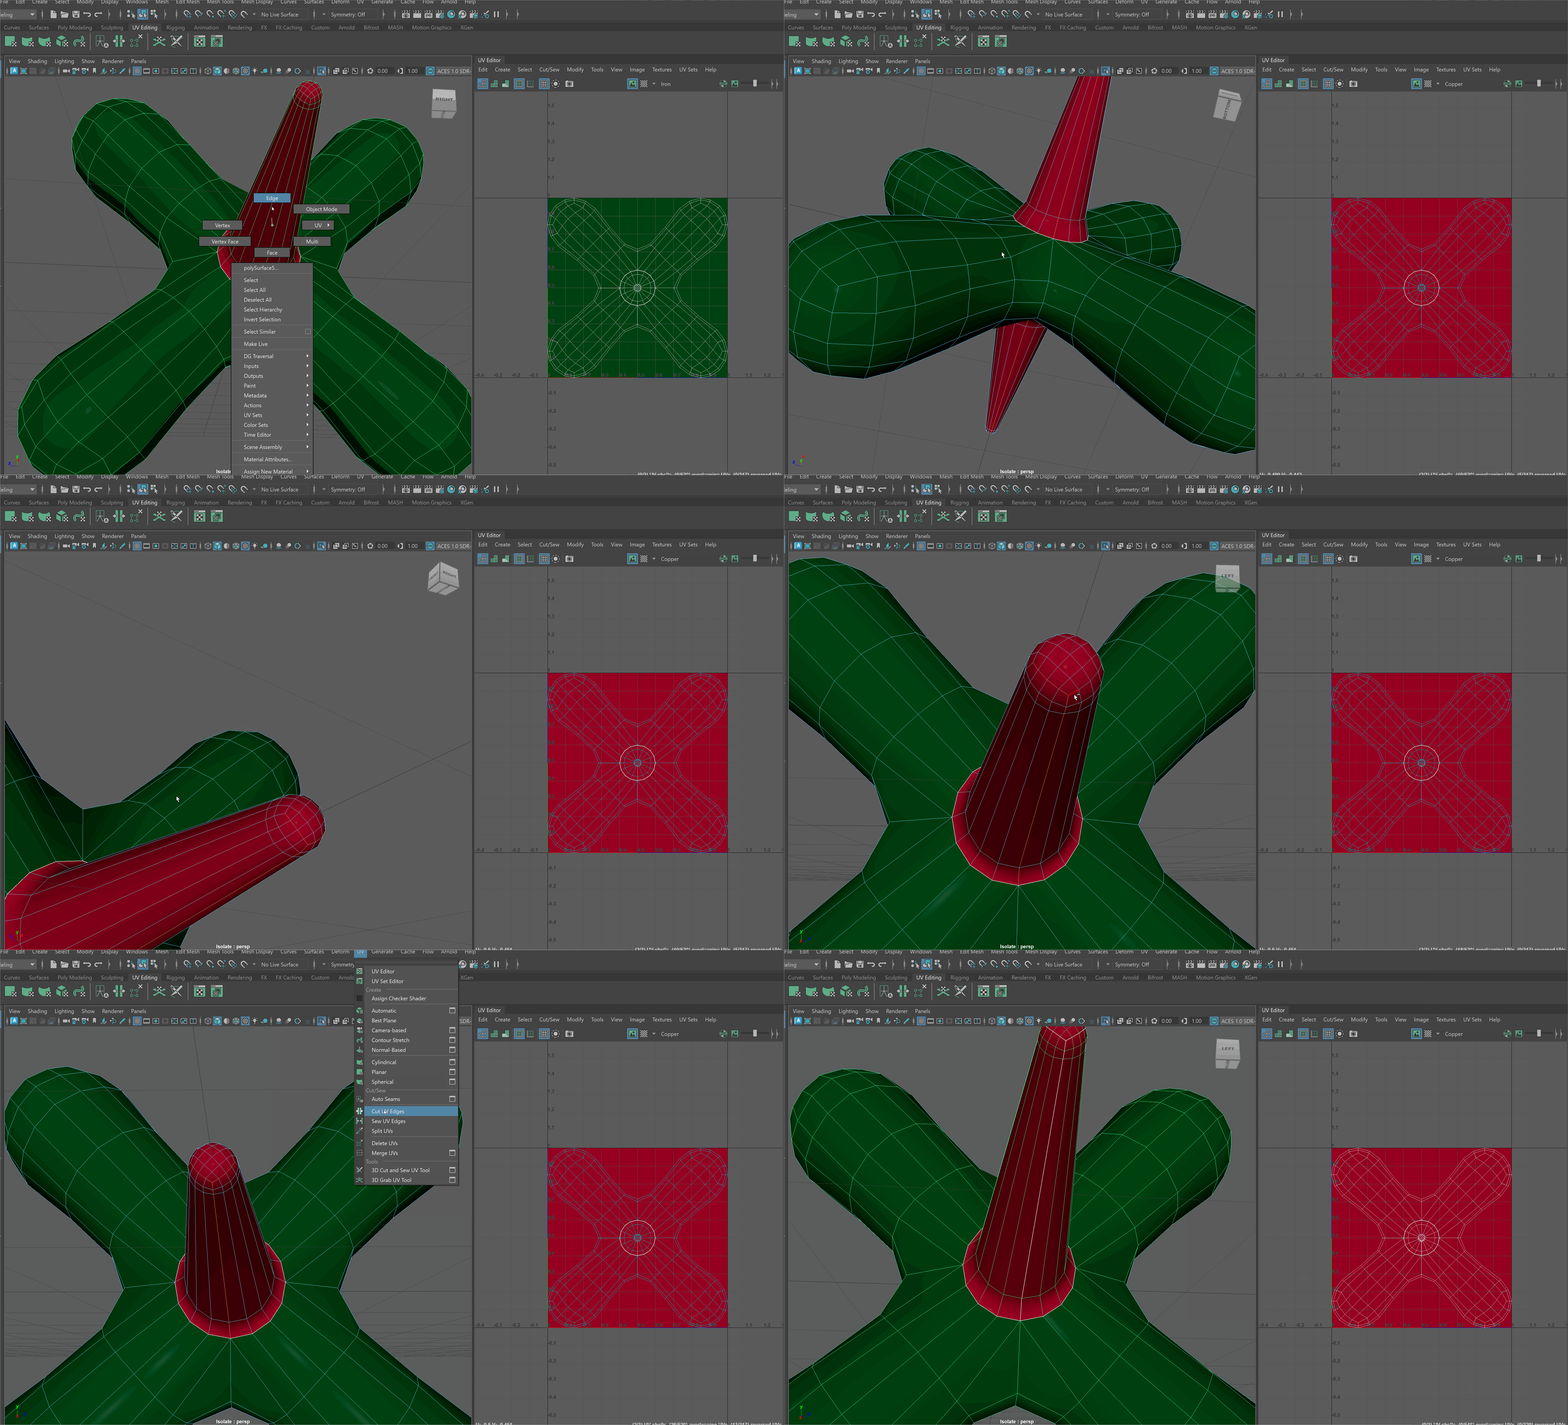
Next, I would cut along the bottom of my Jack tip to allow the UV object to unfold.
For the body of the Jack, I can begin by cutting all the center edges.
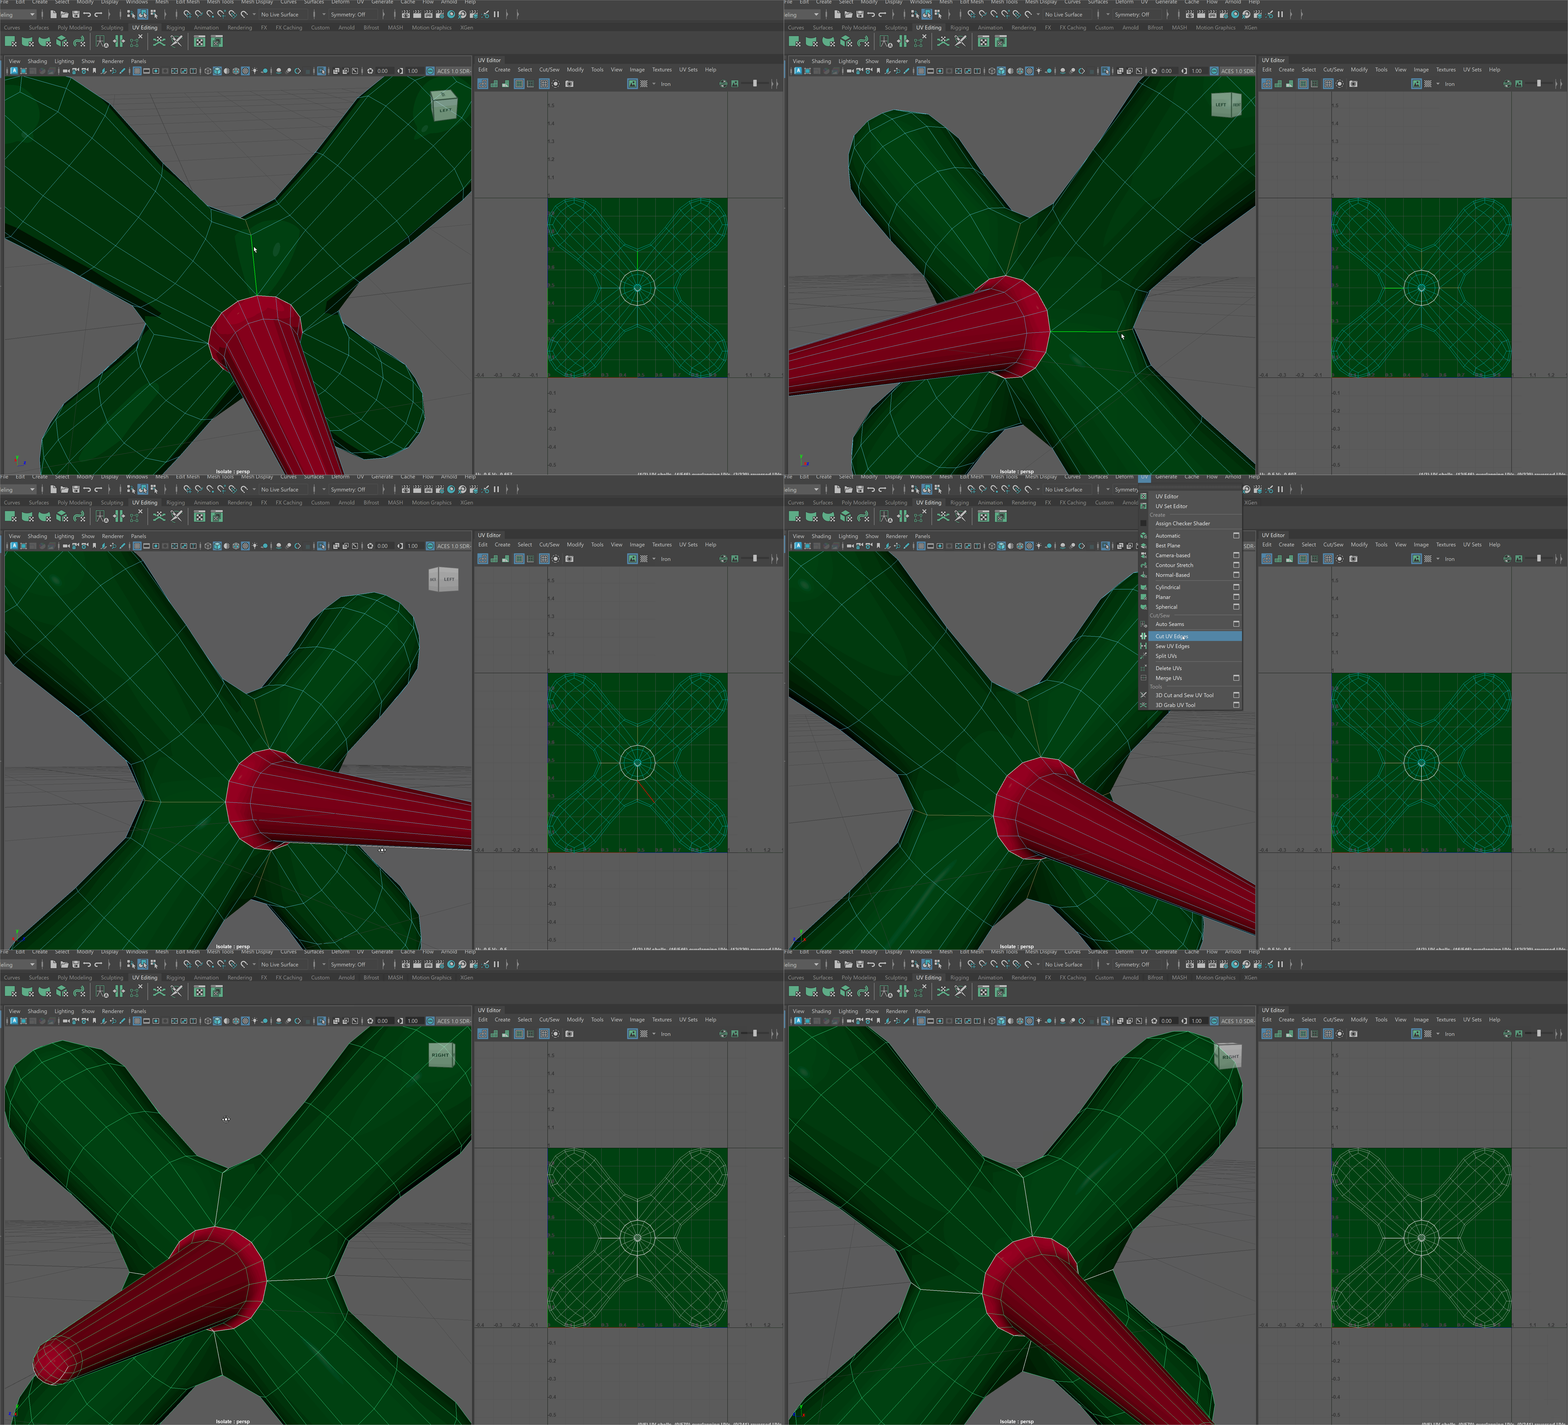
Then, along the right and left side, I can cut from the end of one protruding part to the other. This will add in an edge that will allow each segment to open and unfold.
Unfold and and Clean-up
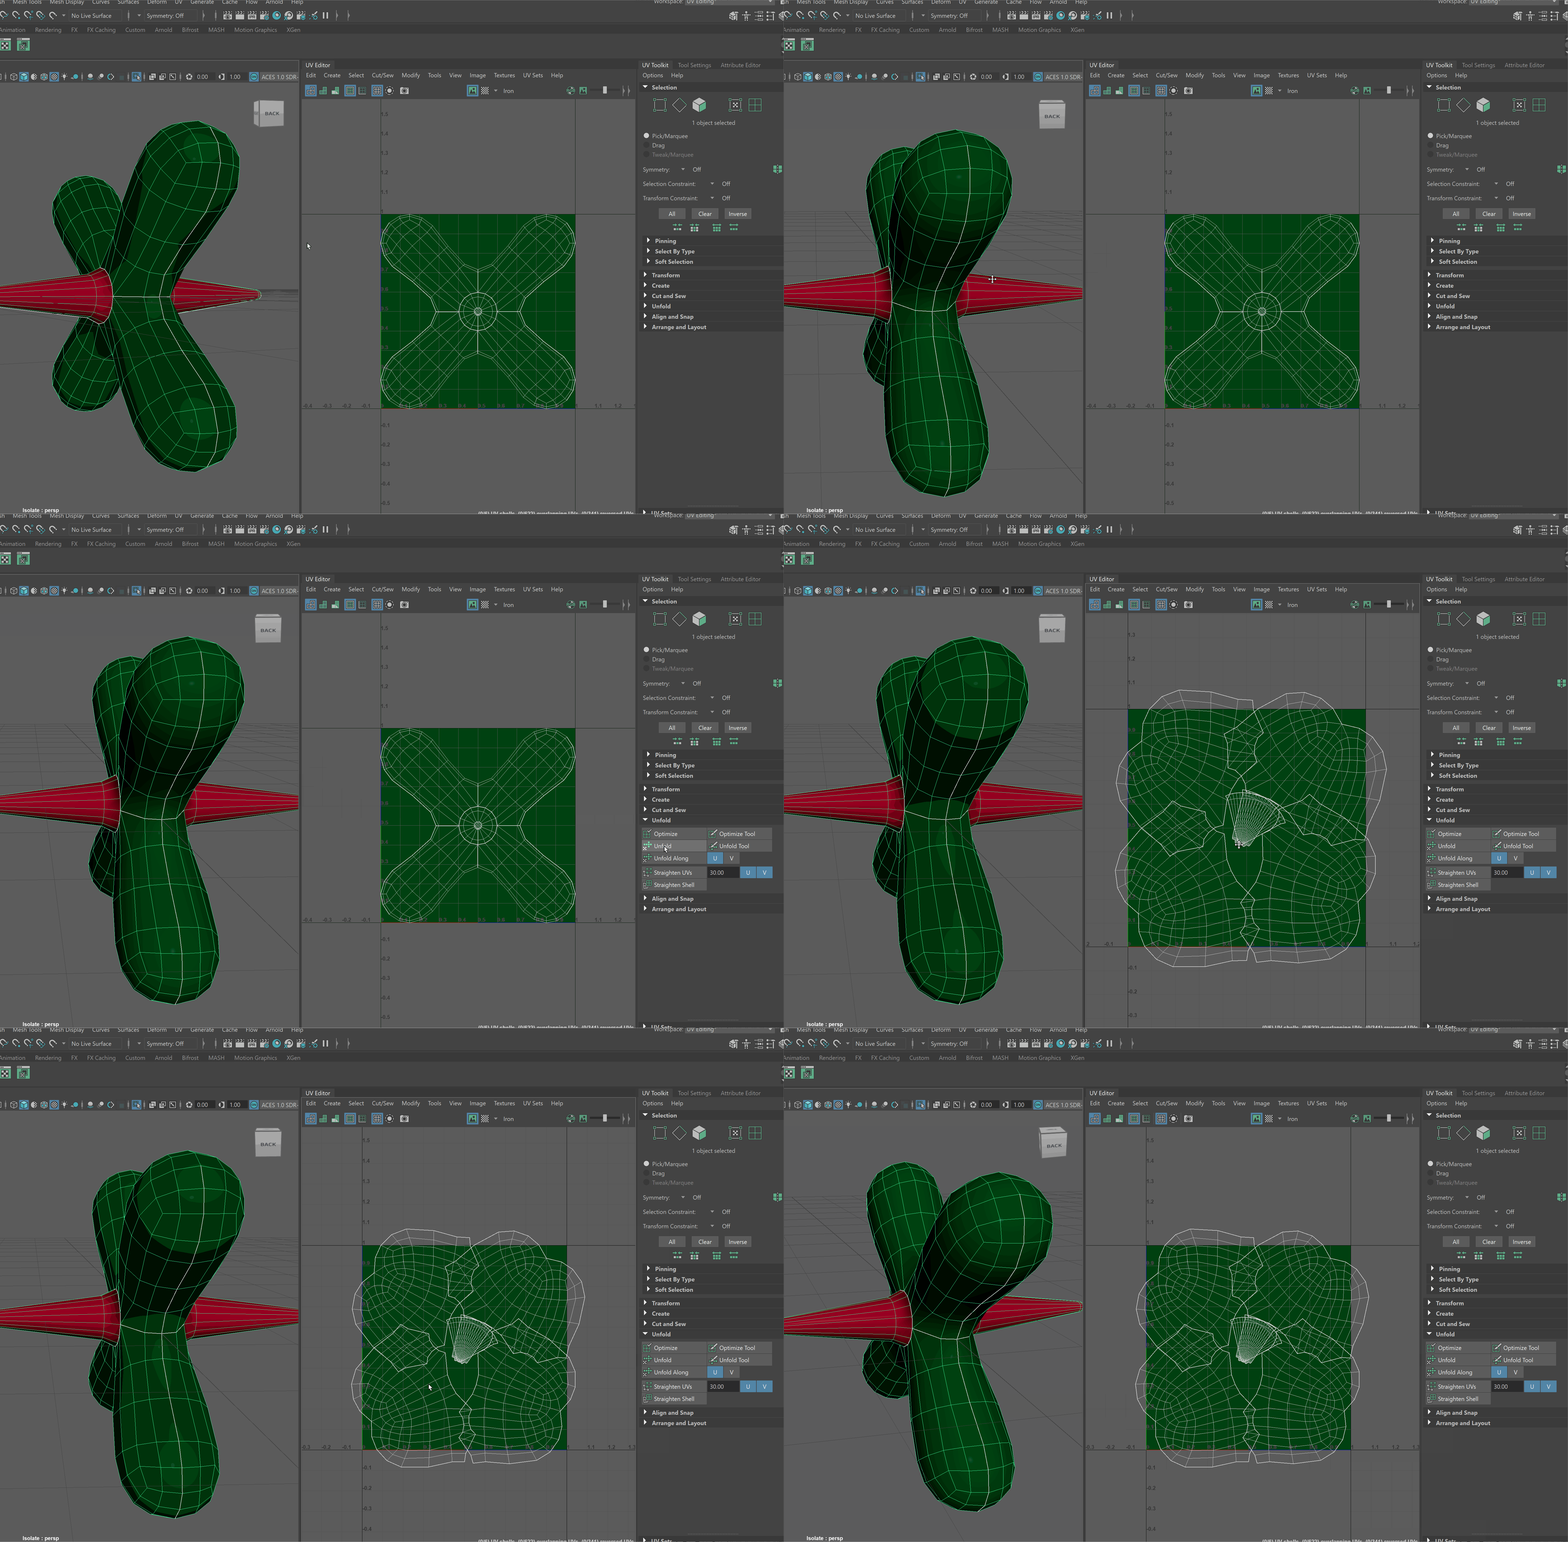
Now that I have cut my UV seams, I need to unfold my UVs.
- With our object selected, navigate to the Unfold dropdown in the UV Toolkit window
- Select Unfold
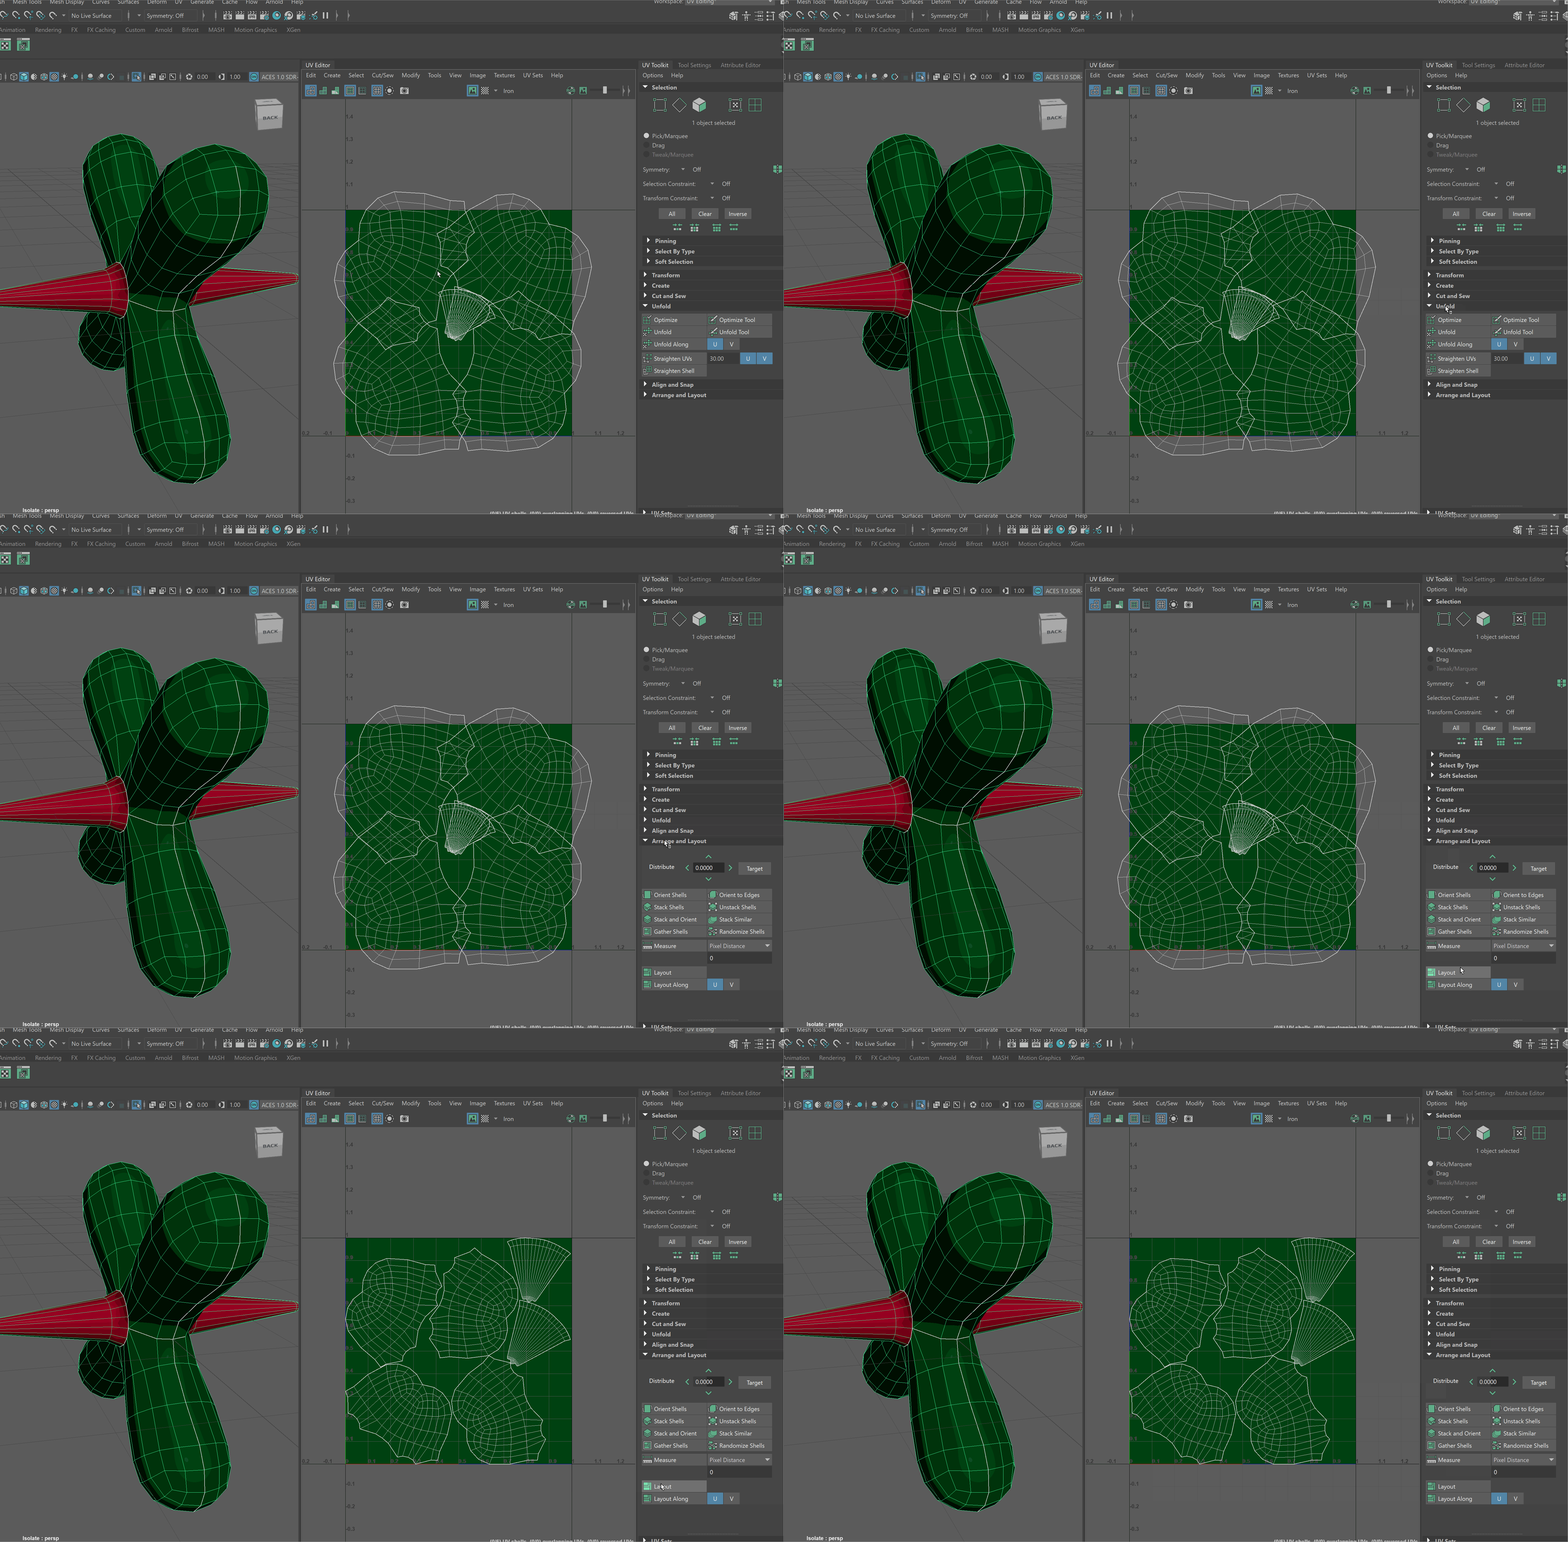
With our object unfolded, we can then layout all the UV Shells in our UV Editor.
To layout our UVs
- With our object selected, navigate to the Arrange and Layout dropdown in the UV Toolkit window
- Select Layout
If we want to Move, Rotate and Scale our UV Shells:
- Use Right Click in our UV Editor and navigate to UV Shell
- Use Move, Rotate and Scale Tool to Change the layout of our UVs.
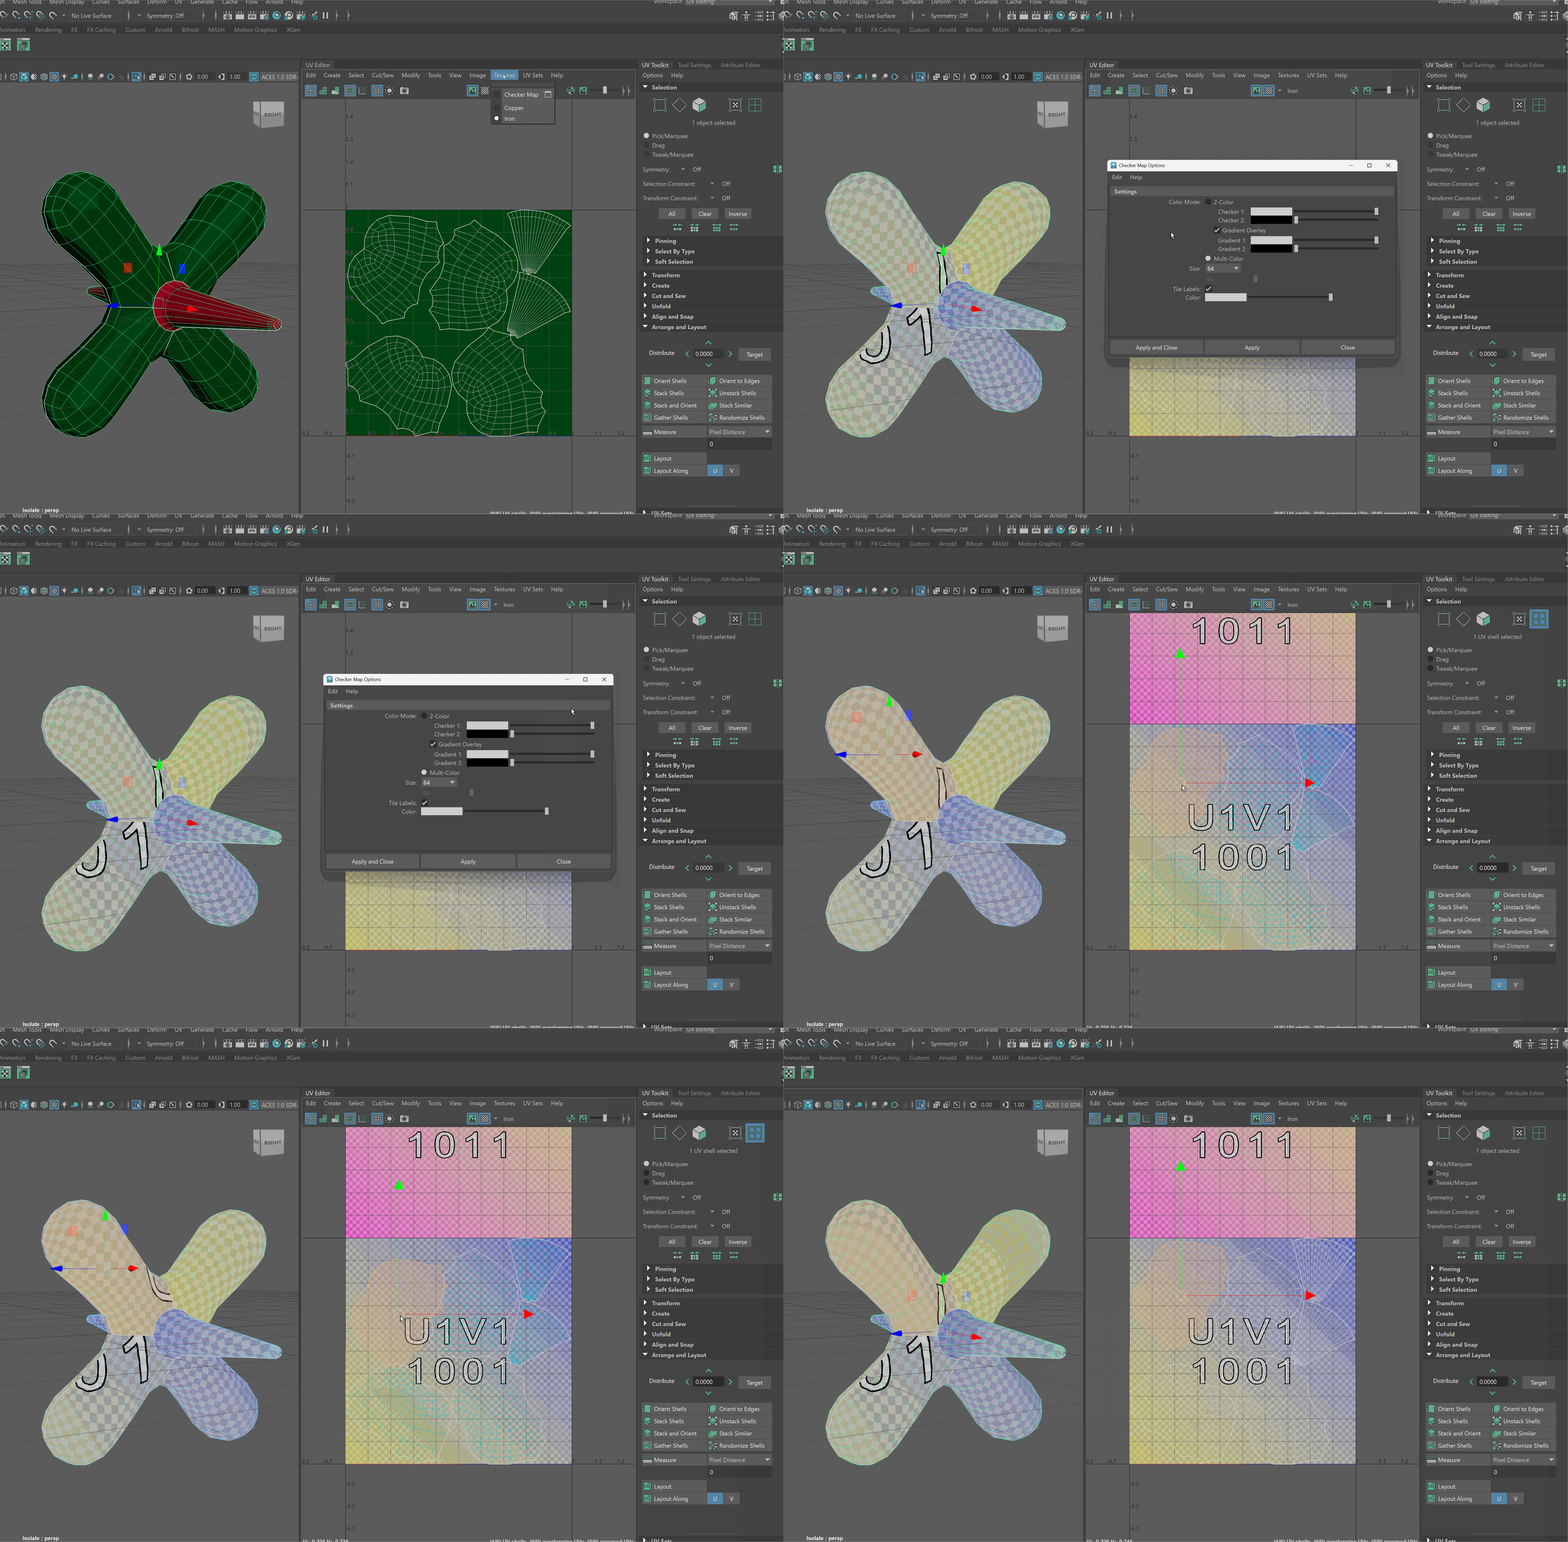
Checker Map
When editing our UVs, sometimes it is beneficial to a have a default texture on our model so that we can see the changes that the UV map is making.
To turn on a checker map:
- In your UV Editor window, navigate to Textures > Checker Map
