ABC's of ZBrush
What is ZBrush
ZBrush is a 3D sculpting software that is used to make high-resolution models for animation, films, games, and fabrication. While many software such as Blender or Autodesk Mudbox can be used to produce digital sculptures, ZBrush has become the tool of choice for many artists due to its artist friendly features such as Dynamesh and ZRemesher, as well as for the clay-like feeling of its sculpting tools.
ZBrush allows artists to create highly complex 3D models with 10 of millions of polygons. In production pipelines, ZBrush is commonly used to sculpt characters, creatures, and other organic objects.
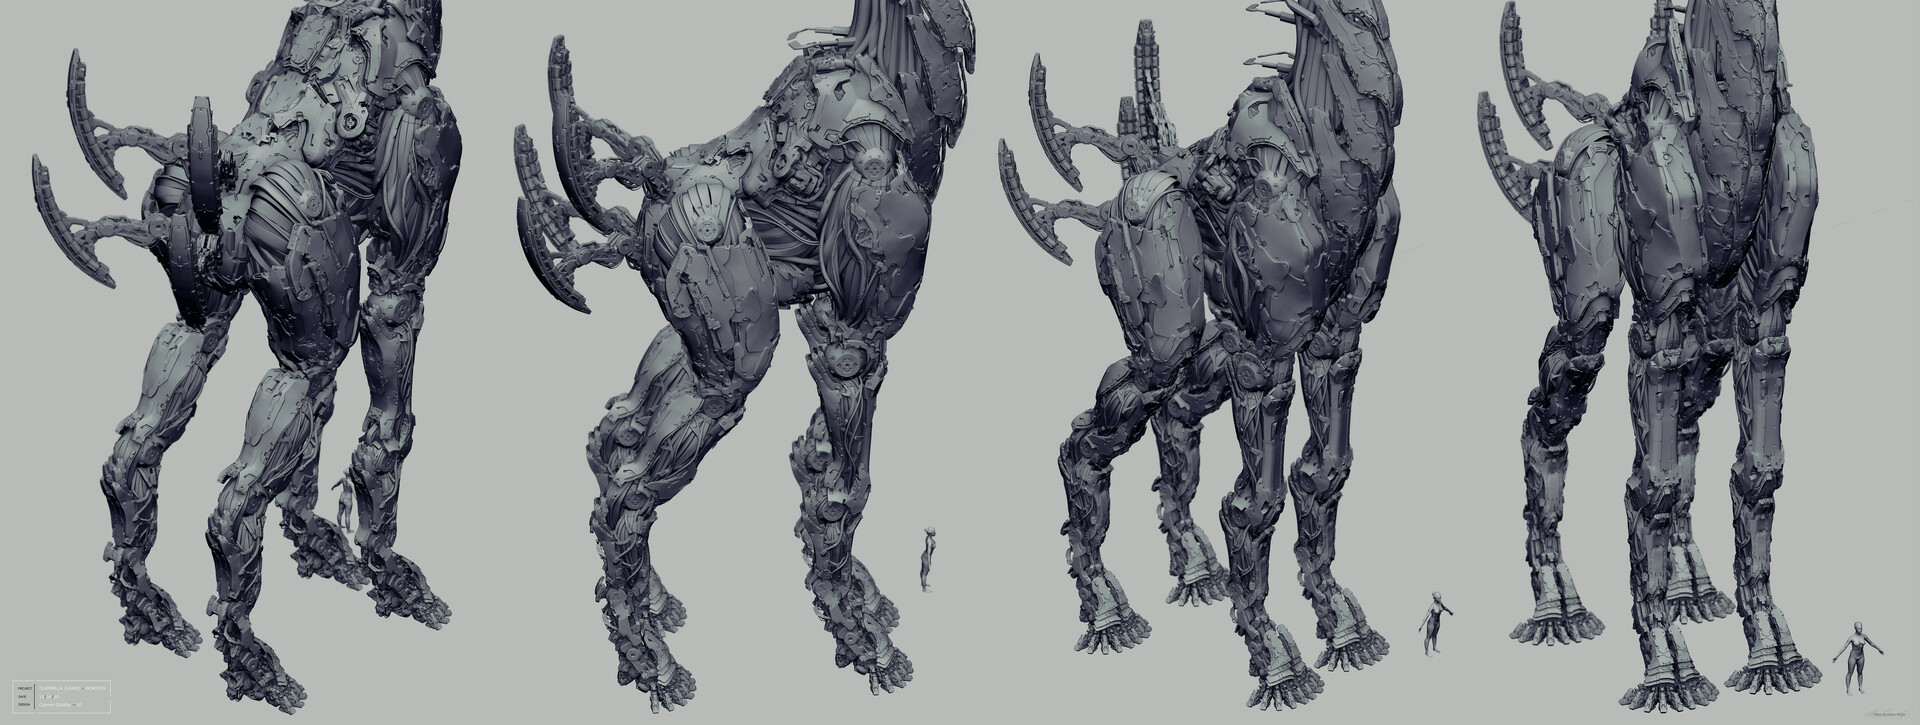
Creature sculpted with ZBrush from the video game Horizon Zero Dawn (Guerrilla Games, 2017), Mark Nash
Getting Started
When creating a new file in ZBrush, it is typically best to start with a preexisting ZBrush project. These projects can be found in the LightBox. The LightBox contains a variety of base meshes and projects we can start from as well as many other assets including brushes and alphas.
To start a new project:
- Navigate to the Lightbox
- Navigate to the Projects Tab
- Double-click on DynaMesh_Sphere.128.ZPR
This will open a basic sphere set to Dynamesh resolution of 128.
User Interface
By default, the ZBrush UI can be roughly Divided into six sections.
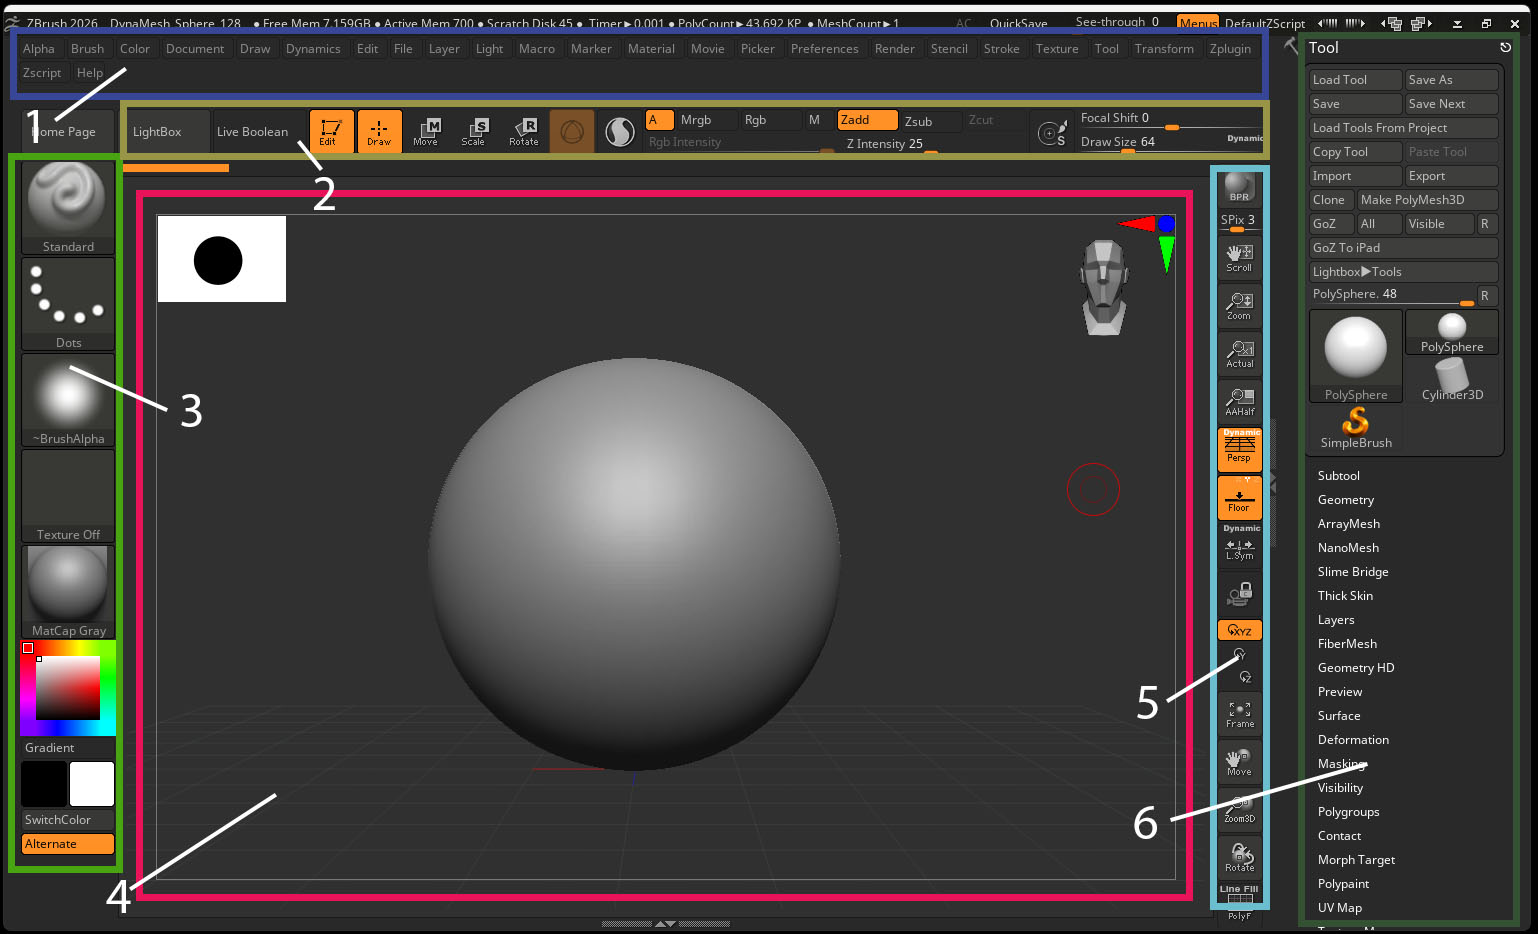
- The Title Bar: This is where we can access of variety of settings related to all parts of ZBrush
- The Top Shelf: Contains shortcuts for editing brushes as well as access to Move, Scale, Rotate and Draw tool.
- The Left Shelf: Contains tools for painting, sculpting and materials.
- The ZBrush canvas: Main view port for editing Zbrush tools
- The Right Shelf: Contains tools for changing camera and view settings
- The Right Tray: By default, the Right Tray contains the tool settings. These settings control all aspects of tools (Zbrush’s word for models).
Navigation
Unlike Maya, it is best to use ZBrush with a pen and tablet.
When using a pen and tablet with ZBrush, it is conventional to set the following parameters:
- Tap Screen: Left-Click
- Bottom Button: Right-Click
- Top Button: Middle-Click
To Navigate:
- Rotate: Bottom Pen Button (Right-Click) and Drag while Hovering over tablet
- Pan: Alt + Bottom Pen Button (Right-Click) and Drag while Hovering over tablet
- Zoom: Ctrl+ Bottom Pen Button (Right-Click) and Drag while Hovering over tablet OR Alt > Hold Bottom Pen Button (Right-Click) > release Alt > Keep holding Bottom Pen Button (Right-Click) and Drag while Hovering over tablet
- Rotate by 90 Degree Angle: Shift + Bottom Pen Button (Right-Click) and Drag while Hovering over tablet
Turn Off Right Click Menu
By default, ZBrush will bring up a menu when right-click is pressed. This default setting does not work well with a tablet as it causes our right click menu to accidentally appear.
To disable the pop-up menu:
- Navigate to Preferences in the Title Bar
- Interface > Navigation> Deselect Enable Rightclick Pop Up
- Navigate to Preferences > Config > Save UI > Save (This will save this change when you open up ZBrush later)
Sculpting
To sculpt using a sculpting brush, click and drag on your model. ZBrush defaults to the Standard Brush which will generically pull out faces of the model:
Hold Alt while dragging to create the opposite effect of your brush. For the Standard Brush, this will cut into our model:
Hold Shift while dragging to smooth your model:
To Change Brush size: Hold S + Click and Drag
You can also hold the Space key to bring up more brush options.
Brushes:
The main three brushes I use with ZBrush:
- Clay Buildup: Add clay-like geometry to your model
- Move: Pull and push on your model to change geometry
- DamStandard: Cut sharp lines into your model
Accessing Brushes
Brushes are accessed through a series of three sequential hotkeys. The first key is always B, followed by two keys that represent the brush.
Hot keys for common brushes:
- Clay Buildup: B > C > B
- Move: B > M > V
- DamStandard: B > D > S
- Standard: B > S > T
- Trim Dynamic: B > T > D
- hPolish: B > H > P
Clay Buildup (B > C > B)
The Clay Buildup is best for adding or subtracting large amounts of volume to your sculpt. This brush can both be used to rough in major forms, as well as to create fine details. Overall, it is an amazing all-around brush and the one I use most of the time when sculpting within ZBrush.
By default, the Clay Buildup has a square brush alpha applied that produces hard edges when sculpting. Many artists like this hard alpha as it feels similar to building up clay and adds texture to your sculpt. However, many artists also replace this harsh alpha with either the softer circular alpha of Alpha06 or using no alpha.
To change the brush Alpha:
- Navigate to the Alpha selector in your Left Shelf
- Select either Alpha06 or Alpha Off
DamStandard (B > D > S)
The DamStandard brush is great for adding hard creases into your model to define features of your sculpt. By default, the Dam Standard has a high Z Intensity which can make the brush a bit uncontrollable. It is recommended to use a Z Intensity of 10-15 when using the DamStandard brush.
Trim Dynamic and hPolish (B > T > D) (B > H > P)
Trim Dynamic and hPolish are commonly thought of as “hard-surface” brushes within ZBrush. While these brushes are similar in that they both flatten the geometry of your model to create plans, they have slightly different effects. hPolish will respect any existing edges when you use the brush on the model. The brush will attempt to “polish” a flat plane on your model wherever you draw with the brush.
Trim Dynamic, instead, with trim you model down to whatever height you have selected when you begin drawing without respecting edges. The Trim Dynamic brush is great for adding new planes to your model as you sculpt.
Move (B > M > V)
The move brush is best for pushing in and pulling parts of your model to create new shapes. The move brush is great for making large changes to the shape of your model.
Transpose (W , E, or R)
The transpose tools of Move, Scale and Rotate can be accessed in ZBrush by pressing the W, E, or R key. This will activate the Transpose gizmo. Unlike in Maya, the Transpose gizmo does not move an “object”, it is instead moving the geometry. Therefore, if you have symmetry turned on, it will attempt to move, scale, or rotate both parts of the geometry symmetrically.
Important Transpose Gizmo Buttons:
- Lock Icon - This will unlock or lock the movement of your gizmo to your mesh. Unlock the gizmo to move, rotate, scale, center or realign your gizmo.
- Map Icon - This will center your gizmo is the unmasked area of your mesh
- Home Icon - This will recenter your mesh or gizmo to the world origin point.
- Circular Arrow Icon - This will realign your mesh or gizmo to the world X, Y, and Z axes.
Symmetry
Symmetry can be toggled on an off by using the X key.
Symmetry settings can be found in the Transform menu in the Title Bar.

Masking
Masking in ZBrush restricts the effects of brushes or modifiers to only unmasked areas of your mesh. Masks are great for both details sculpting as well as for creating new volumes on your mesh.
- To mask part of your model: Paint with the Ctrl key held down.
- To invert your mask: Tap in an empty area with the Ctrl key held down.
- To clear a mask: Click and drag in an open area with the Ctrl key held down.
- To soften a mask: With a mask already drawn, tap on your mesh with the Ctrl key held down.
- To change your mask brush: Tap the brush palette with the Ctrl key held down, and choose a new mask brush.
- To paint a white mask: Paint with Ctrl+Alt key held down.
Wireframe
To display the wireframe of your model, press Shift+F (think "f" for "frame").
Dynamesh
Dynamesh is an extremely important setting within ZBrush that allows us to dynamically re-mesh our model as we add more volume and detail. Dynamesh is on by default when opening a DynaSphere project. DynaMesh is activated by pressing the DynaMesh button in the DynaMesh settings.
To access the DynaMesh settings:
- Navigate to your Tool panel
- Navigate to Geometry > Dynamesh
The main DynaMesh setting is Resolution. 128 is a fairly standard resolution when using DynaMesh as it allows you to draw most primary, secondary, and some tertiary details without getting overwhelmed by too much geometry. However, there are many different approaches to using ZBrush, and many artists prefer using a lower DynaMesh setting such as a value of 16 or 32 to work on lower resolution meshes.
- To DynaMesh your model while working: With no mask active, Click and drag in an open area with Ctrl held down.
Subdivisions
When modeling within ZBrush you can dynamically move through multiple levels of subdivision to work on both low-poly and high-poly versions of your model. The typical ZBrush workflow is to create all major volumes and details with DynaMesh activated and then, when those details are mostly complete, switch over to working with a Subdivision workflow. There is no hard rule as to when to switch over to subdivision workflow, however, a good rule of thumb is to begin subdividing at the point when the 128 resolution of the DynaMesh model is no longer enough to sculpt the details you are trying to make.
Subdivision levels can be found in the Geometry section of your Tool Shelf.
- To subdivide your model: Press Ctrl D
- To move up a SDiv level: Press D
- To move down a SDiv level: Press Shift+D
History
You can scroll through the history bar in ZBrush to go back to a particular point in your sculpts history:
Saving
Save ZBrush project using Ctrl+S or navigating to File > Save.
Sculpting Technique Basics
The basic technique behind sculpting with ZBrush is to slowly move up in geometry resolution as you slowly move up in the level of detail you are sculpting: In other words: large forms = low resolution mess, detailed forms = high resolution mesh.
There are many theories for the best approaches to sculpting. It is up to you to explore both ZBrush and available resources to find the technique that works best for you. While all these techniques differ slightly, they often overlap and all use the technique of increasing detail and resolution over time.
Some prominent approaches to sculpting (these are not official titles, but instead names I am giving to widely grouped schools of thought):
- Anatomical
- Planes
- Massing Volumes
Anatomical
The Anatomical approach to sculpting begins outside our ZBrush with deep study of physical anatomy. This applies not only to humans and creatures, but a deep study of how objects are formed, made and move. The anatomical approach is not, “sculpt what you see, not what you know.” Instead, it involves applying knowledge of anatomy including bone or muscle structure to interpret reference images.
When taking the anatomical approach to sculpting within ZBrush, you typically begin by sculpting a complete or rough skeleton and then begin massing in the muscular forms, adding in finer and finer detail. In this video by Finn GB, you can see the artist begin with a skull and then slowly as muscle, fat and tissue detail.
Pros:
- Allows for the creation of photorealistic creatures, humans and humanoid sculptures based on real-life anatomy
- By starting with skeleton, you have a roadmap of where the sculpt will continue
Cons:
- Often limited to photorealistic creatures
- Takes a long time to study anatomy properly
- When embraced as best approach, can become wrapped up in notions of scientific dominance
- Often relies on problematic notions of standardized anatomy
Resources:
- Anatomy Exercises (VIDEO)
- Anatomy for Sculptors (PURCHASABLE BOOK)
- Atlas of Animal Anatomy for Artists (PDF)
- RISD Nature Lab Sketchfab (3D Collection of skeletons and taxidermy)
Planes
Planes is a common sculpting process of using planes to create more and more complex sculptures. This technique involves defining planes of sculpture and slowly refining those planes to add more and more detail. This is an observational and geometric approach in which a reference is simplified down into its simplest planes with more complex planes slowly added to the sculpt. In general, this technique involves creating simplified geometric forms that slowly morph into organic shapes. In the following video by Follygon, you can see the plane approach in action:
Pros:
- Can be very clear and geometric
Cons:
- Can be a bit too analytically for many artists
Massing Volumes
Massing Volumes is a technique of slowly adding volume to your mesh based on simplifying details. The technique involves moving through primary, secondary, and tertiary volumes to slowly create more complex sculptures. This technique is somewhat of a blend between the anatomical and plane approach as you are often simplifying a model into geometric volumes based on anatomical knowledge. Unlike the anatomical approach, the massing volumes approach can be used more widely to create everything from stylized to realistic models. You can see the massing volume technique in action in the below timelapse video by Flipped Normals of a Thanos sculpt. The artist slowly blocks in major volumes. They then add in smaller volumes and increase the resolution of the sculpt as necessary. (Muting the video recommended) (Something important to consider is how closely ZBrush and digital sculpting is tied to industry: hence some of the best artists often occupy themselves with recreating popular culture icons either for view count or for their own enjoyment. Although much of this content is based around popular culture, it is good practice to imagine other alternatives for this software besides block-buster super hero cinema):
You can see more information on the massing volume technique as well as primary, secondary and tertiary forms in the below video:
Pros:
- Easy to use within ZBrush
Cons:
- Difficult to jump into: improves over time with knowledge of form and anatomy
Summary
Learning sculpting takes time! No one technique is a fit-all solution. Instead you will find which blending on techniques work best for you and your approach to sculpting. In general the most important skills for sculpting are good observation skills and knowledge of simplification/form. Improving observation involves examining reference images closely and knowing how to pull from those references to create a sculpt. Knowledge of simplification improves with time. The more you sculpt, the more you will understand which details to focus on for each level of resolution.