3D Scanning
Introduction
3D Scanning is the process of capturing the form and appearance of a real-world object or larger environment to create a 3D model. There are many methods and approaches for creating 3d scans. For example, many of us interact with a 3D scanner everyday when we unlock our digital devices with our face. On an iphone, for example, the TrueDepth camera on the front of a phone, projects many tiny light dots onto your face and scans those dots using an infrared camera. This allows the camera to capture a 3D form of your face that it can use to compare to whenever you try to unlock your phone.
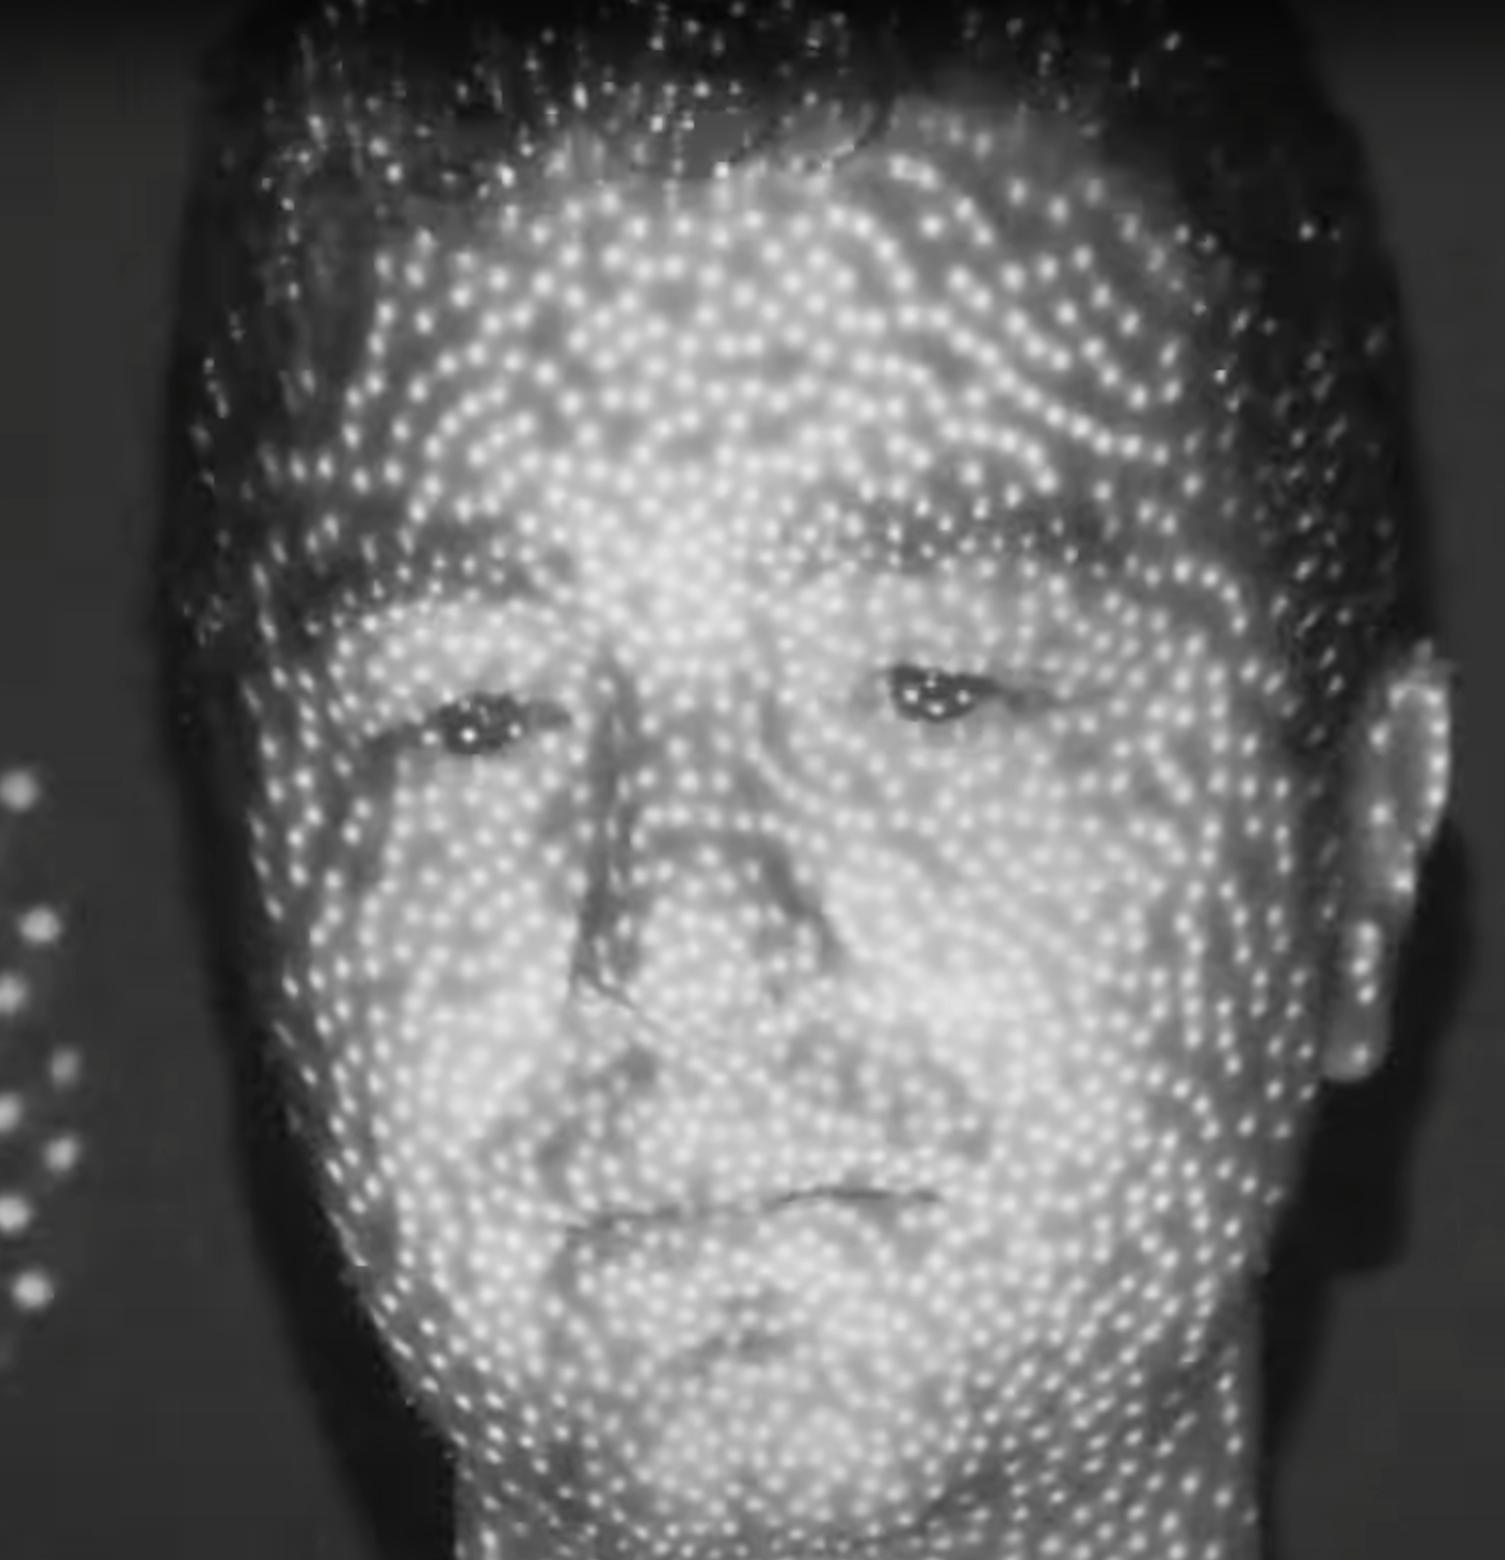
From the video Using An Infrared Camera To Show How Face ID Works by Insider Tech
Infrared cameras are only one way of many to create 3D scans. Another common method is called Photogrammetry. In photogrammetry, a collection of photos from an object are gathered from all sides. In the simplest terms, those photos are then compared to each other to find key features, from that comparison, approximate camera positions are found - a photogrammetry program can then calculate millions of points in space, defining the shape of the object.
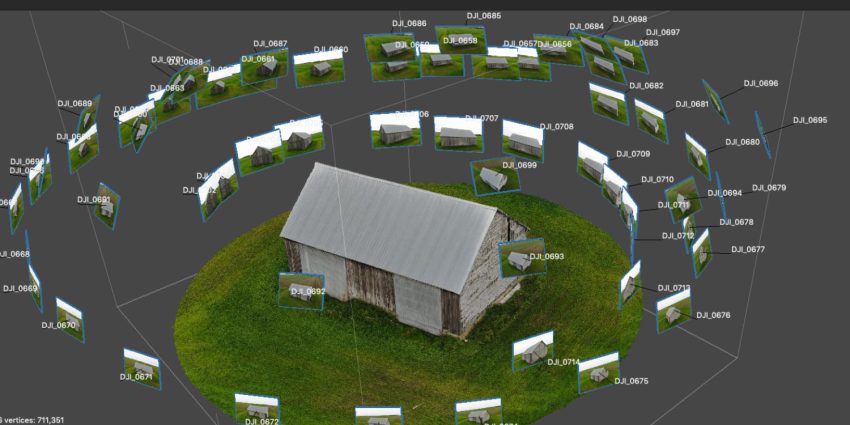
Example of photogrammetry courtesy of bitfab.io
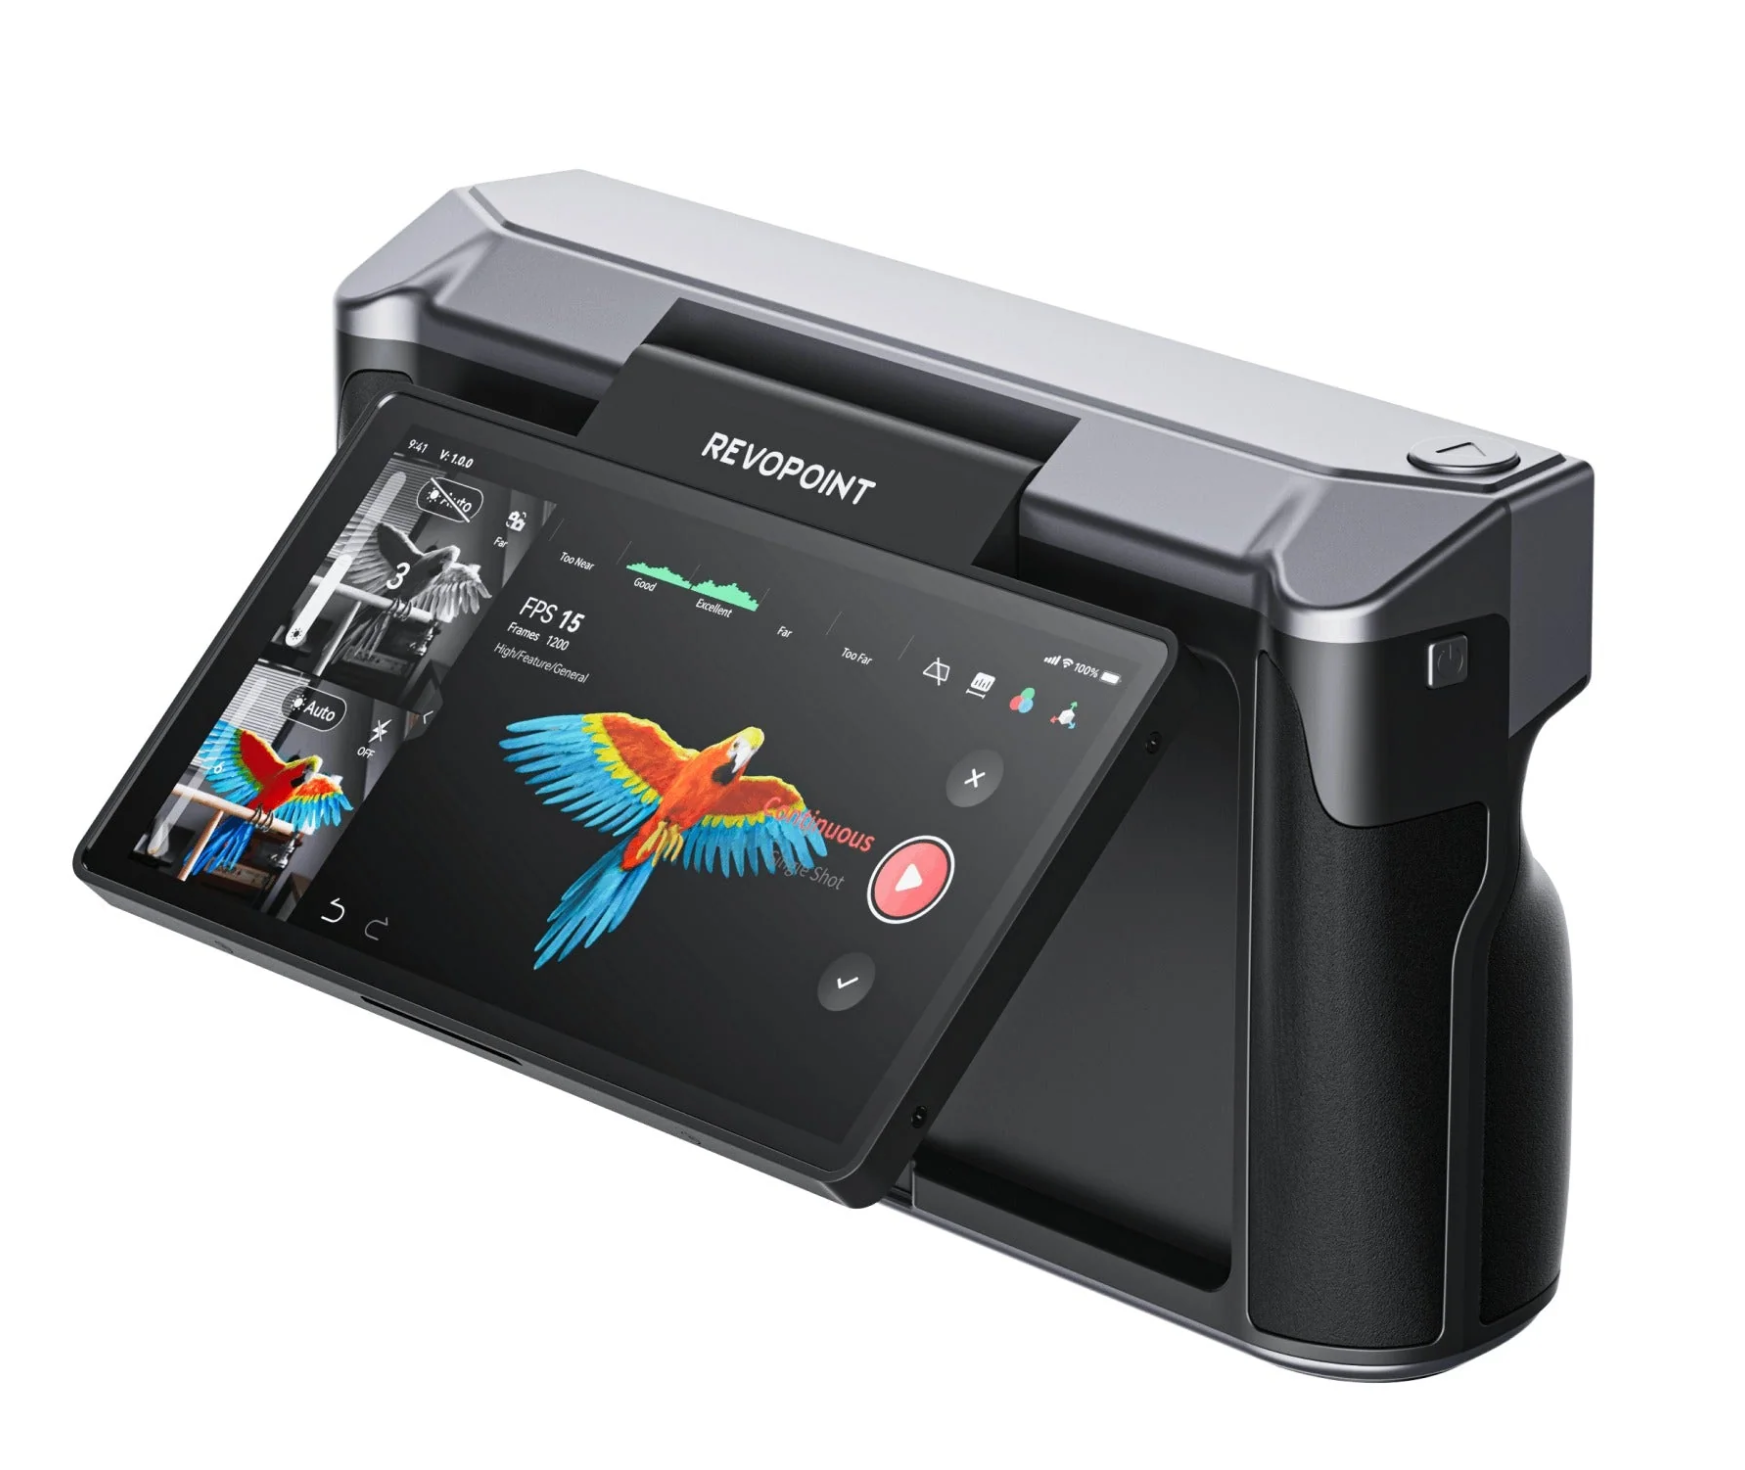
In this class, we will be using a type of 3D Scanner similar to the iphone TrueDepth camera. Our 3D Scanner, the MIRACO by Revopoint, uses a combination of infrared cameras to capture the form of an object and a color camera to capture the texture of an object.
Choosing an Object to Scan
3D scanners, and our MIRACO scanner in particular, have the ability to scan a wide variety of objects. The MIRACO can scan objects of all sizes: using the scanner's two modes of near and far, we can scan any object from a small figurine to a car. However, since 3D scanners use camera technologies that are looking for key features some objects are difficult to impossible to scan:
Objects that are difficult to scan and must be treated:
- Shiny or Reflective objects: these objects bounce light back that camera distorting their shape. Reflective objects need to be painted with a matte paint or treated with a 3D scanning spray to be detected. Reflective objects include hair.
- Transparent object: For the same reason that reflective objects are difficult to scan, transparent and translucent objects are not able to be accurately captured by the cameras on a 3D scanner and must be treated with a matter coating.
- Dark objects, such as dark rubber. These objects absorb light and cannot be detected by the scanner.
- Patterned Objects: objects with many patterns on them such as patterned clothing are difficult to scan as the key features can be lost in the patterning.
- Thin objects such as wires: Very thin objects cannot be detected by most 3D scanners.
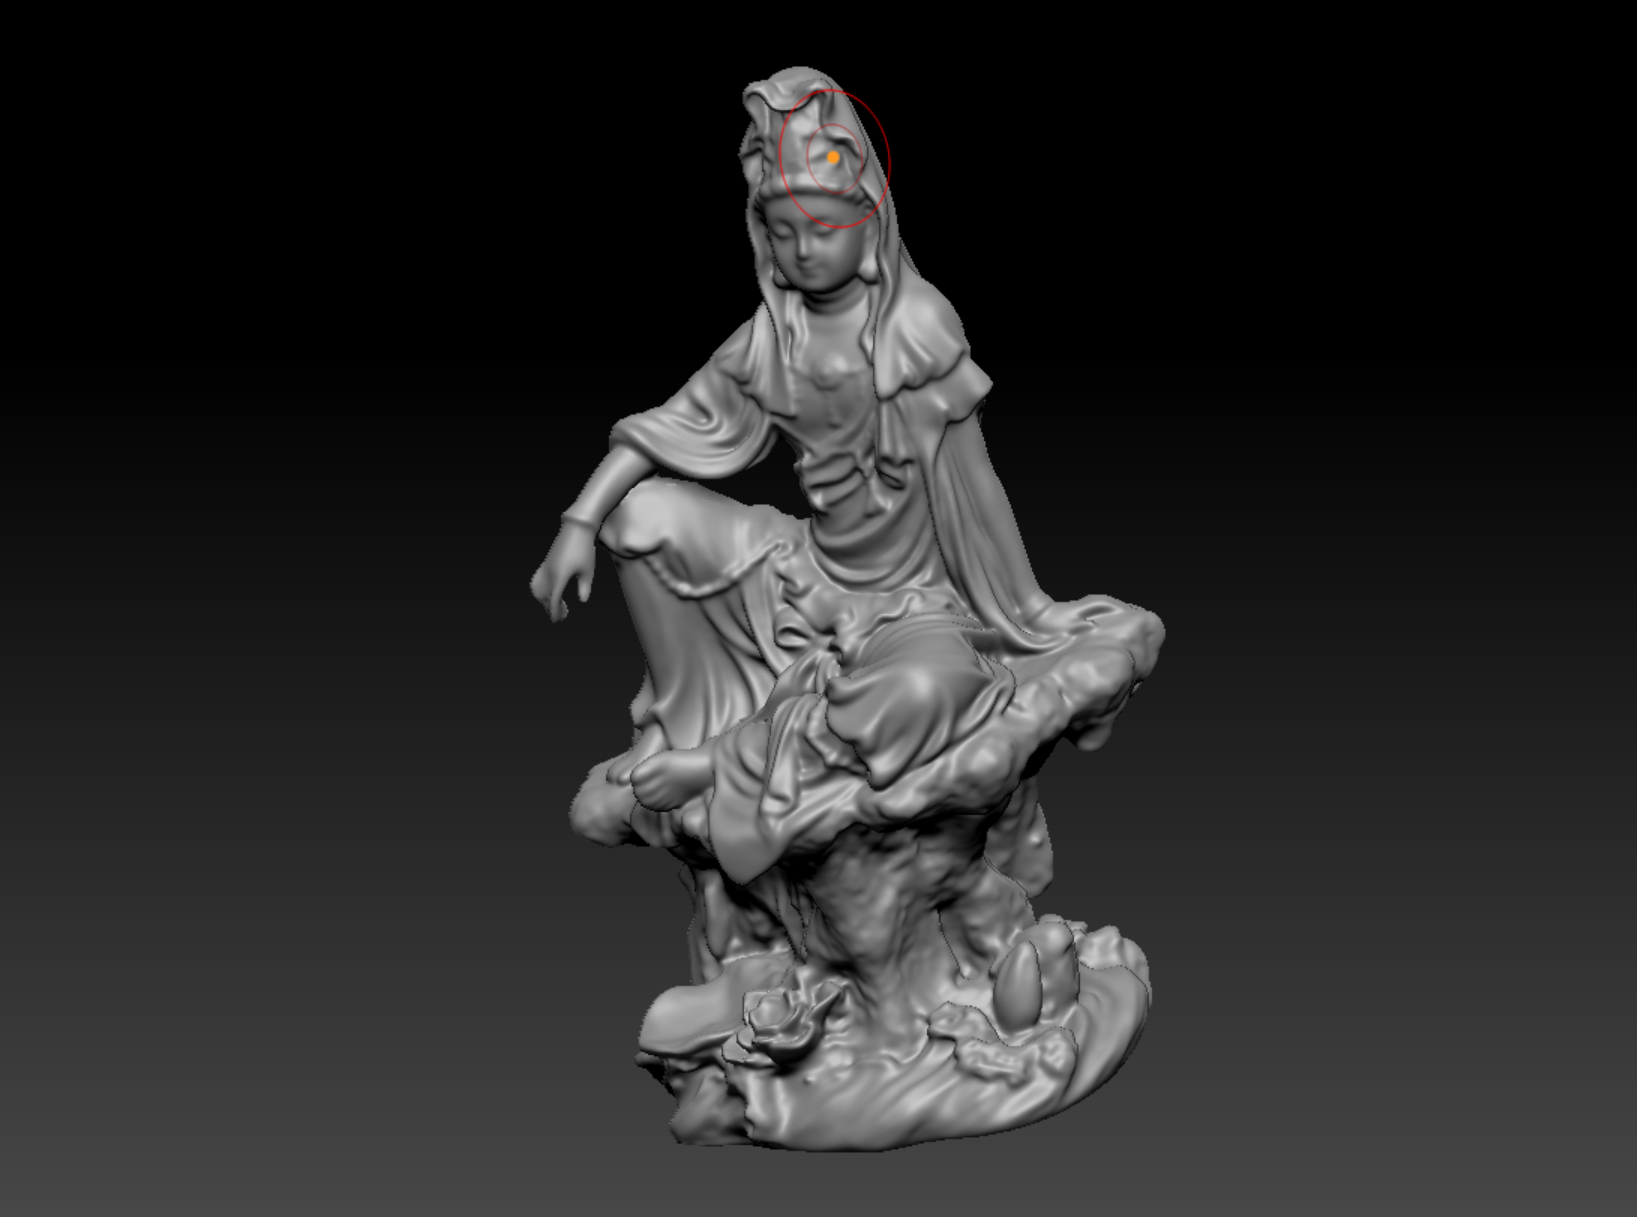
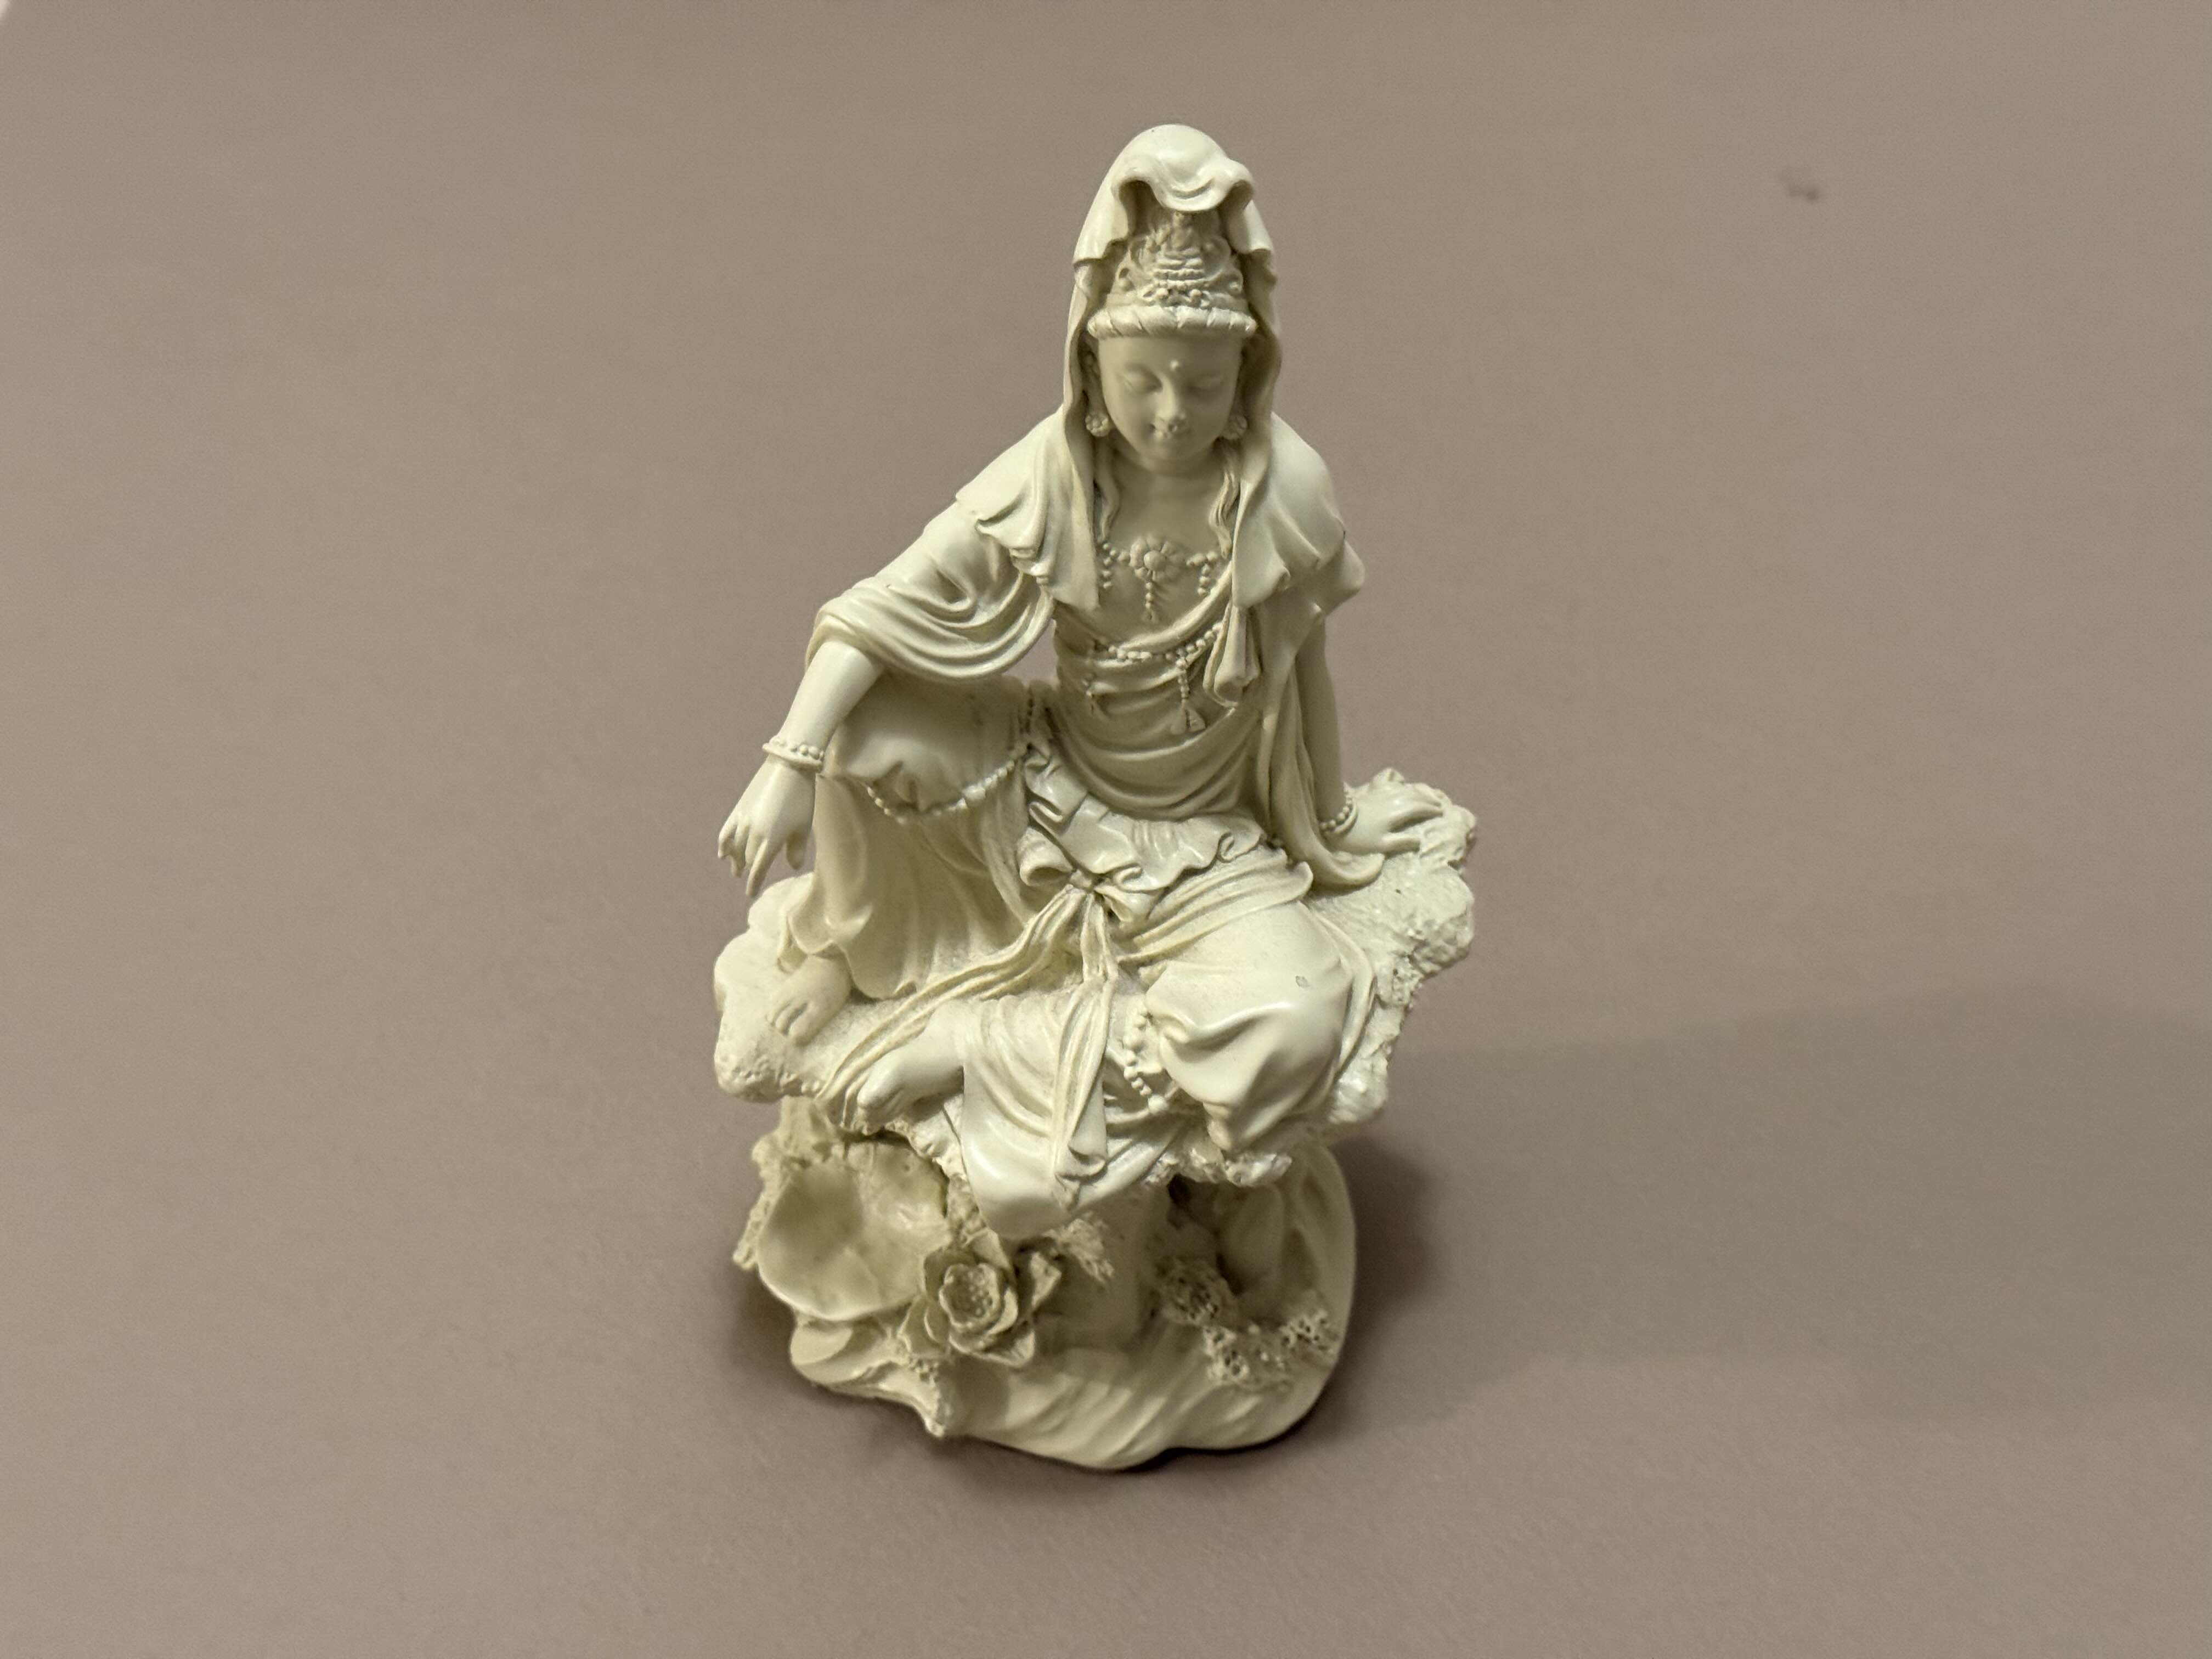
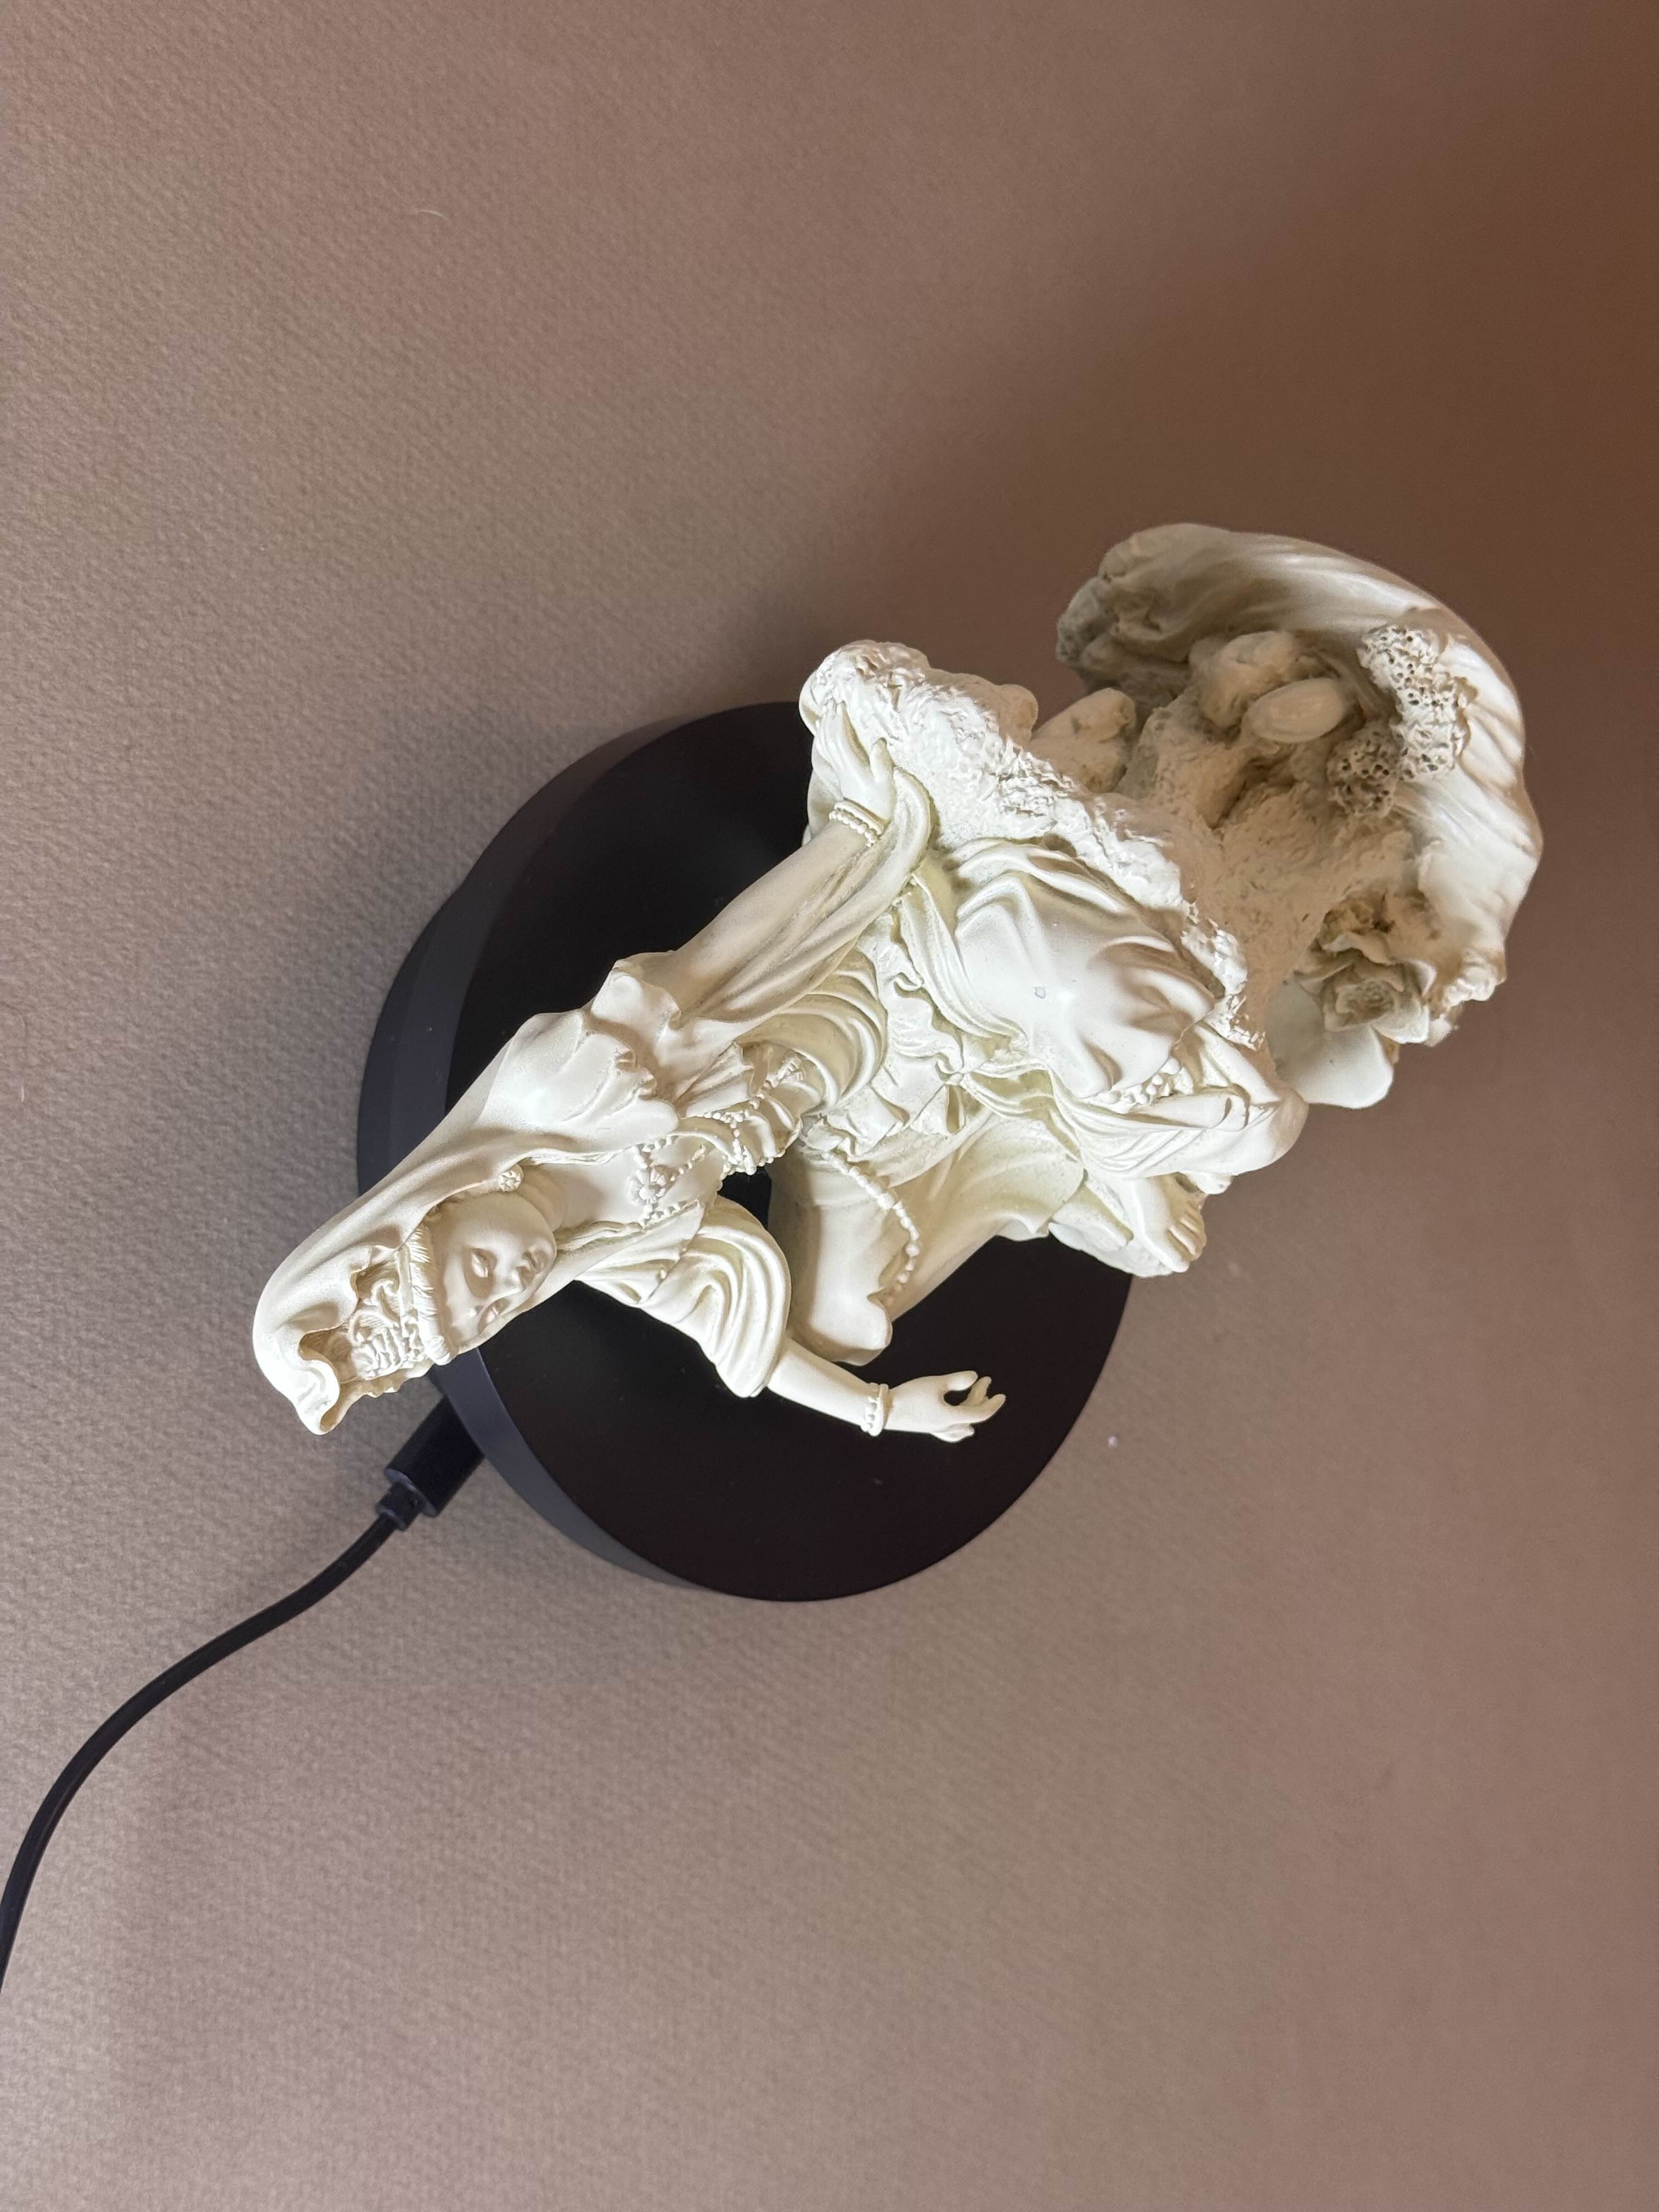
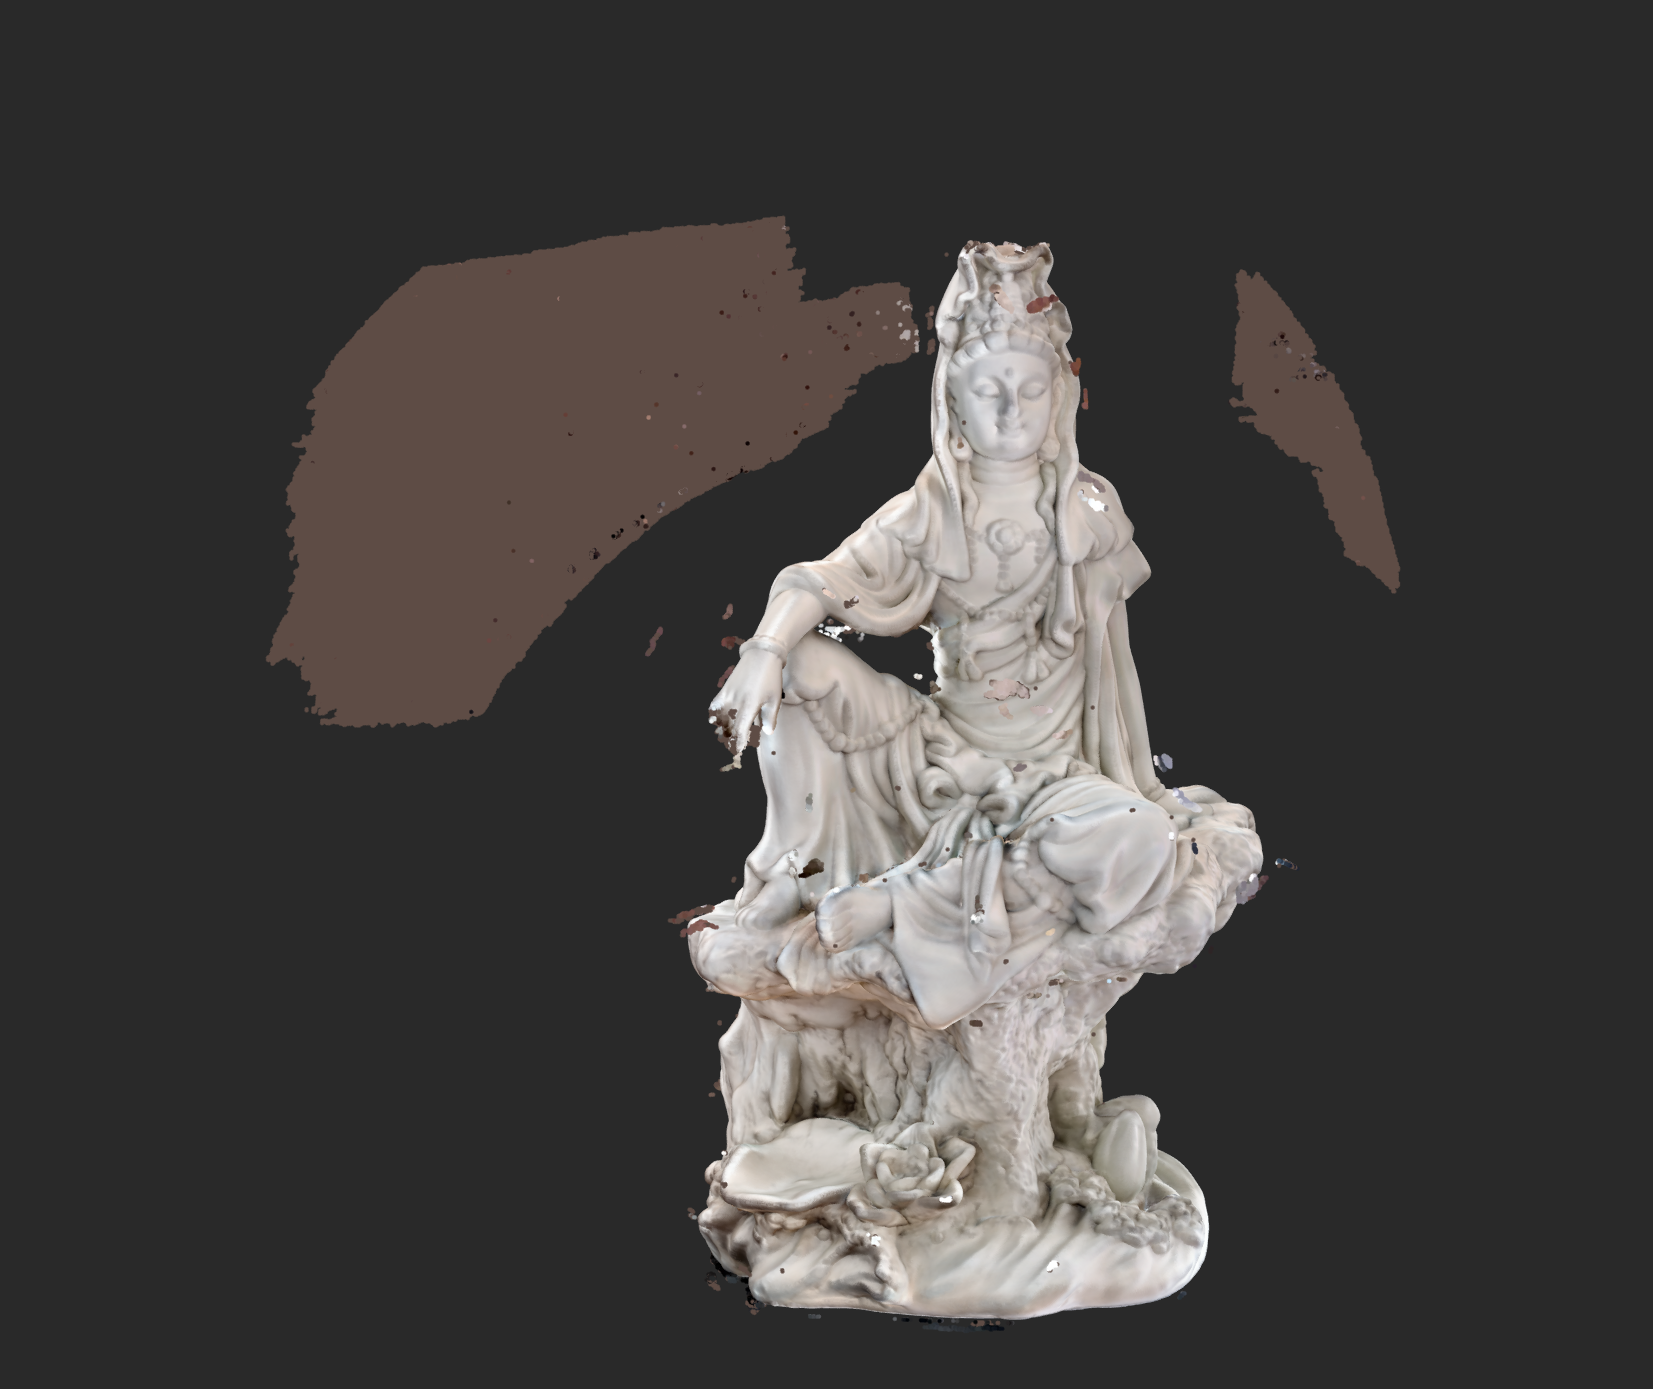
In his tutorial, we will be using this small statue of Guanyin which is approximately 7 inches tall:
Lighting Conditions
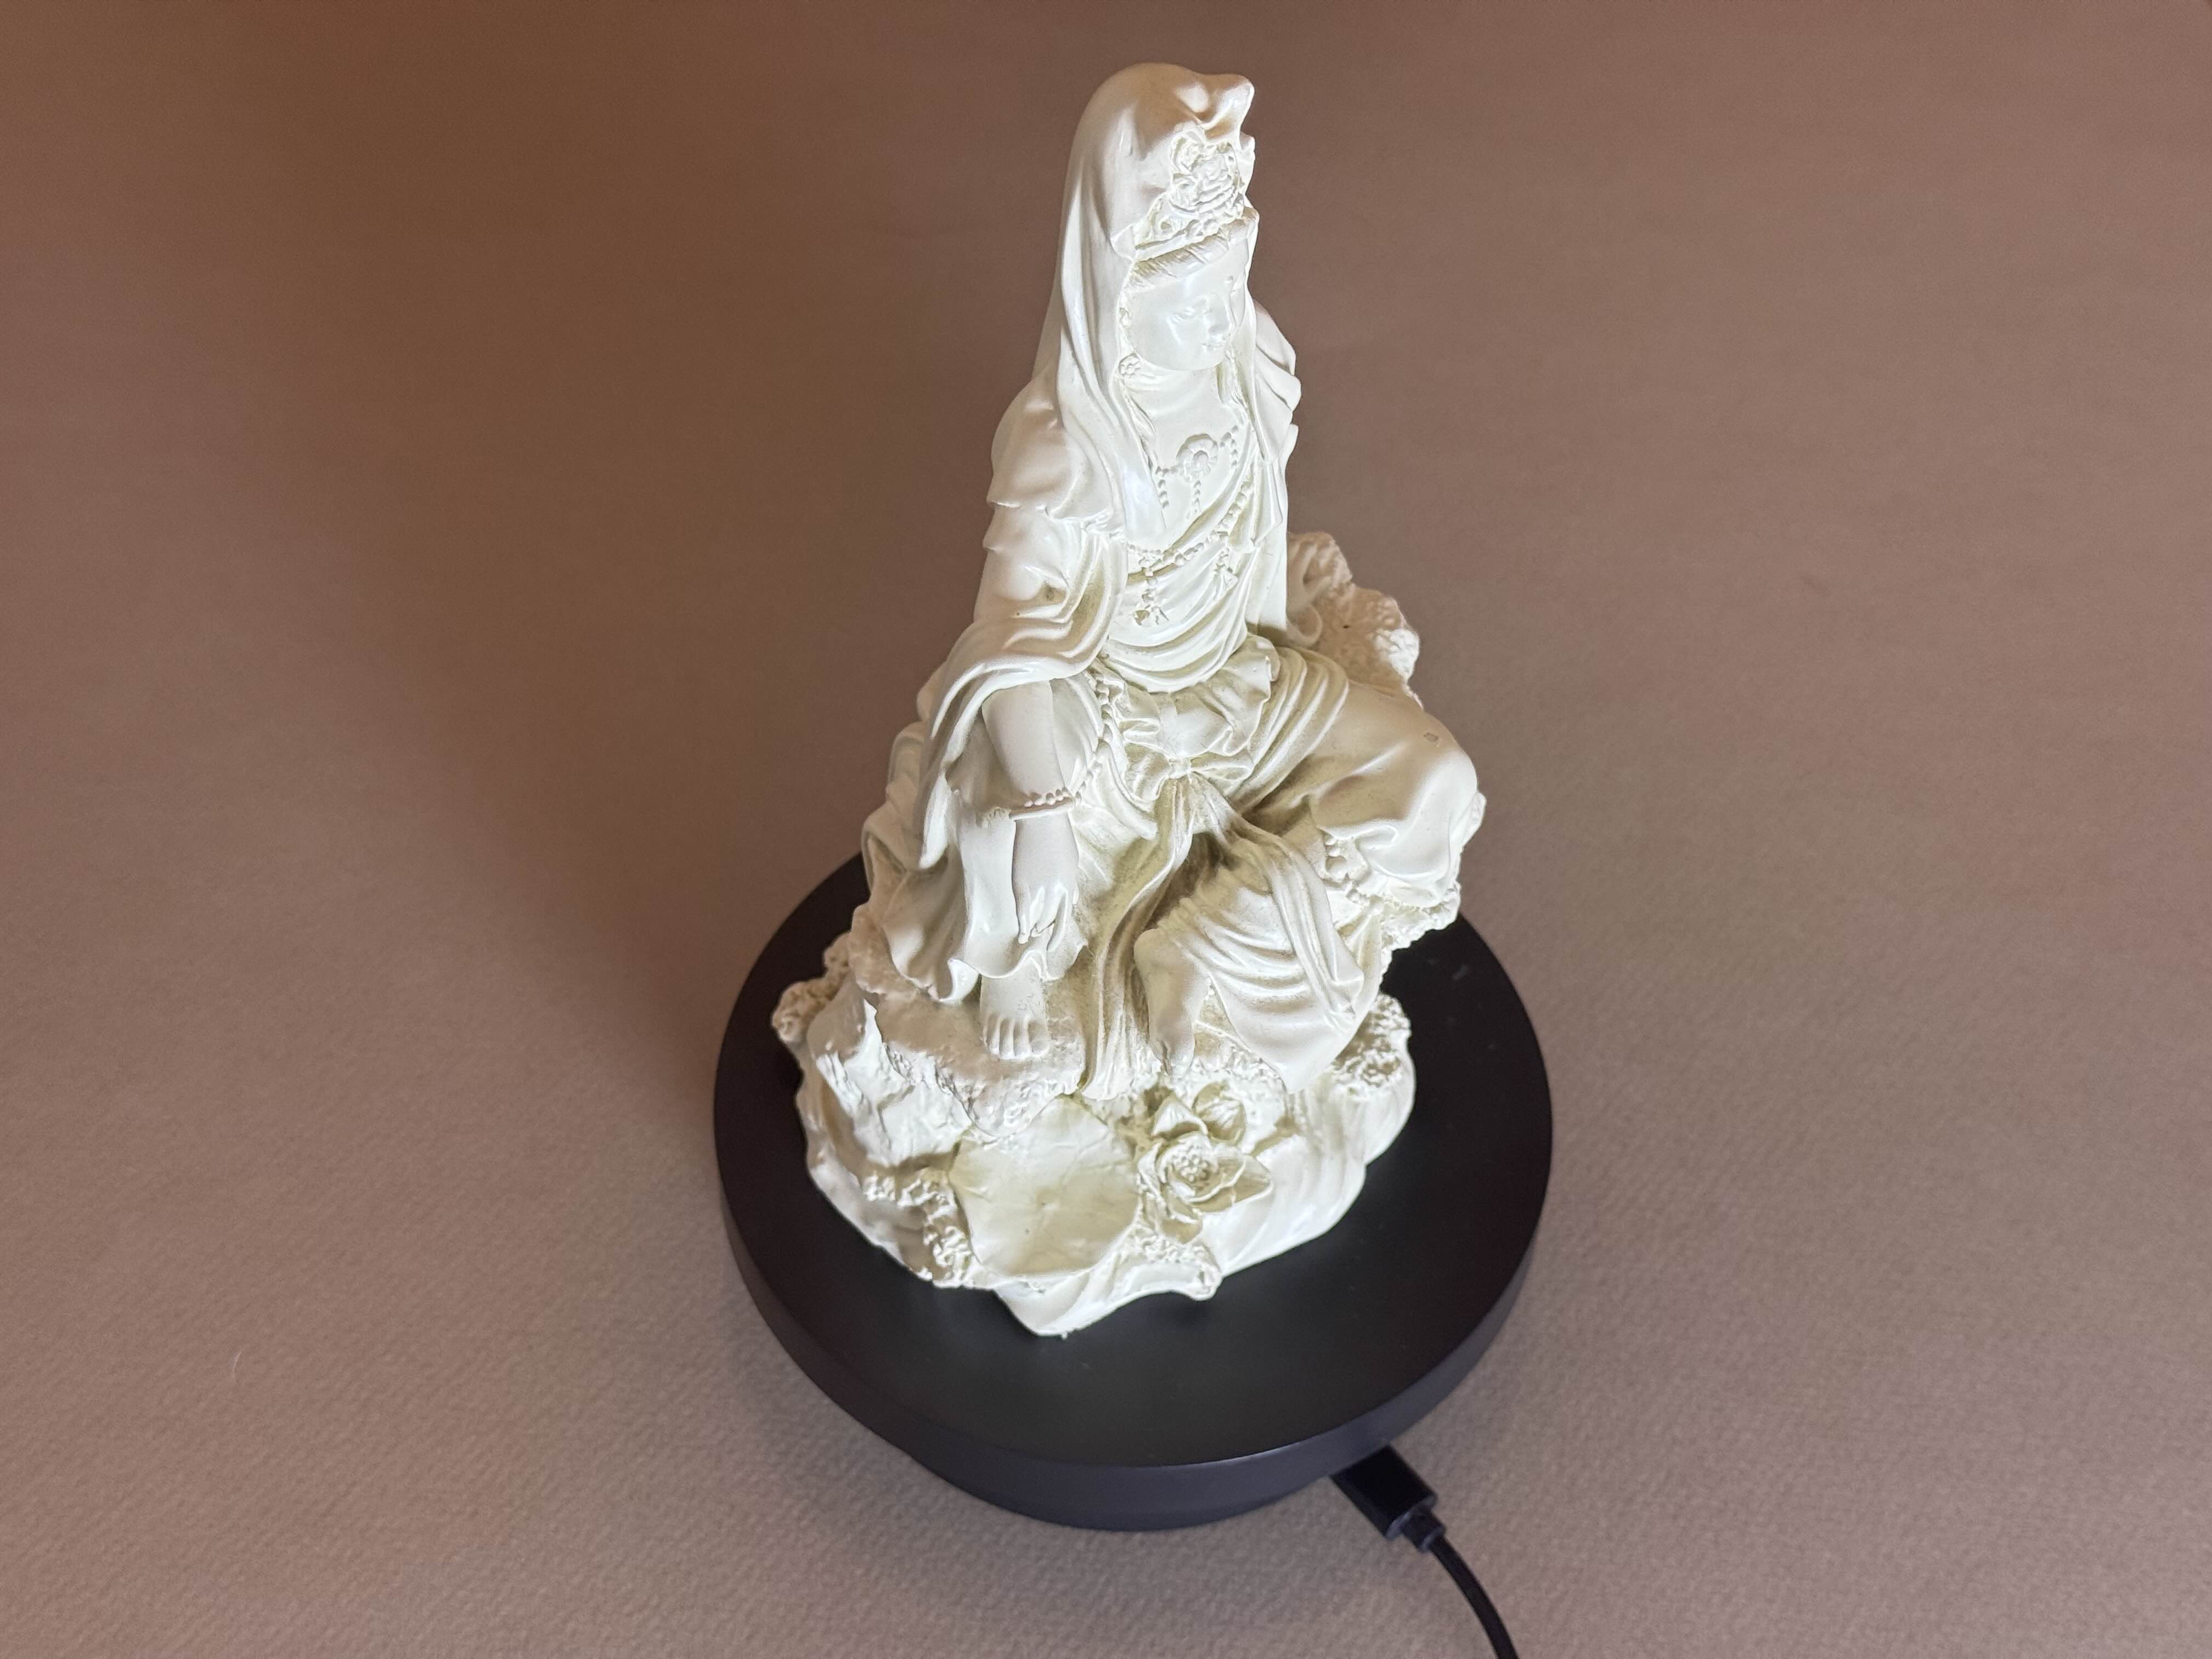
It is best to 3D scan your object in a well and evenly lit environment. This will vary depending on how much control you have on your environment. If using a turntable, you can light your object from one direction as shown below as the scanner will typically only be capturing from a single direction. A turn table allows us to slowly rotate our model and hold our scanner still while the object itself rotates.
MIRACO Scanner - Making a Project
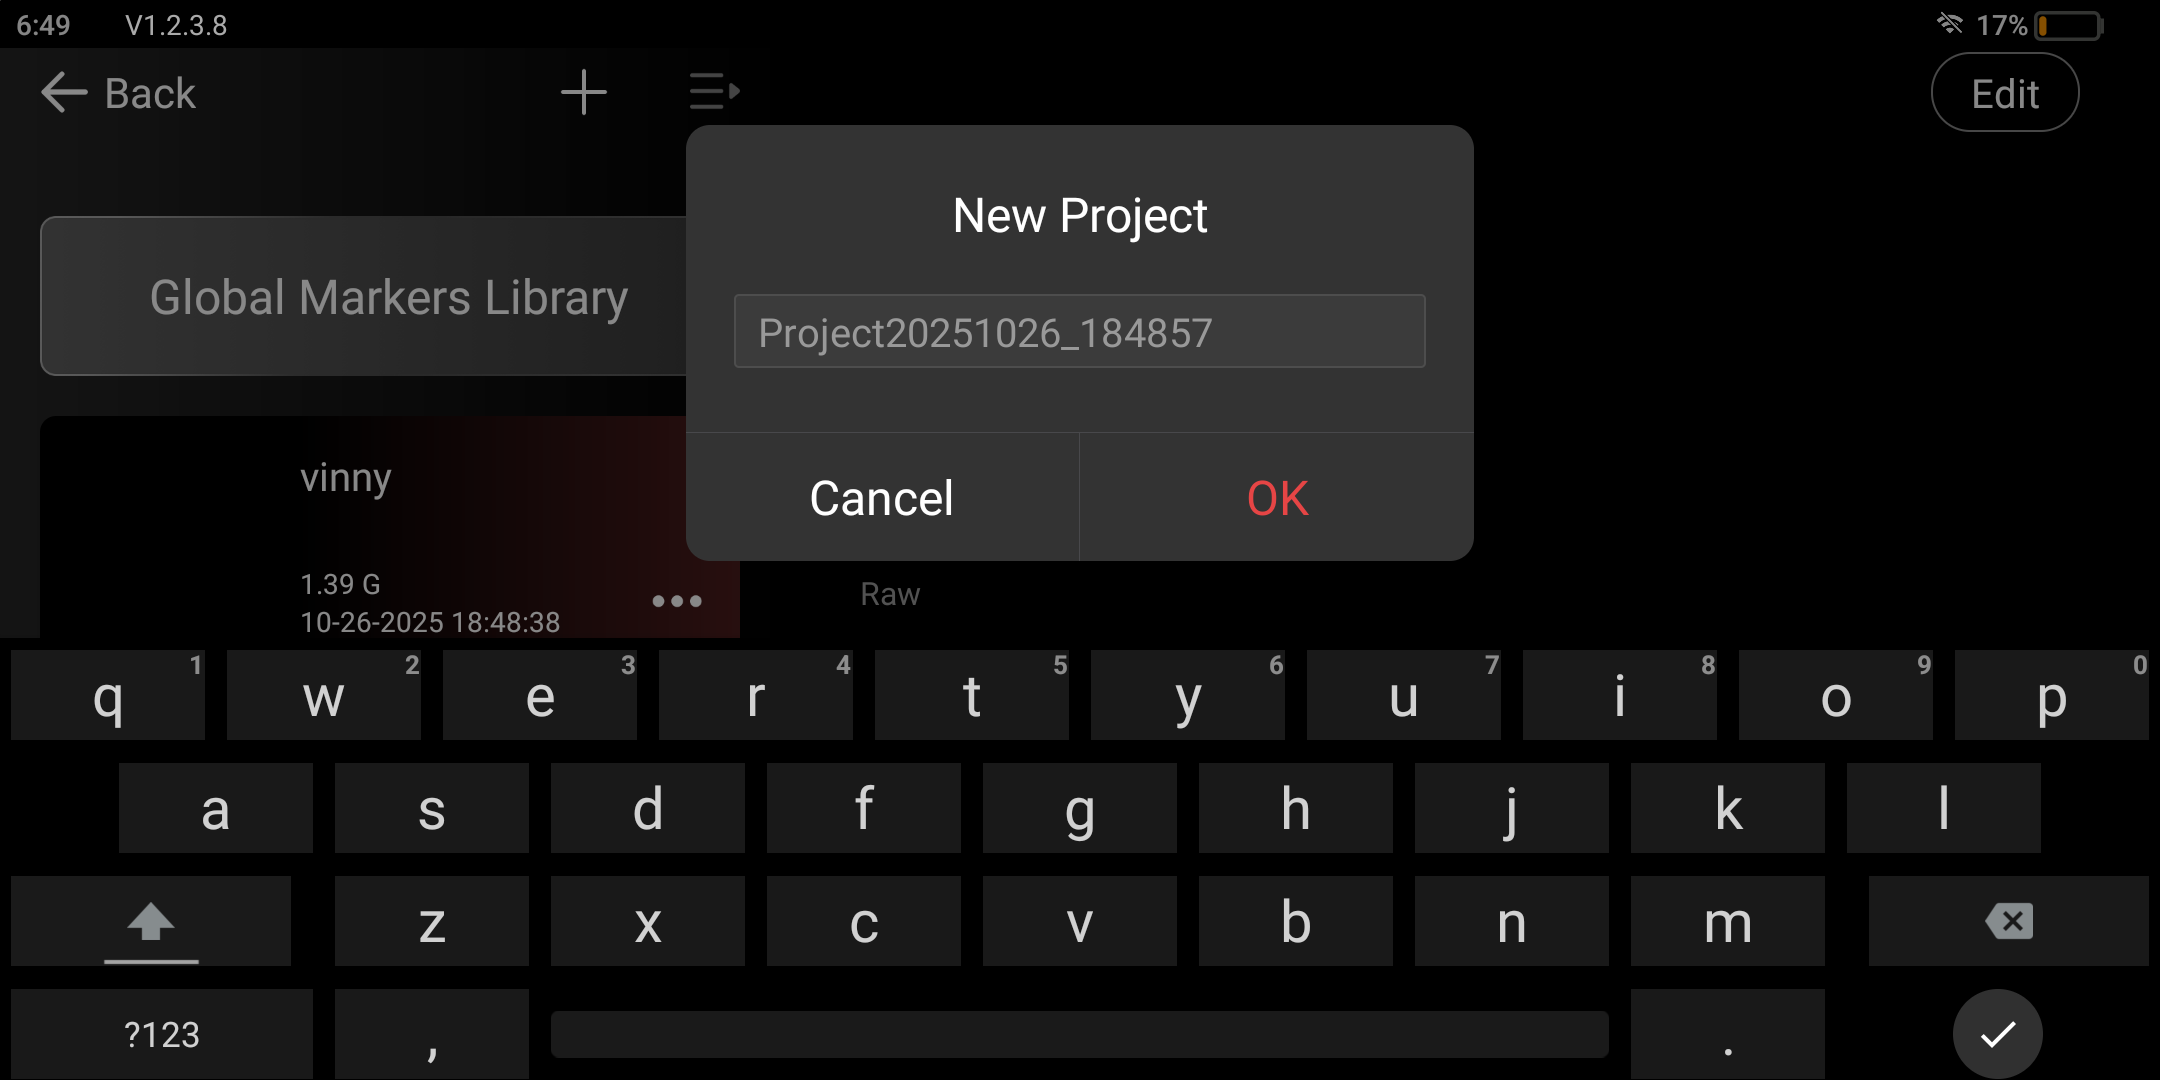
When starting a new project with the MIRACO scanner it is best to make a new project to store your scans.
To make a new project:
- Navigate to Model
- Press the plus button to add a new project
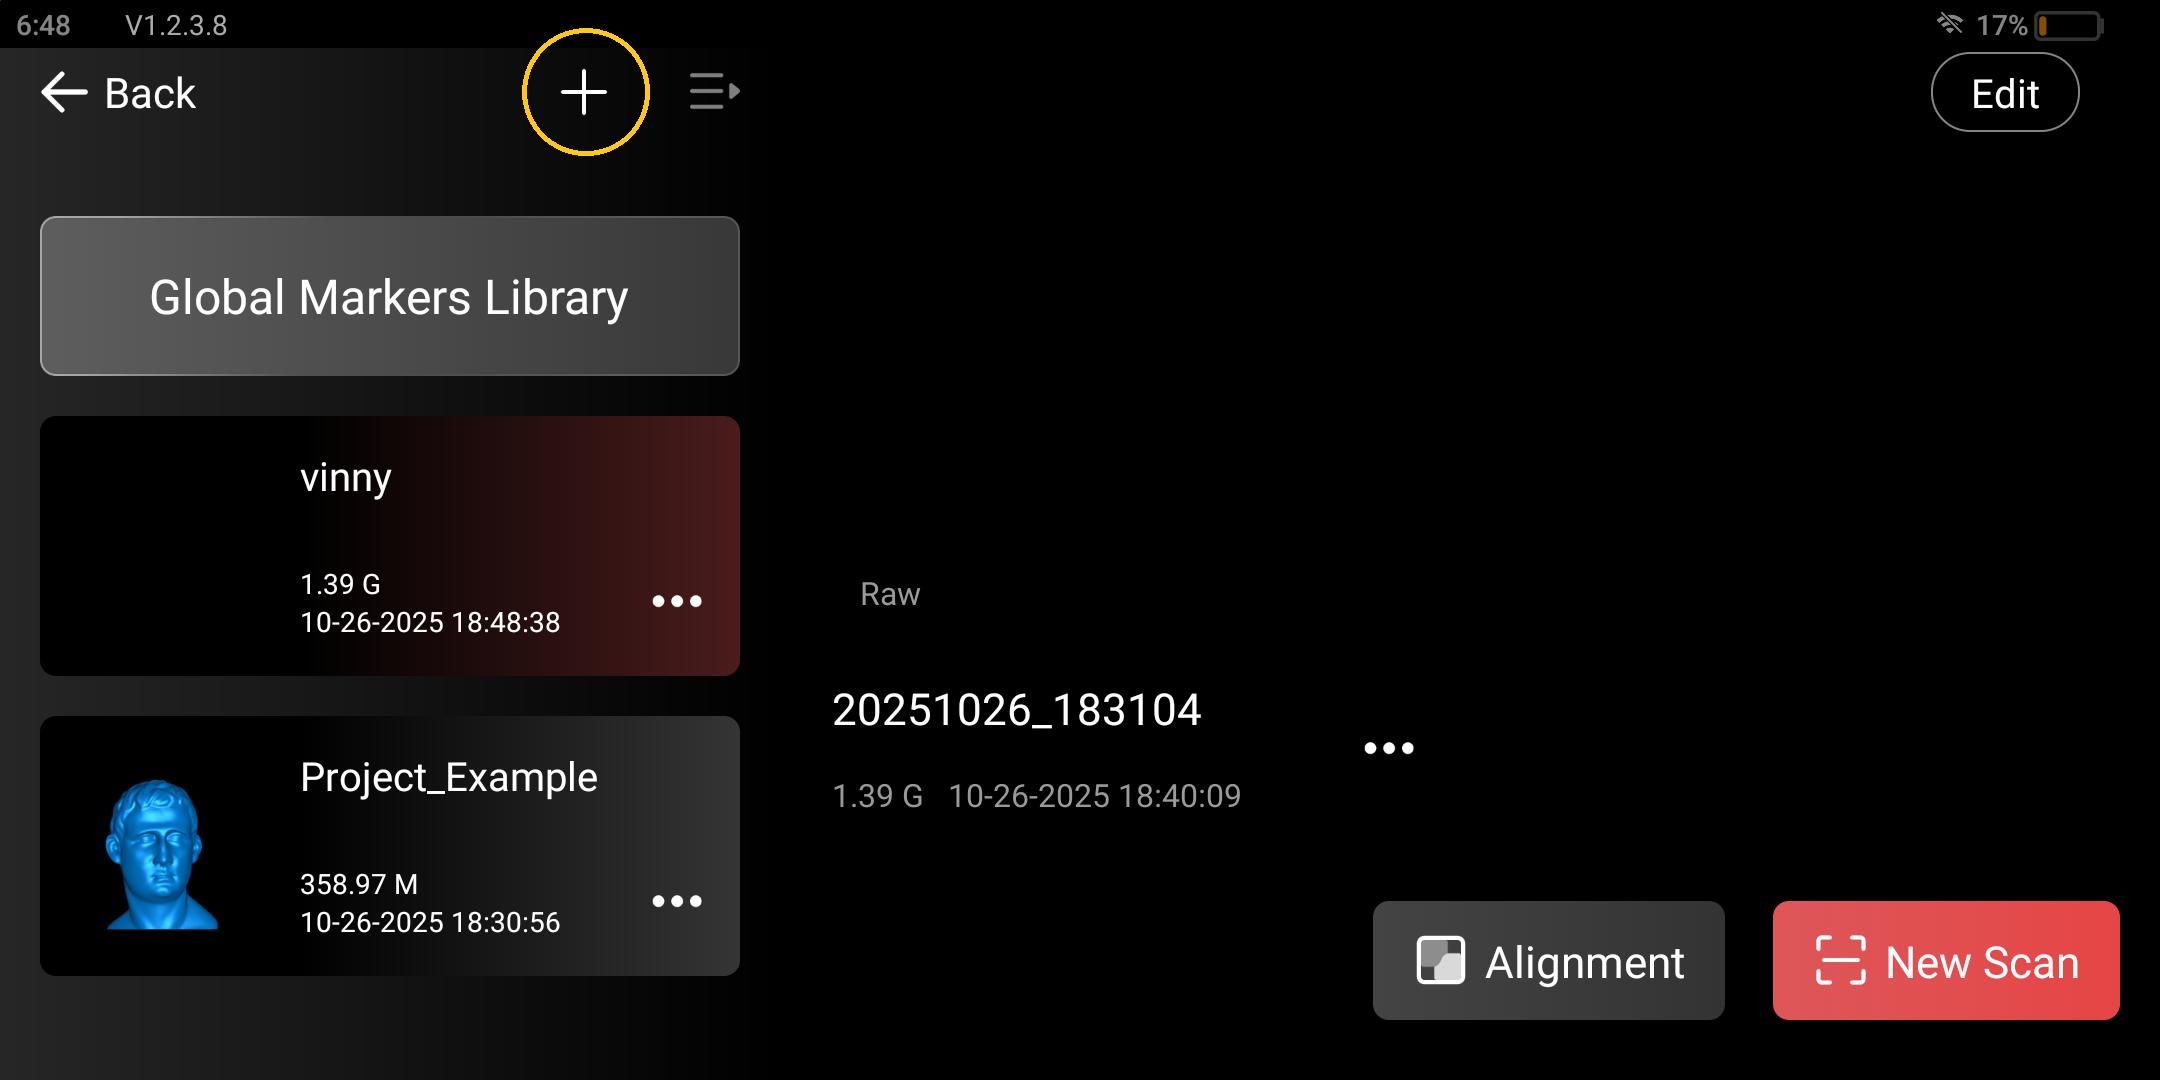
- Name your project and press okay.
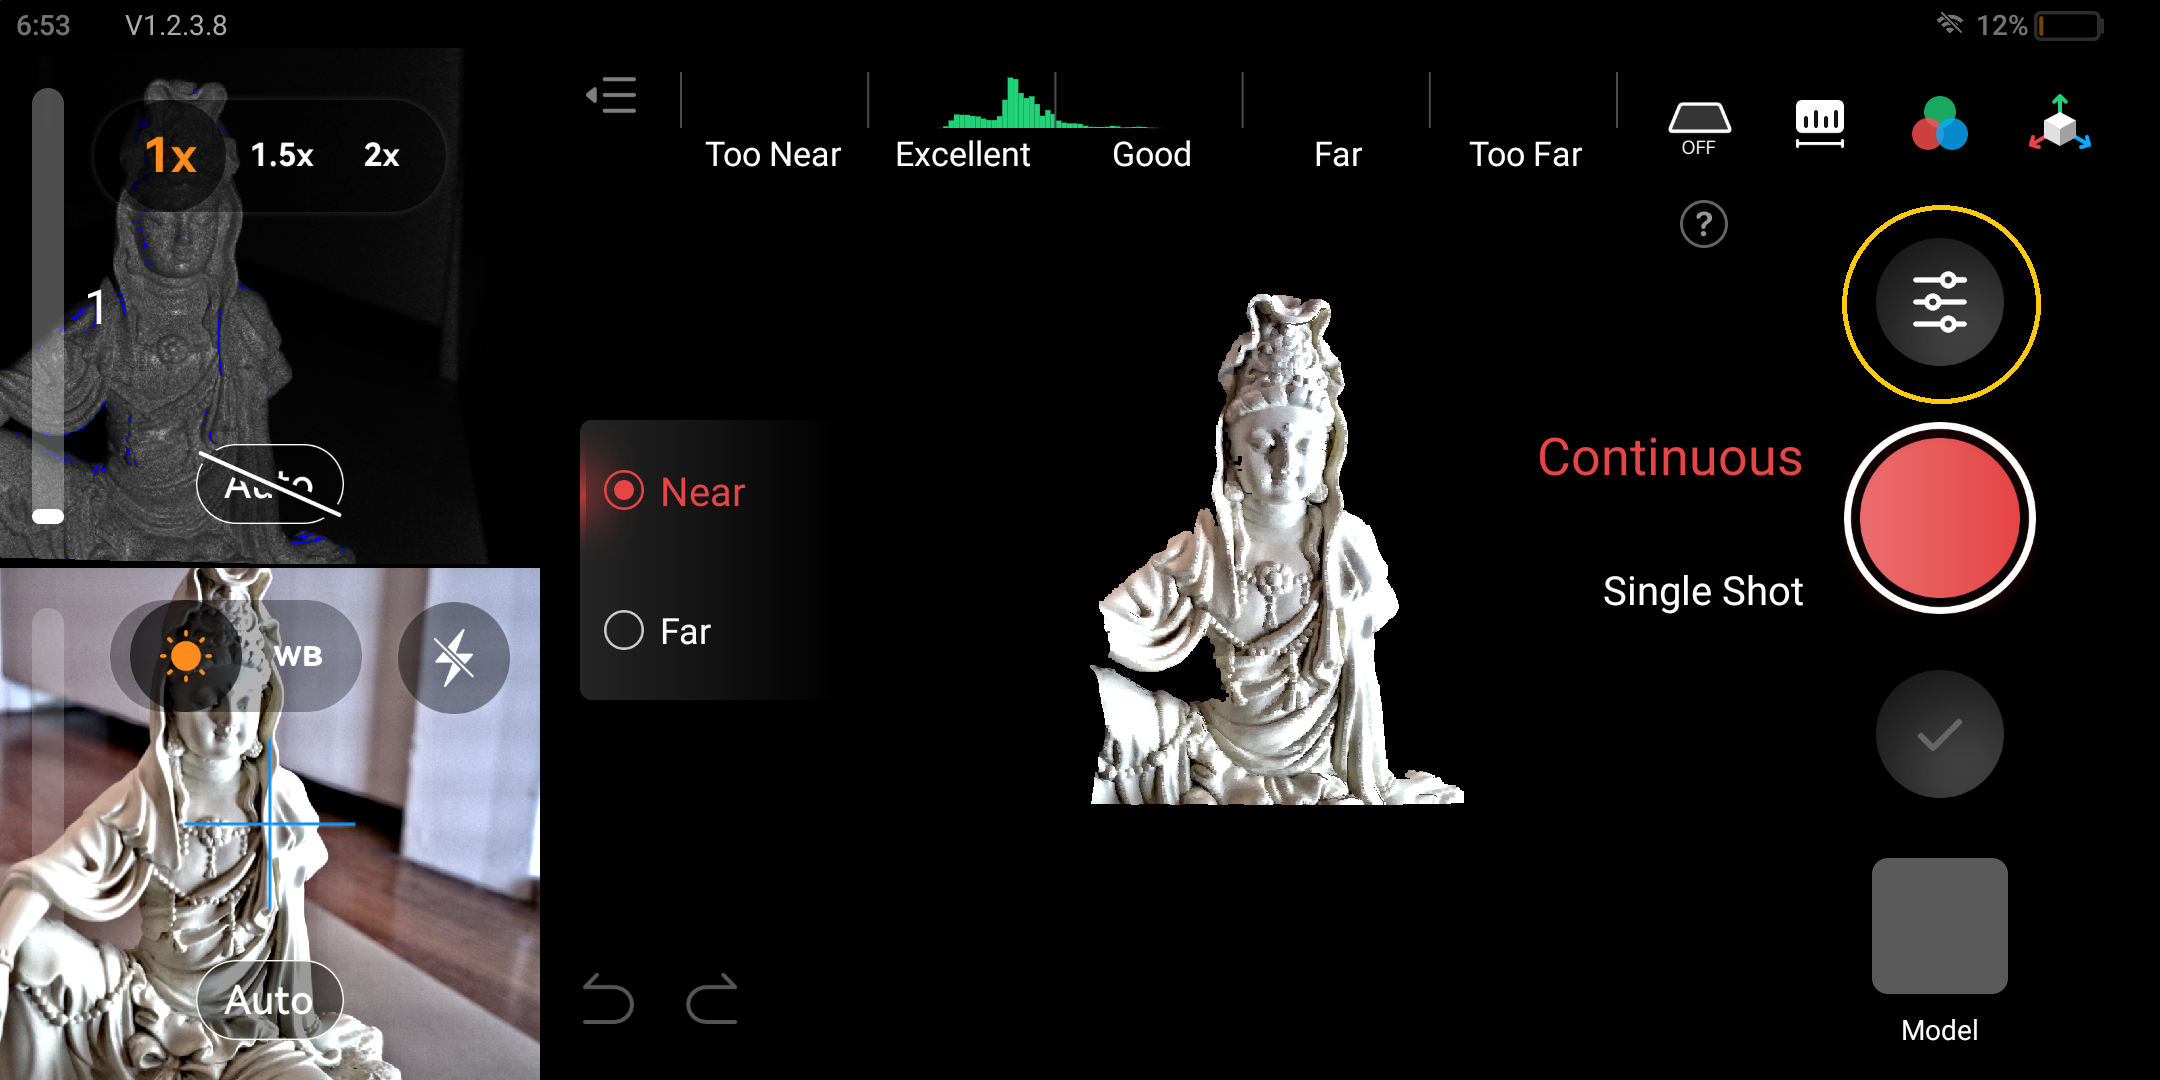
Scanning UI and Settings
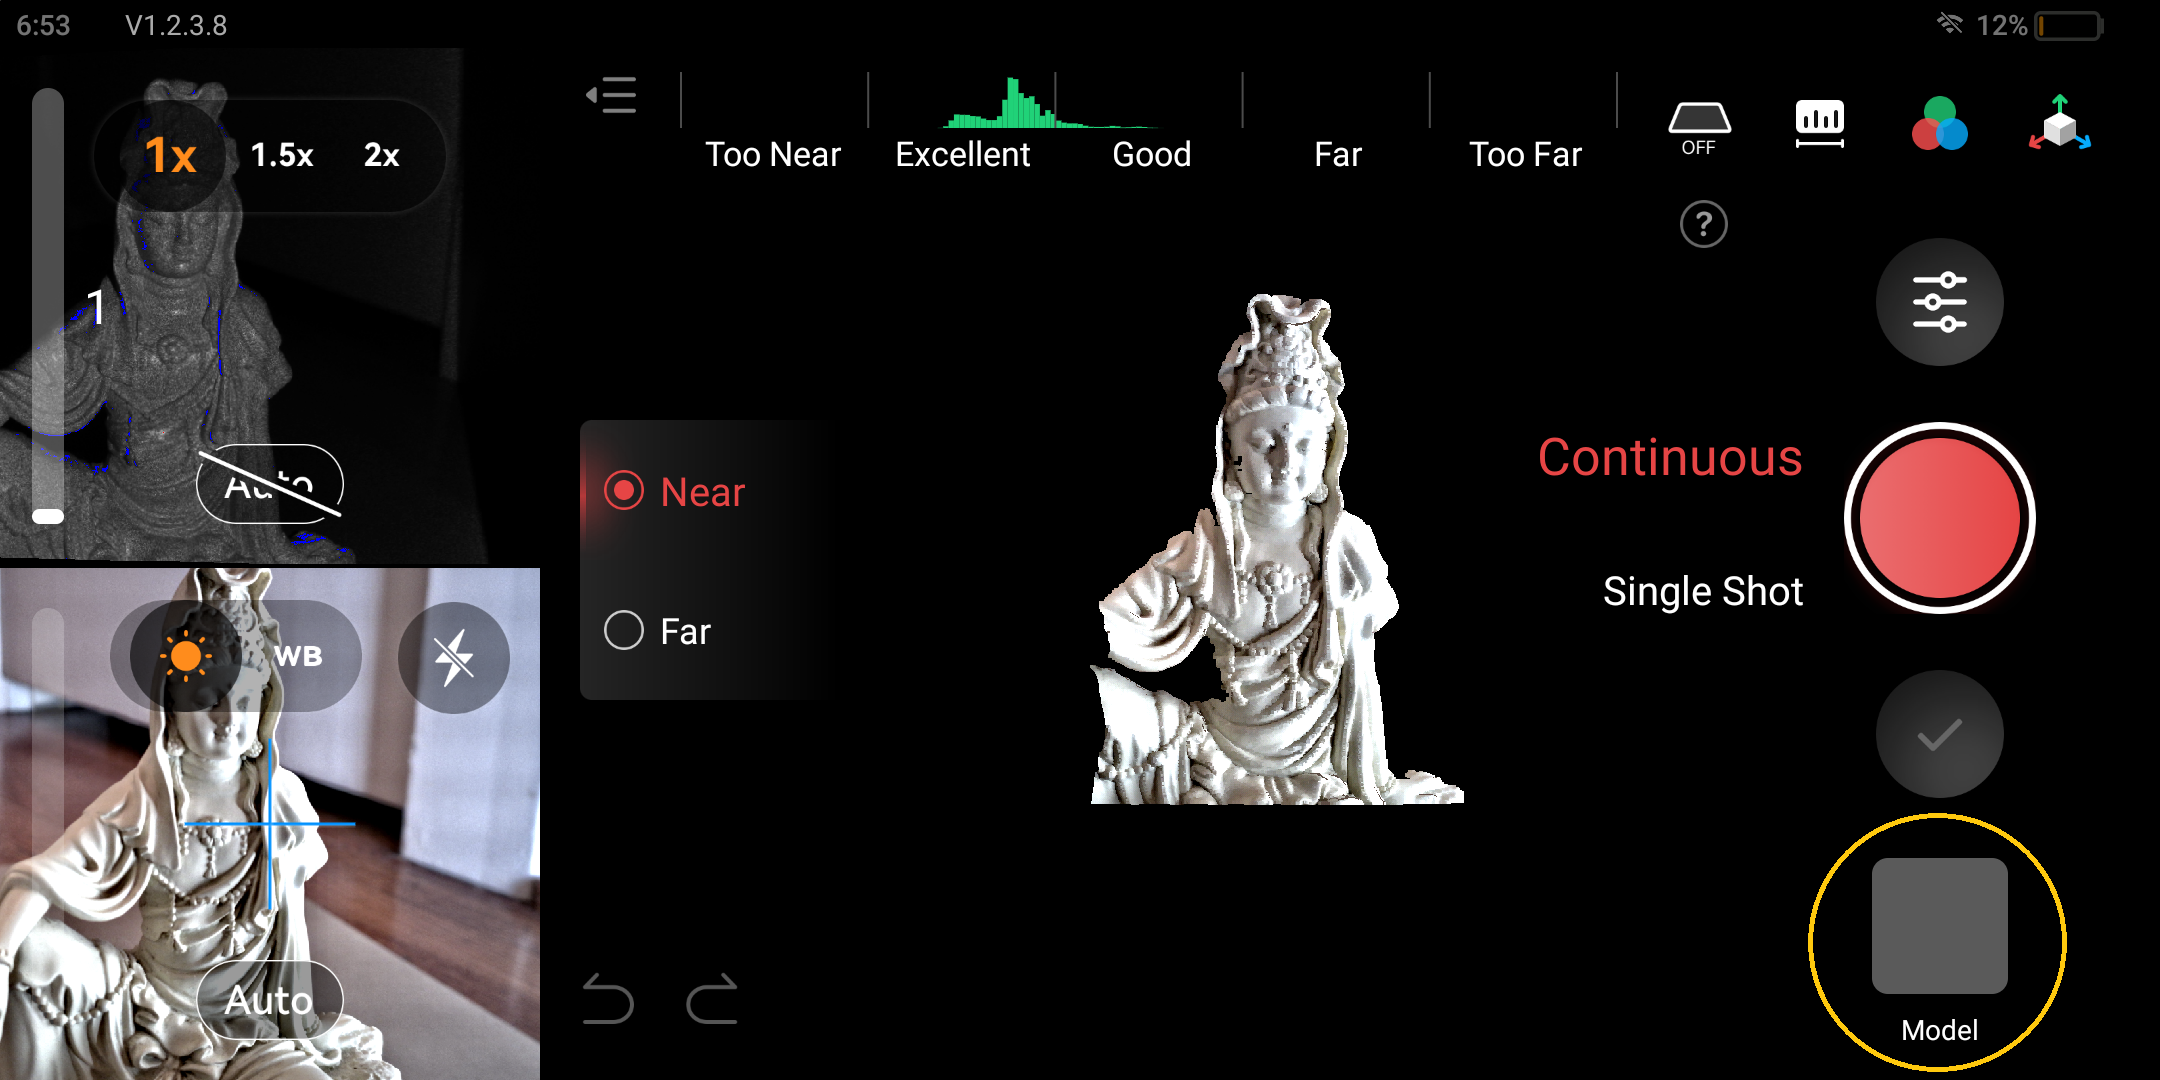
After making a new project, this will bring you into the scanning UI. The Scanning UI shows the infrared camera on the top left, the color camera on the bottom left and a live view of your scan in the center.
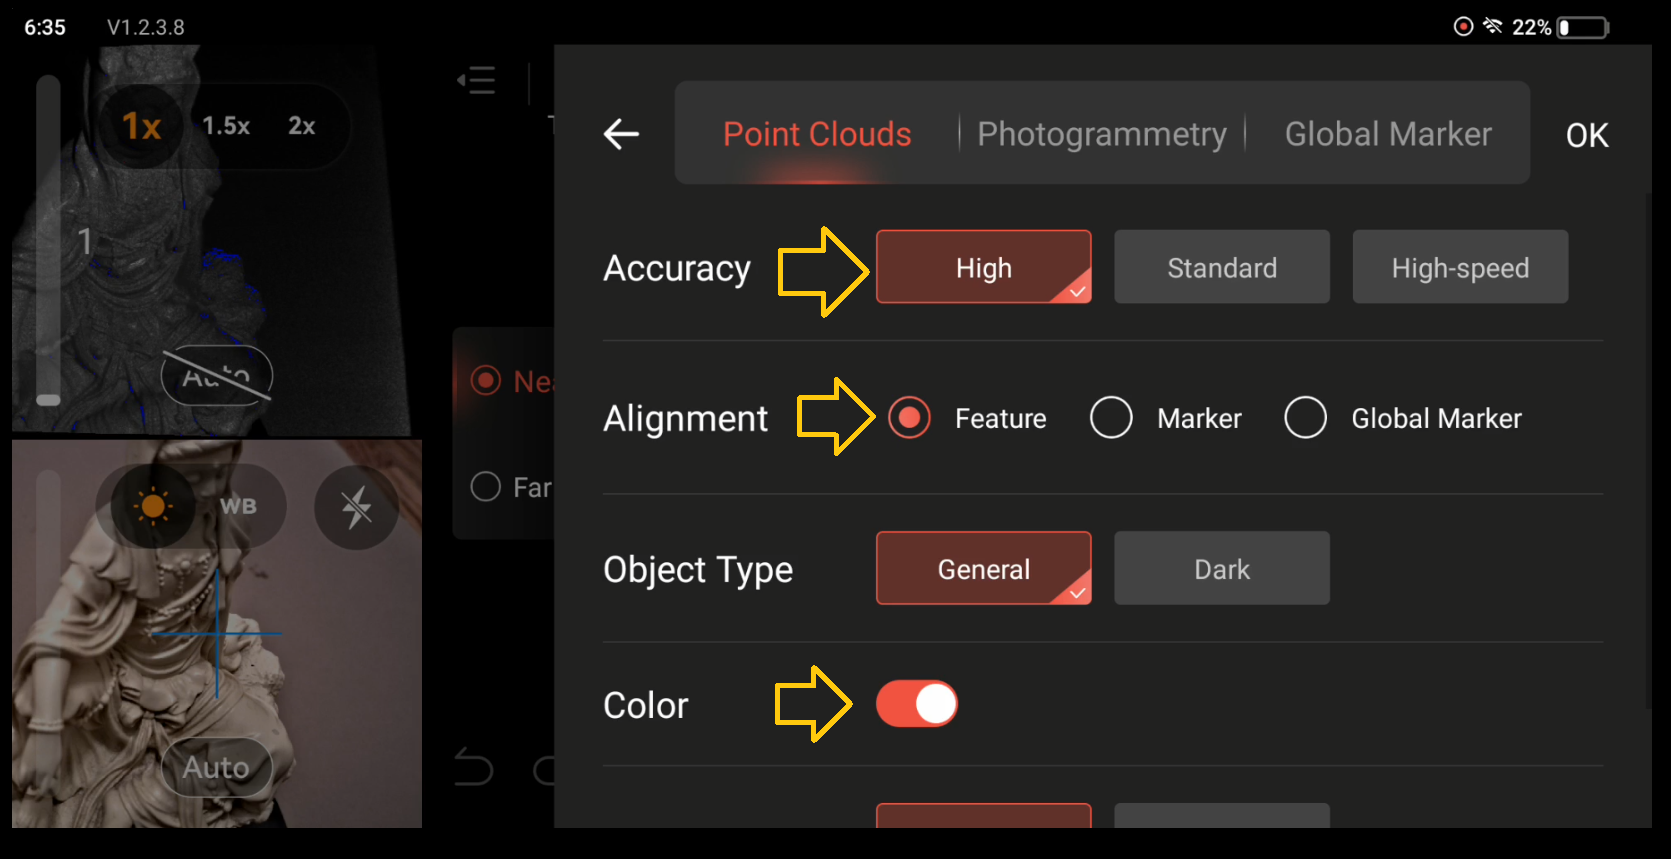
It is best to check your setting before beginning:
- Press the settings button
- Check that: Accuracy = high, Alignment = feature, and, if you want to capture a texture, color is toggled on.
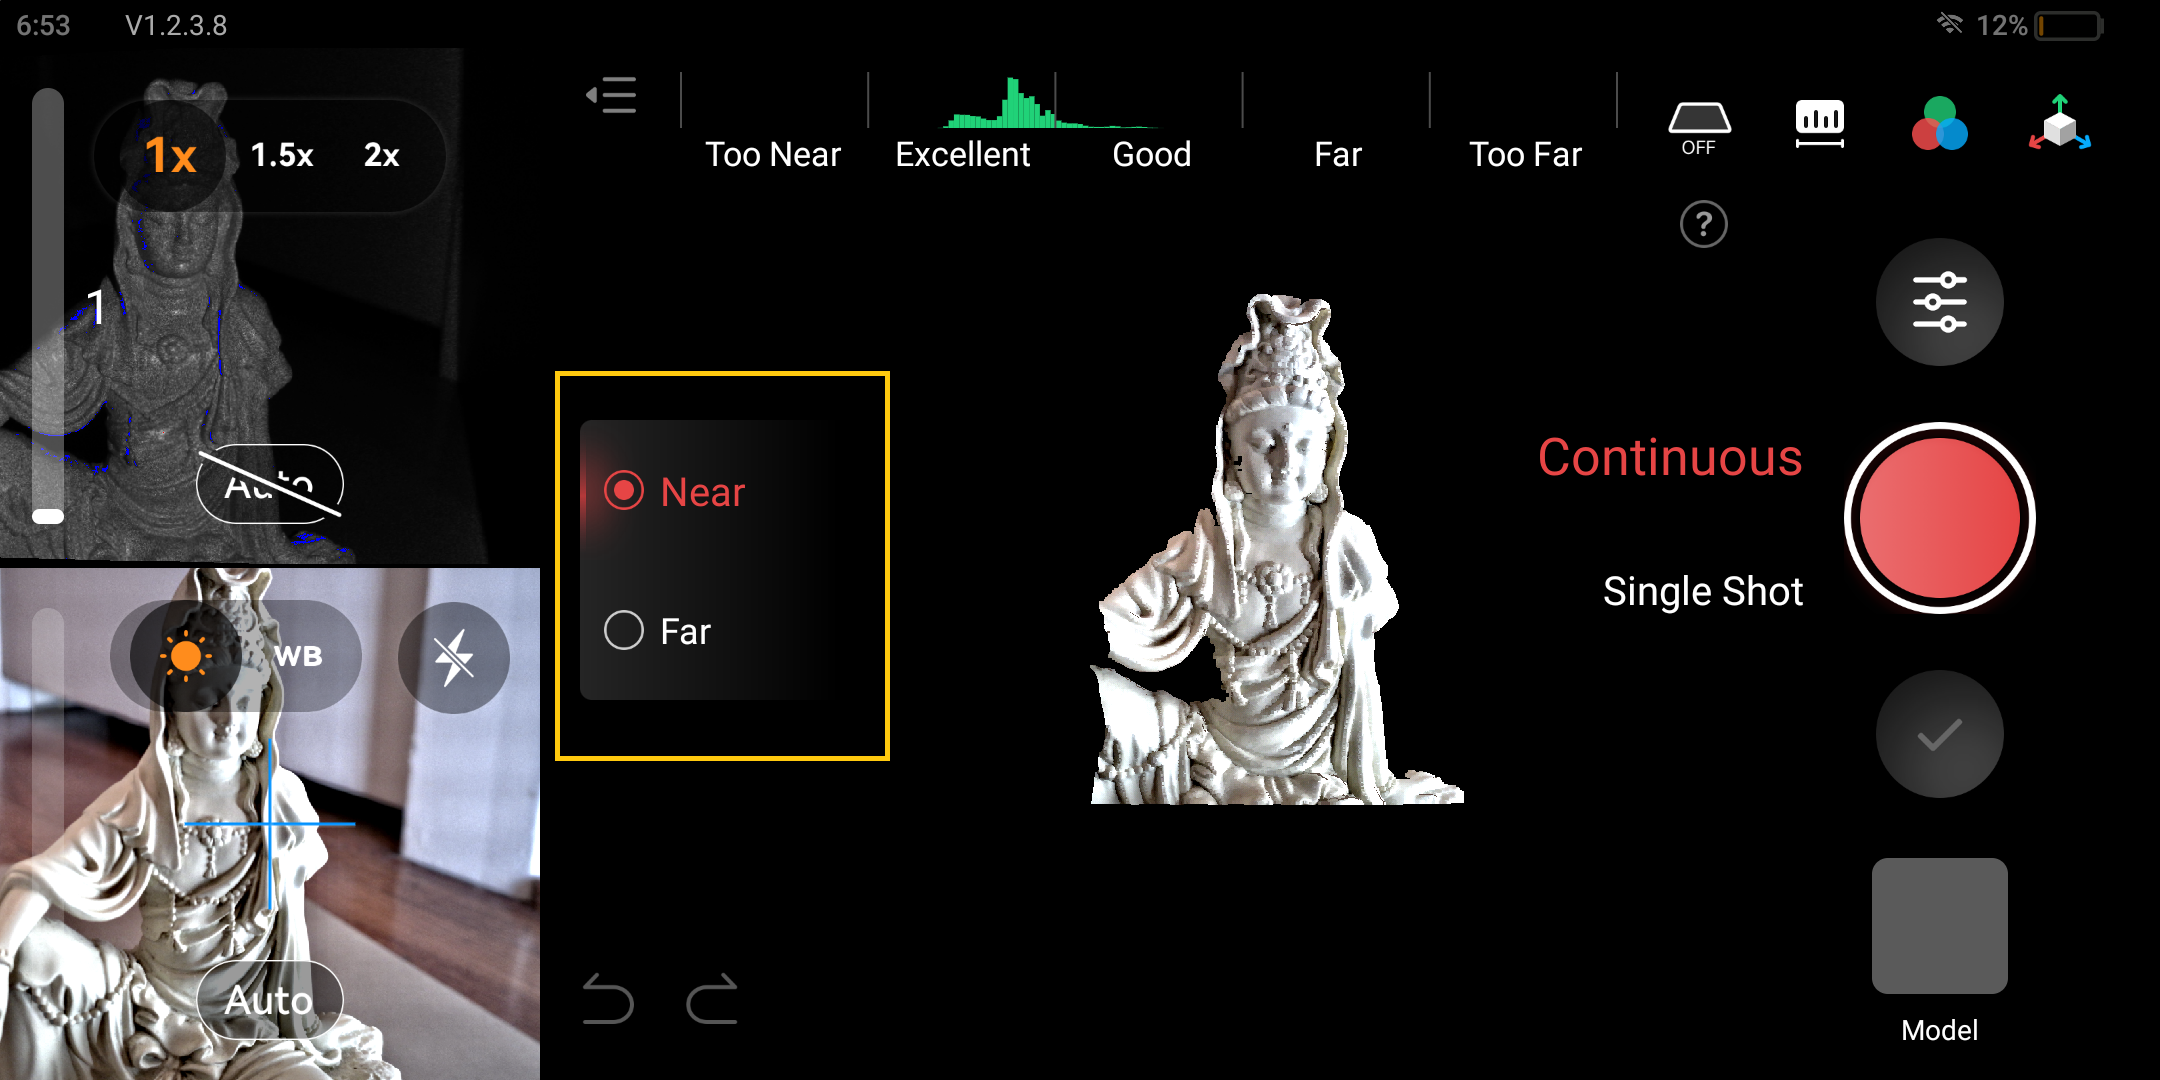
Near or Far
There are two size settings with the MIRACO, near or far.
- Near: for objects larger than a coin and ideally less than a can of soda. However, it can go up to the size of a human head, a medium size object, if you want to capture more fine details.
- Far: for objects larger than the size of a human head and up to around a large car. Captures will have less detail than near mode.
For this example of the statute, we will be using near mode:
Scanning Process
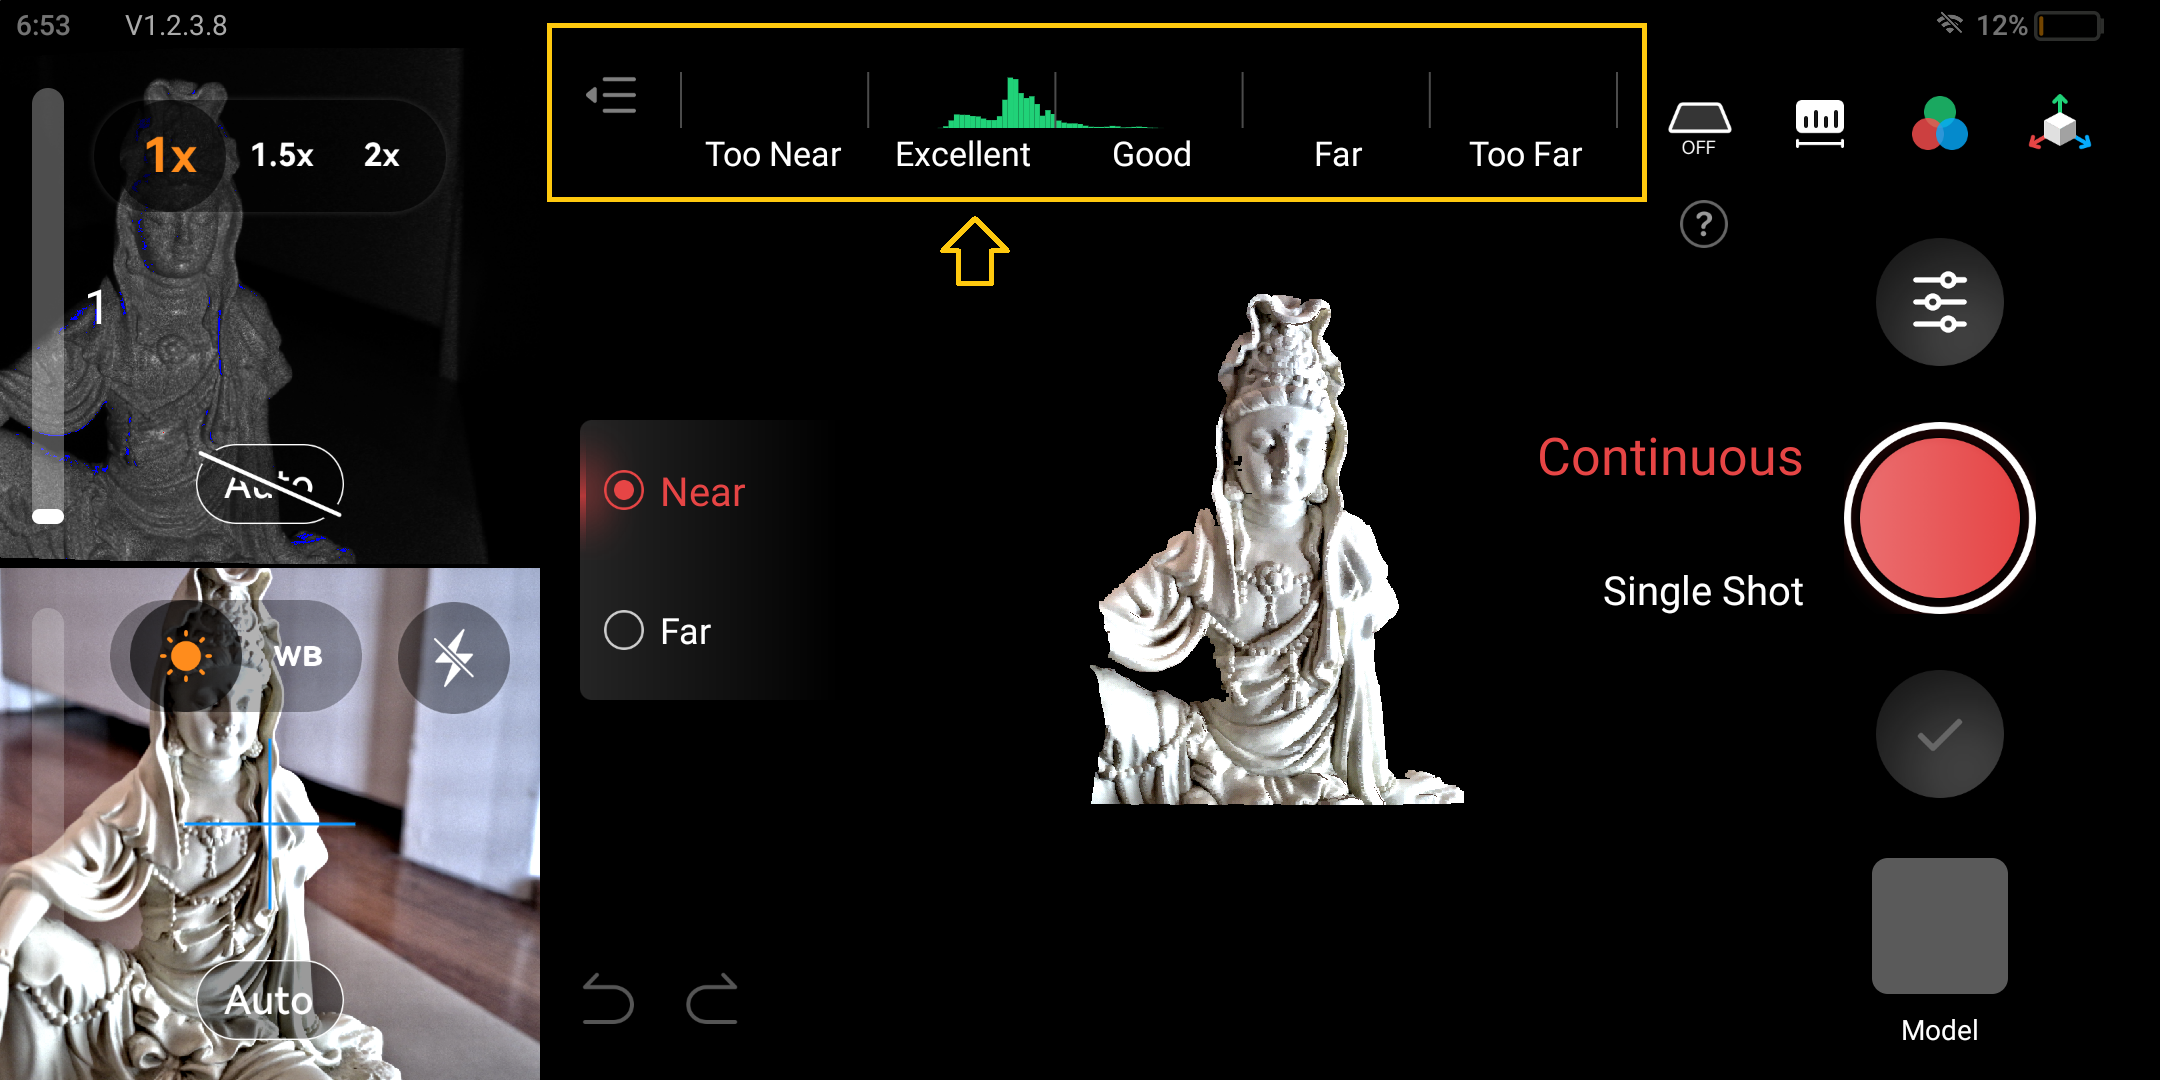
To begin scanning, press the red button with continuous mode set. As seen in the video below, the green parts of the scan indicate parts of the model that MIRACO is accurately scanning. If the MIRACO cannot find recorded features of the model the scan will turn red-orange and it will lose tracking, being unable to capture the object. If the scanner loses tracking, move the scanner until the major features of the model are found again and the 3D scan turns green. It best to keep the scanner at the same distance from your model making sure that the scanner detects the distance as Excellent as indicated at the top of the UI:
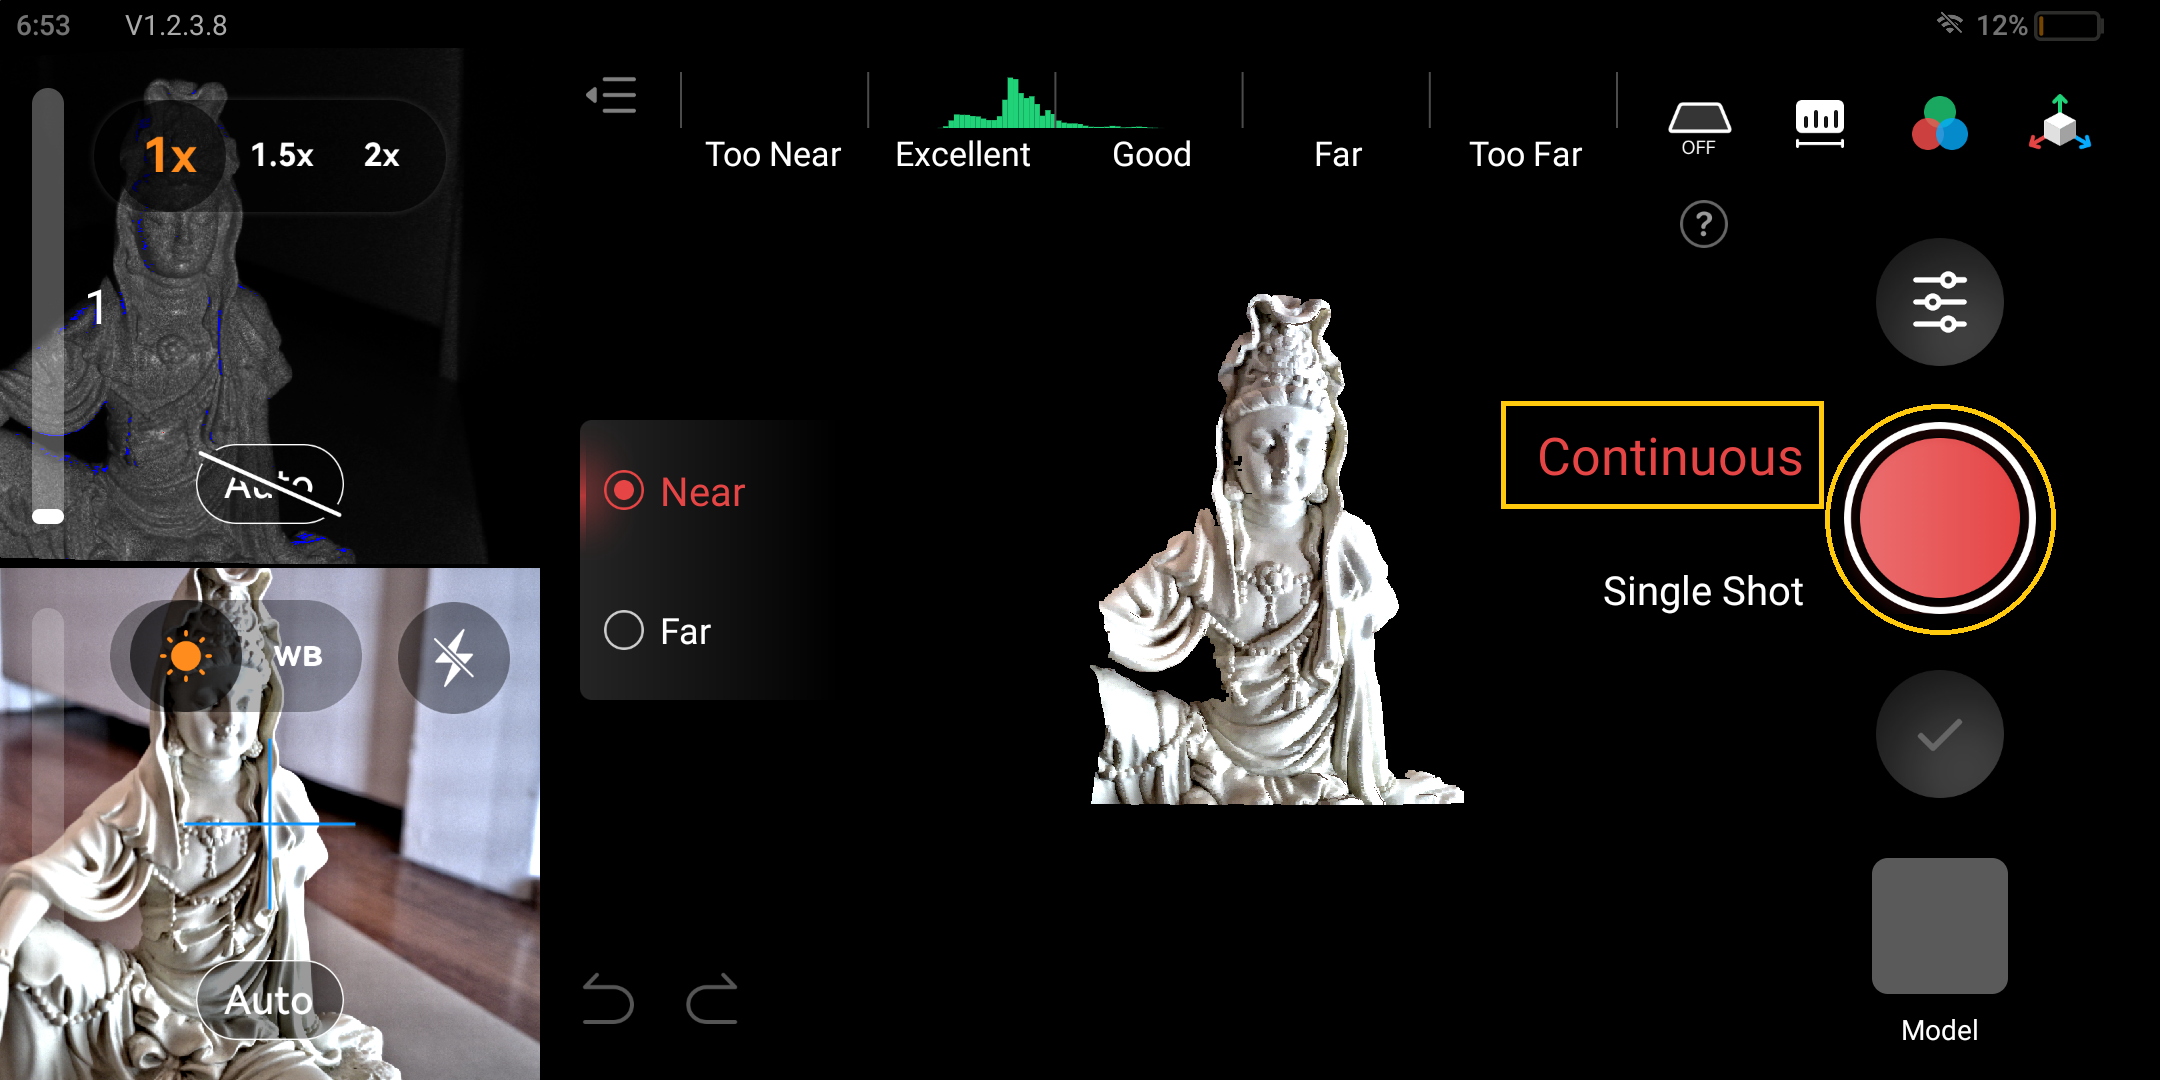
To scan, either slowly rotate your model using the turntable, or slowly move the scanner around your model, making sure that it never loses tracking. If you need to pause scanning, you can press the pause button and resume the scan at anytime after the scanner finds the features of your object.
When scanning your object, it is important to capture the model from all angles to ensure that you are scanning every part of your model.
Turing object
Since the MIRACO tracks key features, after large parts of your model are scanned, you can rotate your object to another angle and continue scanning after the key features are found. In the video example below, the object is rotated on its back to capture the bottom and underside of the model.
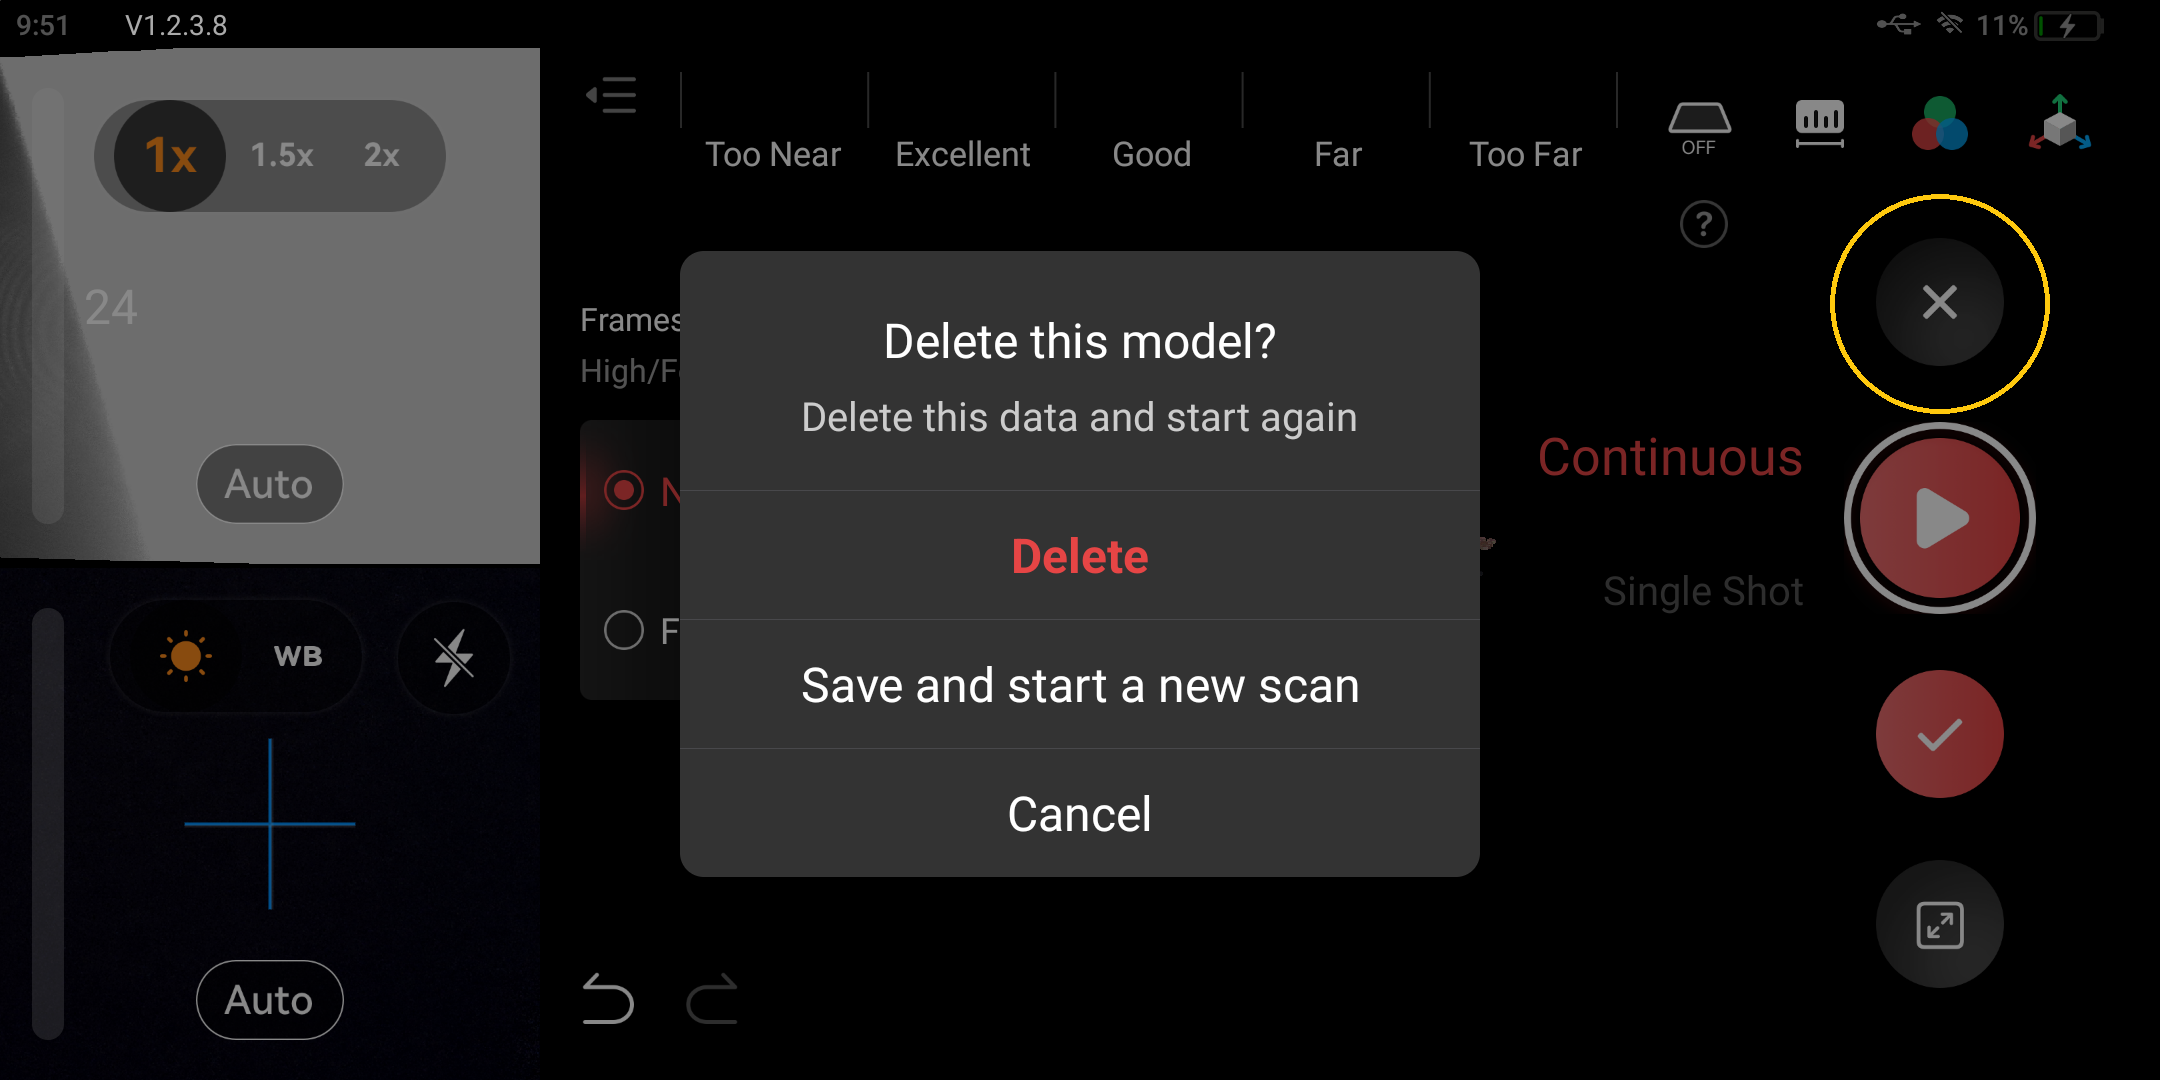
Deleting a Scan
If you accidentally create errors within your scan such as misaligning the tracking of your model, you can pause your model and press the x button to delete your scan.
Checking your scan
After you complete your scan, you can quickly check your scan by either rotating around the point cloud to see if there are any large missing areas, or you can create a One-tap edit. The one-tap edit will quickly mesh your model allowing you to see if there are any major errors. Errors such as small holes or extra geometry can be removed later. This one-tap edit is mostly to see if you missed parts of your model or if you misaligned your model.
To one-tap edit:
- Press One-tap edit
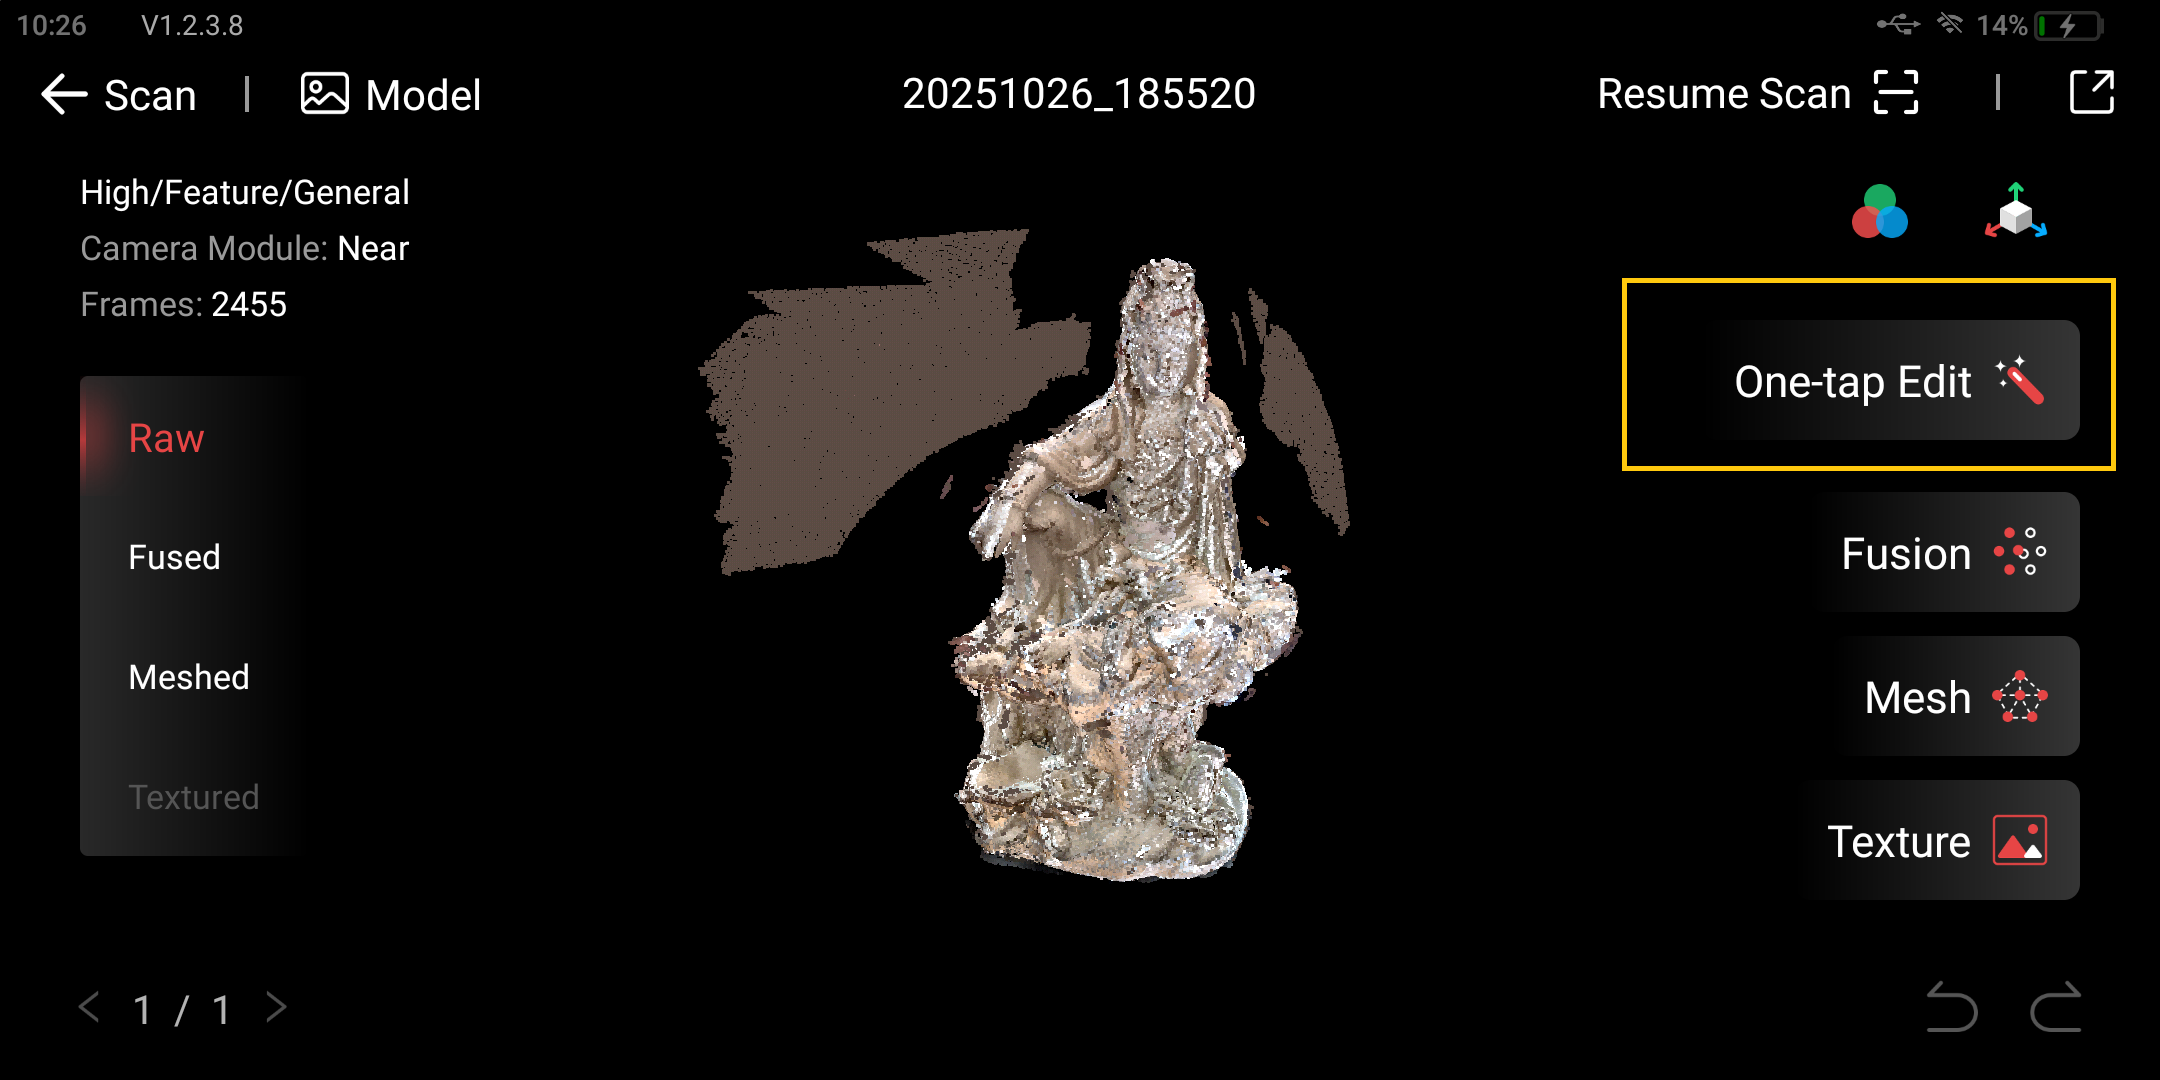
- Make sure Fast is selected and Press apply

- Rotate around the completed model using your fingers to see if there are any errors
Resume Scan
If there are any errors within your scan, you can use the Resume Scan button to continue scanning to fill in any major gaps:

Processing Scan
While the MIRACO is an all-in-one 3D scanning, meaning it can both scan and process models, it is often best to process models on your computer using the software Revo Scan 5
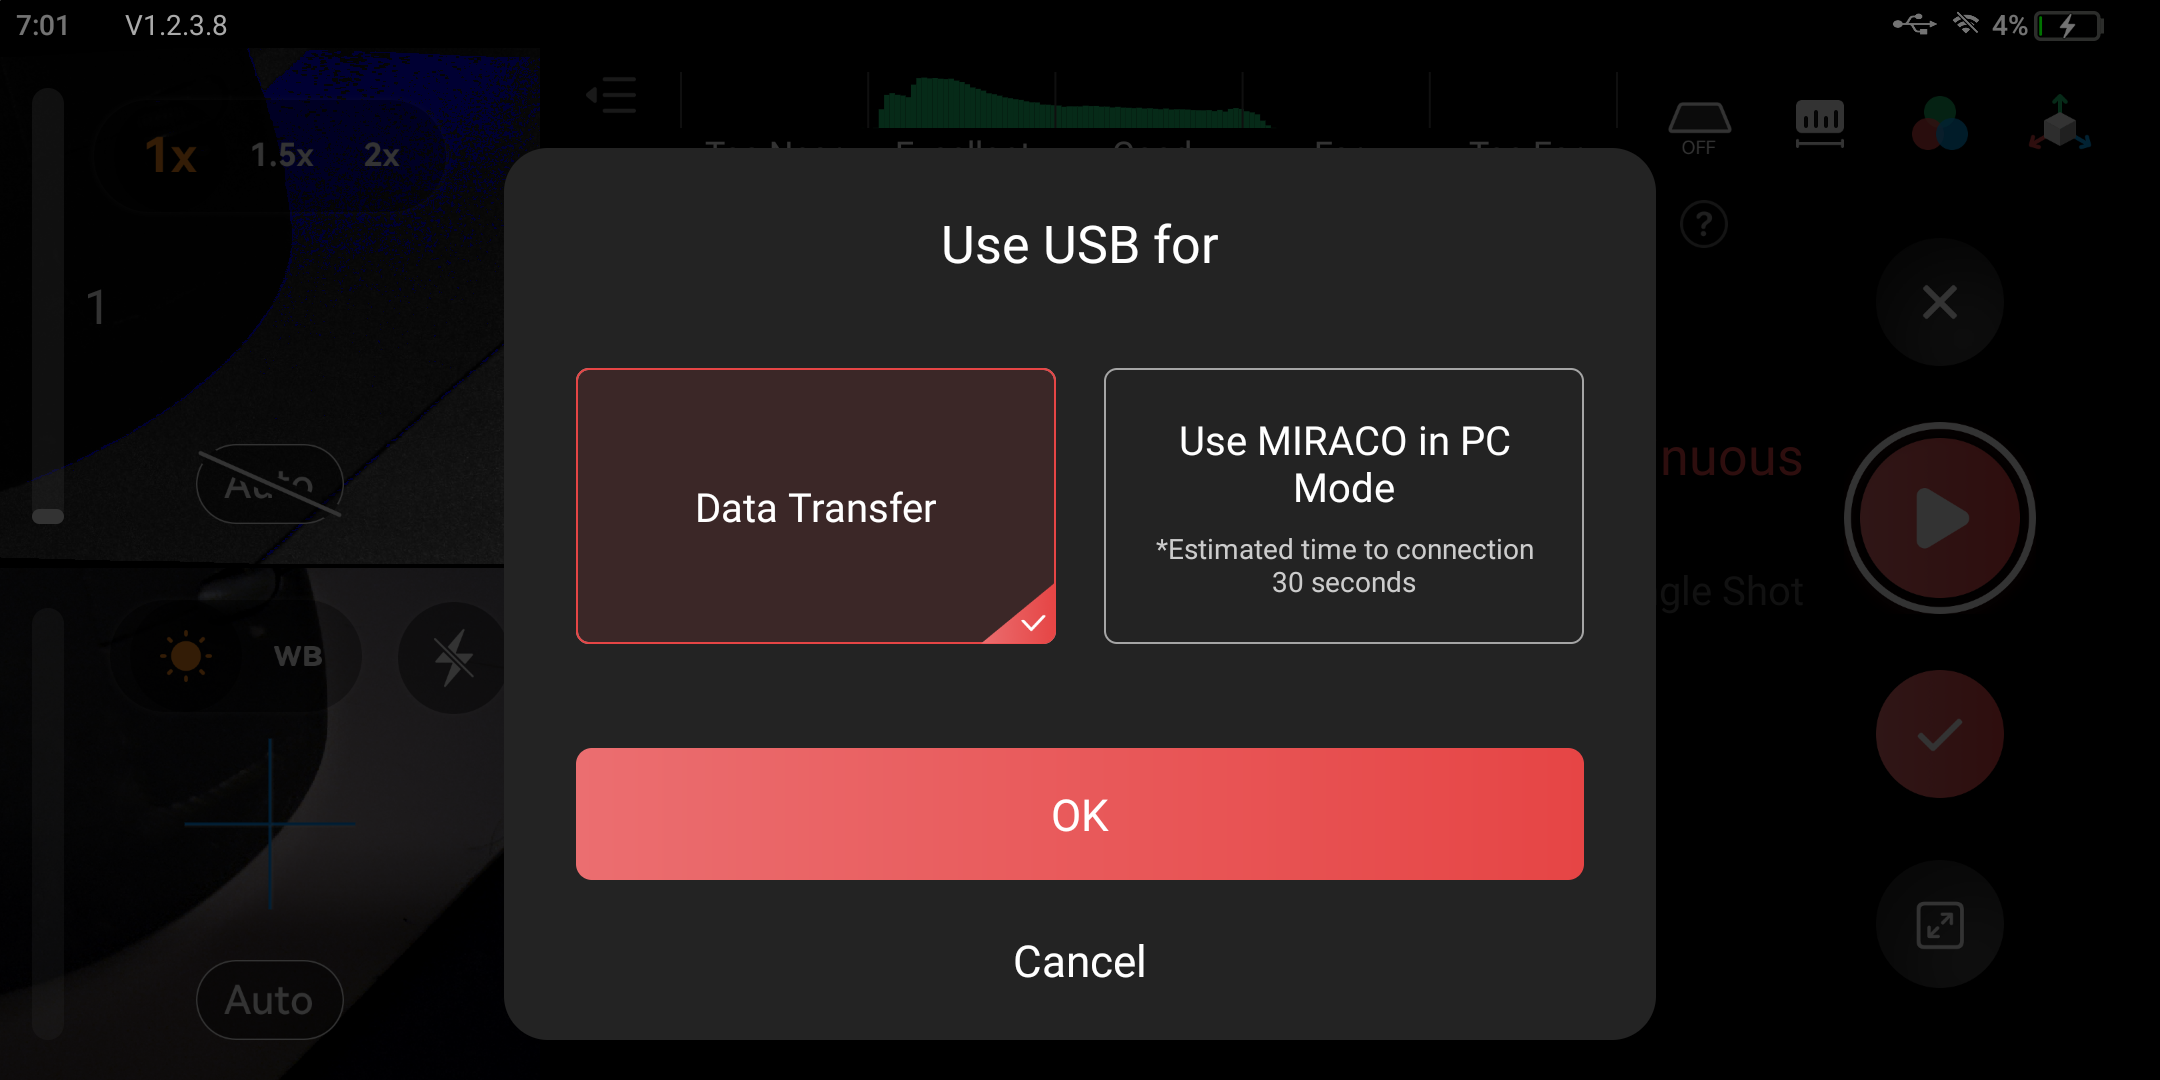
Connecting Miraco to PC
- Open Revo Scan 5
- Plug the MIRACO into your computer using the white USBC cable
- On your MIRACO, select Data Transfer and press OK
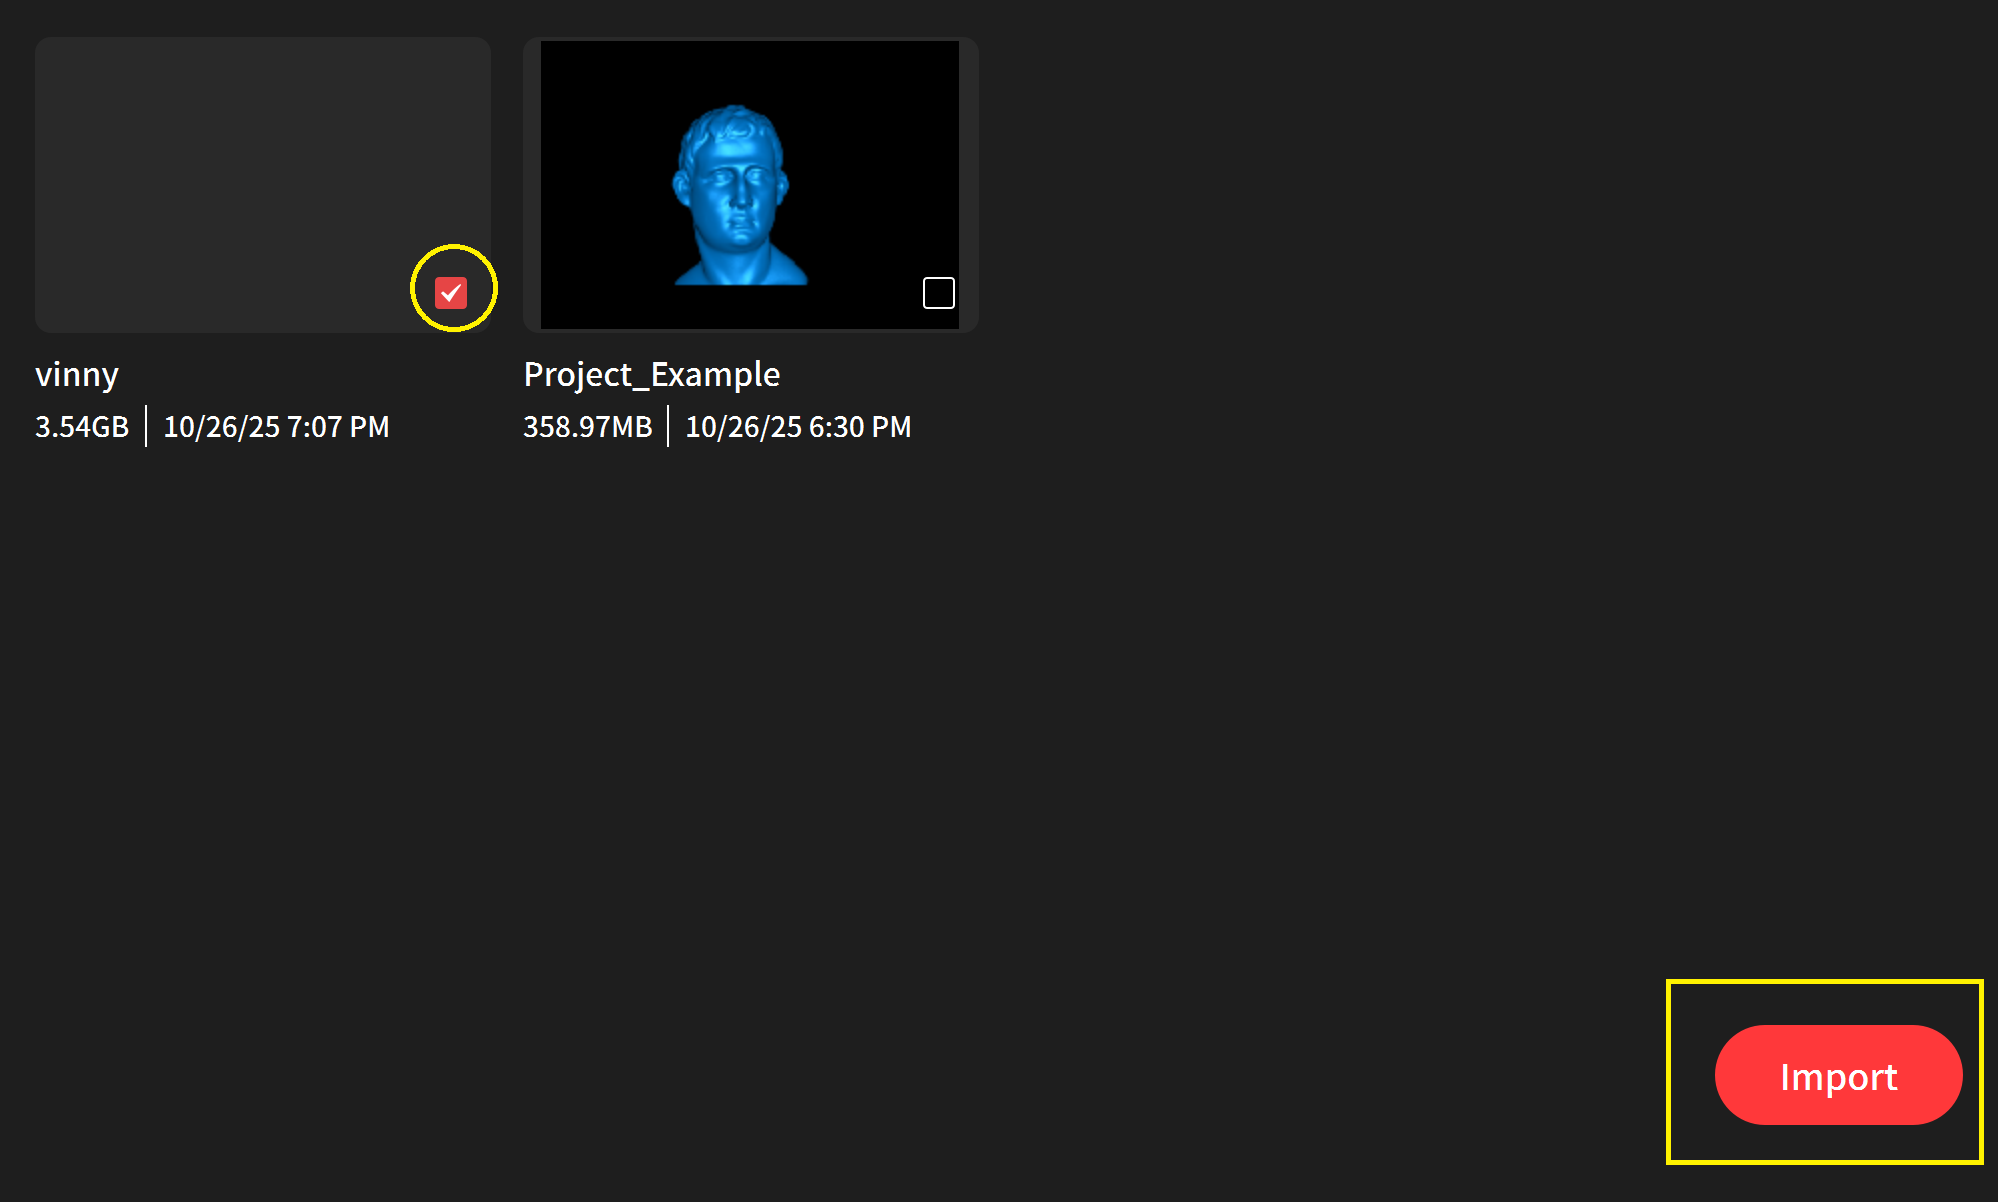
In Revo Scan 5
- Make sure the scanner is being detected and your project is present
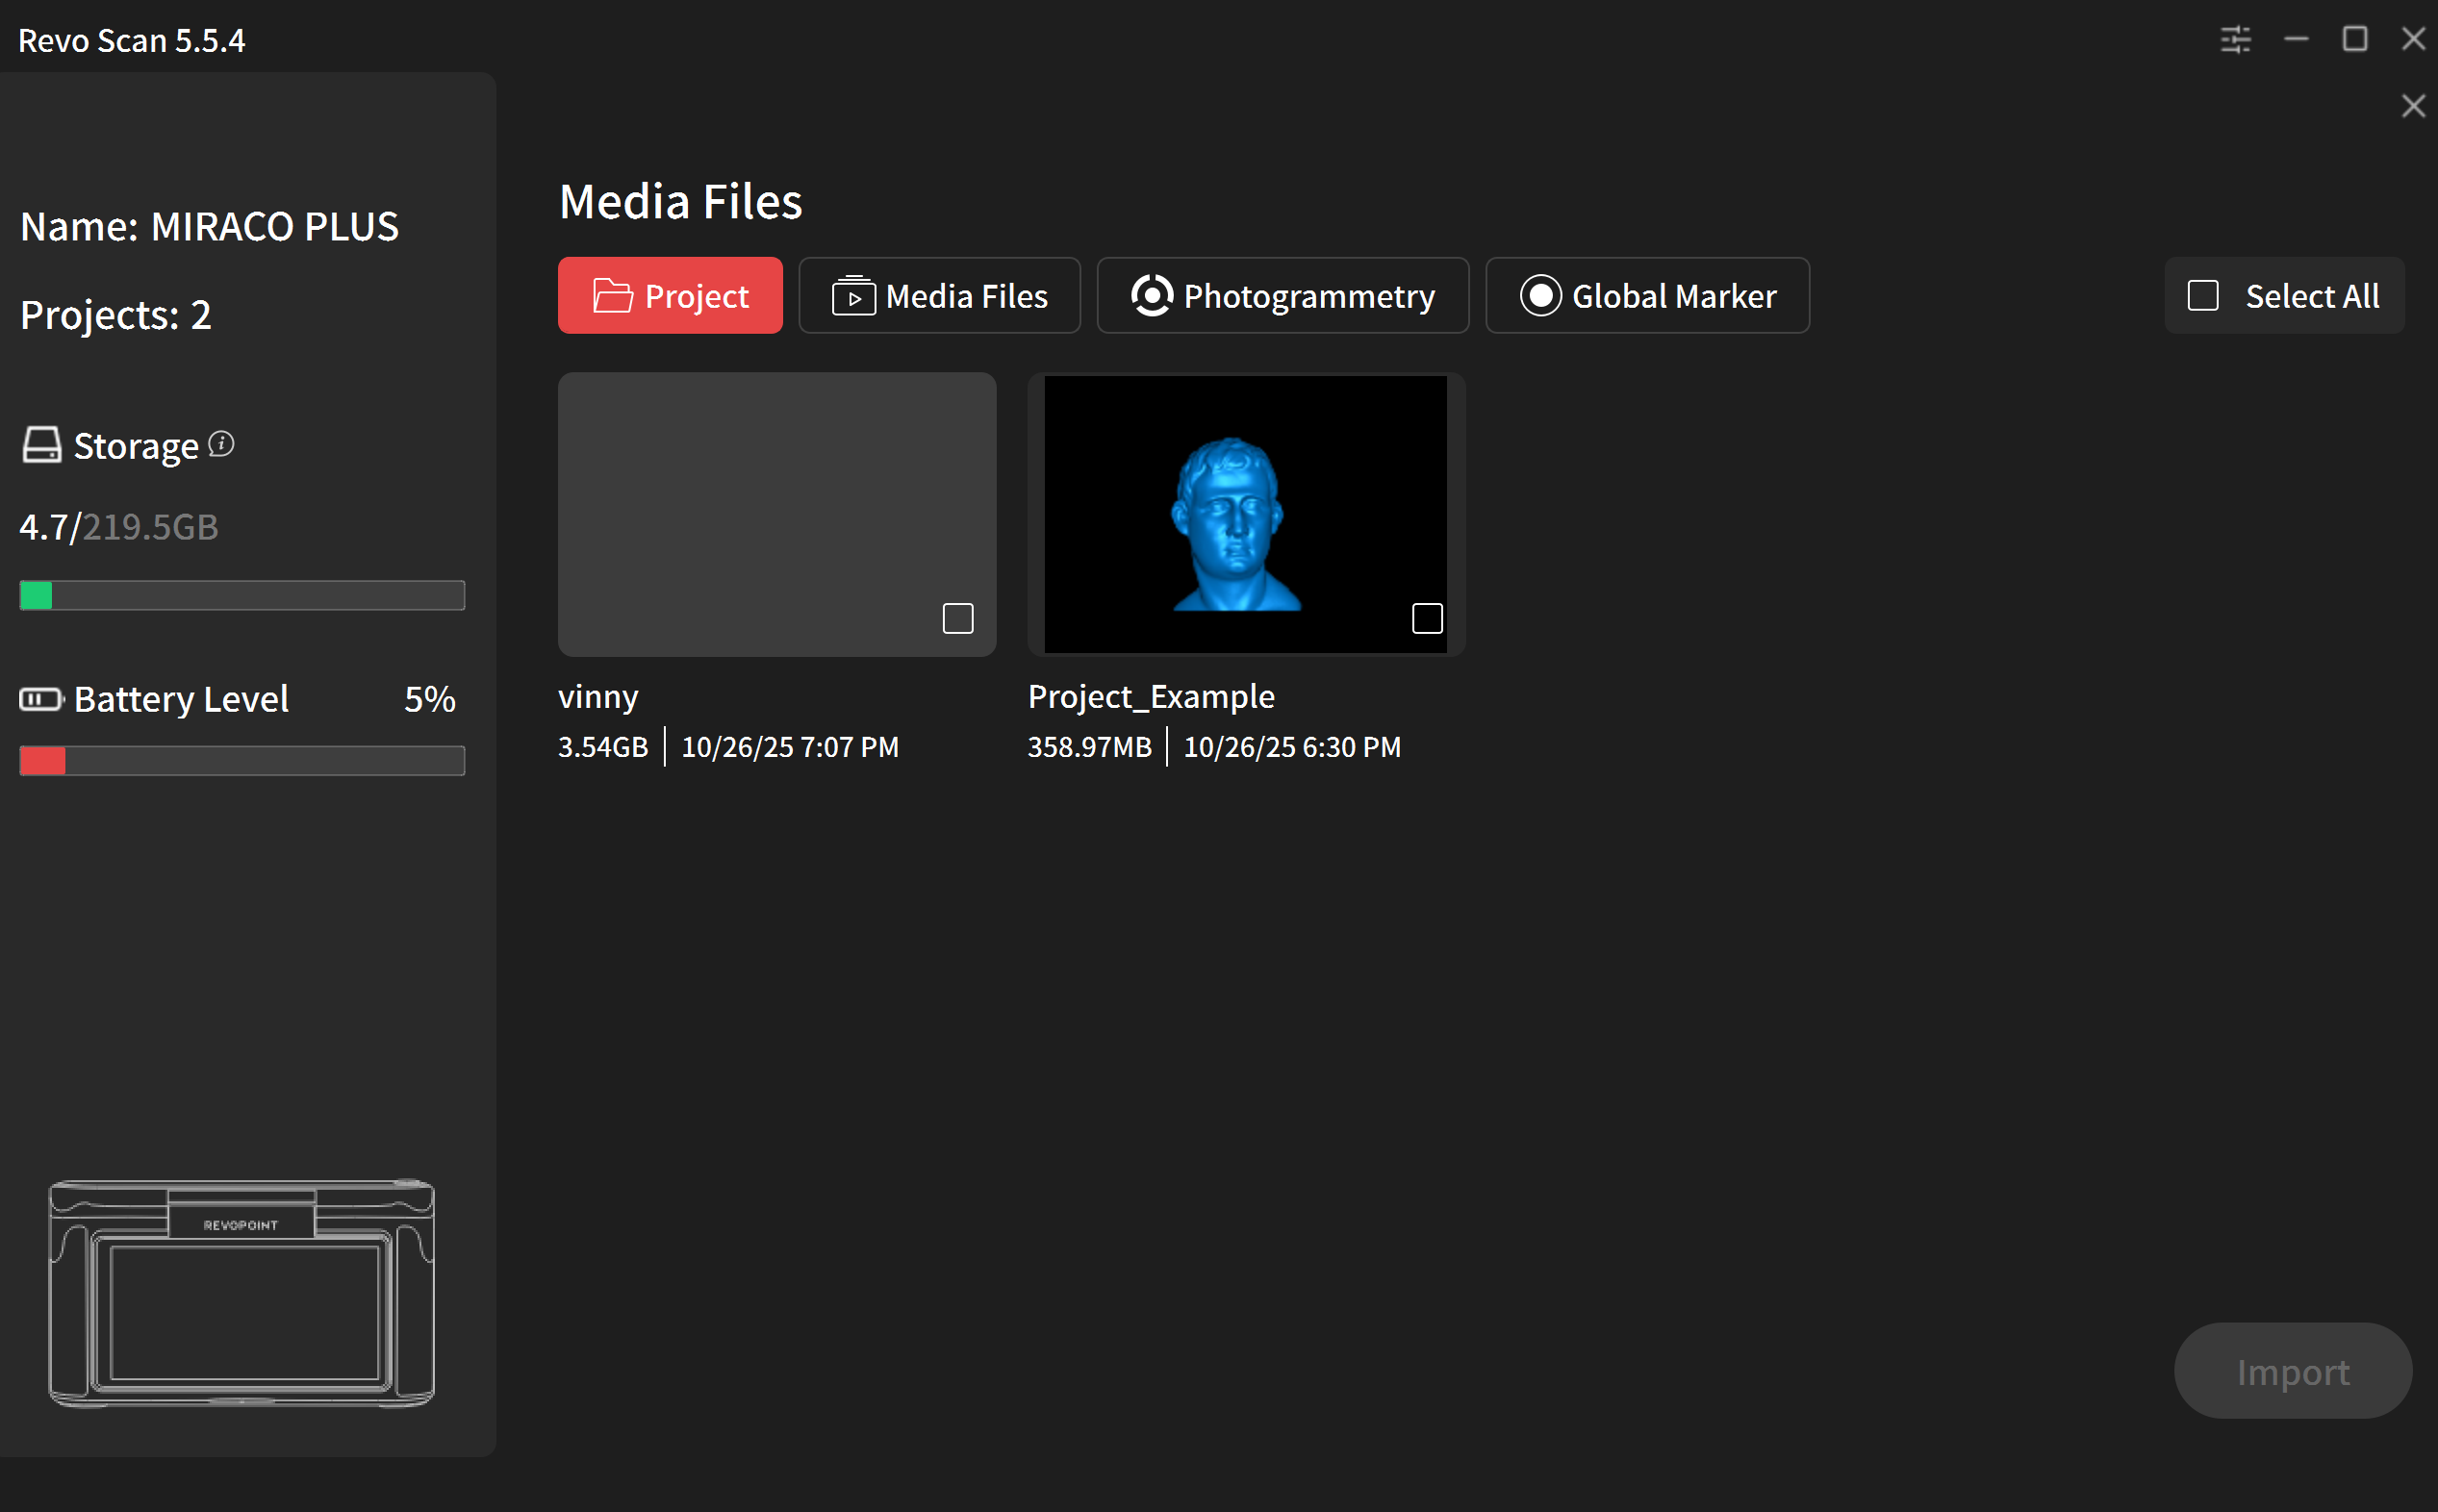
- Press the check on your project and press import
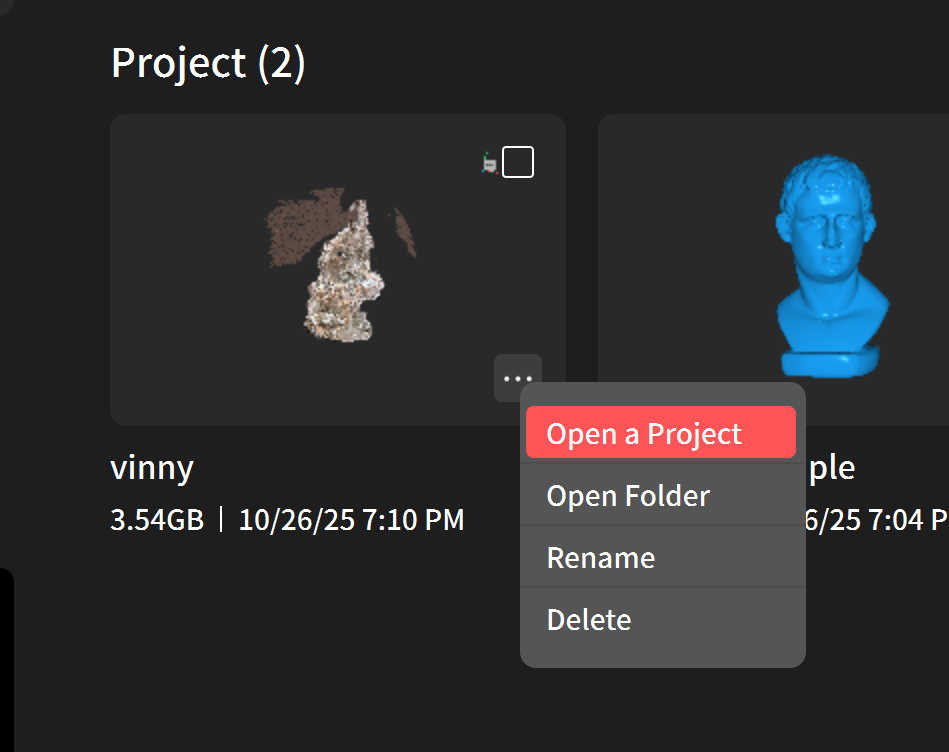
- Press the three dots on your project and press Open a Project
Processing Model
In Revo Scan 5, we can process our model using the step by step process as listed at the top of the UI. This begins with Fusion and ends at Export.
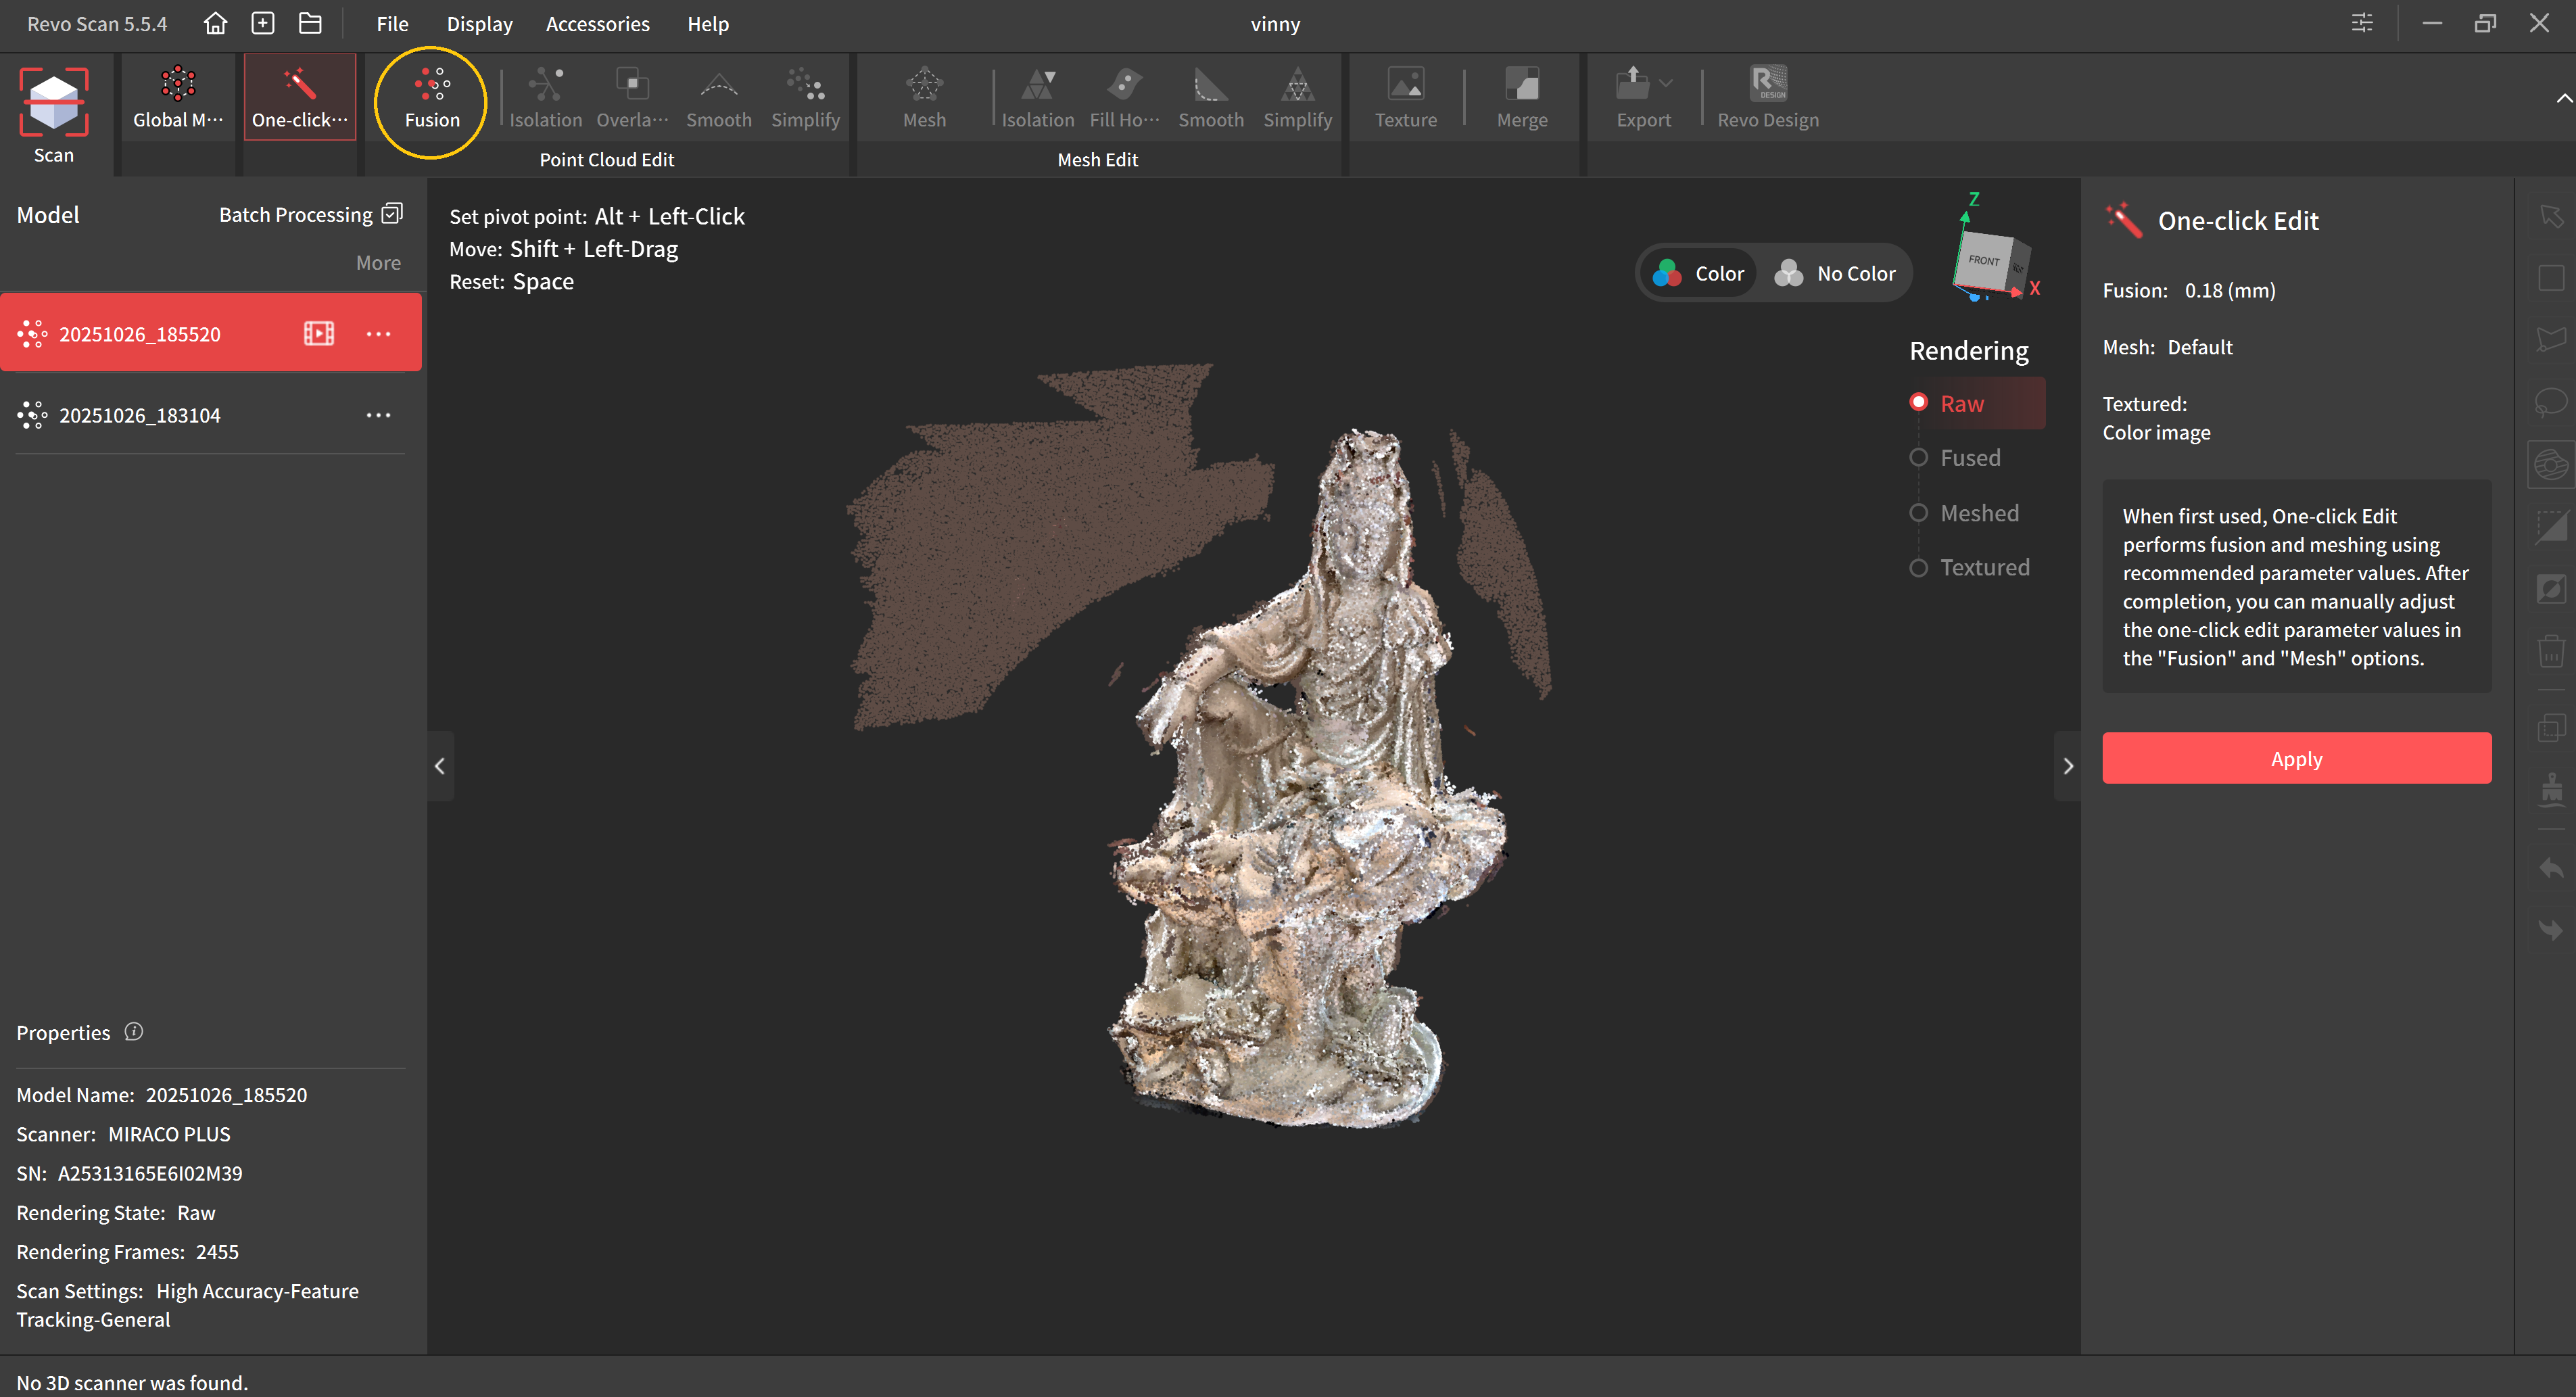
Fusion
Fusion with fuse point cloud points together. To fuse a point cloud:
- Press Fusion
- Set point distance between .1mm and .2 and press Apply
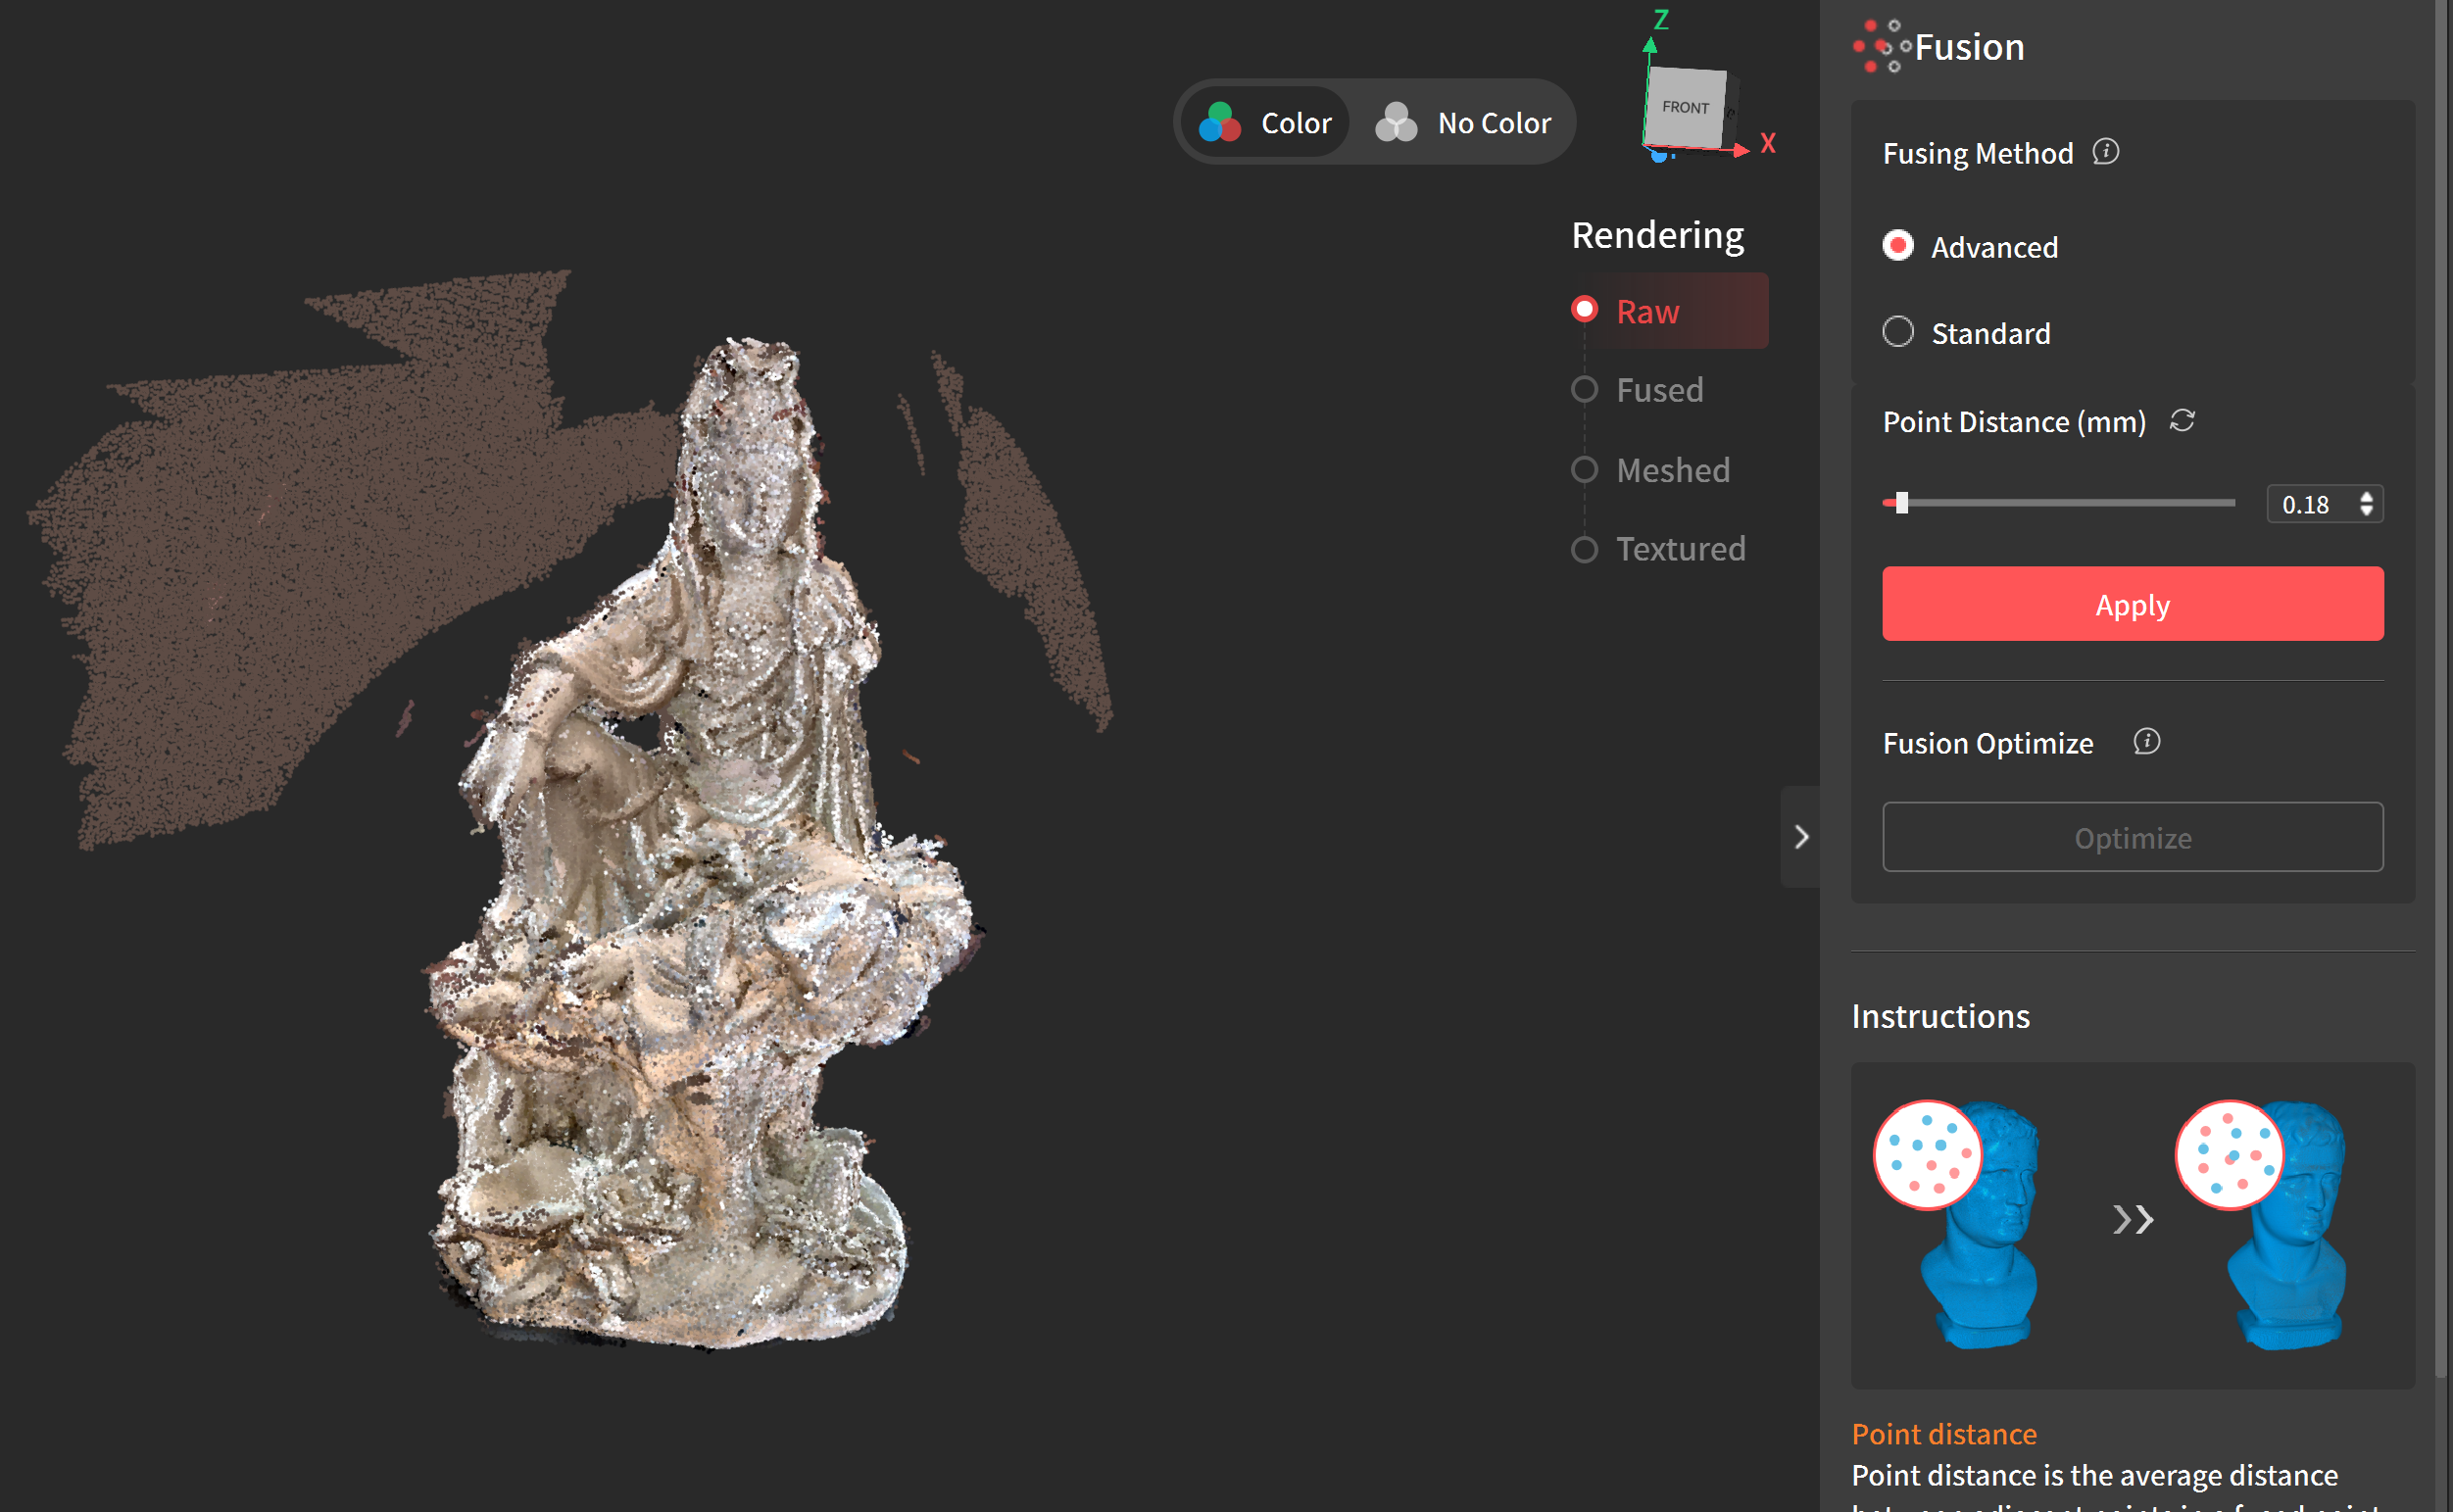
- This will create a fused point cloud model
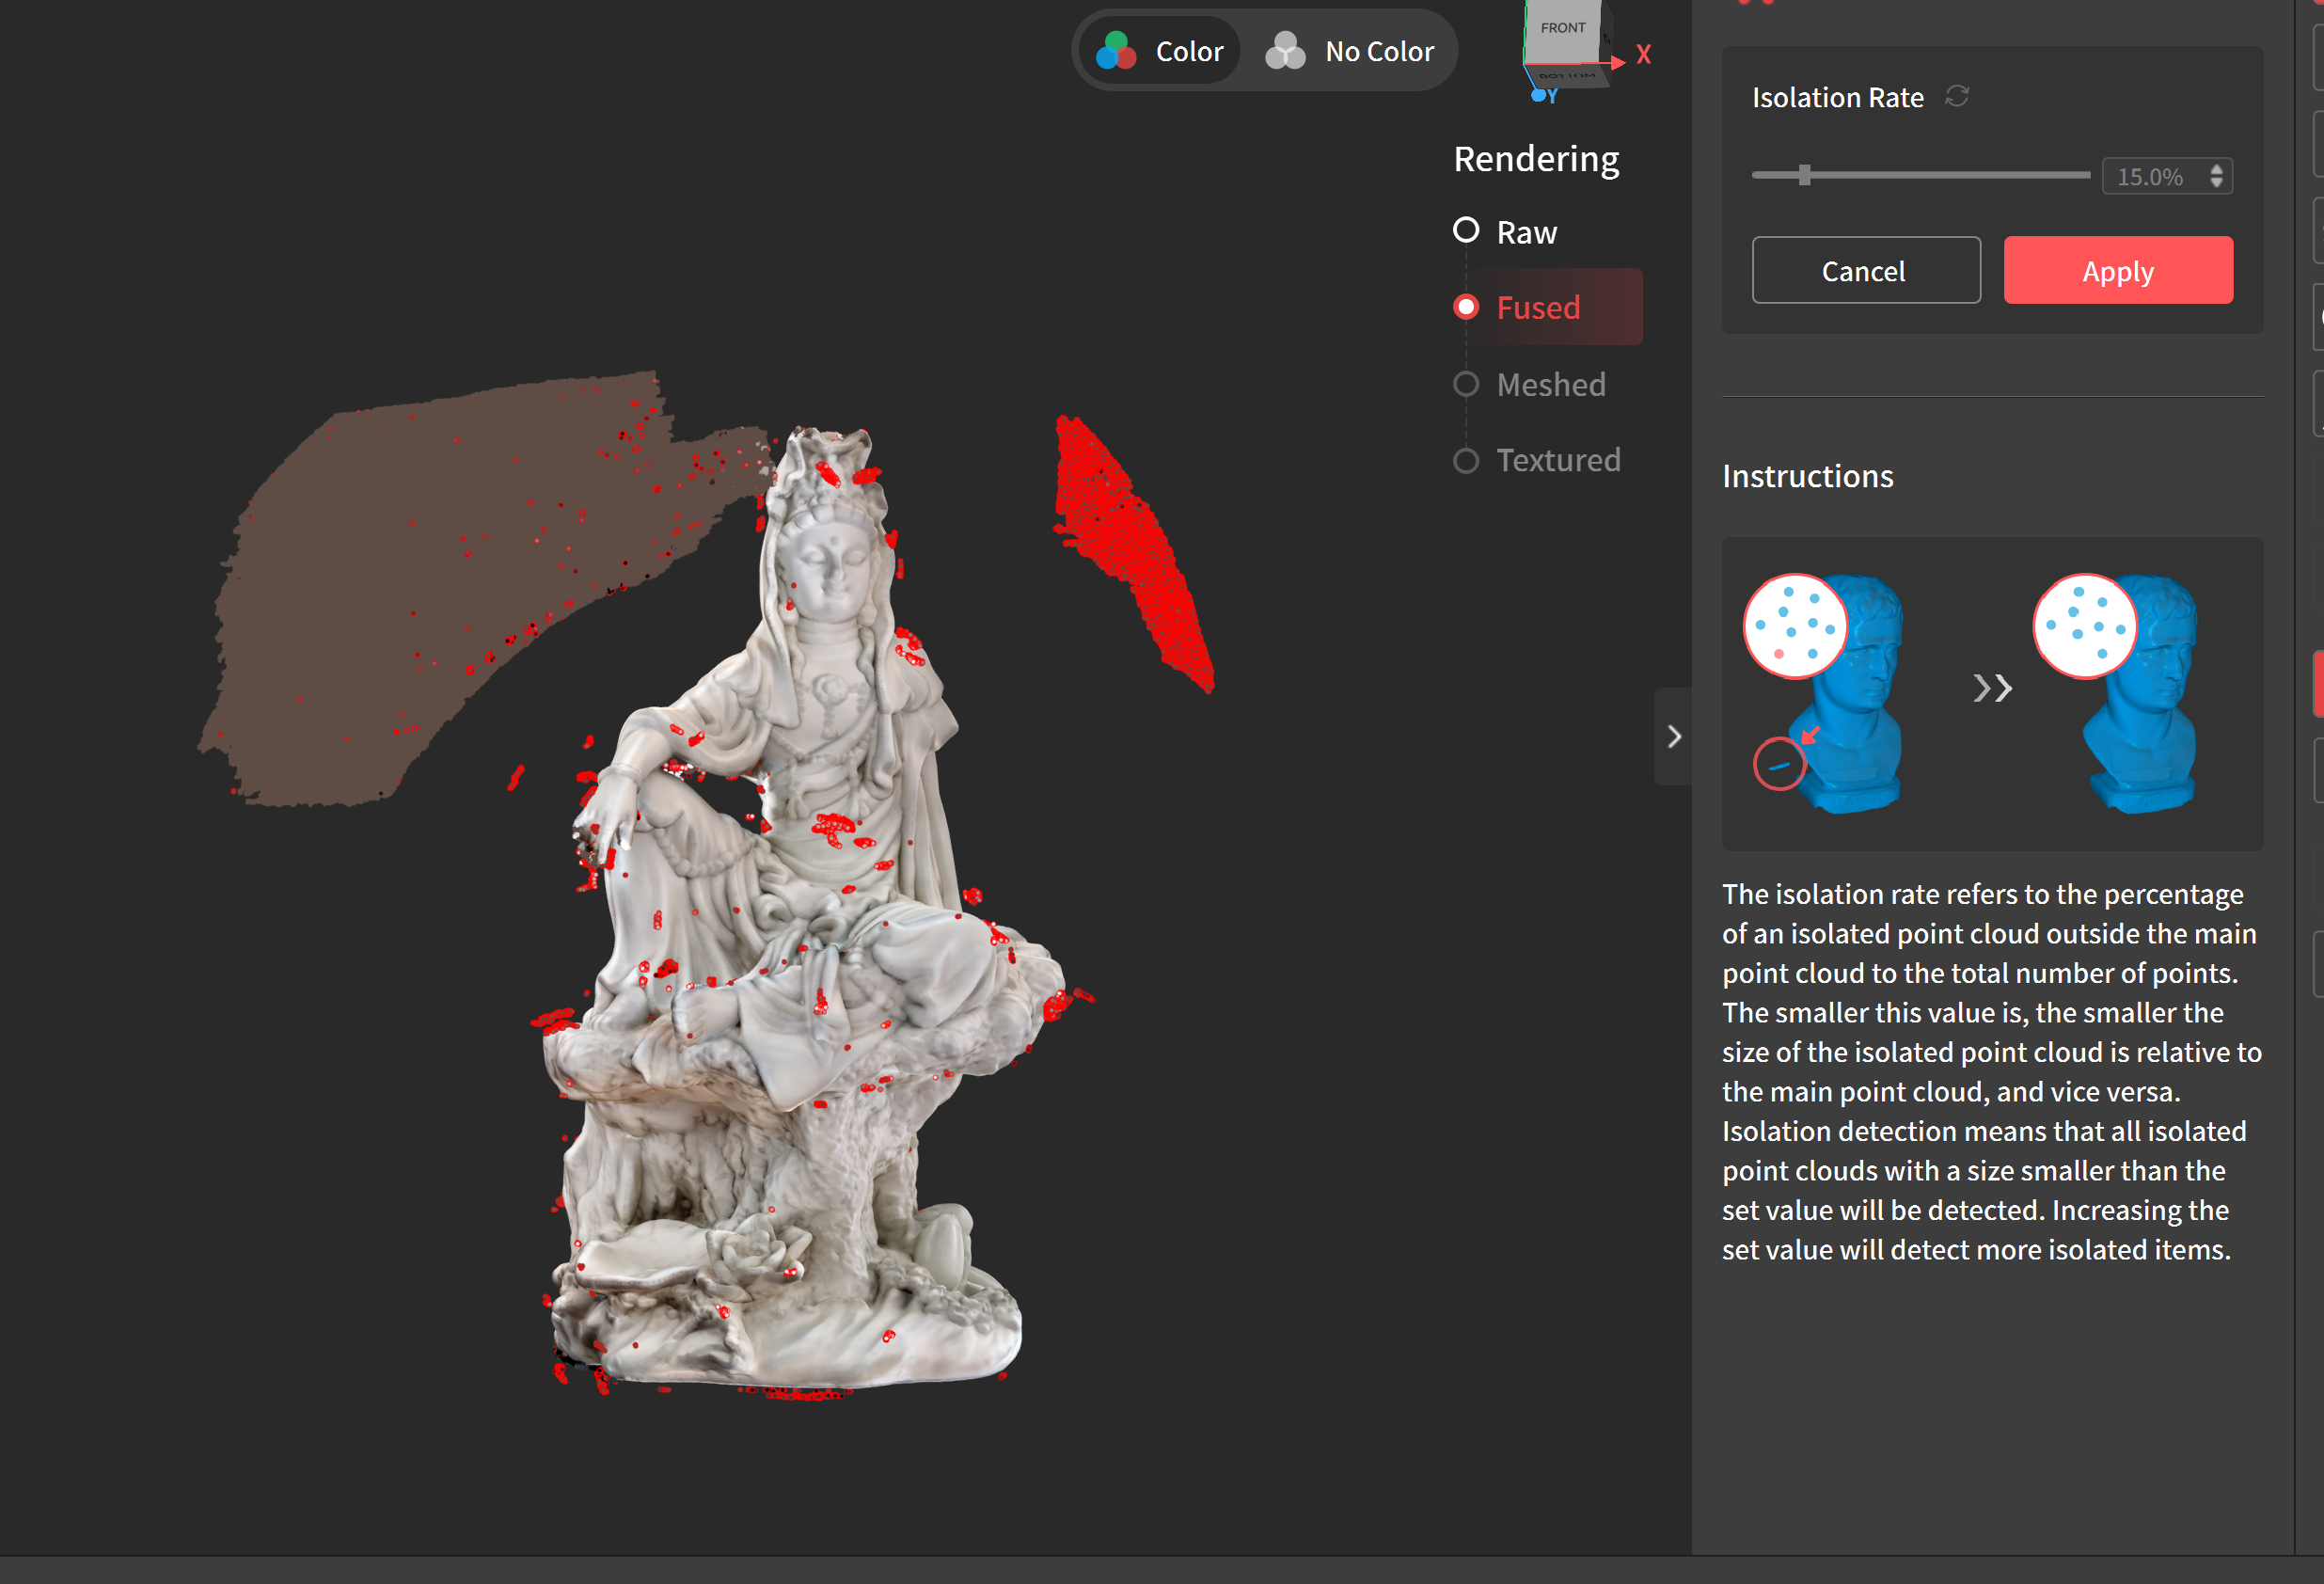
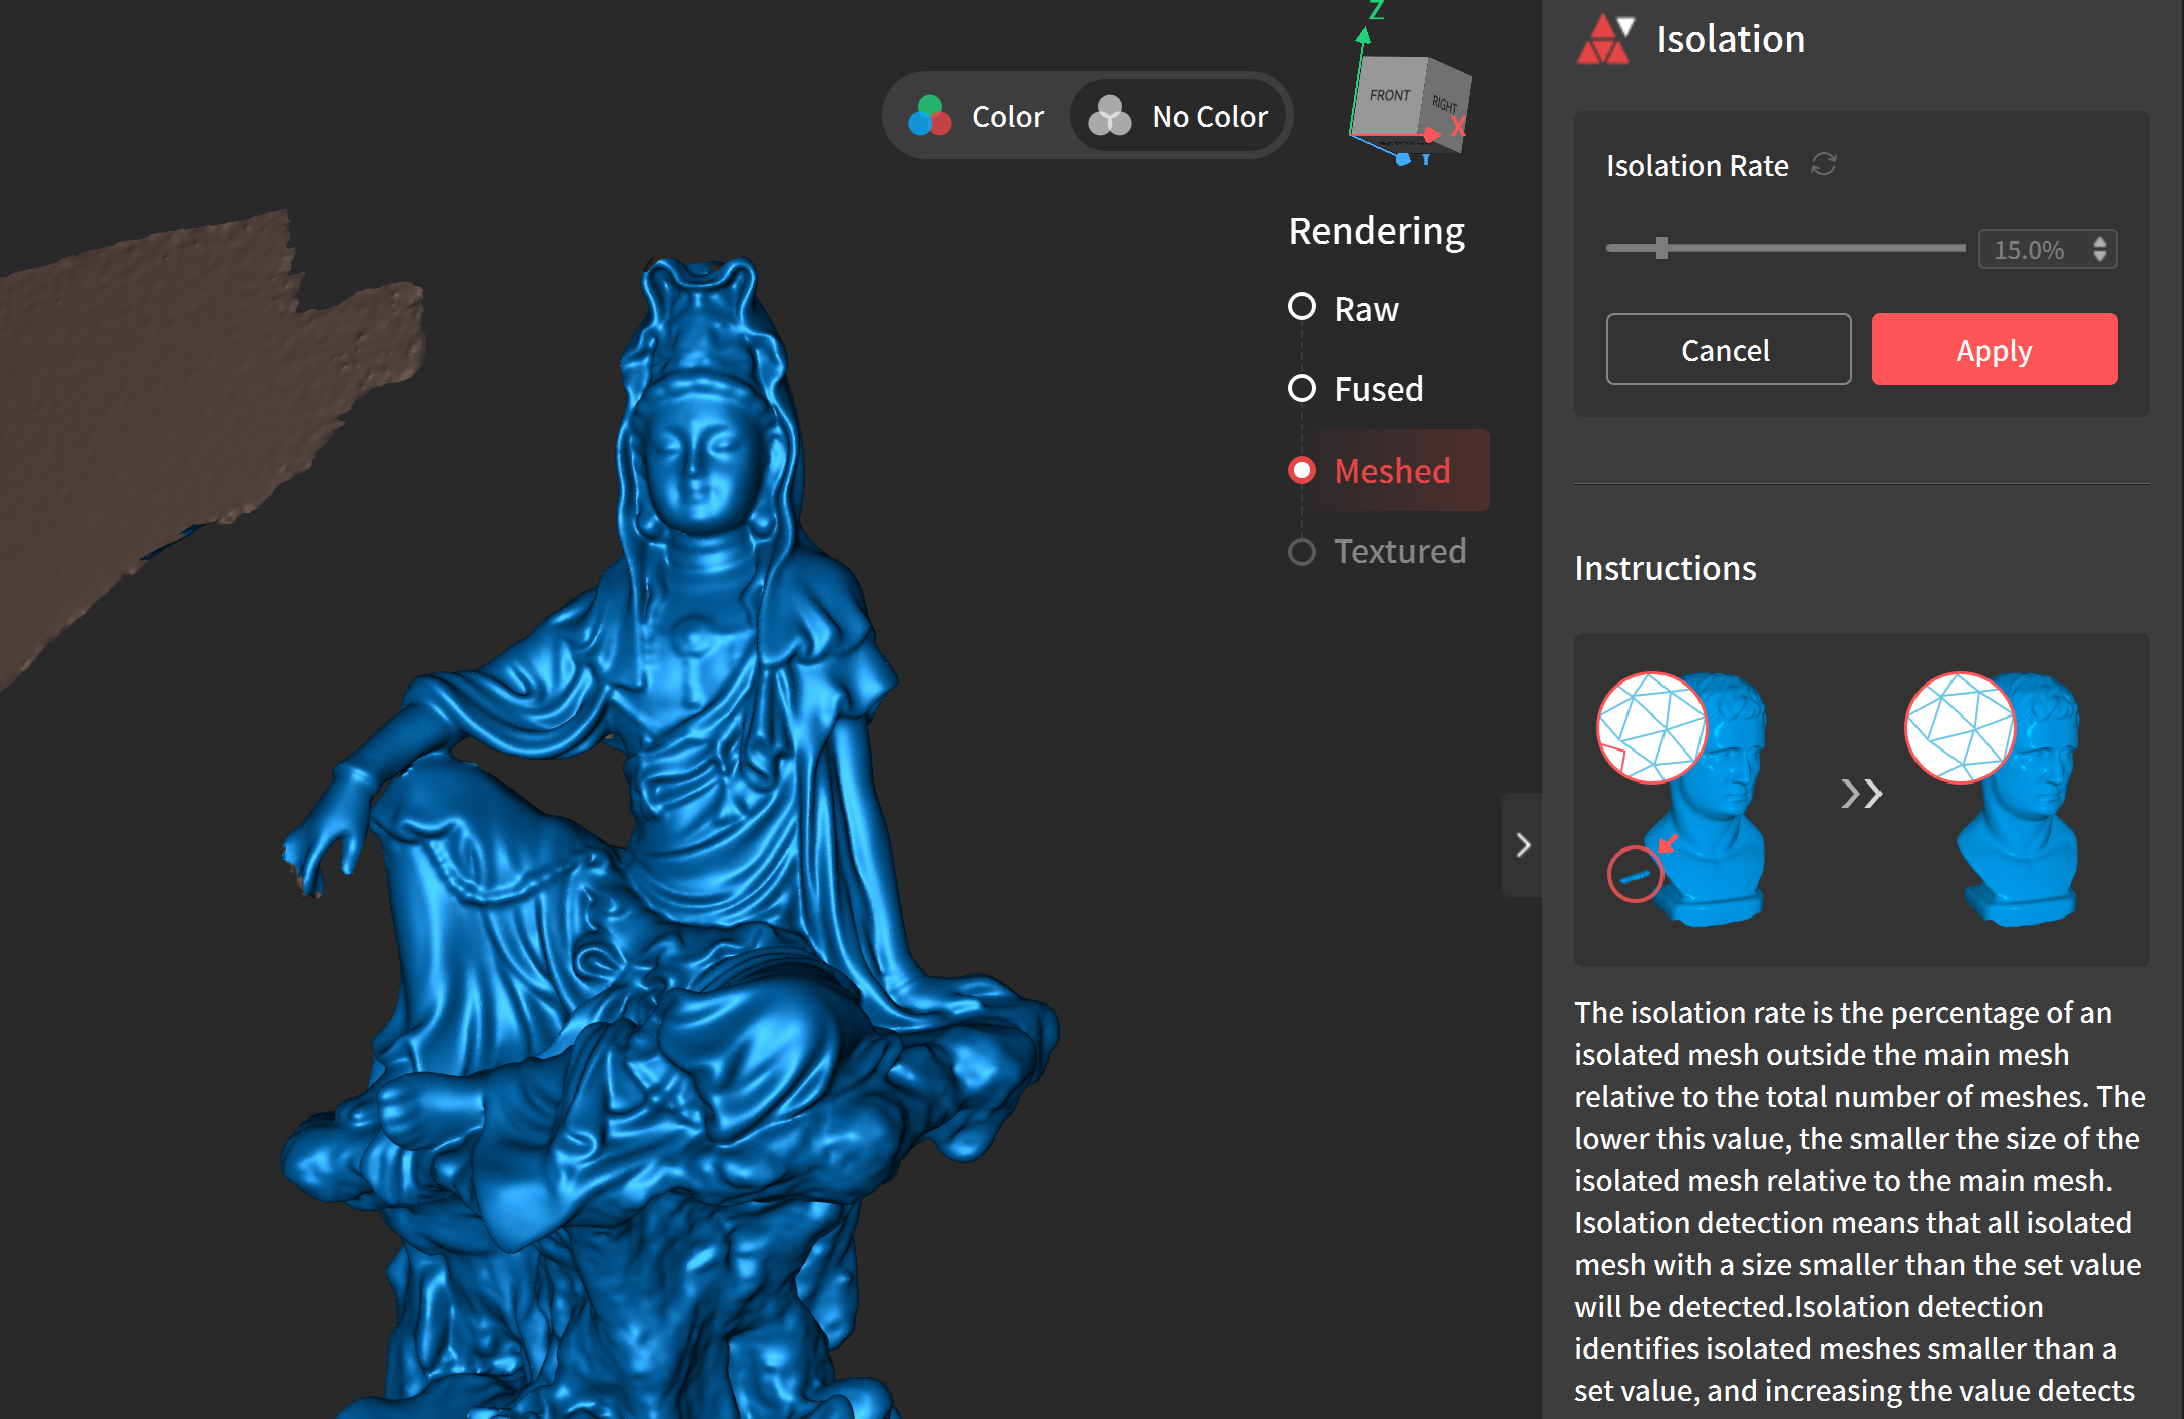
Isolation
Isolation will detect any hanging objects around our main model. This is used to clean up any excess information that might have been captured while scanning. To isolate an object:
- Press Isolation and Detect
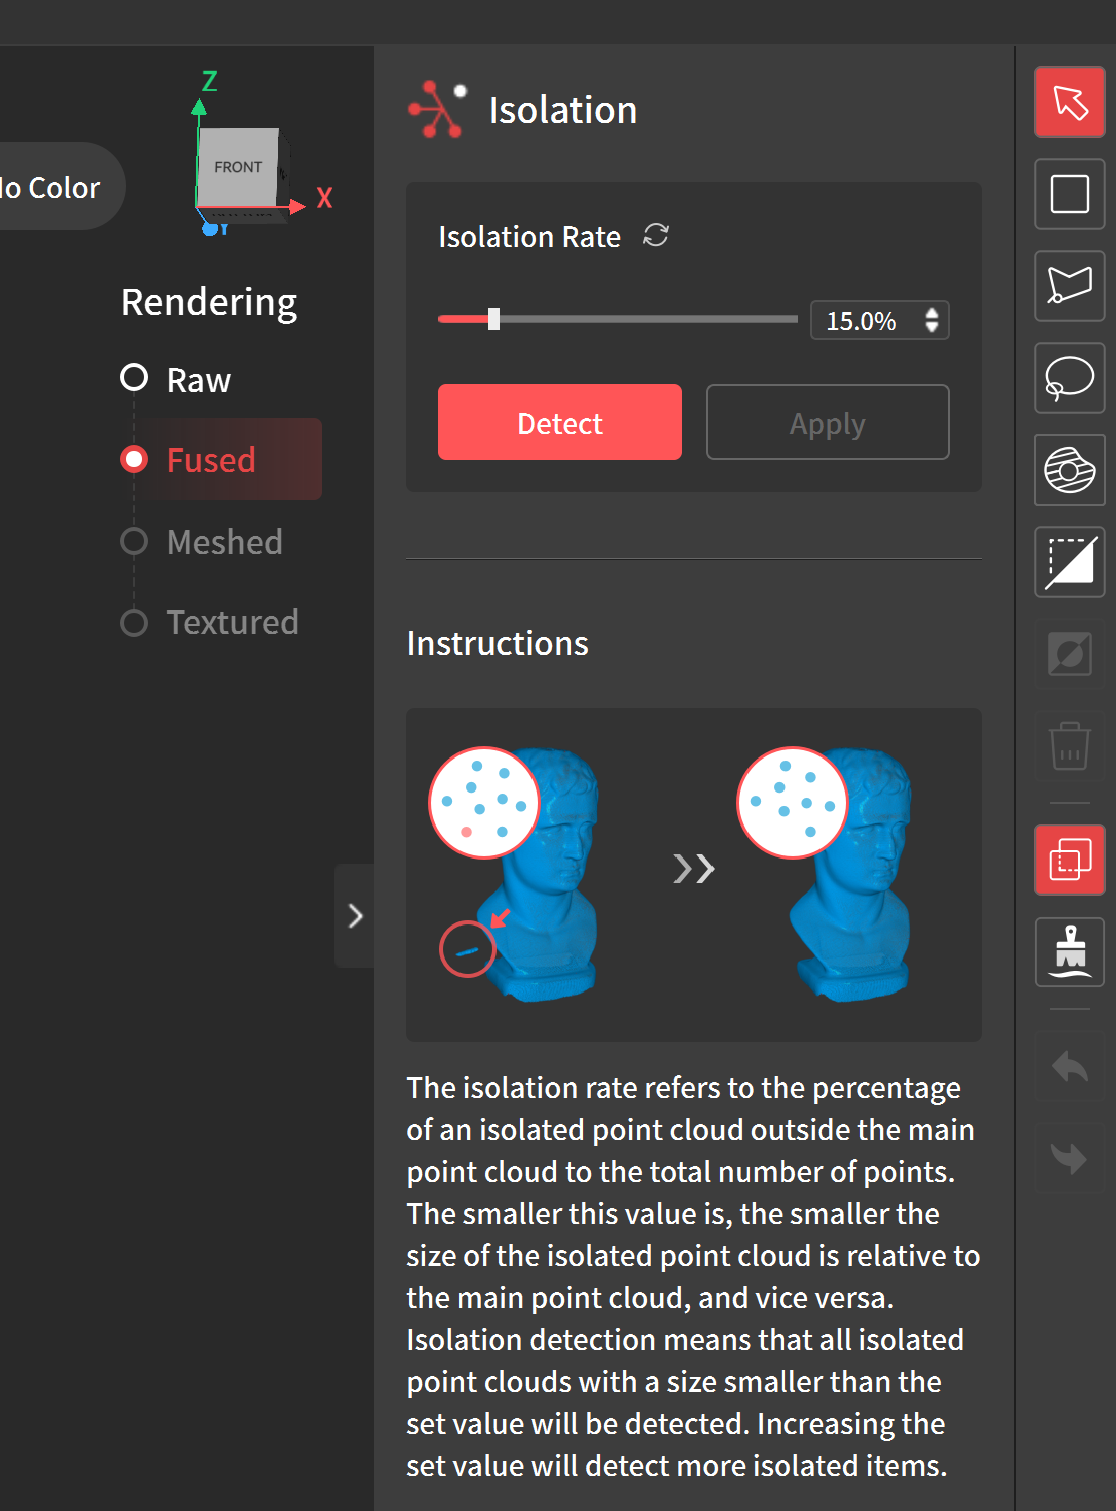
- After isolated objects are selected, press Apply
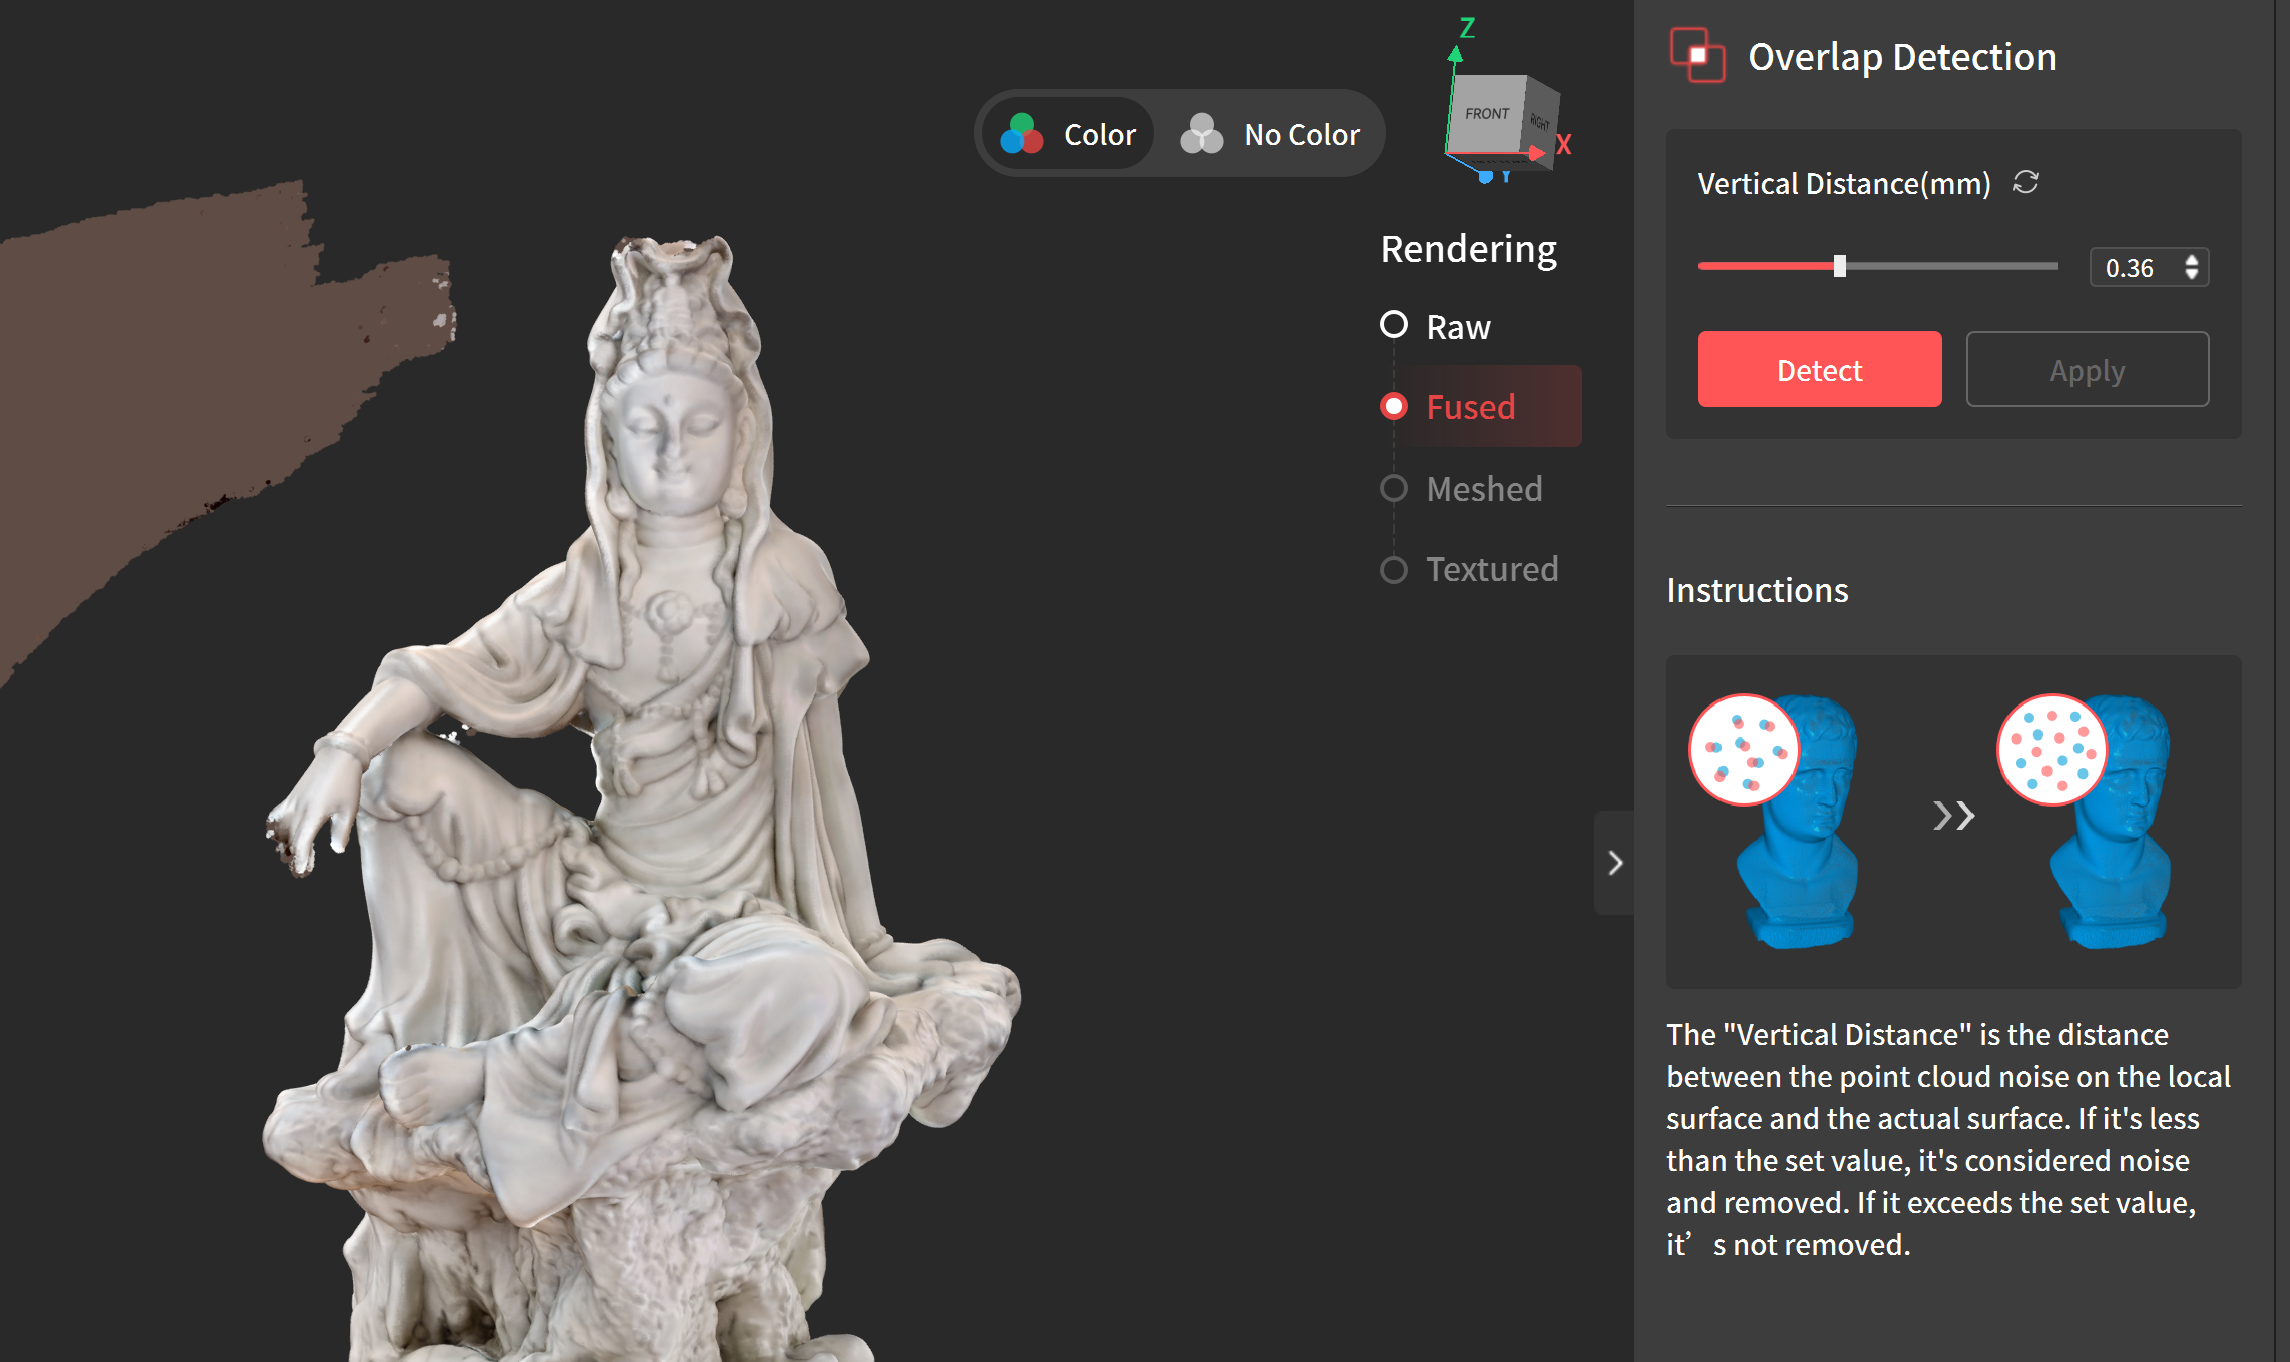
Overlap Detection, Smooth and Simplify
All three of these options are optional:
- Overlap: This is used if you have parts of your model that are overlapping and you want to fuse them together.
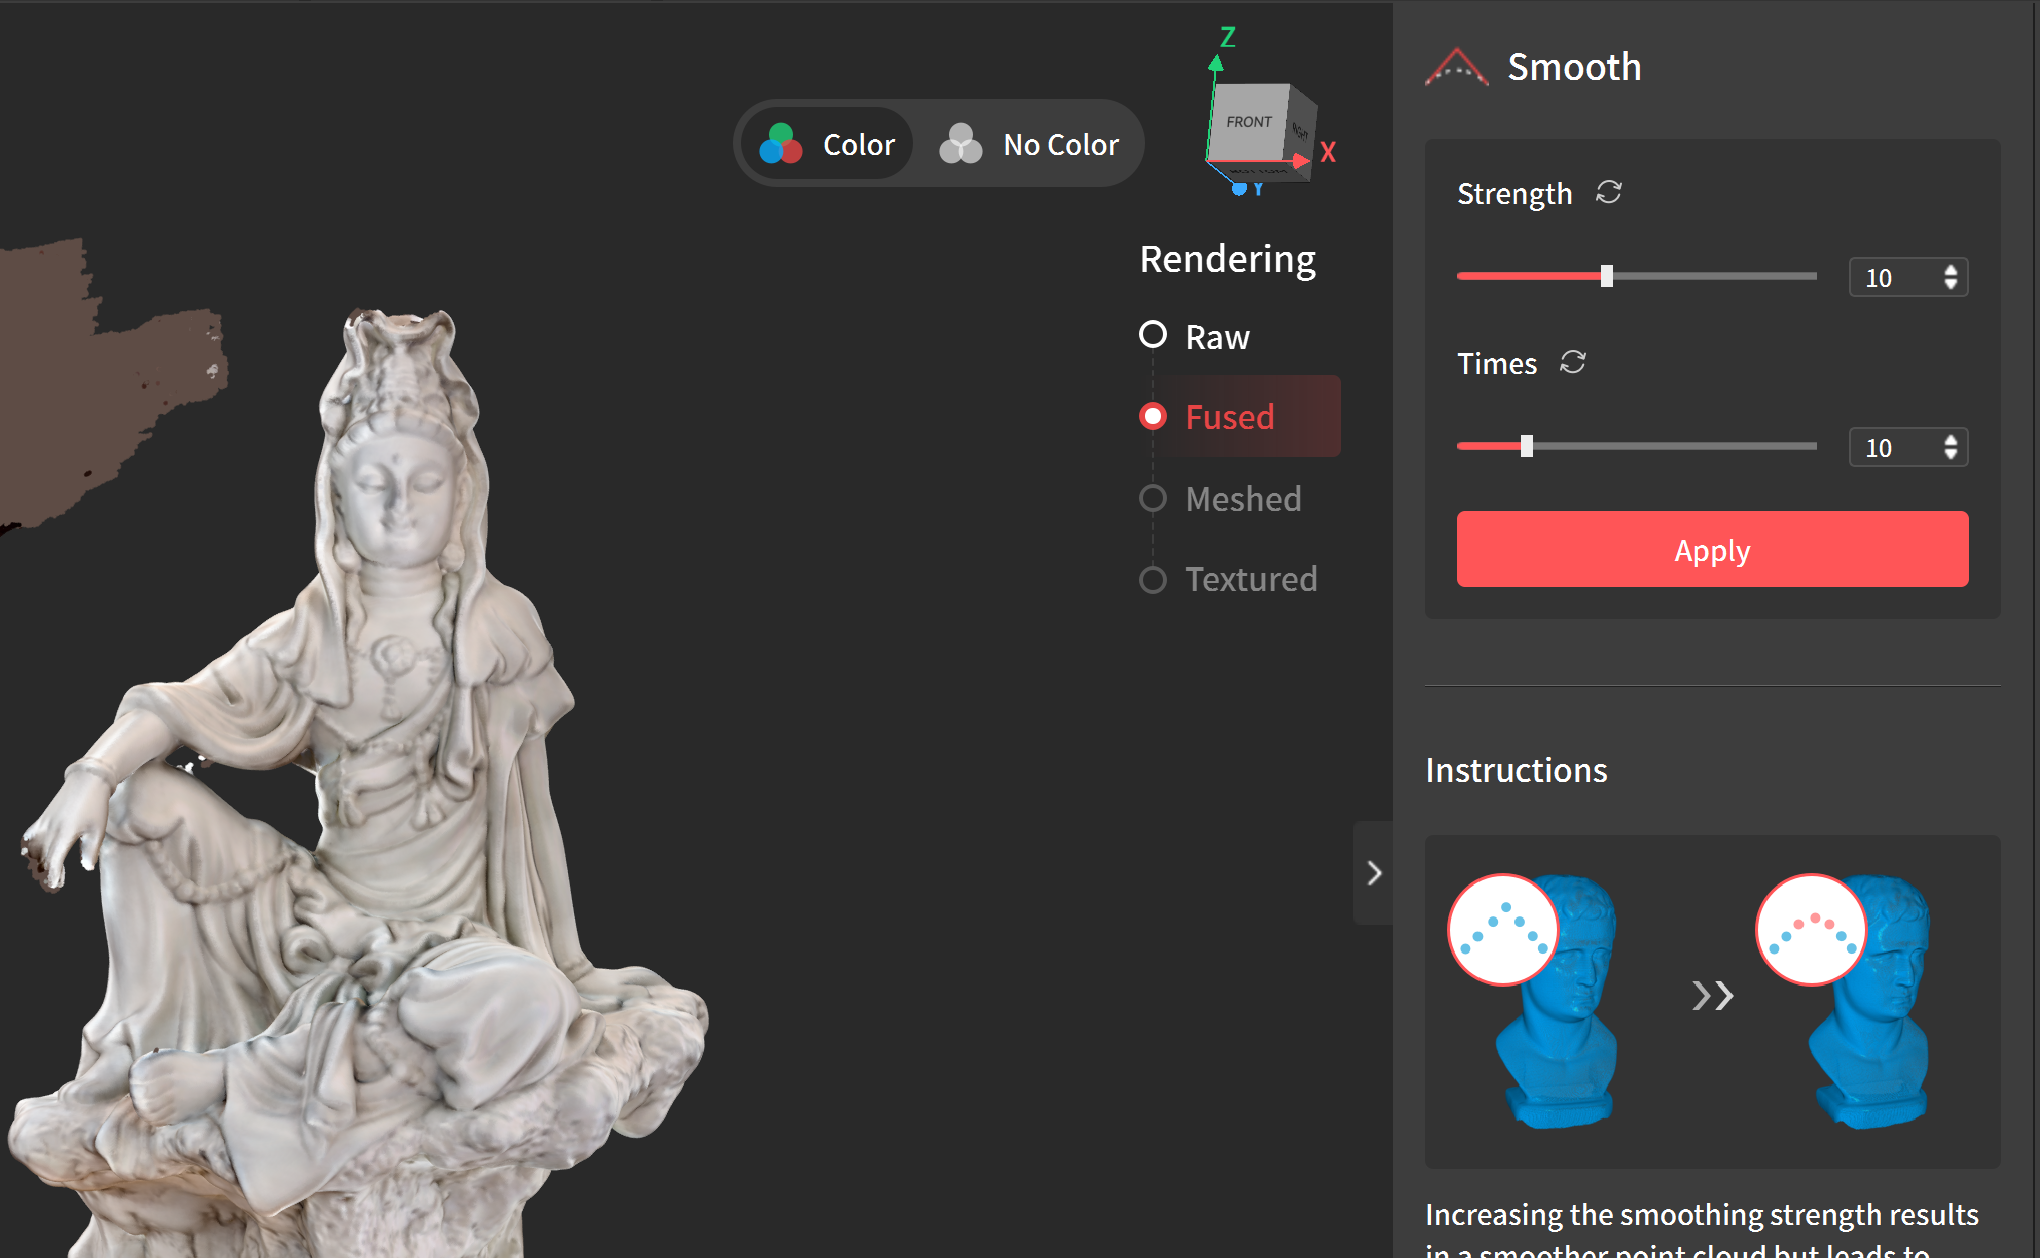
- Smooth: This is used if you have any unusually sharp areas on your model that you want to remove by smoothing.
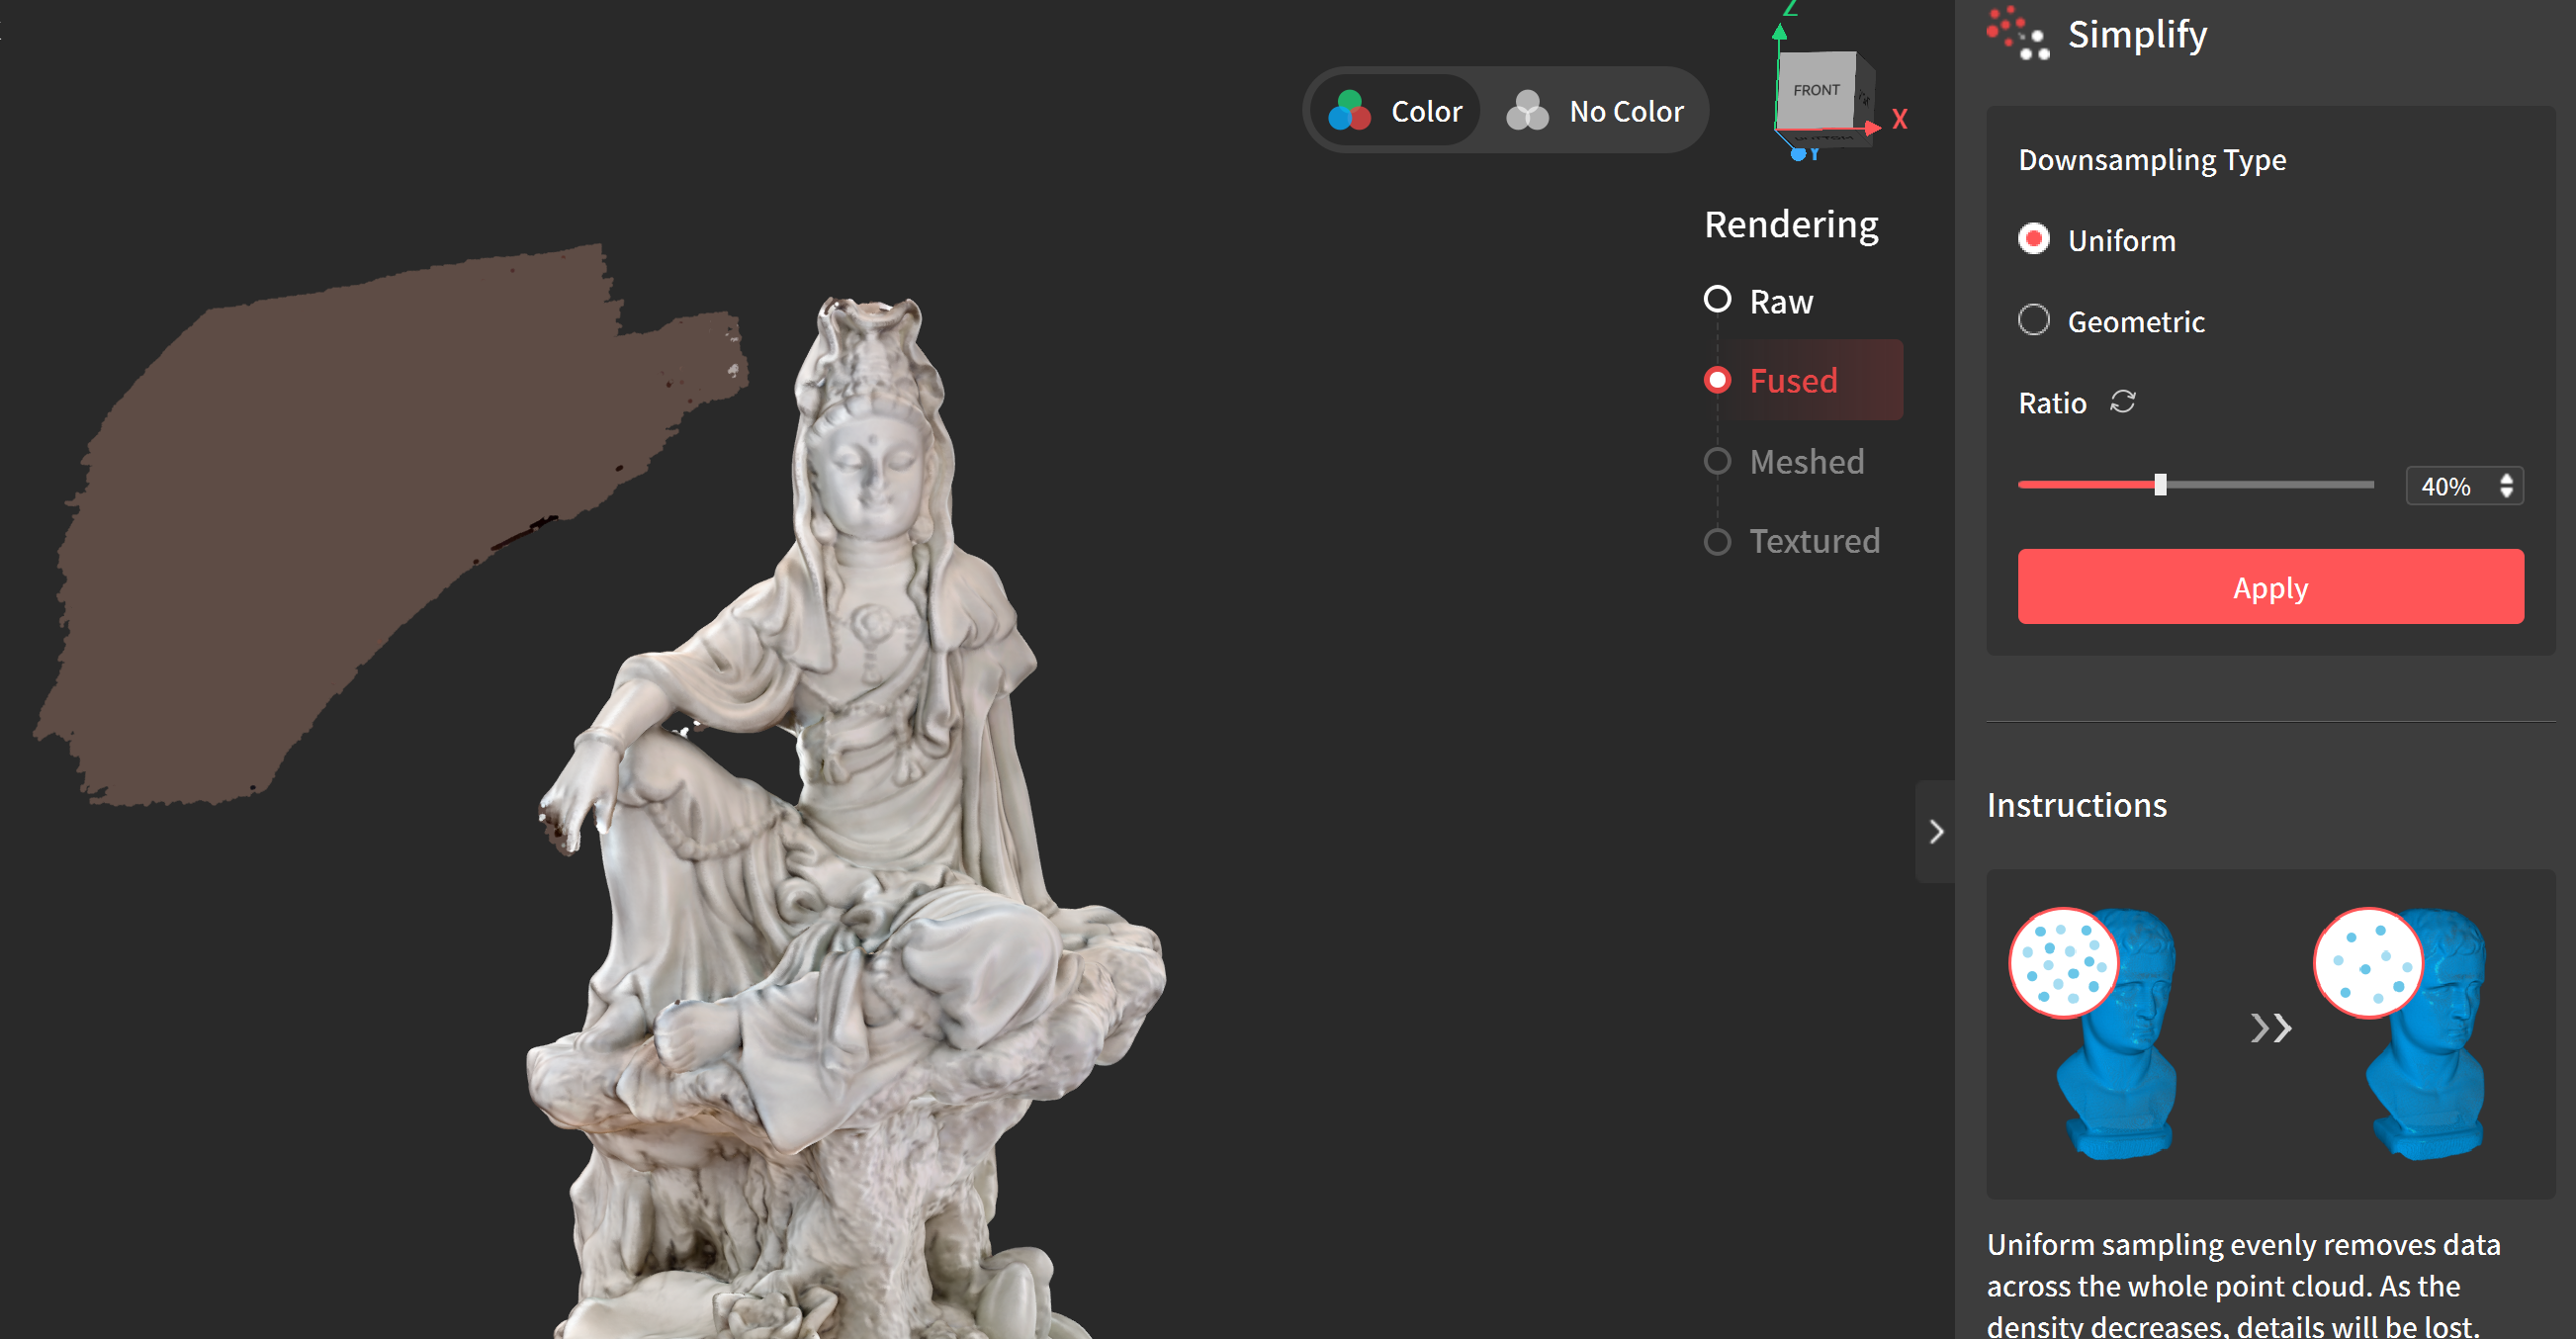
- Simplify: This is used if your mesh has too much detail causing visual errors. This will simplify the shape of your point cloud and cause you to lose detail.
Meshing Point Cloud
Meshing our point cloud converts our collection of points into a 3D mesh that can be used into other pieces of software. To mesh your scan:
Creating Mesh
- Press Mesh
- Set Quality to between 6 and 8 > Press Apply
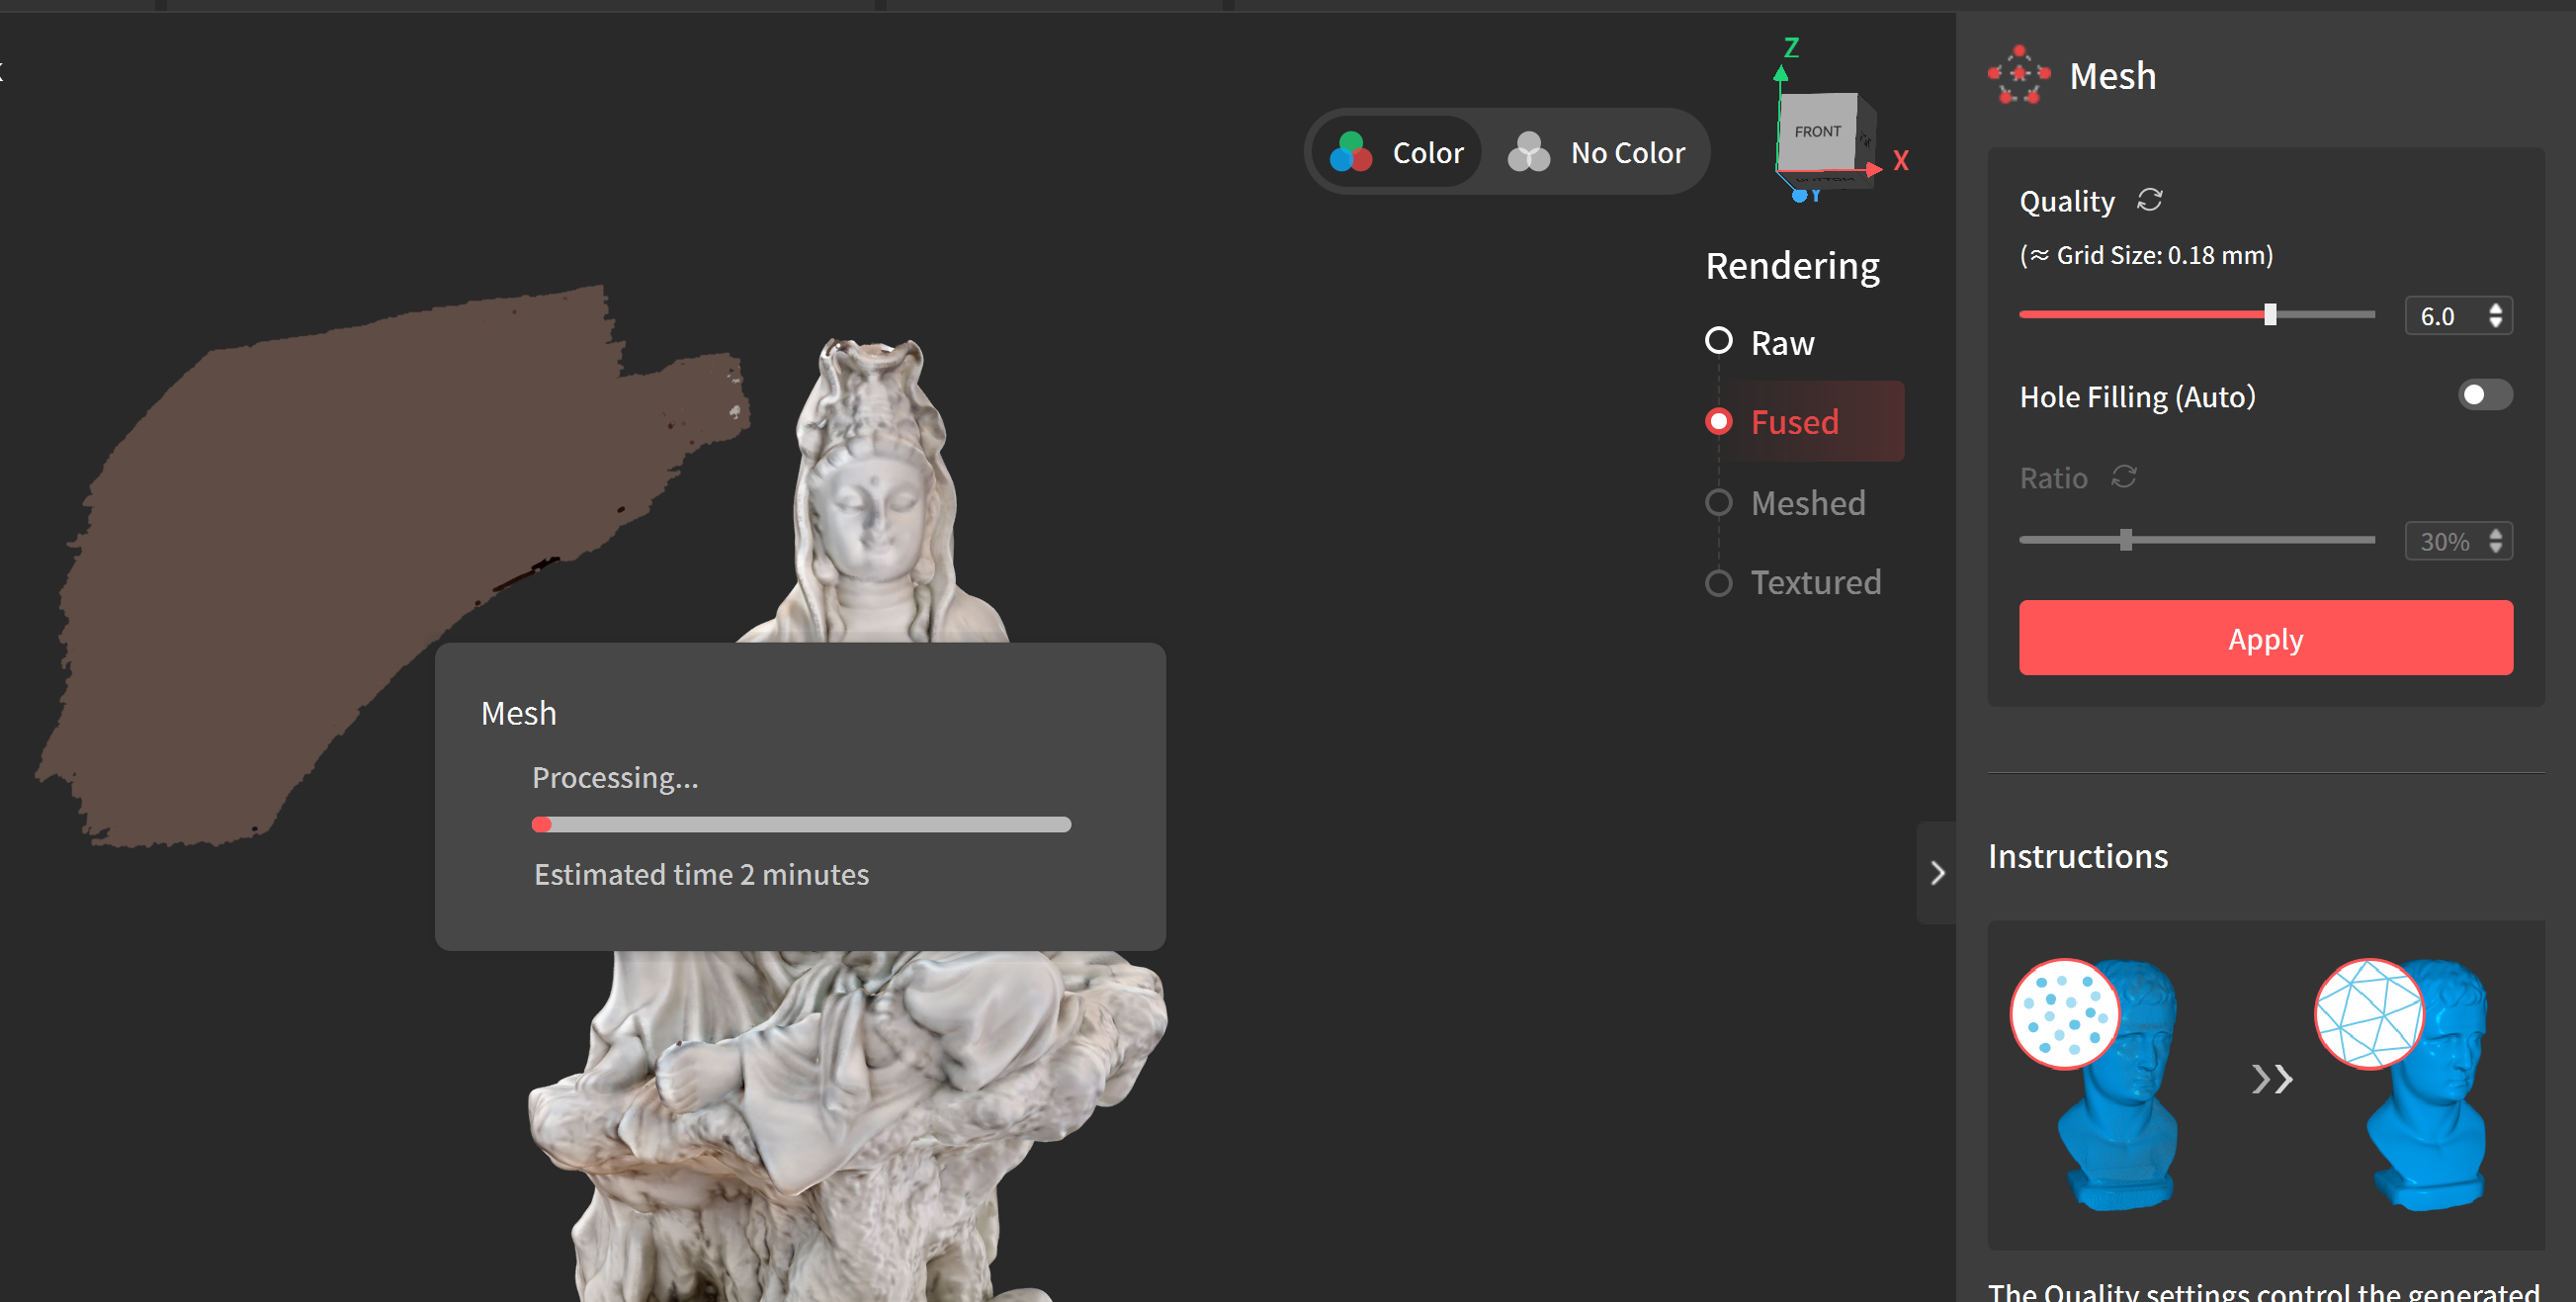
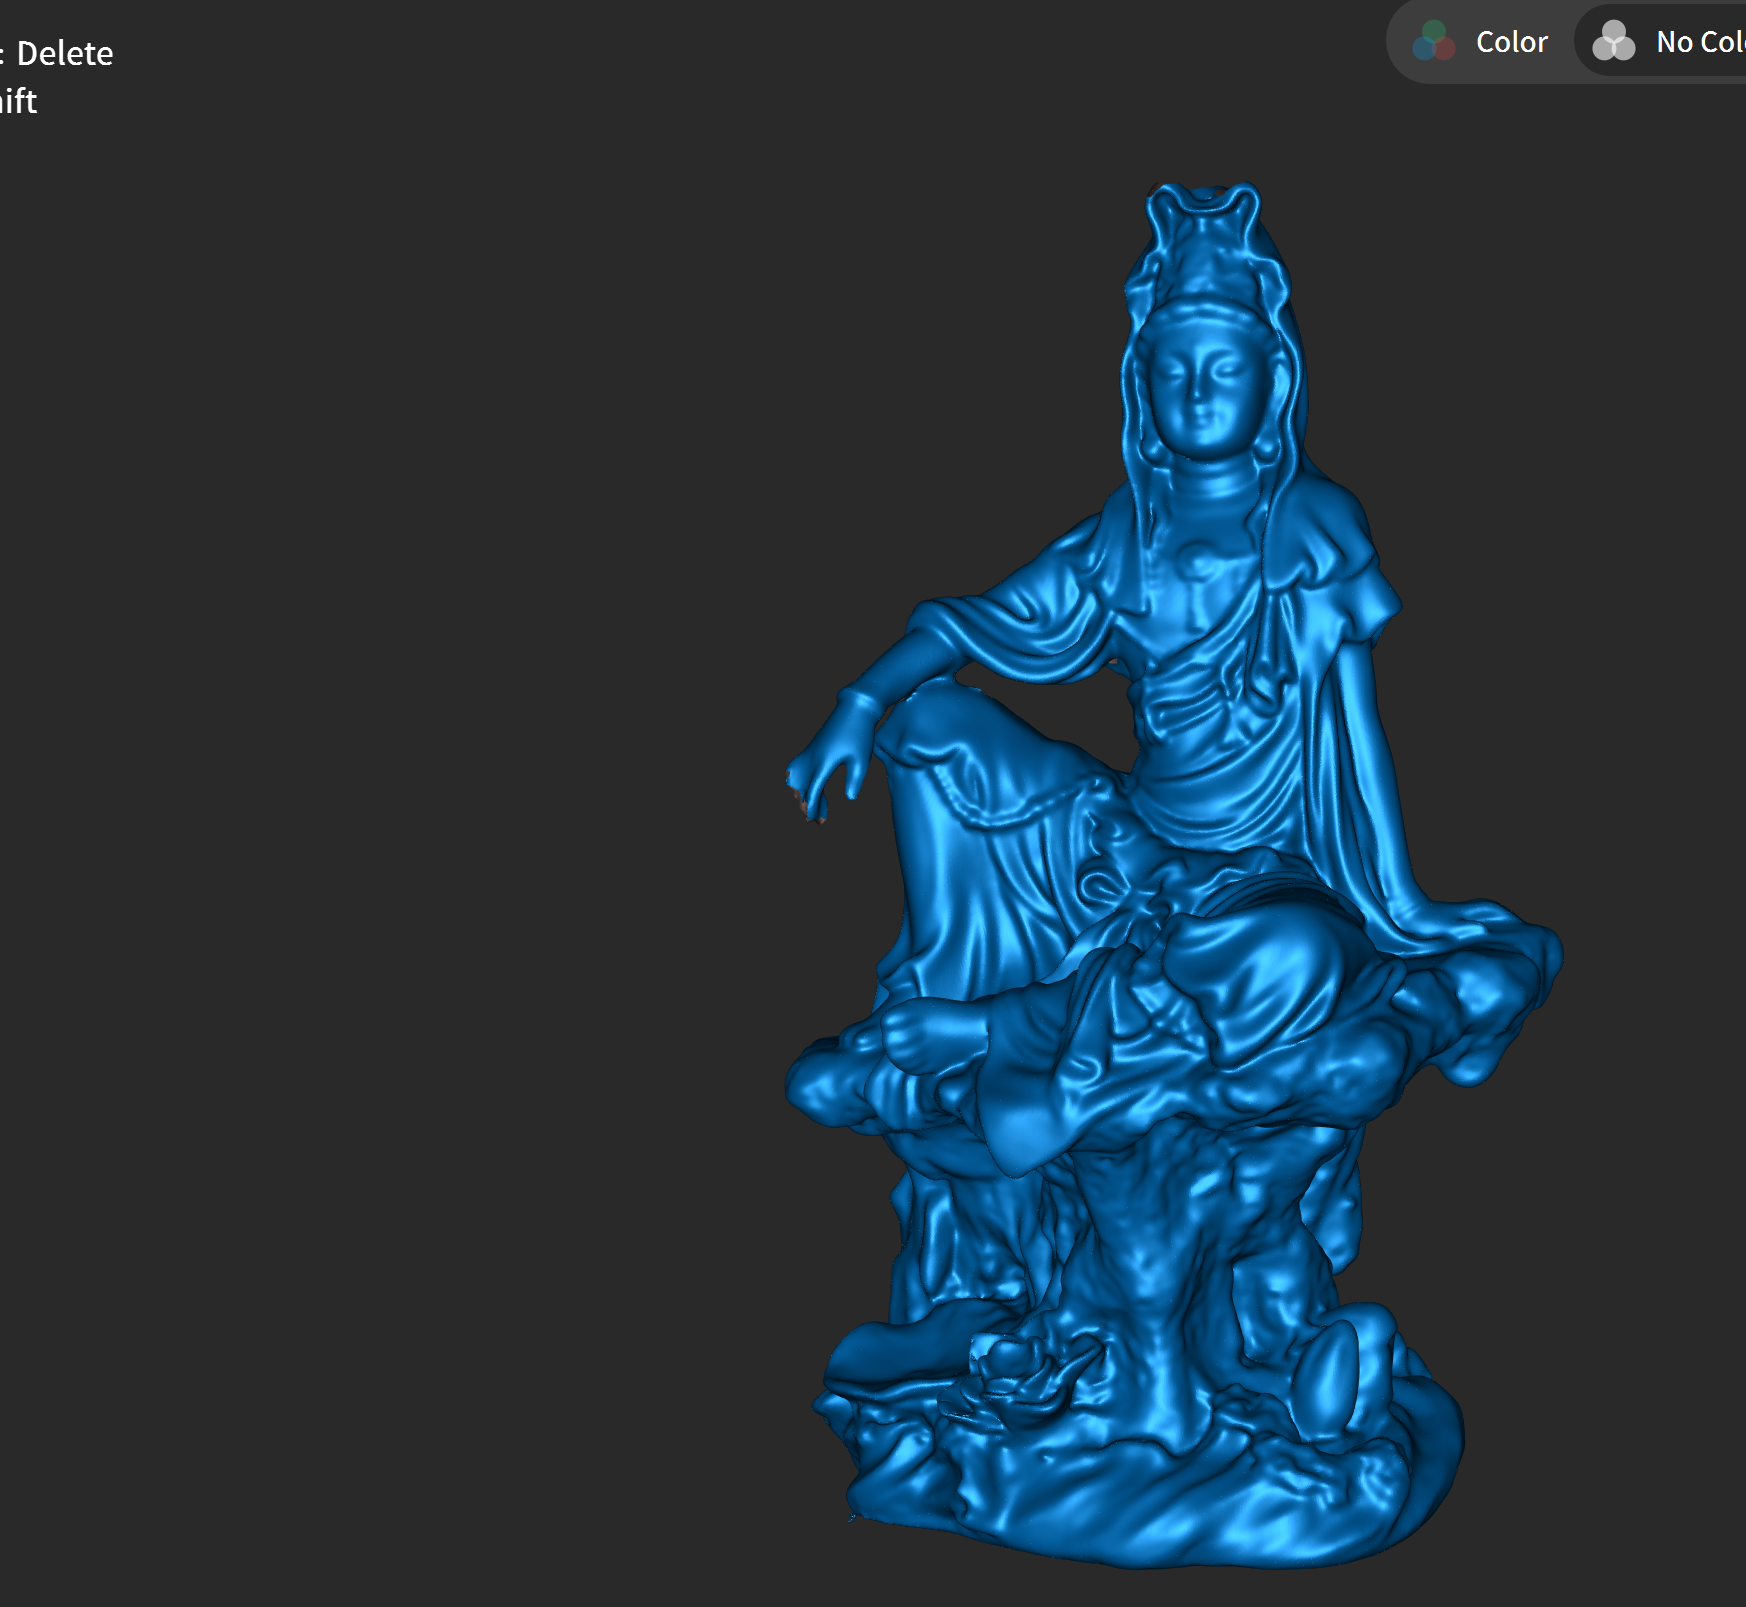
- Check the meshed result by checking on No Color in the top right corner of the viewport

Mesh Isolation
If there are small objects that still exist after the mesh step, you can use mesh isolation to remove them.
Deleting objects with Selection tools
On the right side of the UI there are a variety of selection tools that we can use to edit our model. For example, if I wanted to delete the large piece of floor that was captured when I turned my model on its side:
- Select the lasso tool
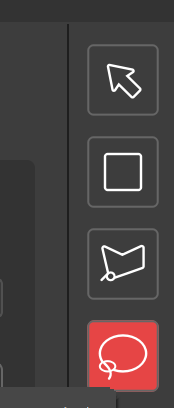
- Select the part to delete
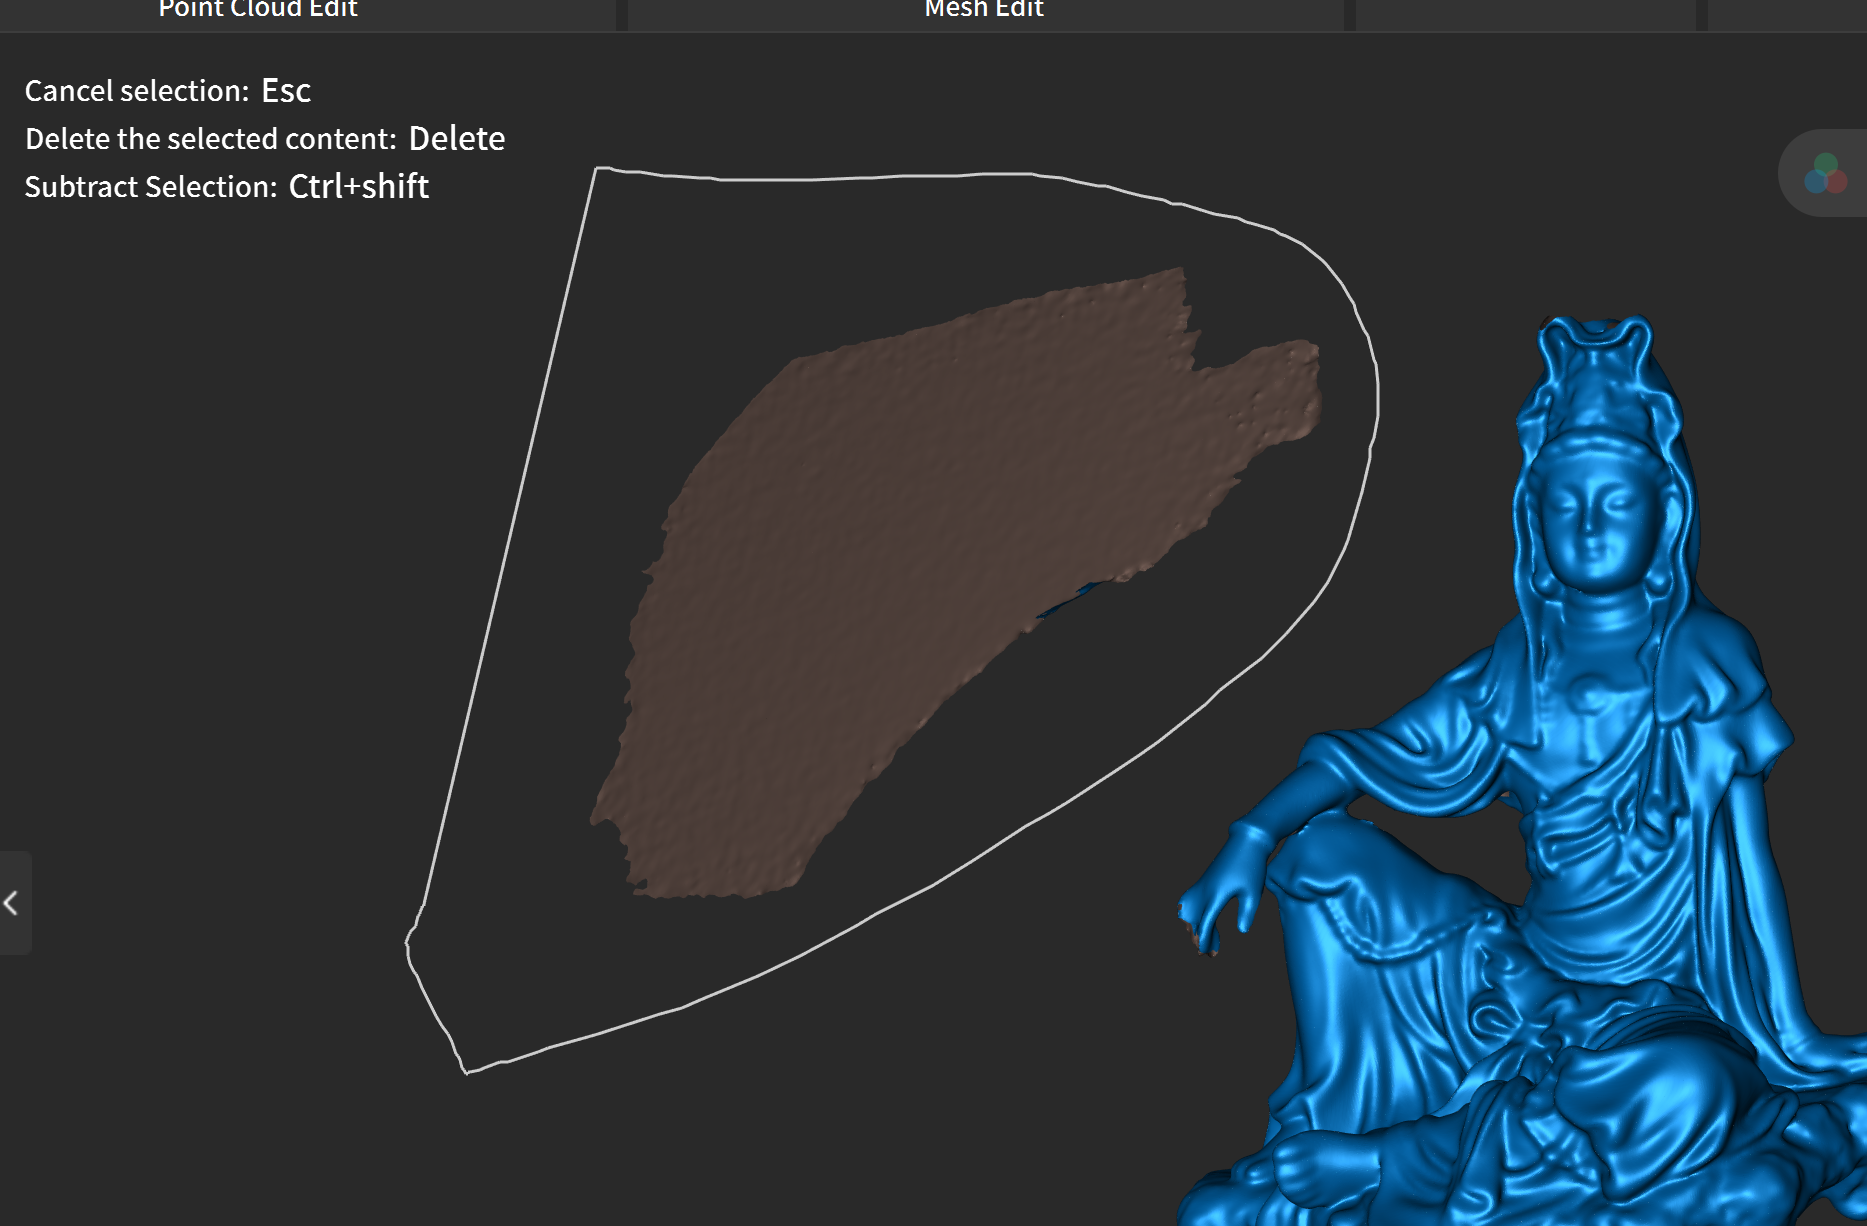
- Press the delete key
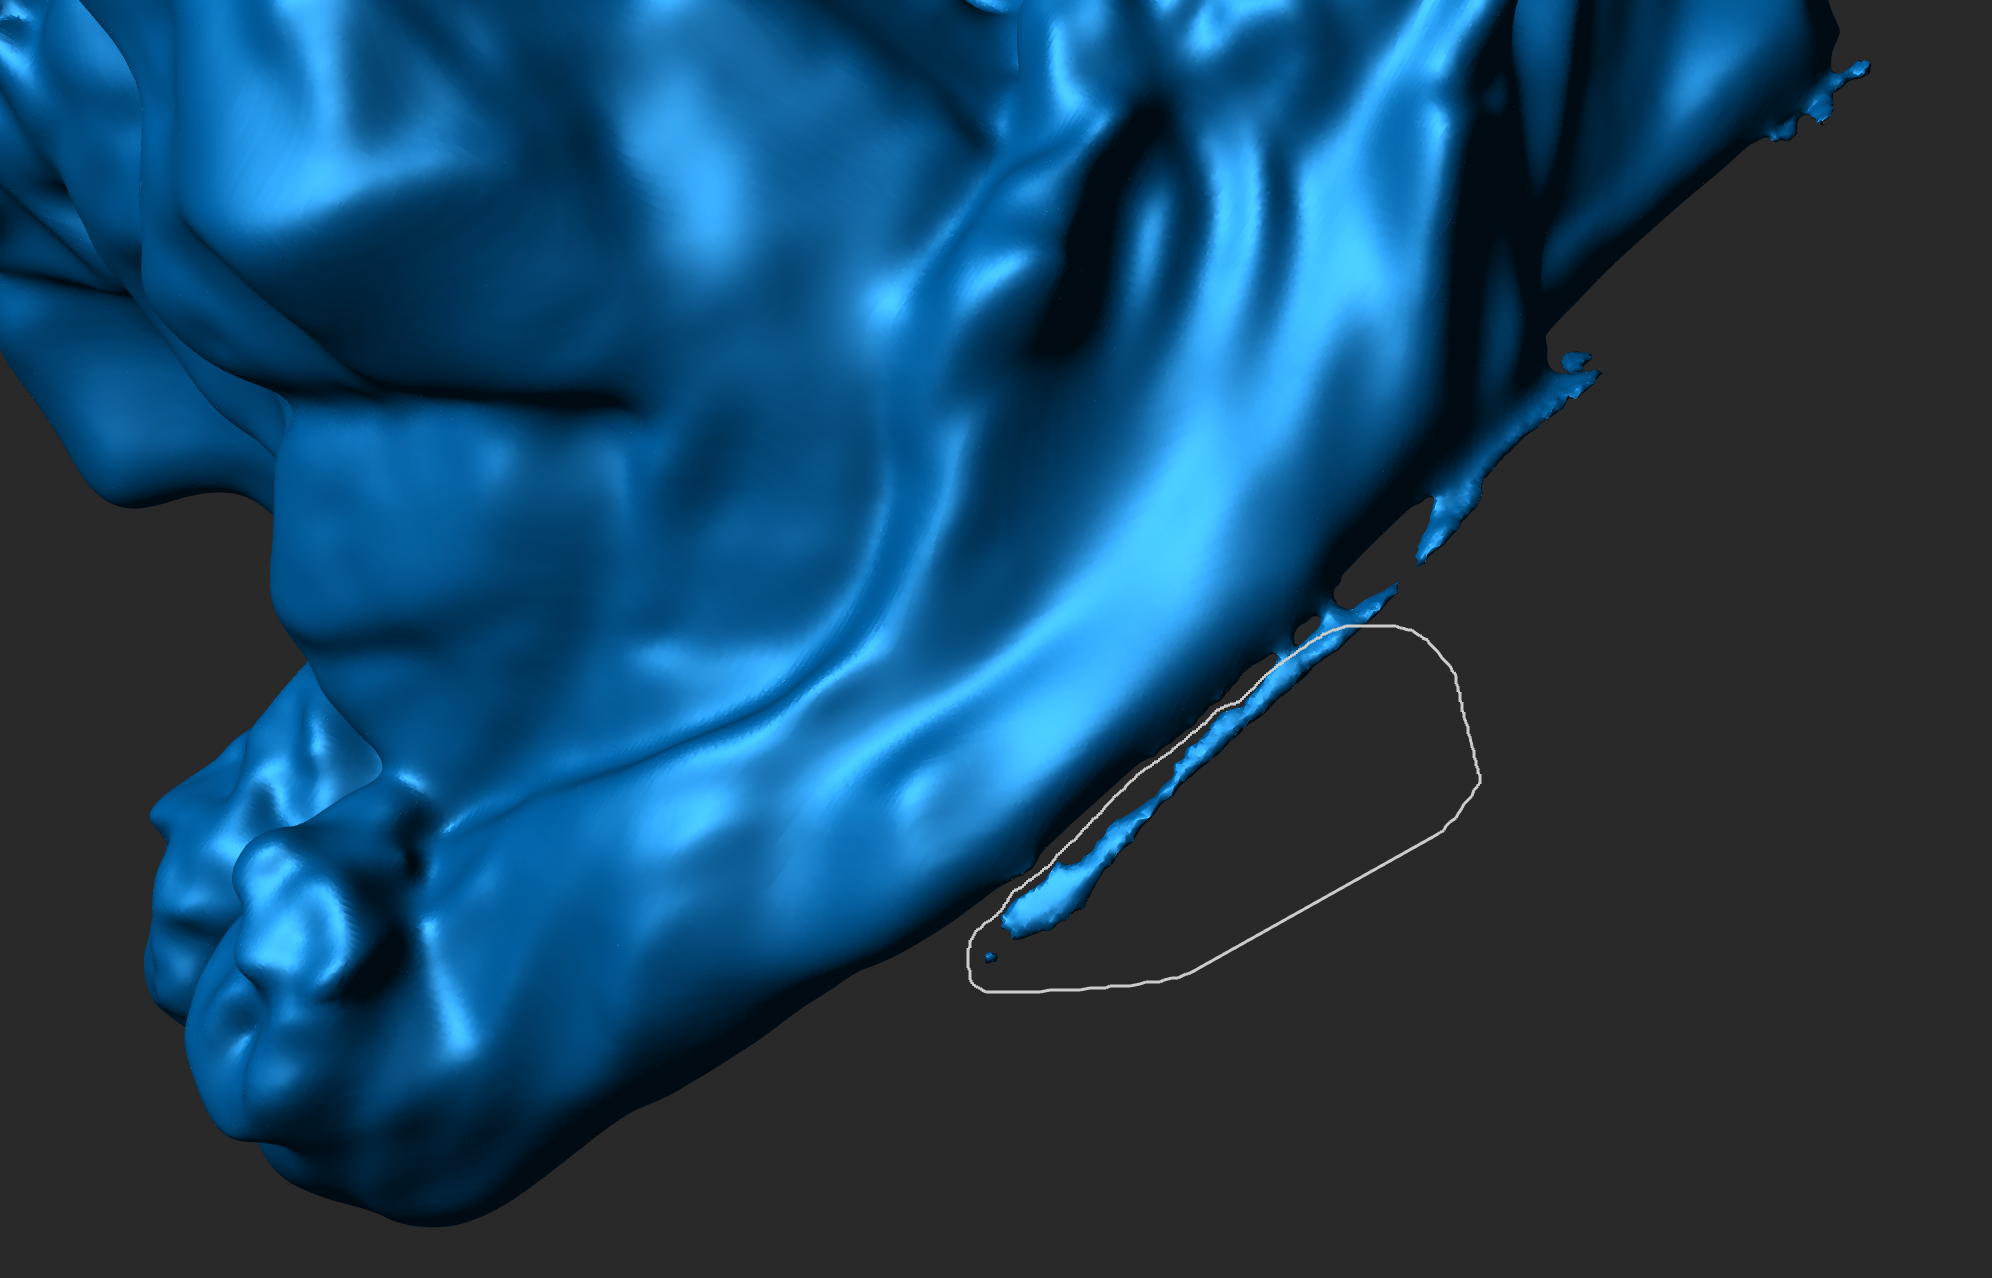
Filling Holes
Often when making a mesh for our point cloud there will be holes in our model. We can fill-in these holes using the fill hole tool. To fill holes:
- Select Fill Holes and press Detect
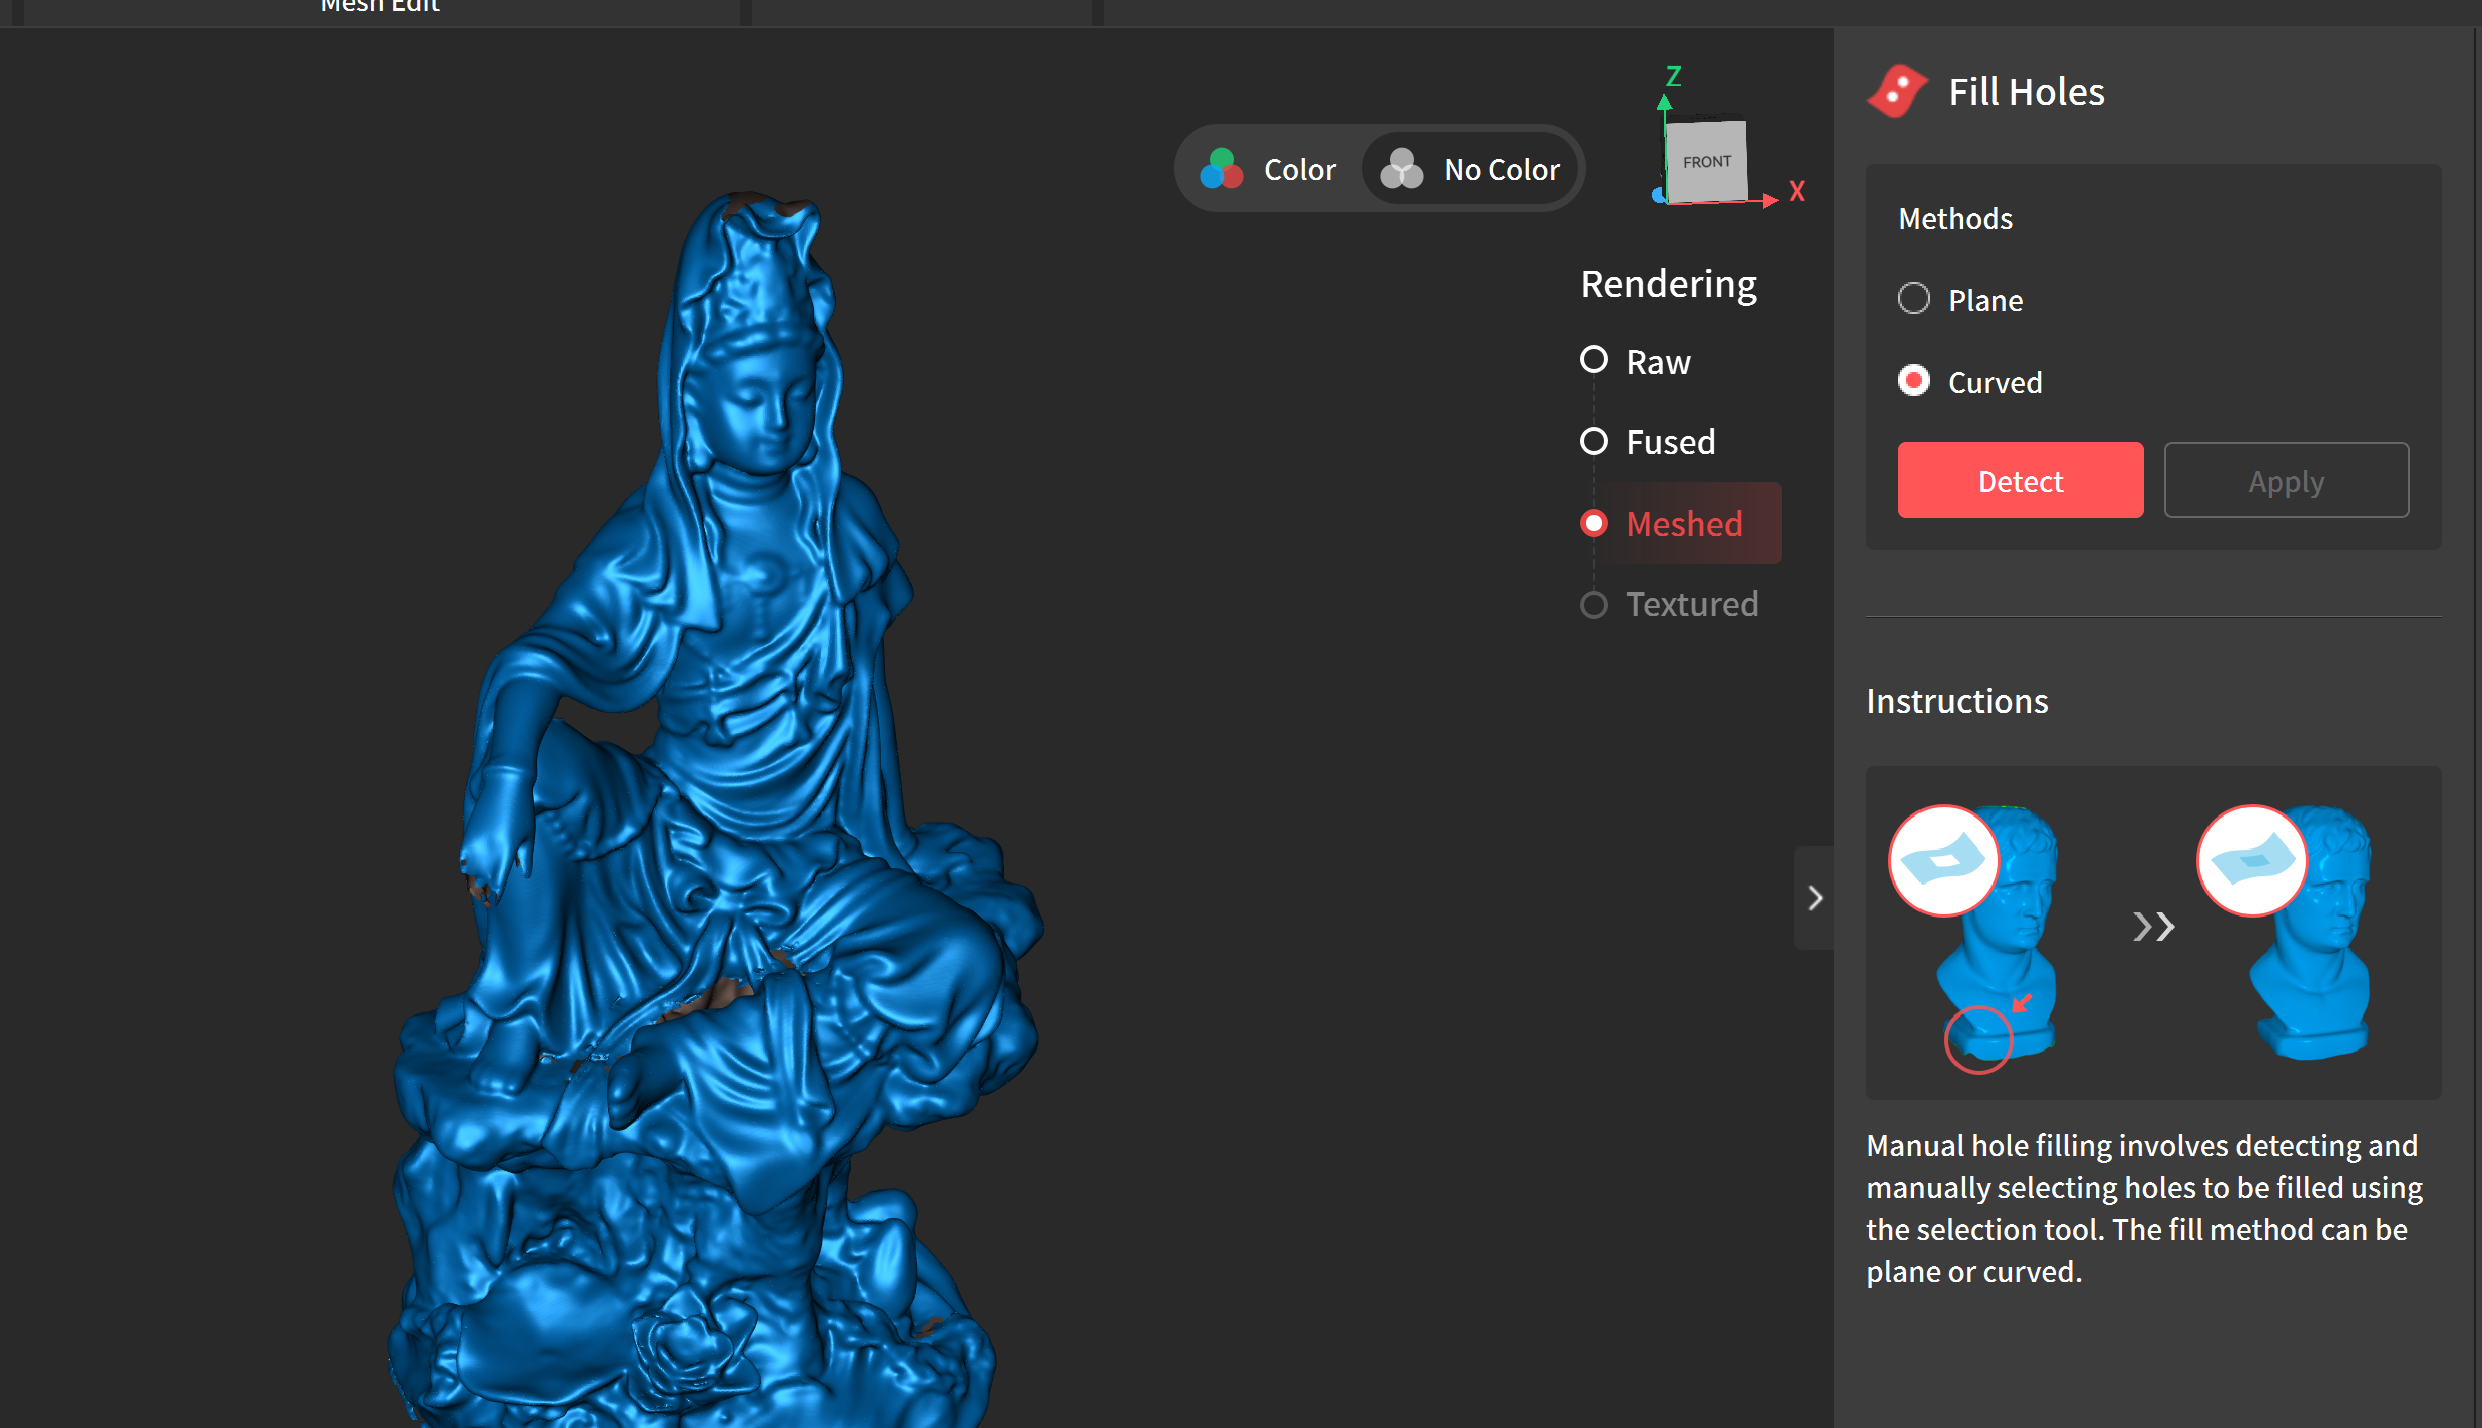
- This will display holes within the model

- Select each hole individually or select all holes.
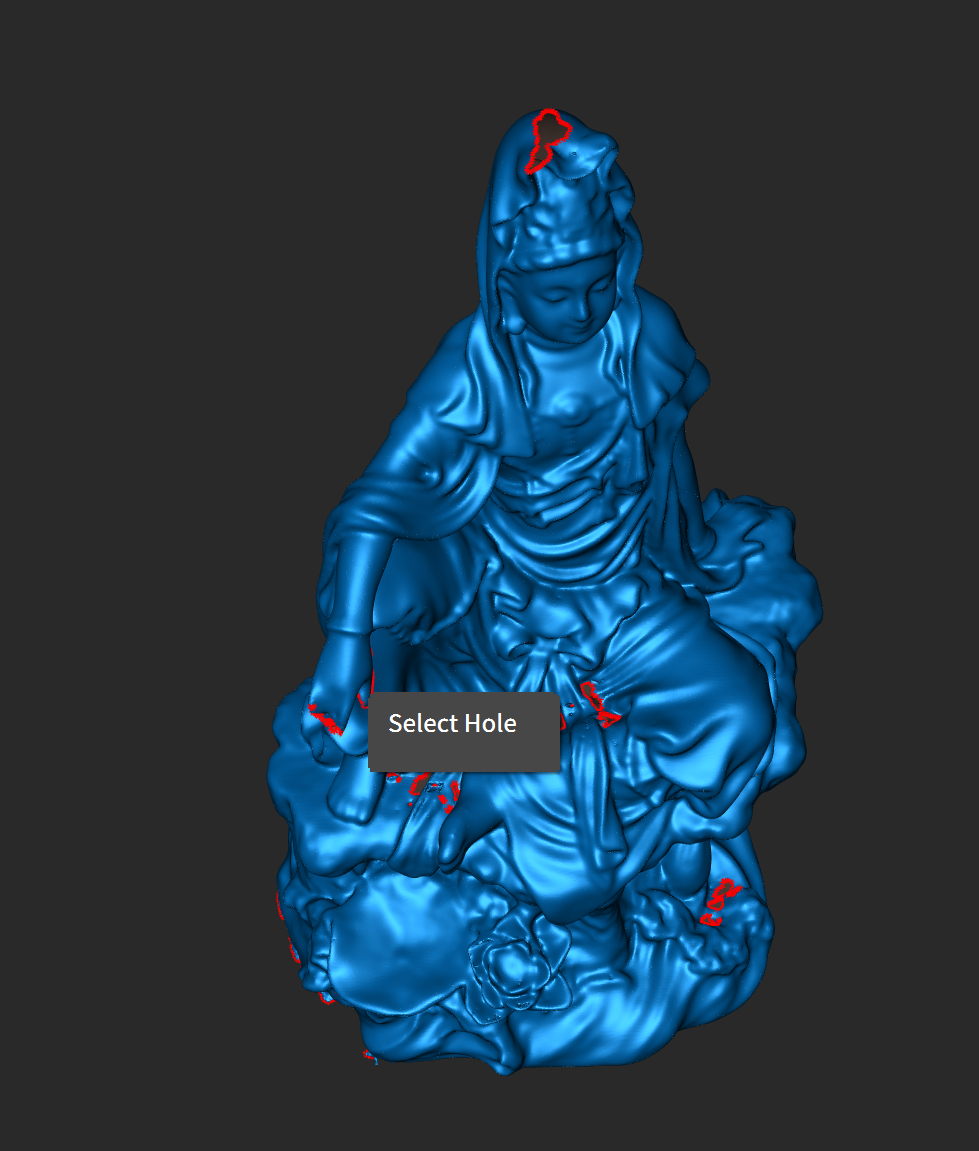
- Decide if the hole should be filled in with a curved mesh or a flat mesh
- Press apply.
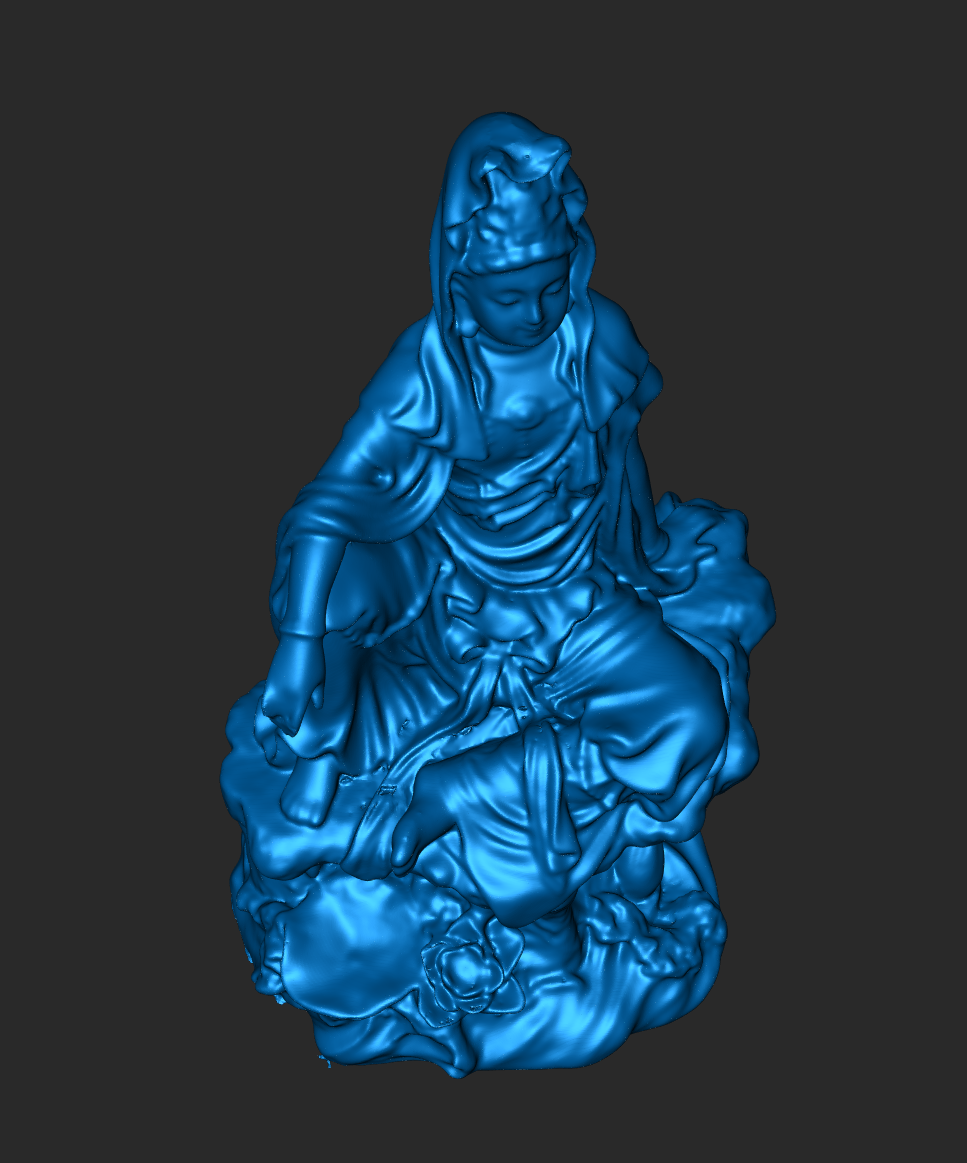
Cleaning up Geometry
If you notice small irregularities in your geometry, you can use the selection tools and the delete keys to remove parts of your model. If you create new holes within your model, you will need to repeat the Fill Hole operation.
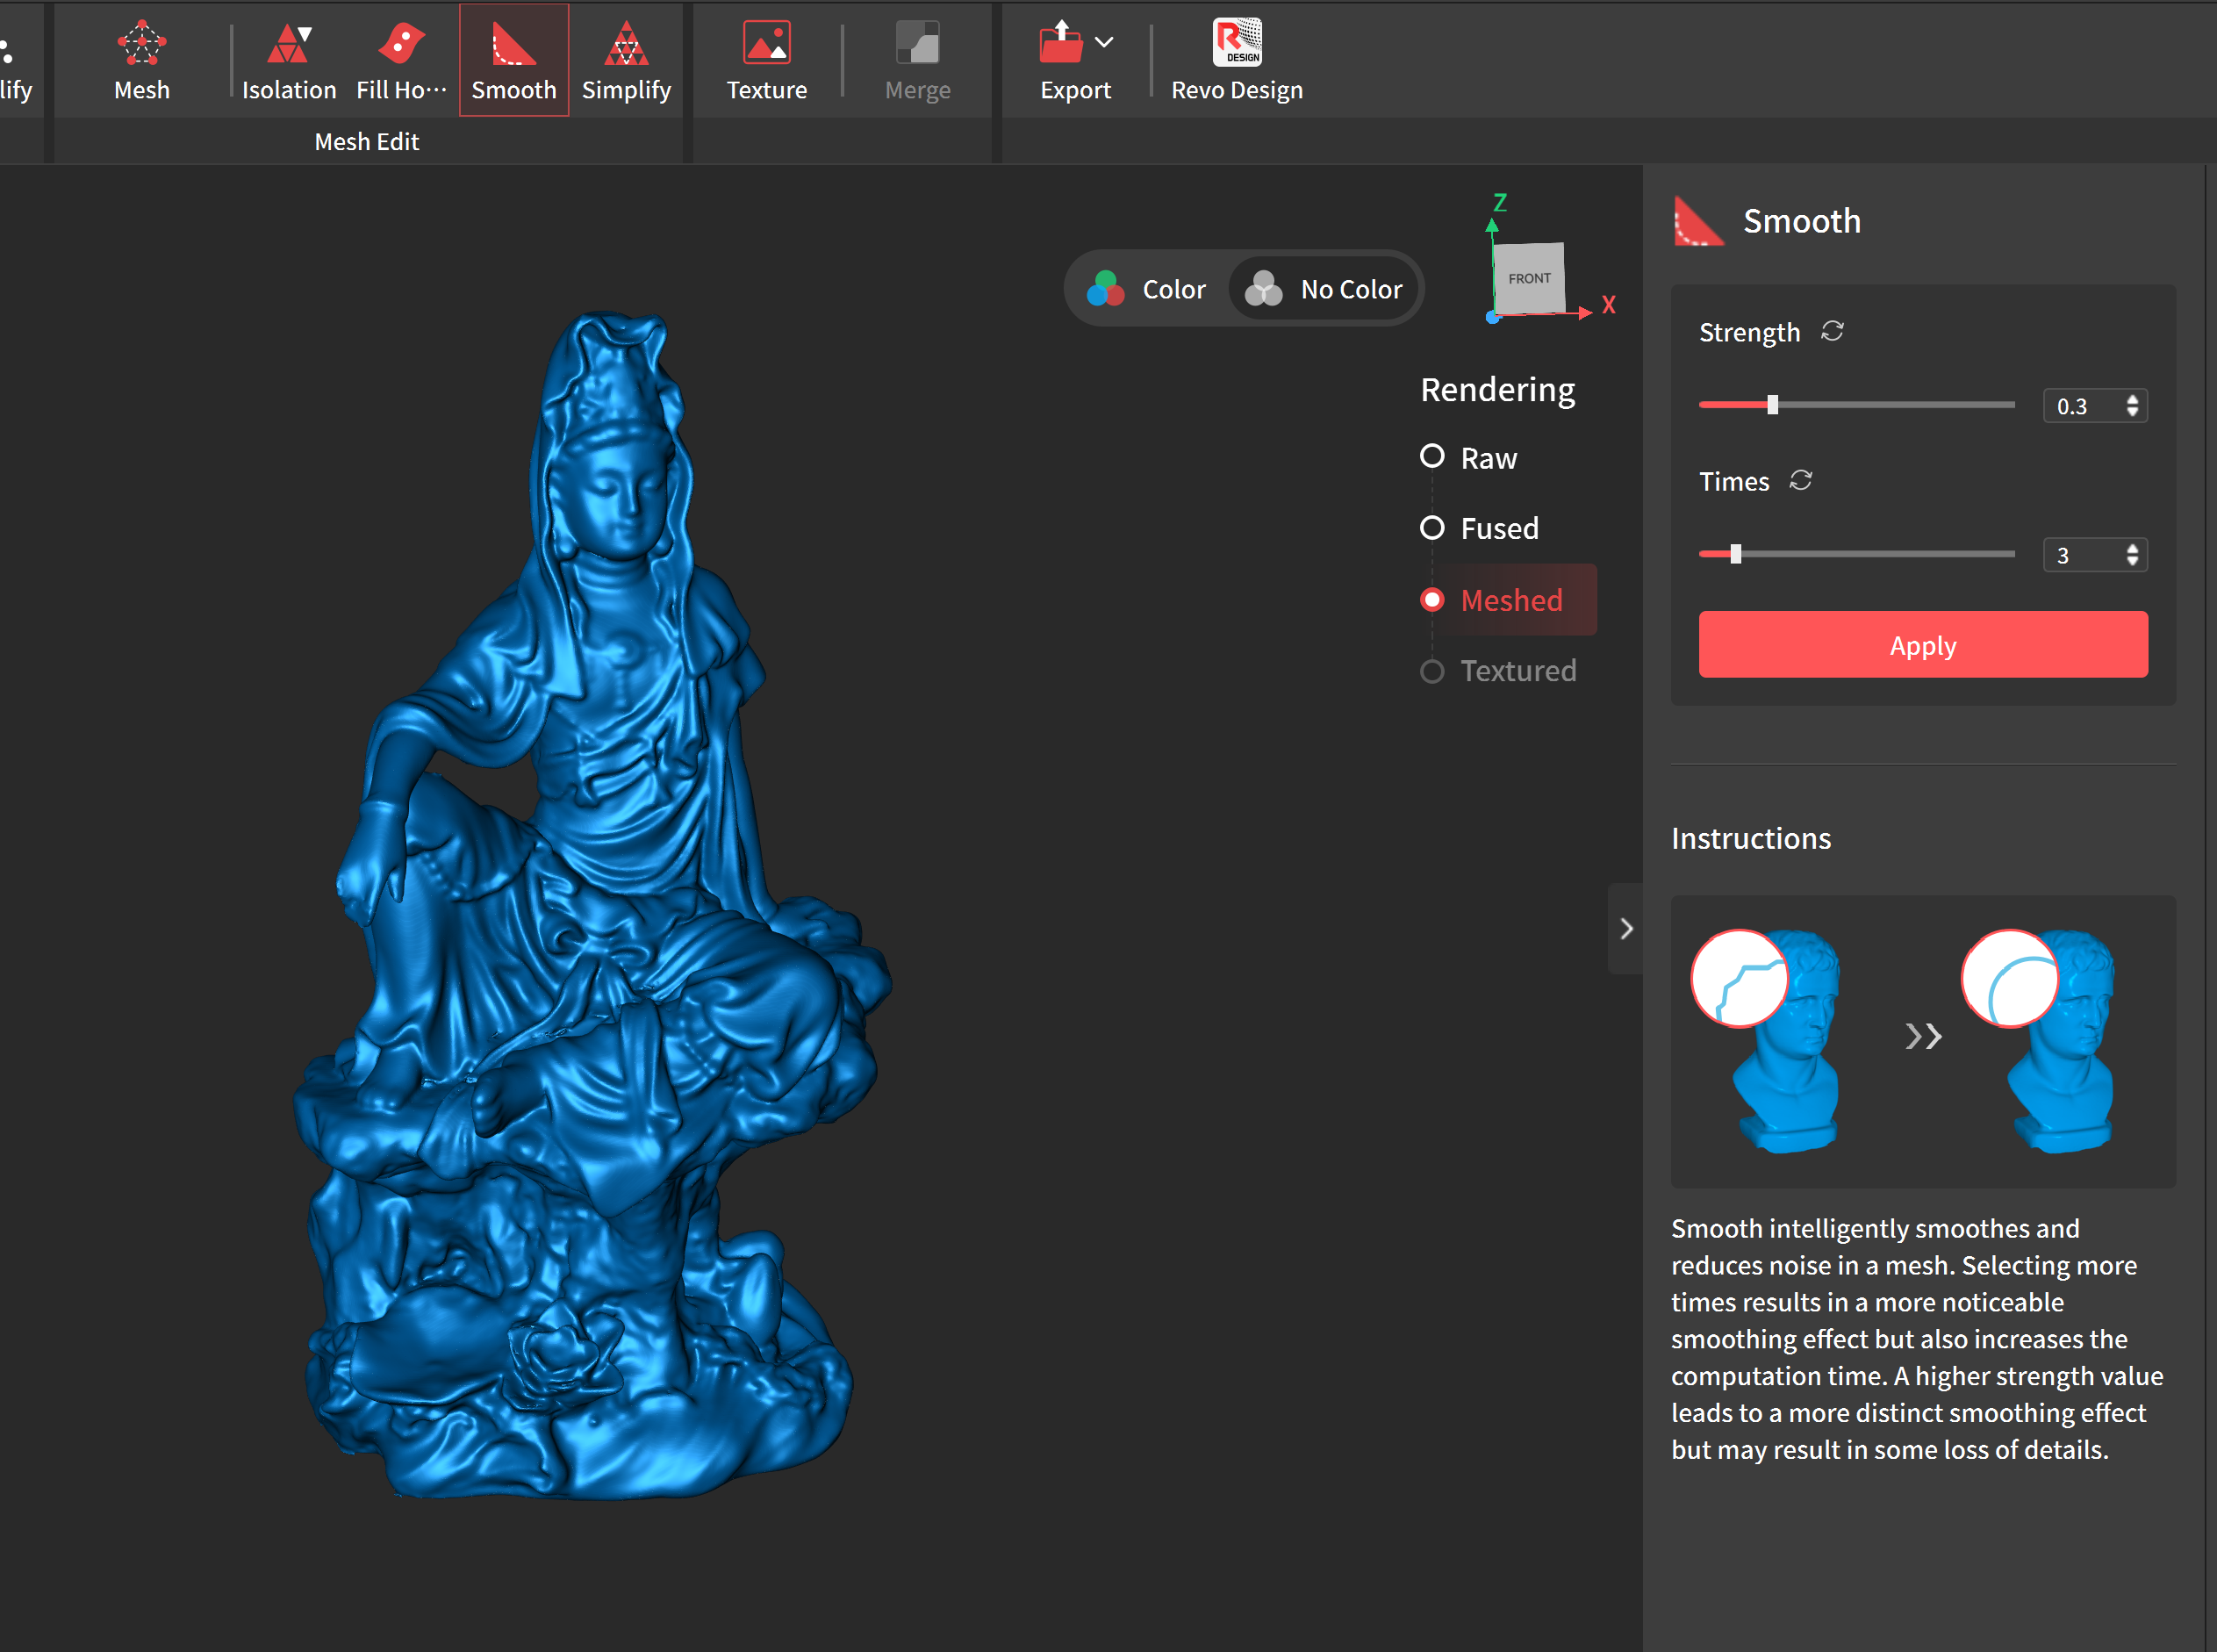
Smooth
Smooth will smooth out jagged parts of your mesh. To smooth your model:
- Select Smooth and Apply
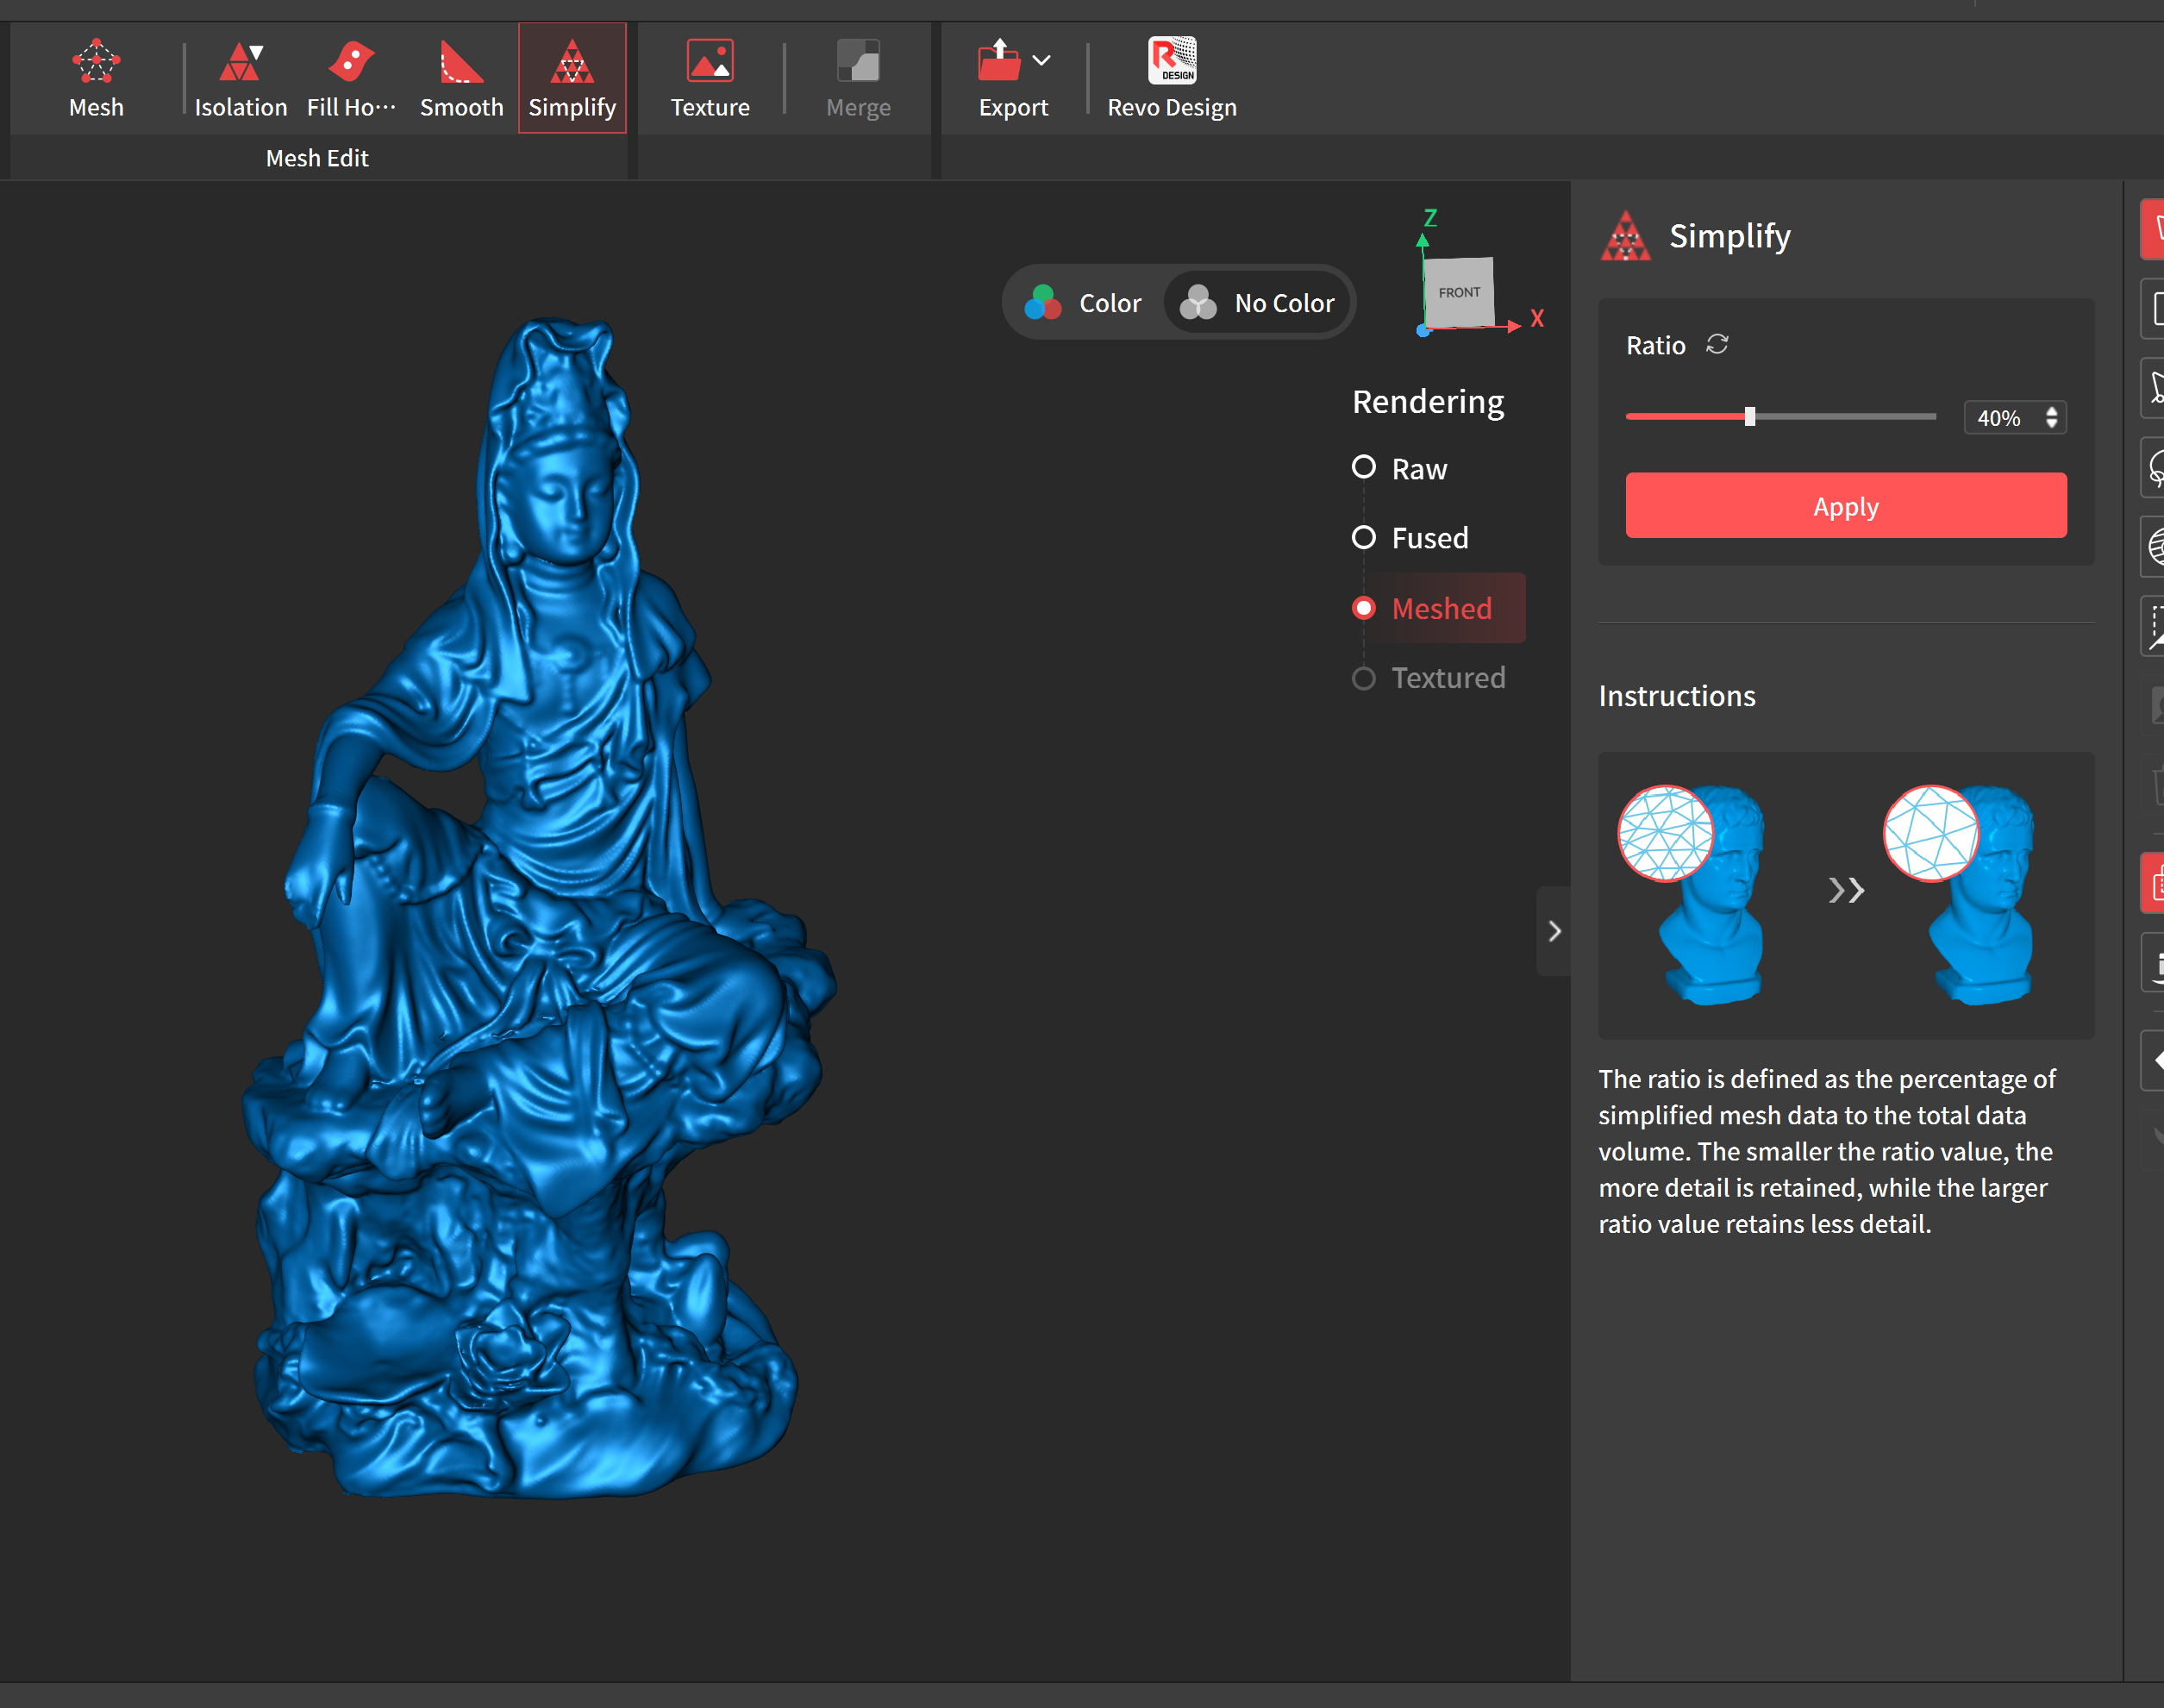
Simplify
Simplify will reduce the topology of your model. It is good practice to reduce the topology of your model by around 20 percent depending on the density of your mesh.
To view the density of your mesh:
- Navigate to Display > Mesh Model Display > Wireframe Overlay

To simplify mesh:
- Select Simplify
- Set ratio to between 20 and 40 percent and press Apply
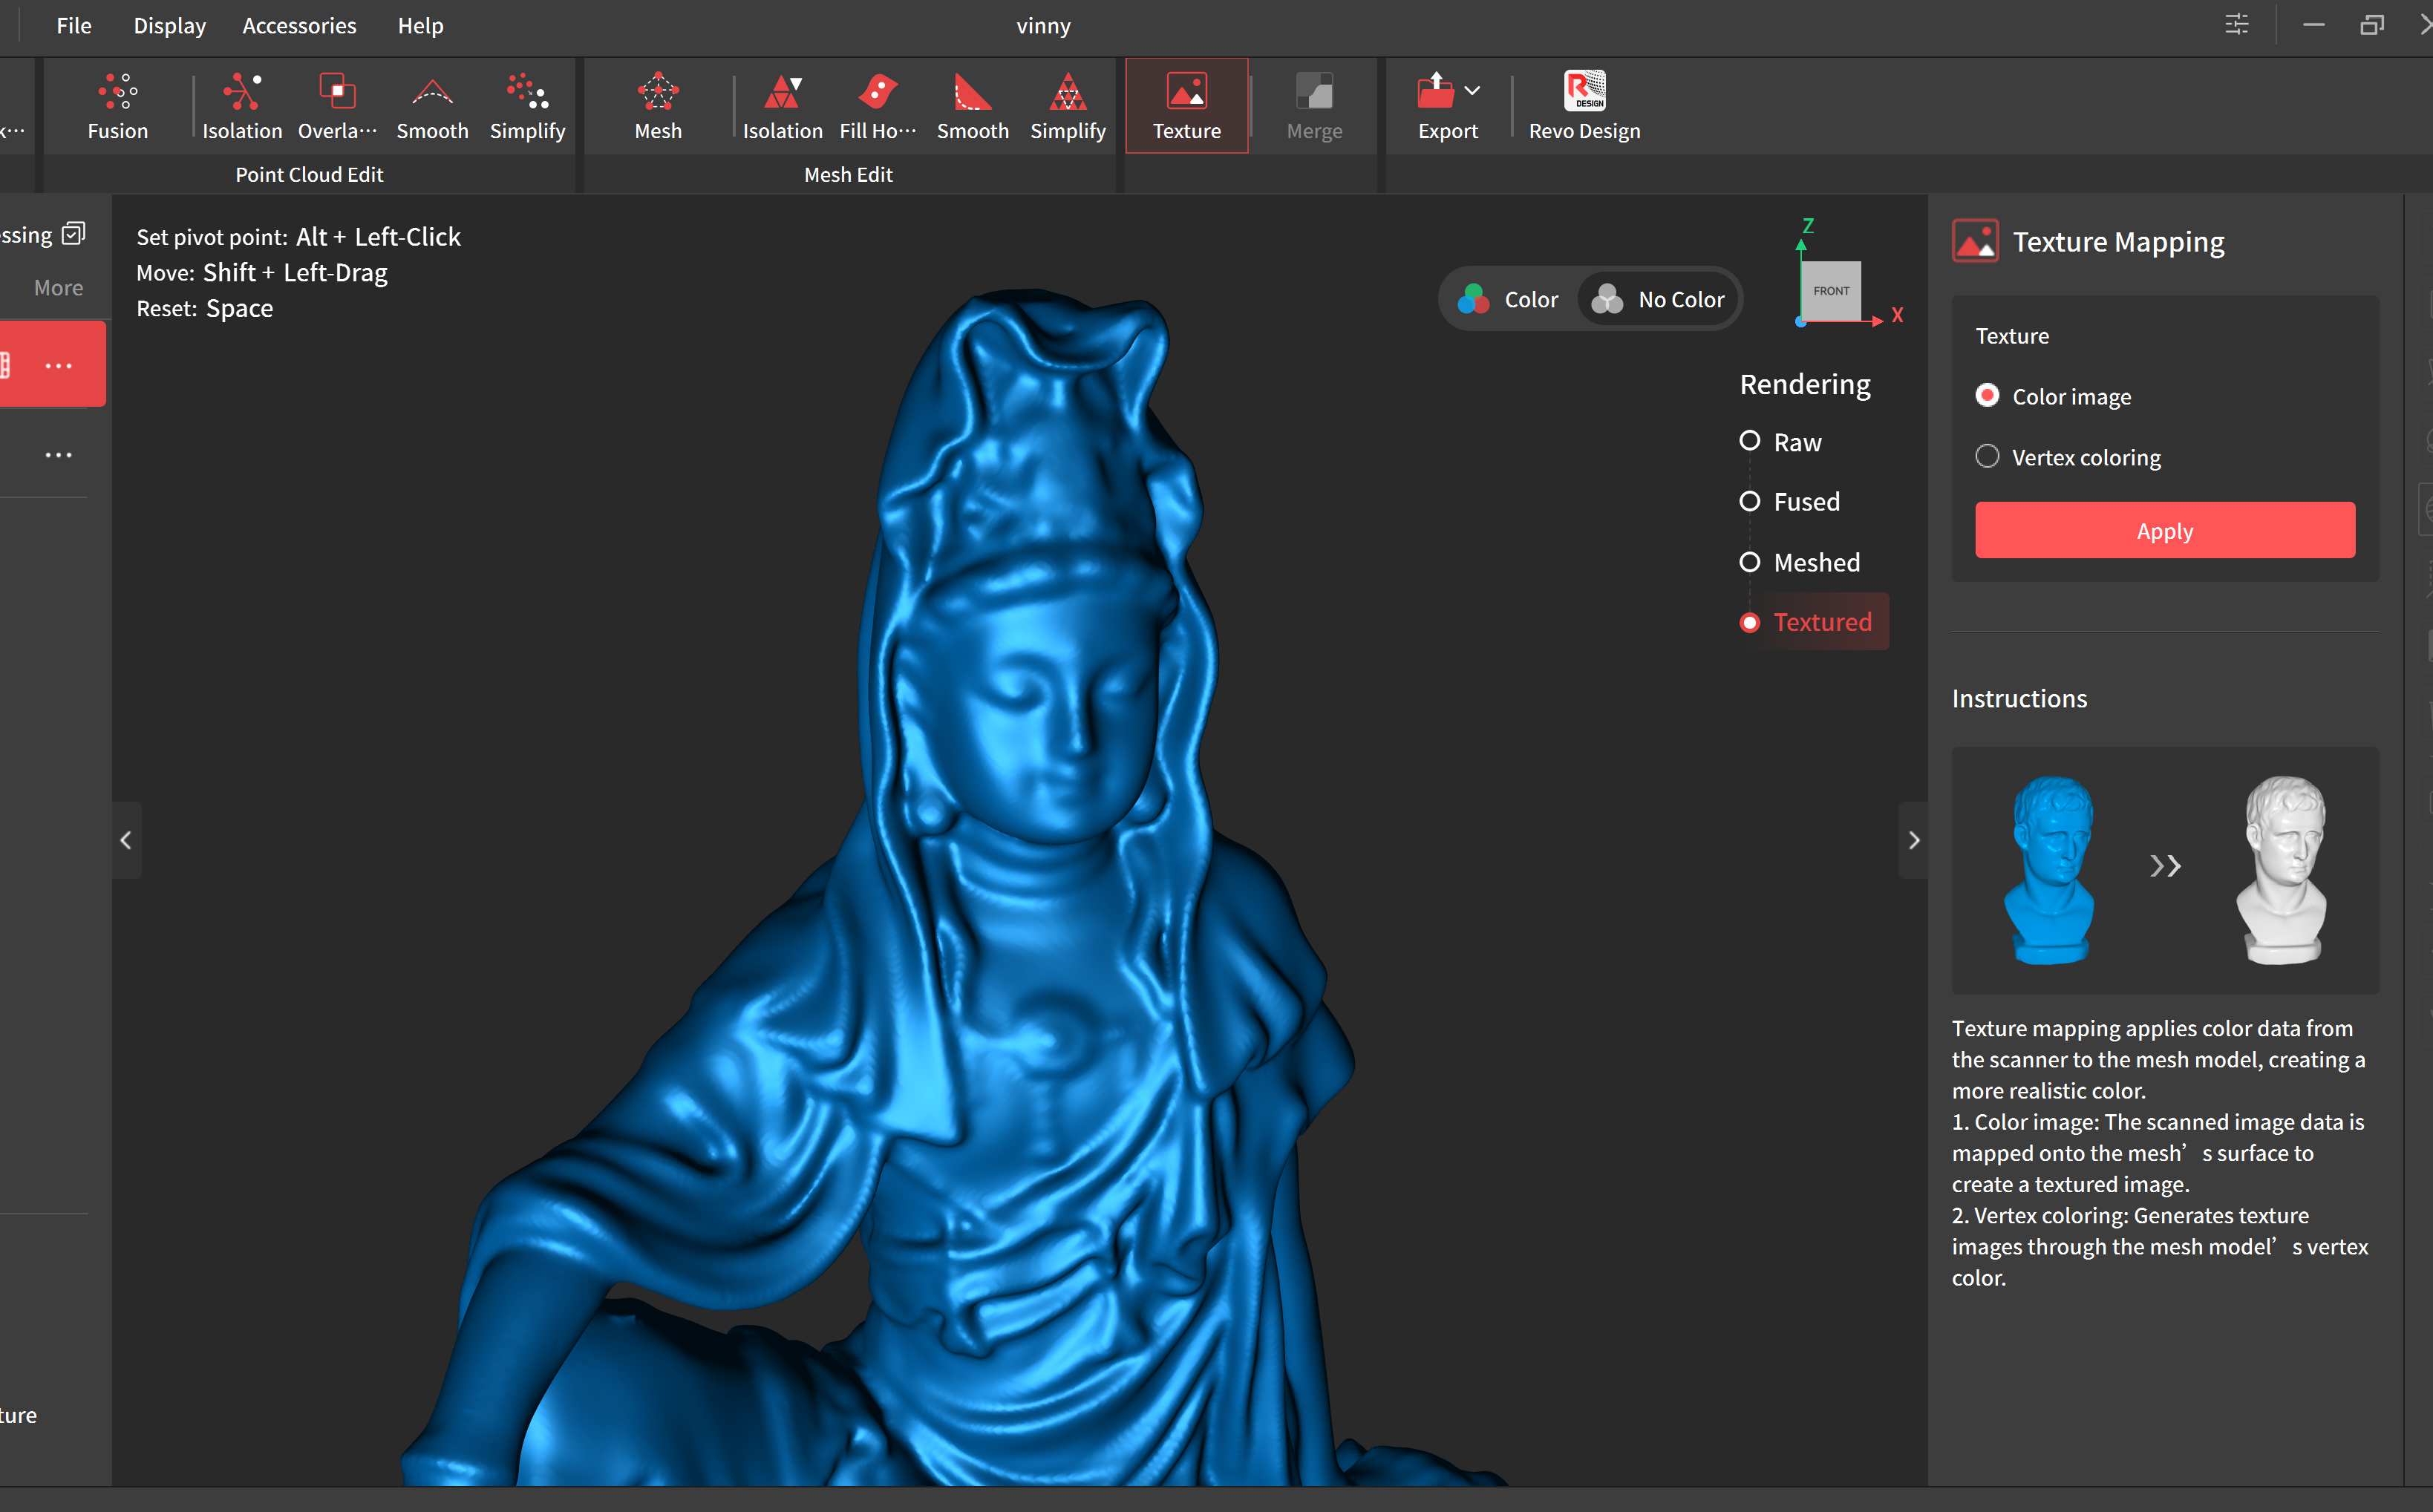
Texture
We can create a texture from our image data by using the texture tool. To create a texture:
- Press the texture tool
- Select Color Image and press Apply
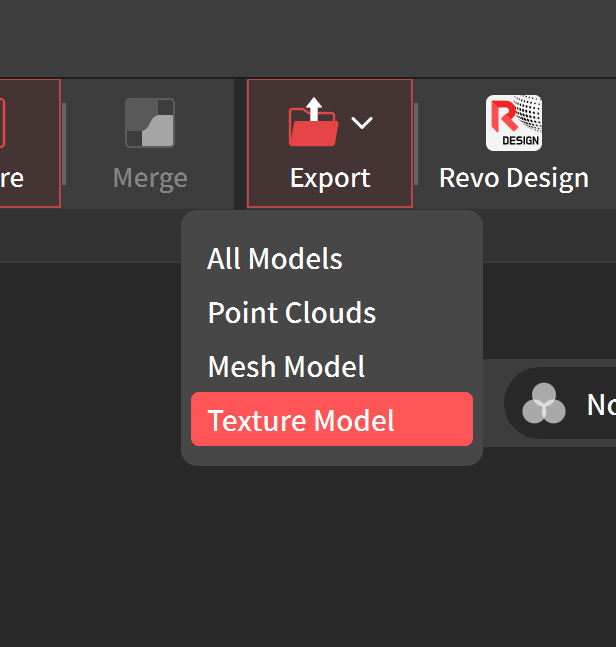
Export
To Export your model:
- Press Export > Texture Mesh
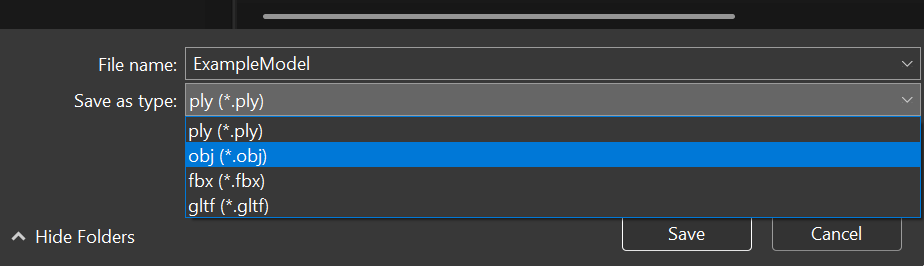
- Save your model as a .obj file
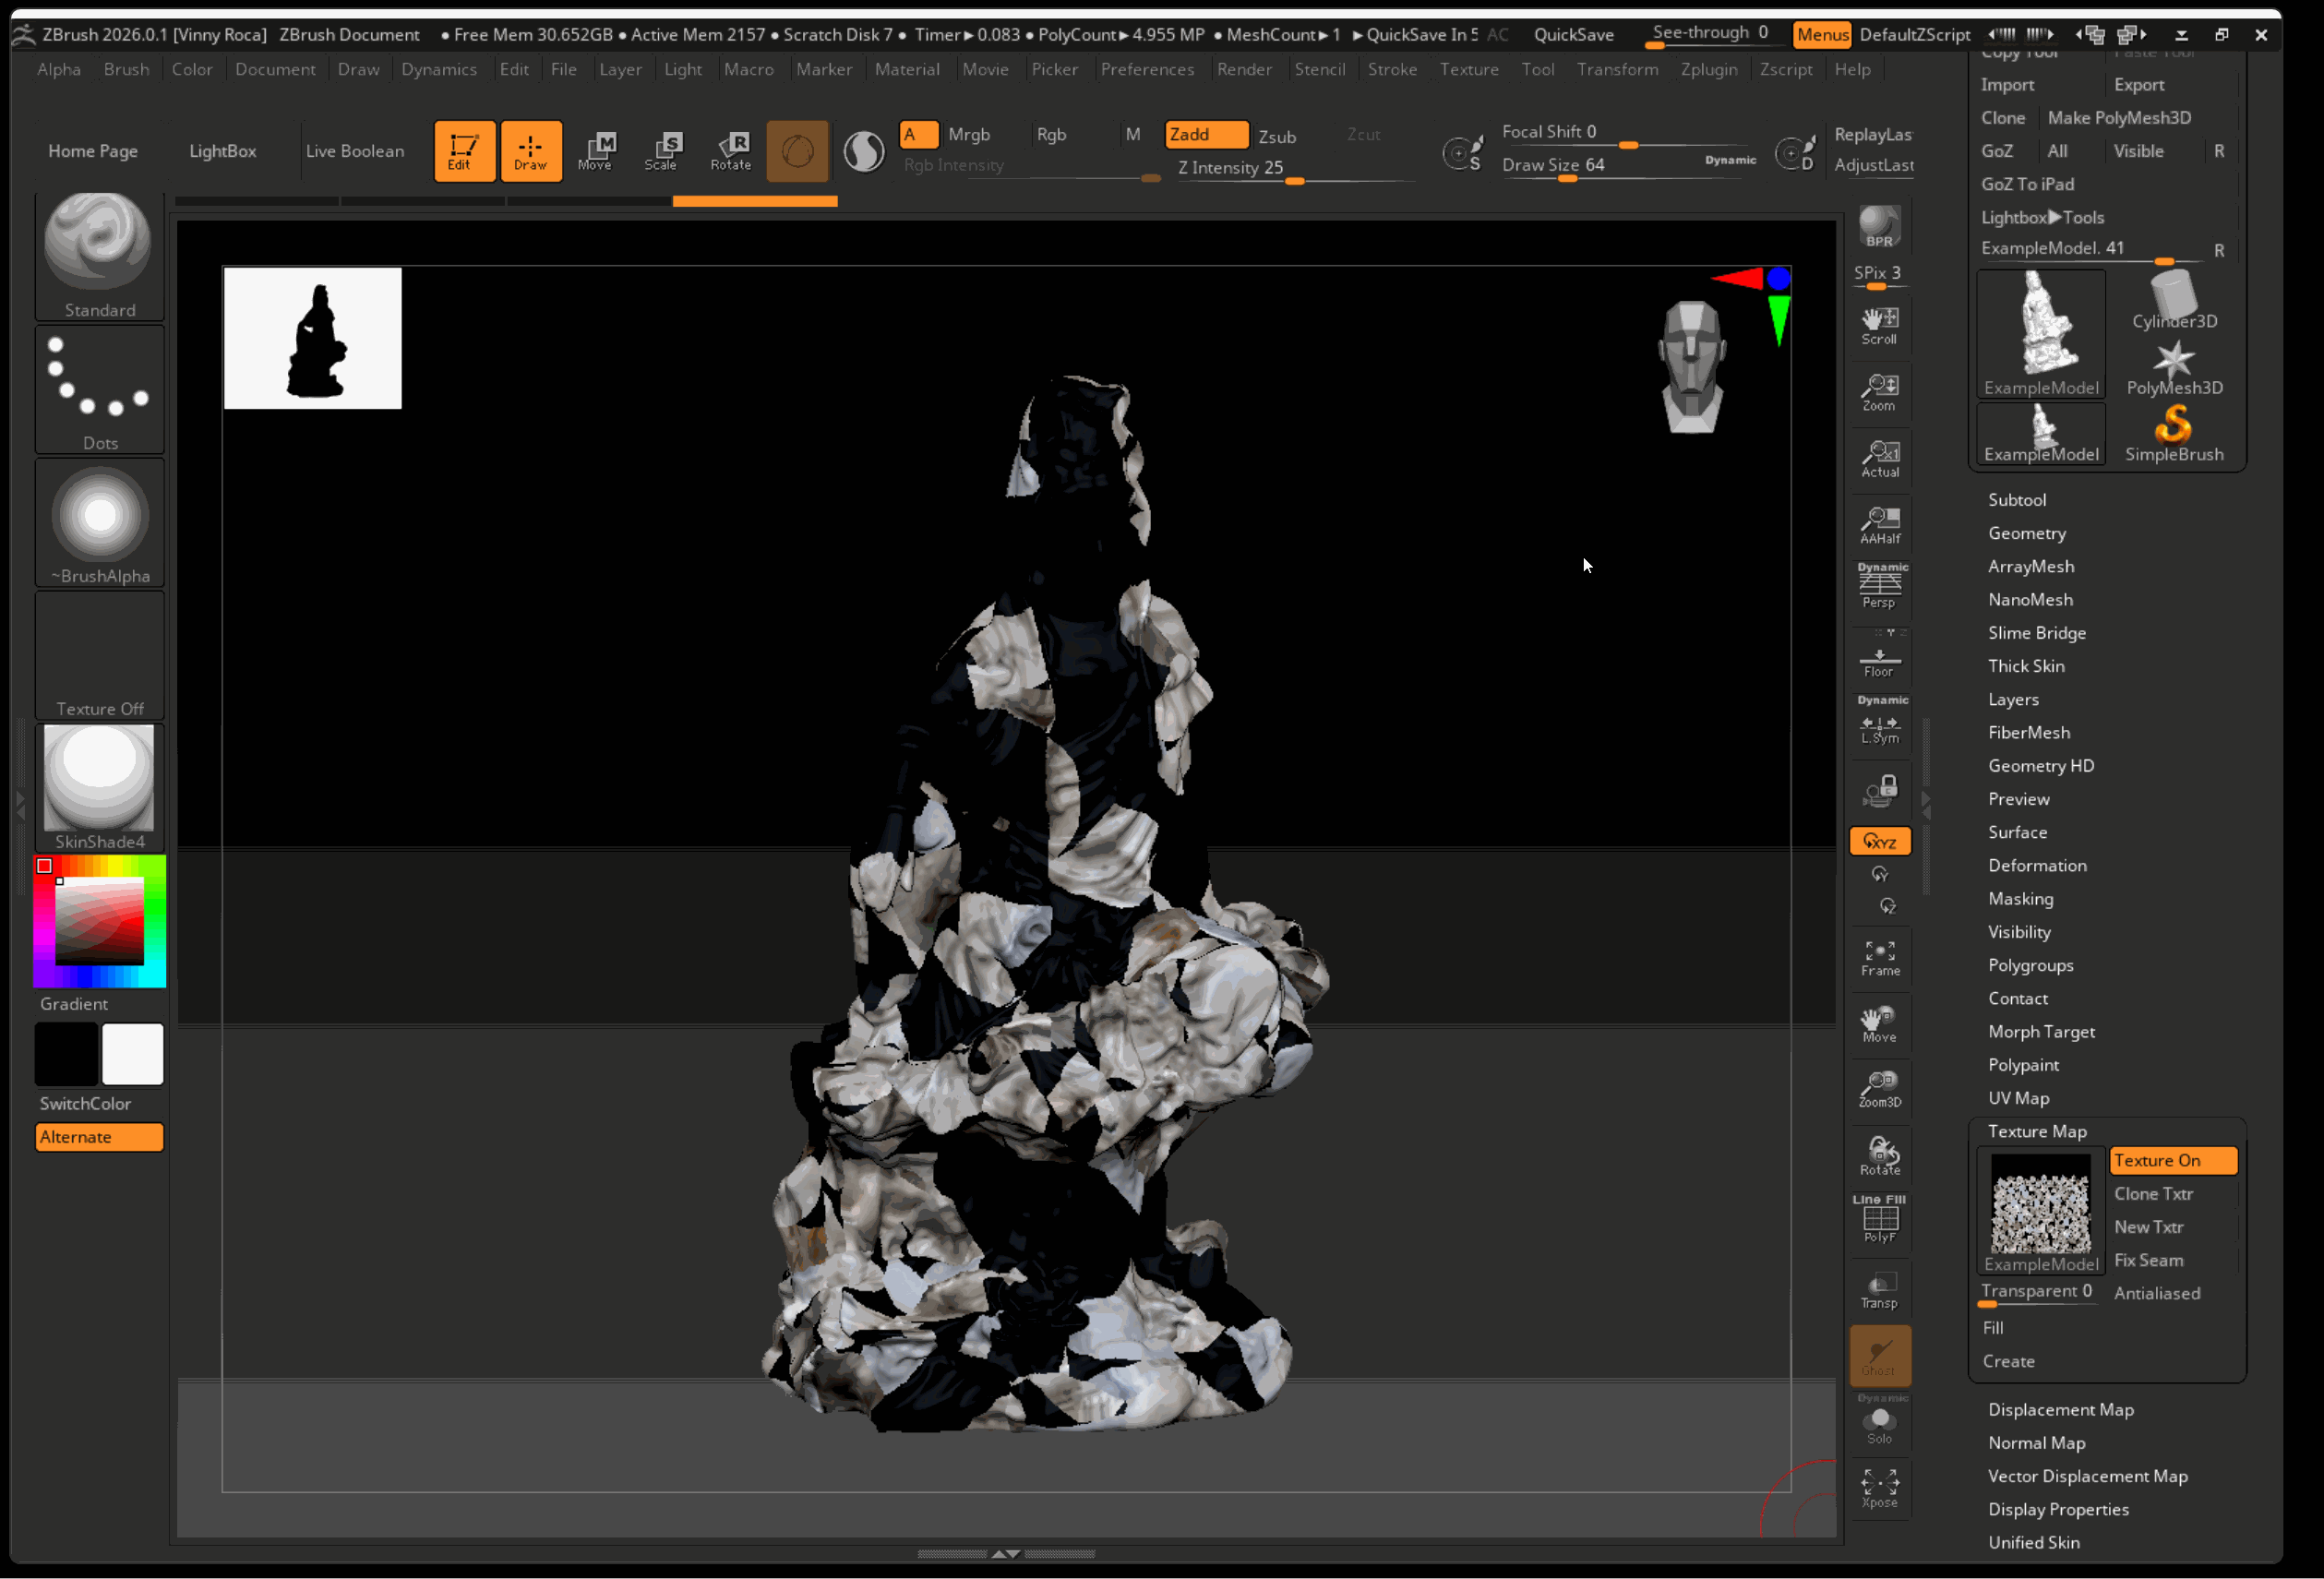
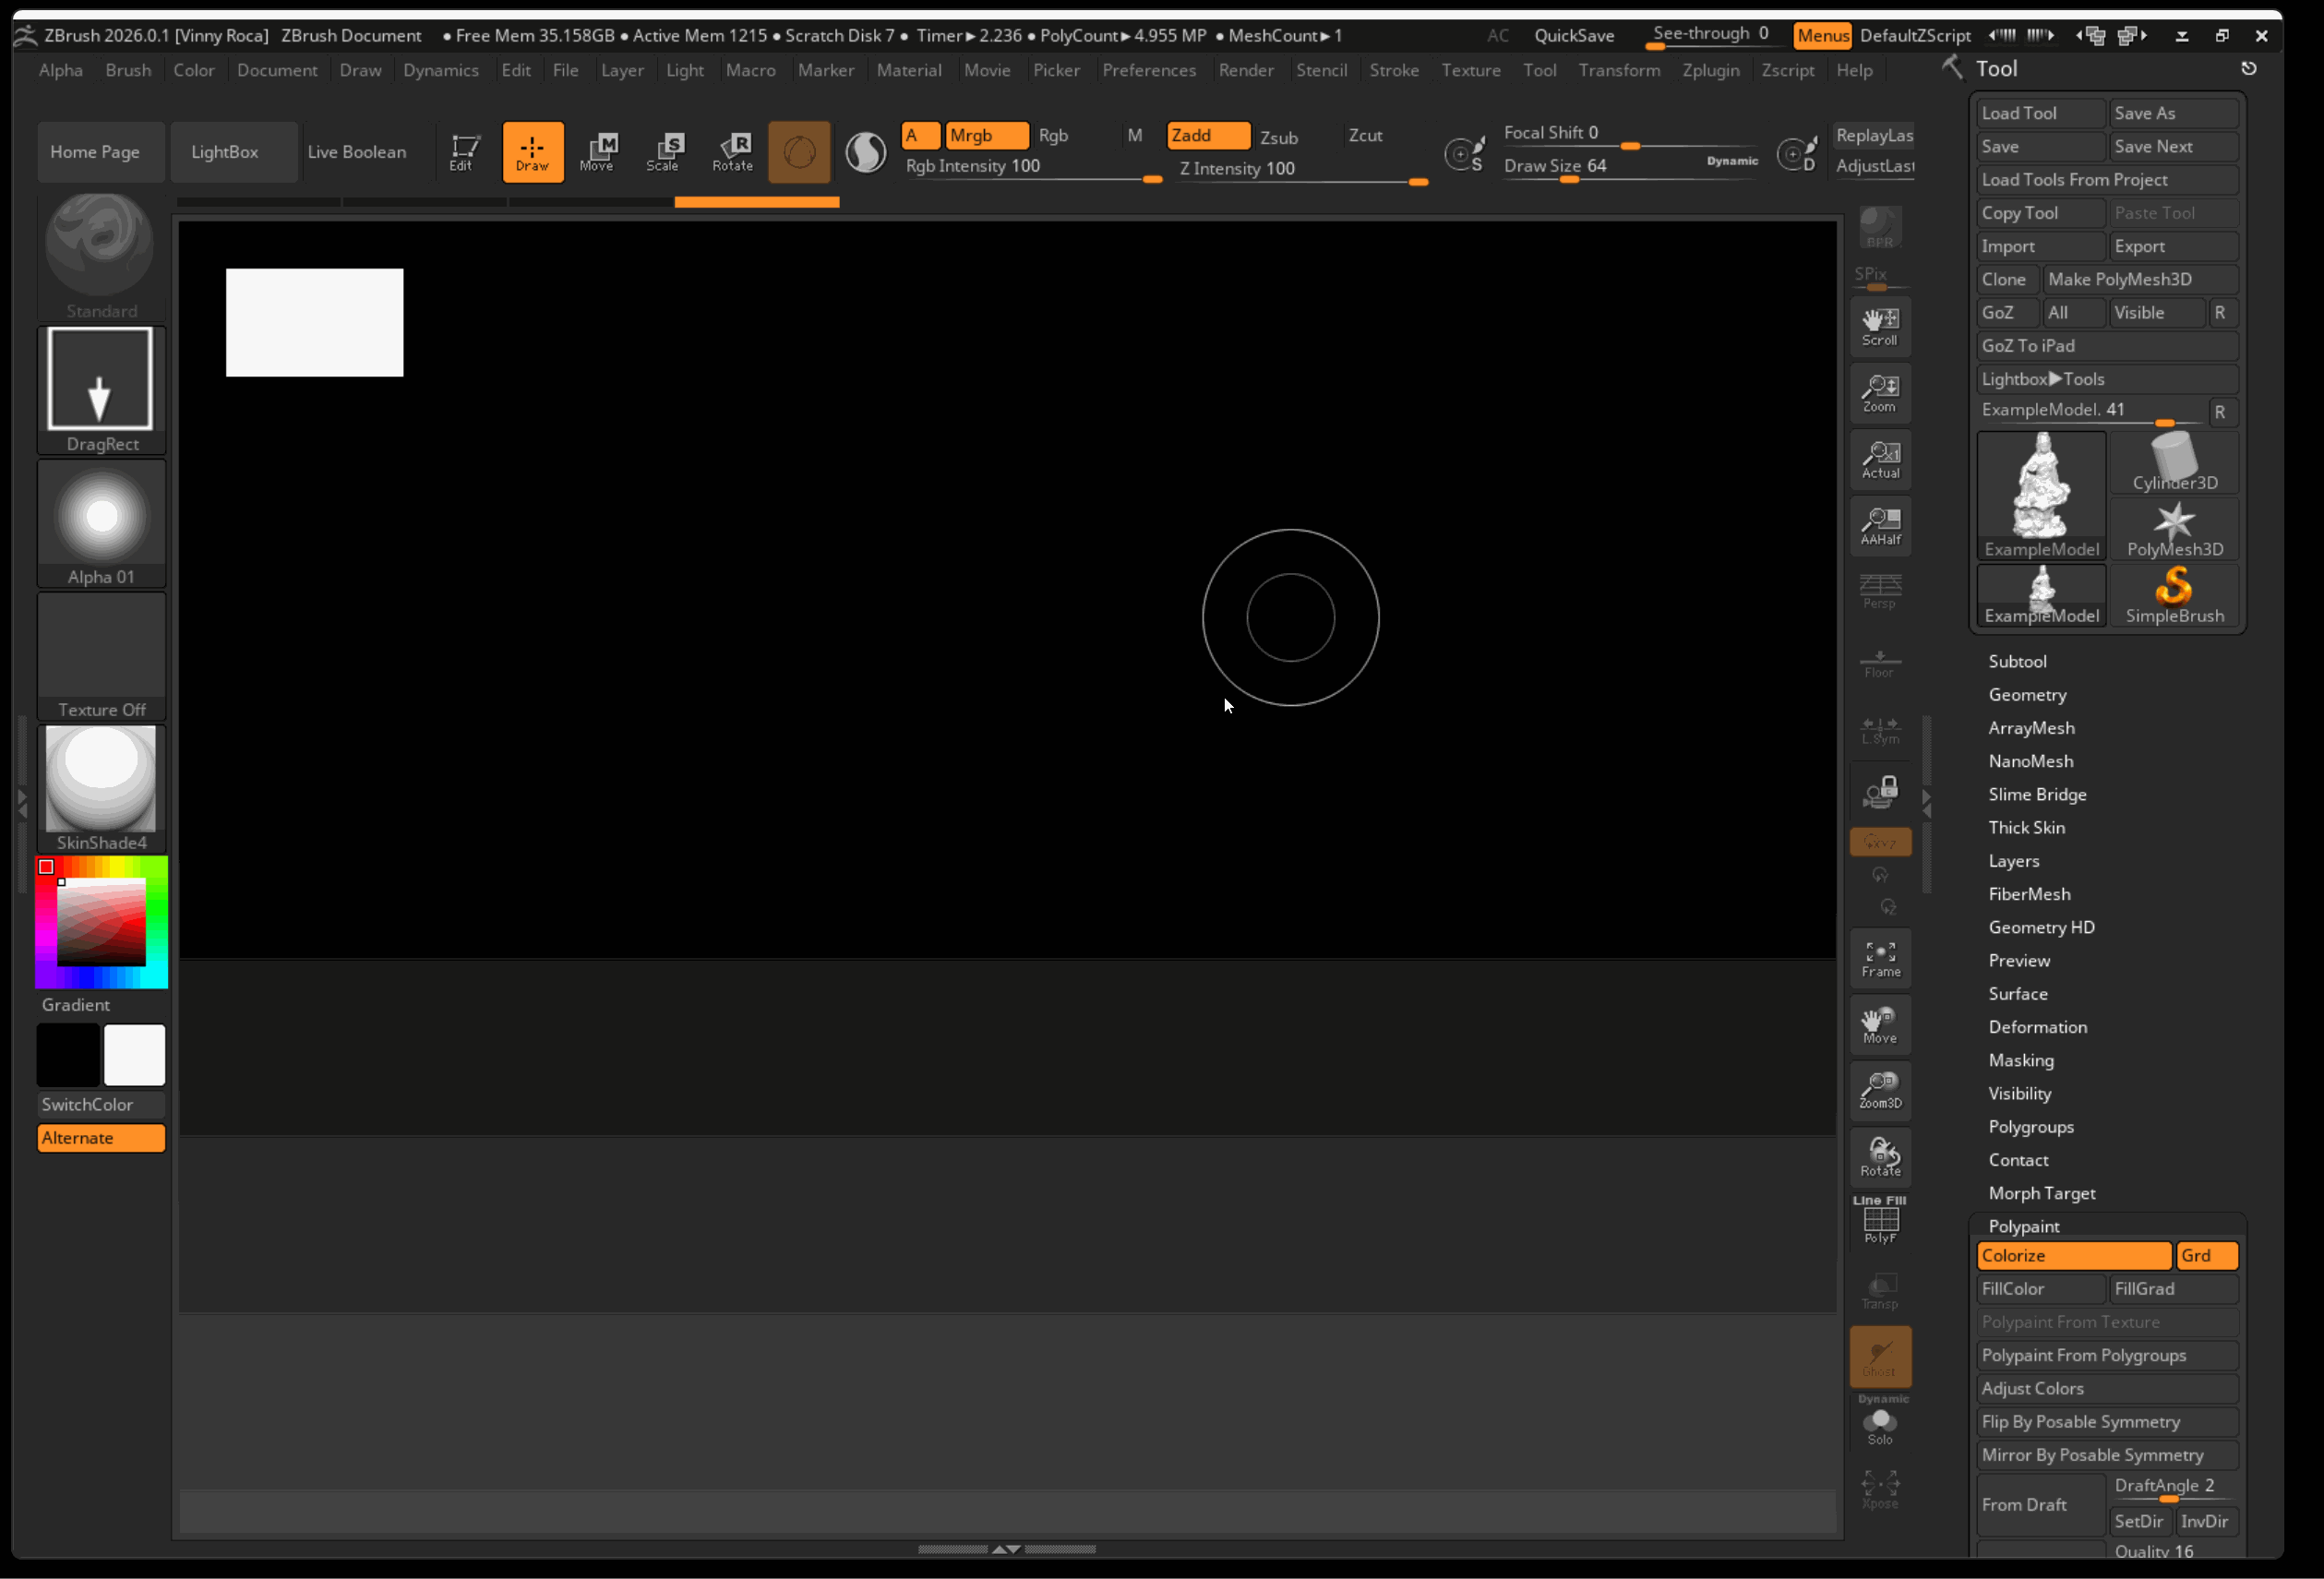
Importing your 3D Scan into ZBrush
- Press Import in the Tool menu and select your .obj file
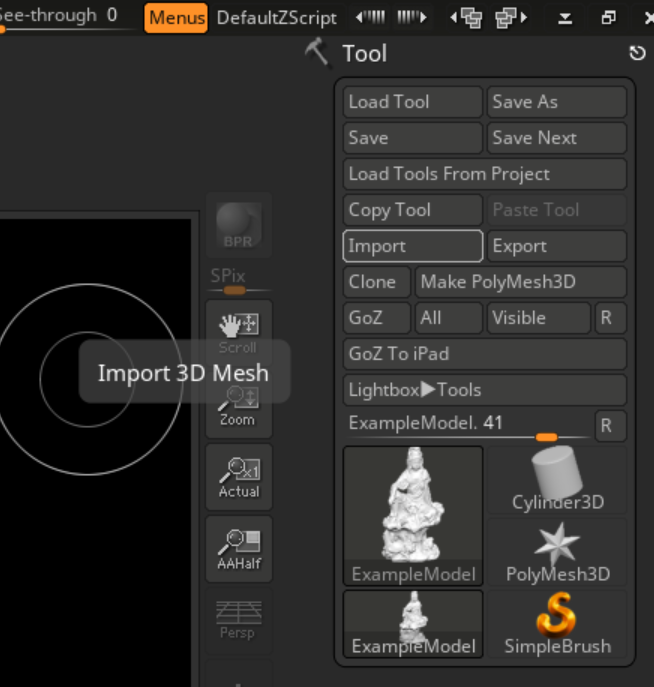
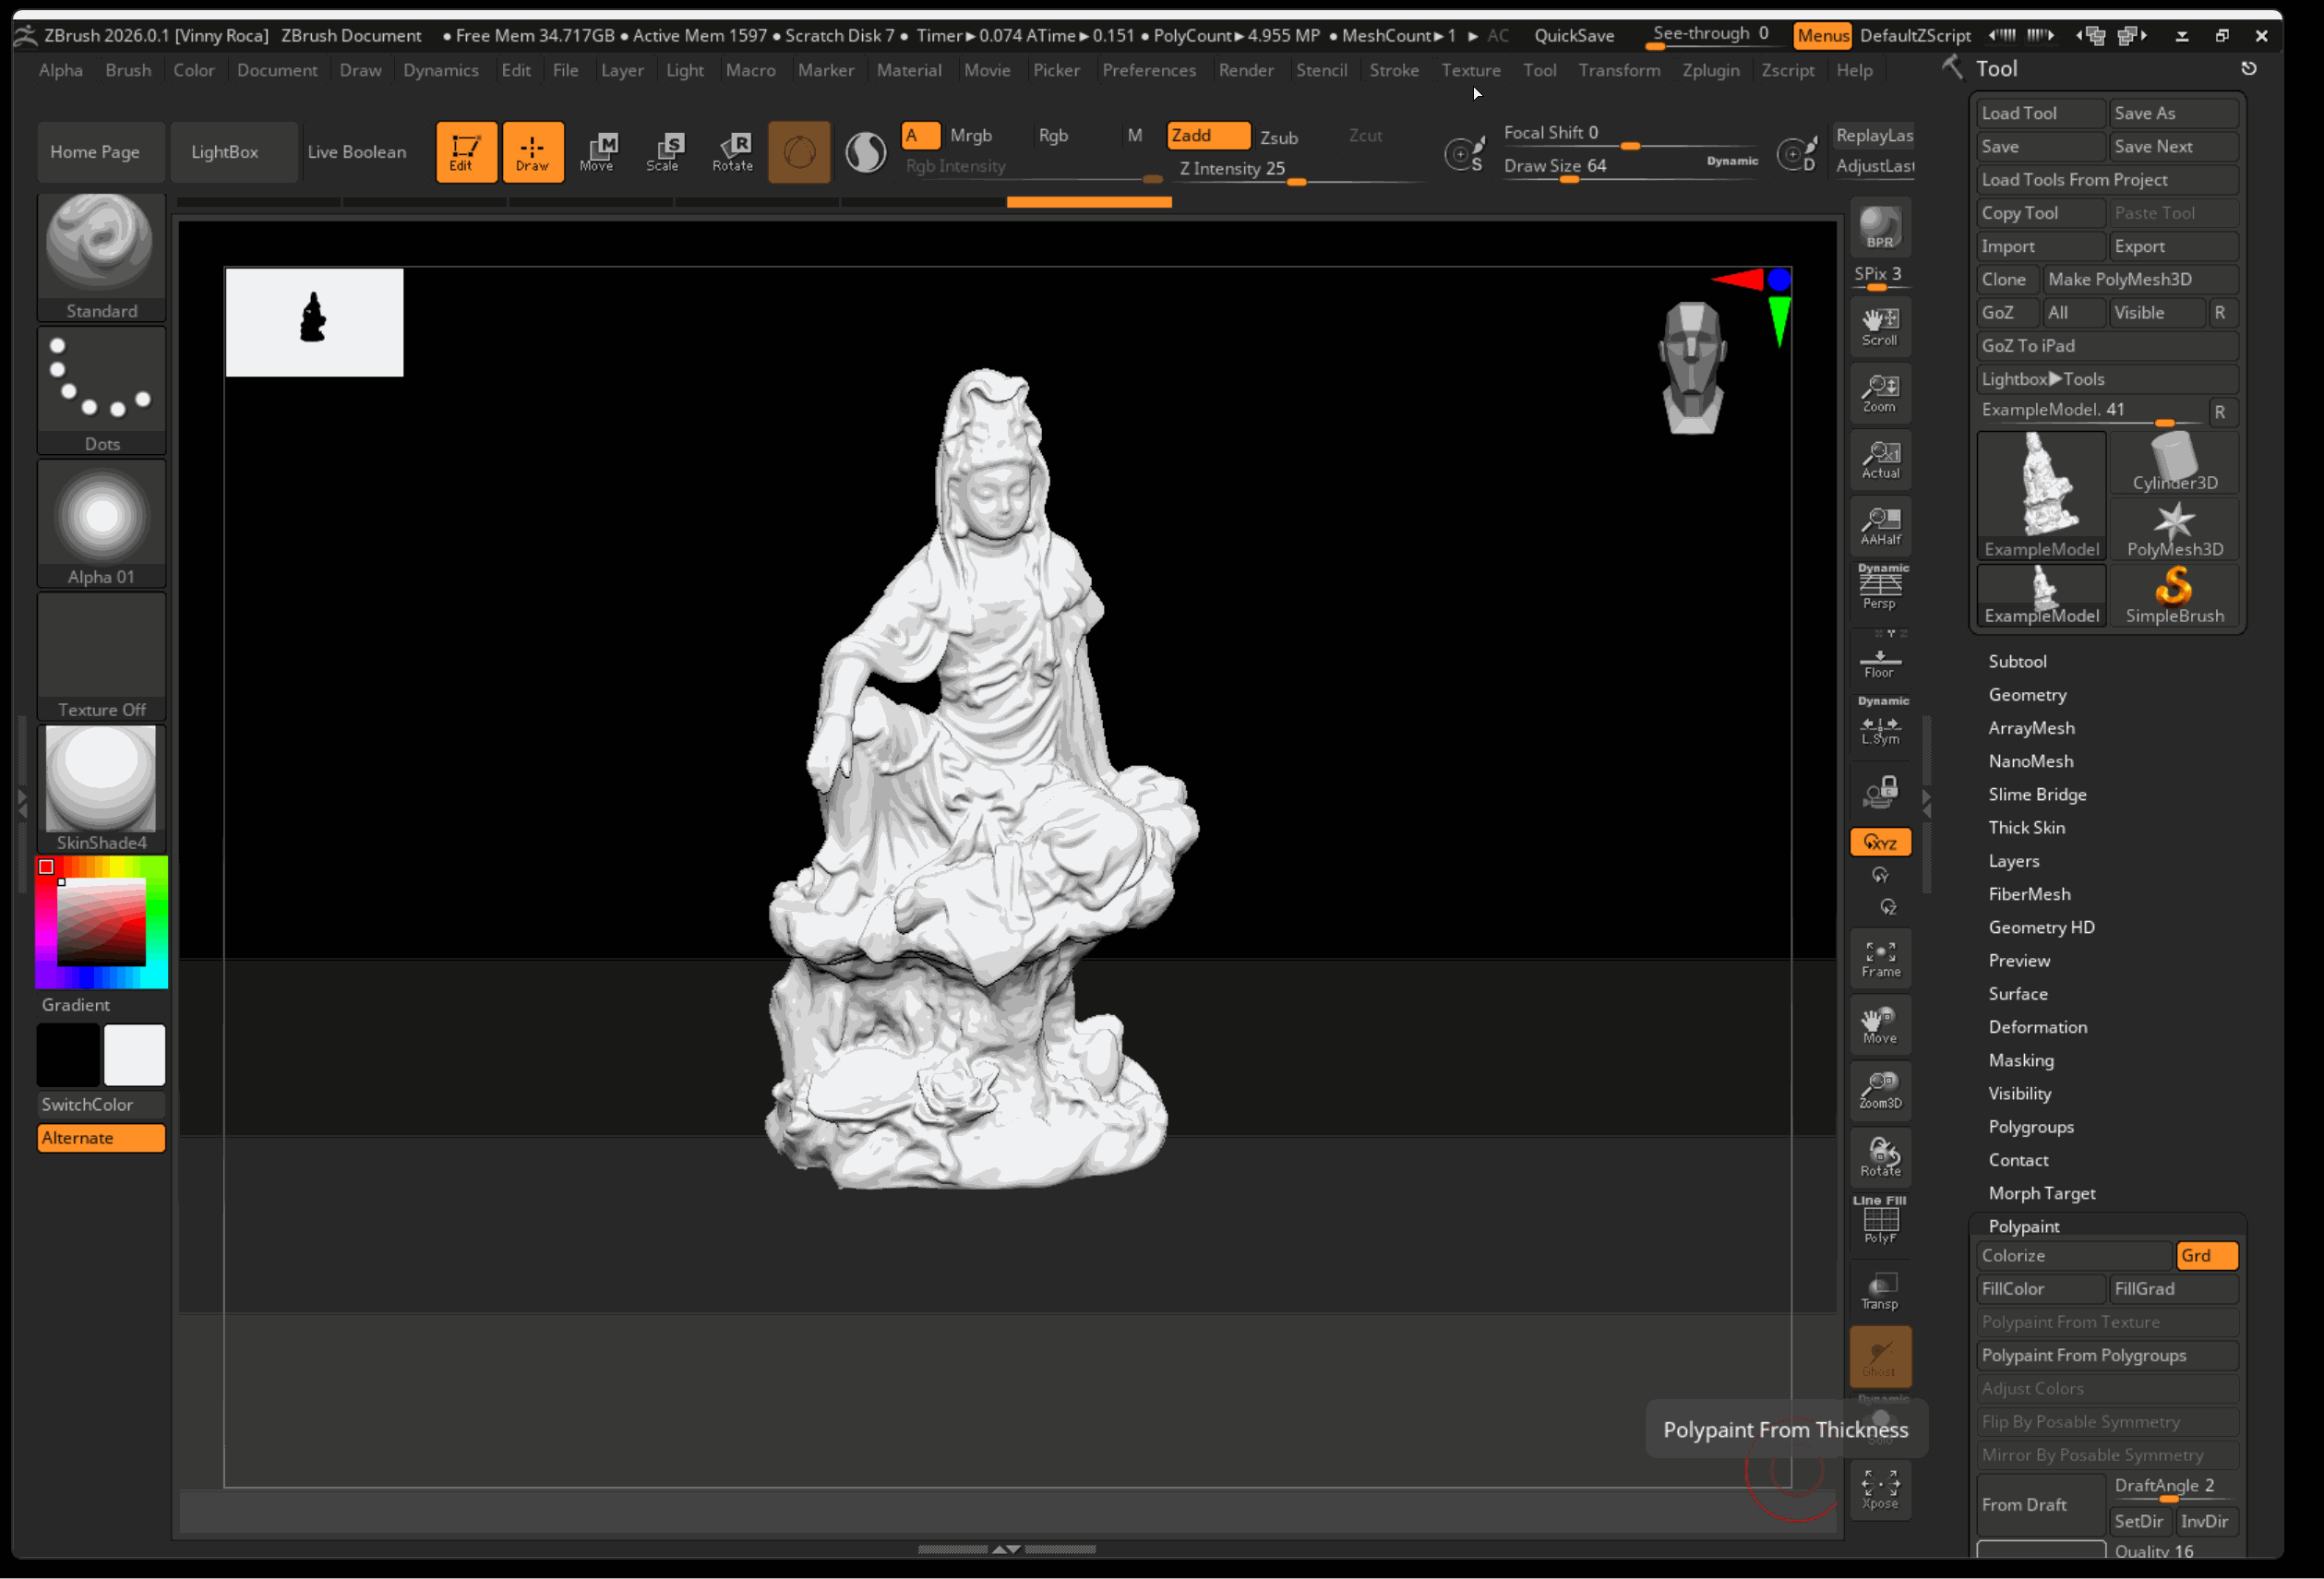
- Click and drag in your viewpoint to import your model
- Press Edit
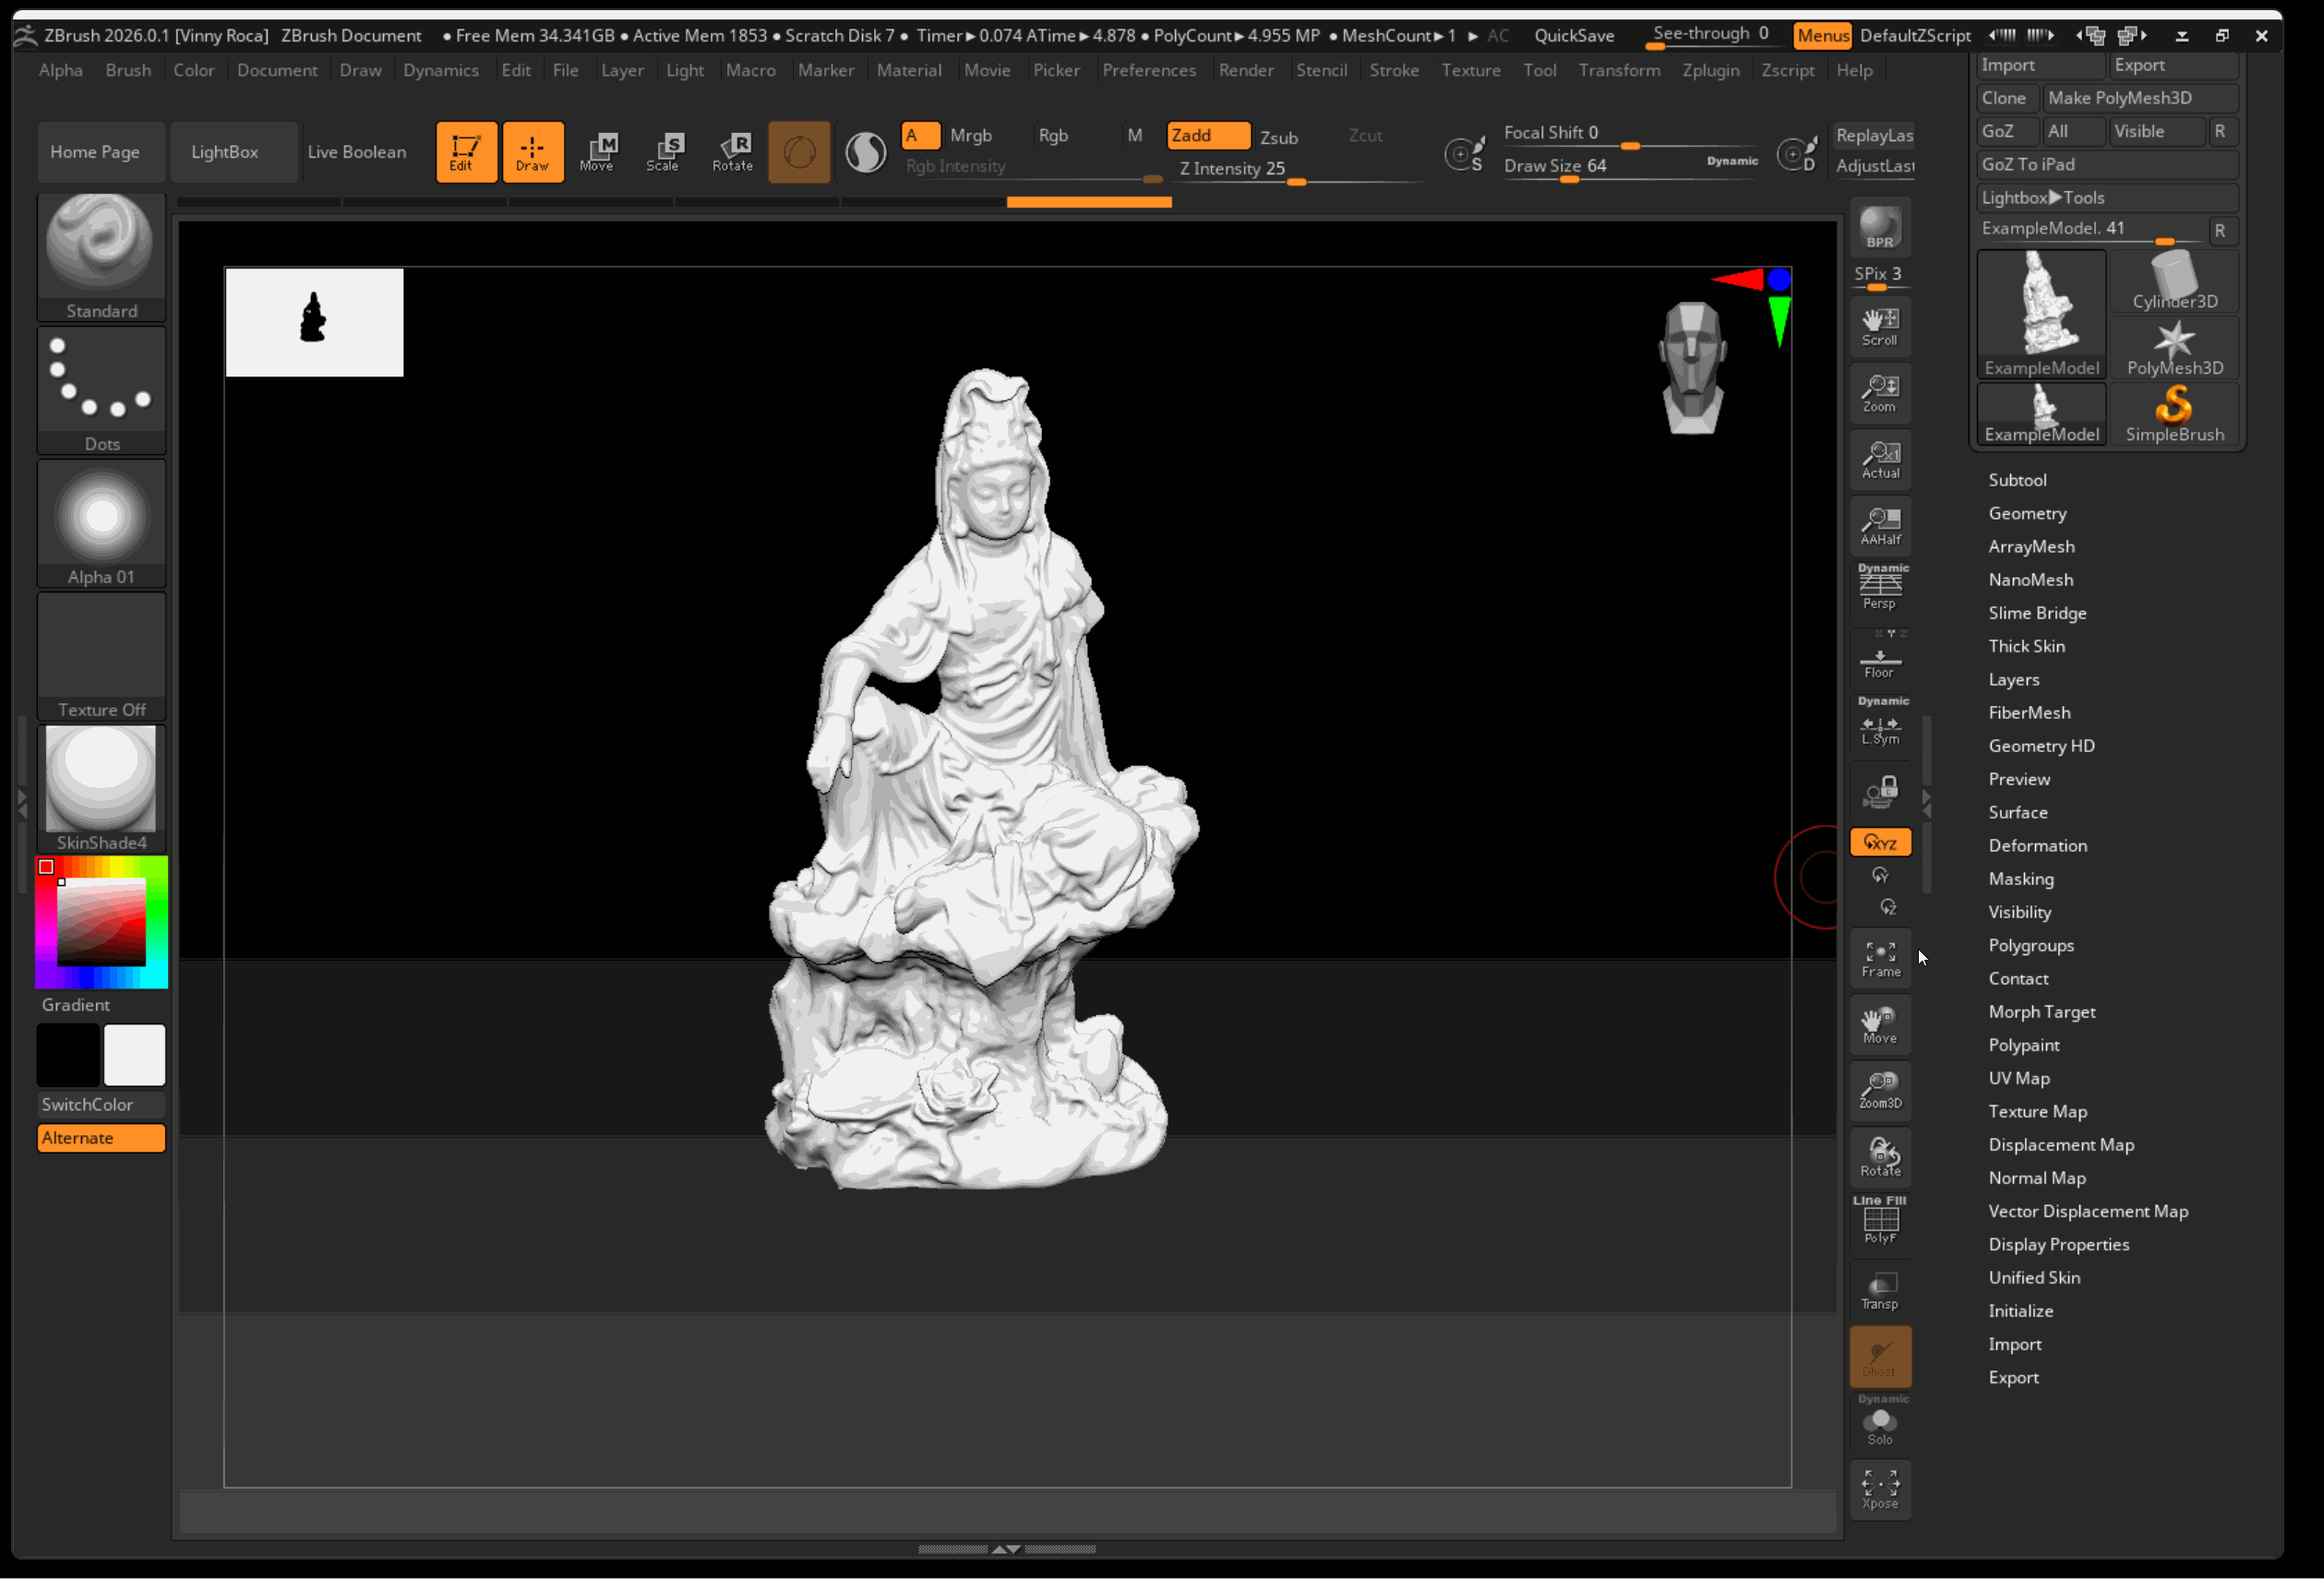
Add Texture to Model
- Set material to SkinShade4
- Navigate to Texture > Import in the Top Shelf
- Select your Texture
Applying Texture to Model
- In your tool menu, Select Texture Map
- Select NewTexr > Select your texture in the Image Section
Fix Texture
ZBrush, by default, flips UV vertically. To fix this error we need to flip our texture.
- Navigate to Texture
- Select your texture and press FlipY
- Reselect your texture in the Tool panel