Independent Exercise: Tree
Description
Inspired by the work of Char Davies and Jennifer Steinkamp, your exercise is to make 3D model of a tree. This exercise will be due at the start of the next class session. To complete this exercise, you'll need to learn some new tools on your own! Follow the tutorial below to get started!
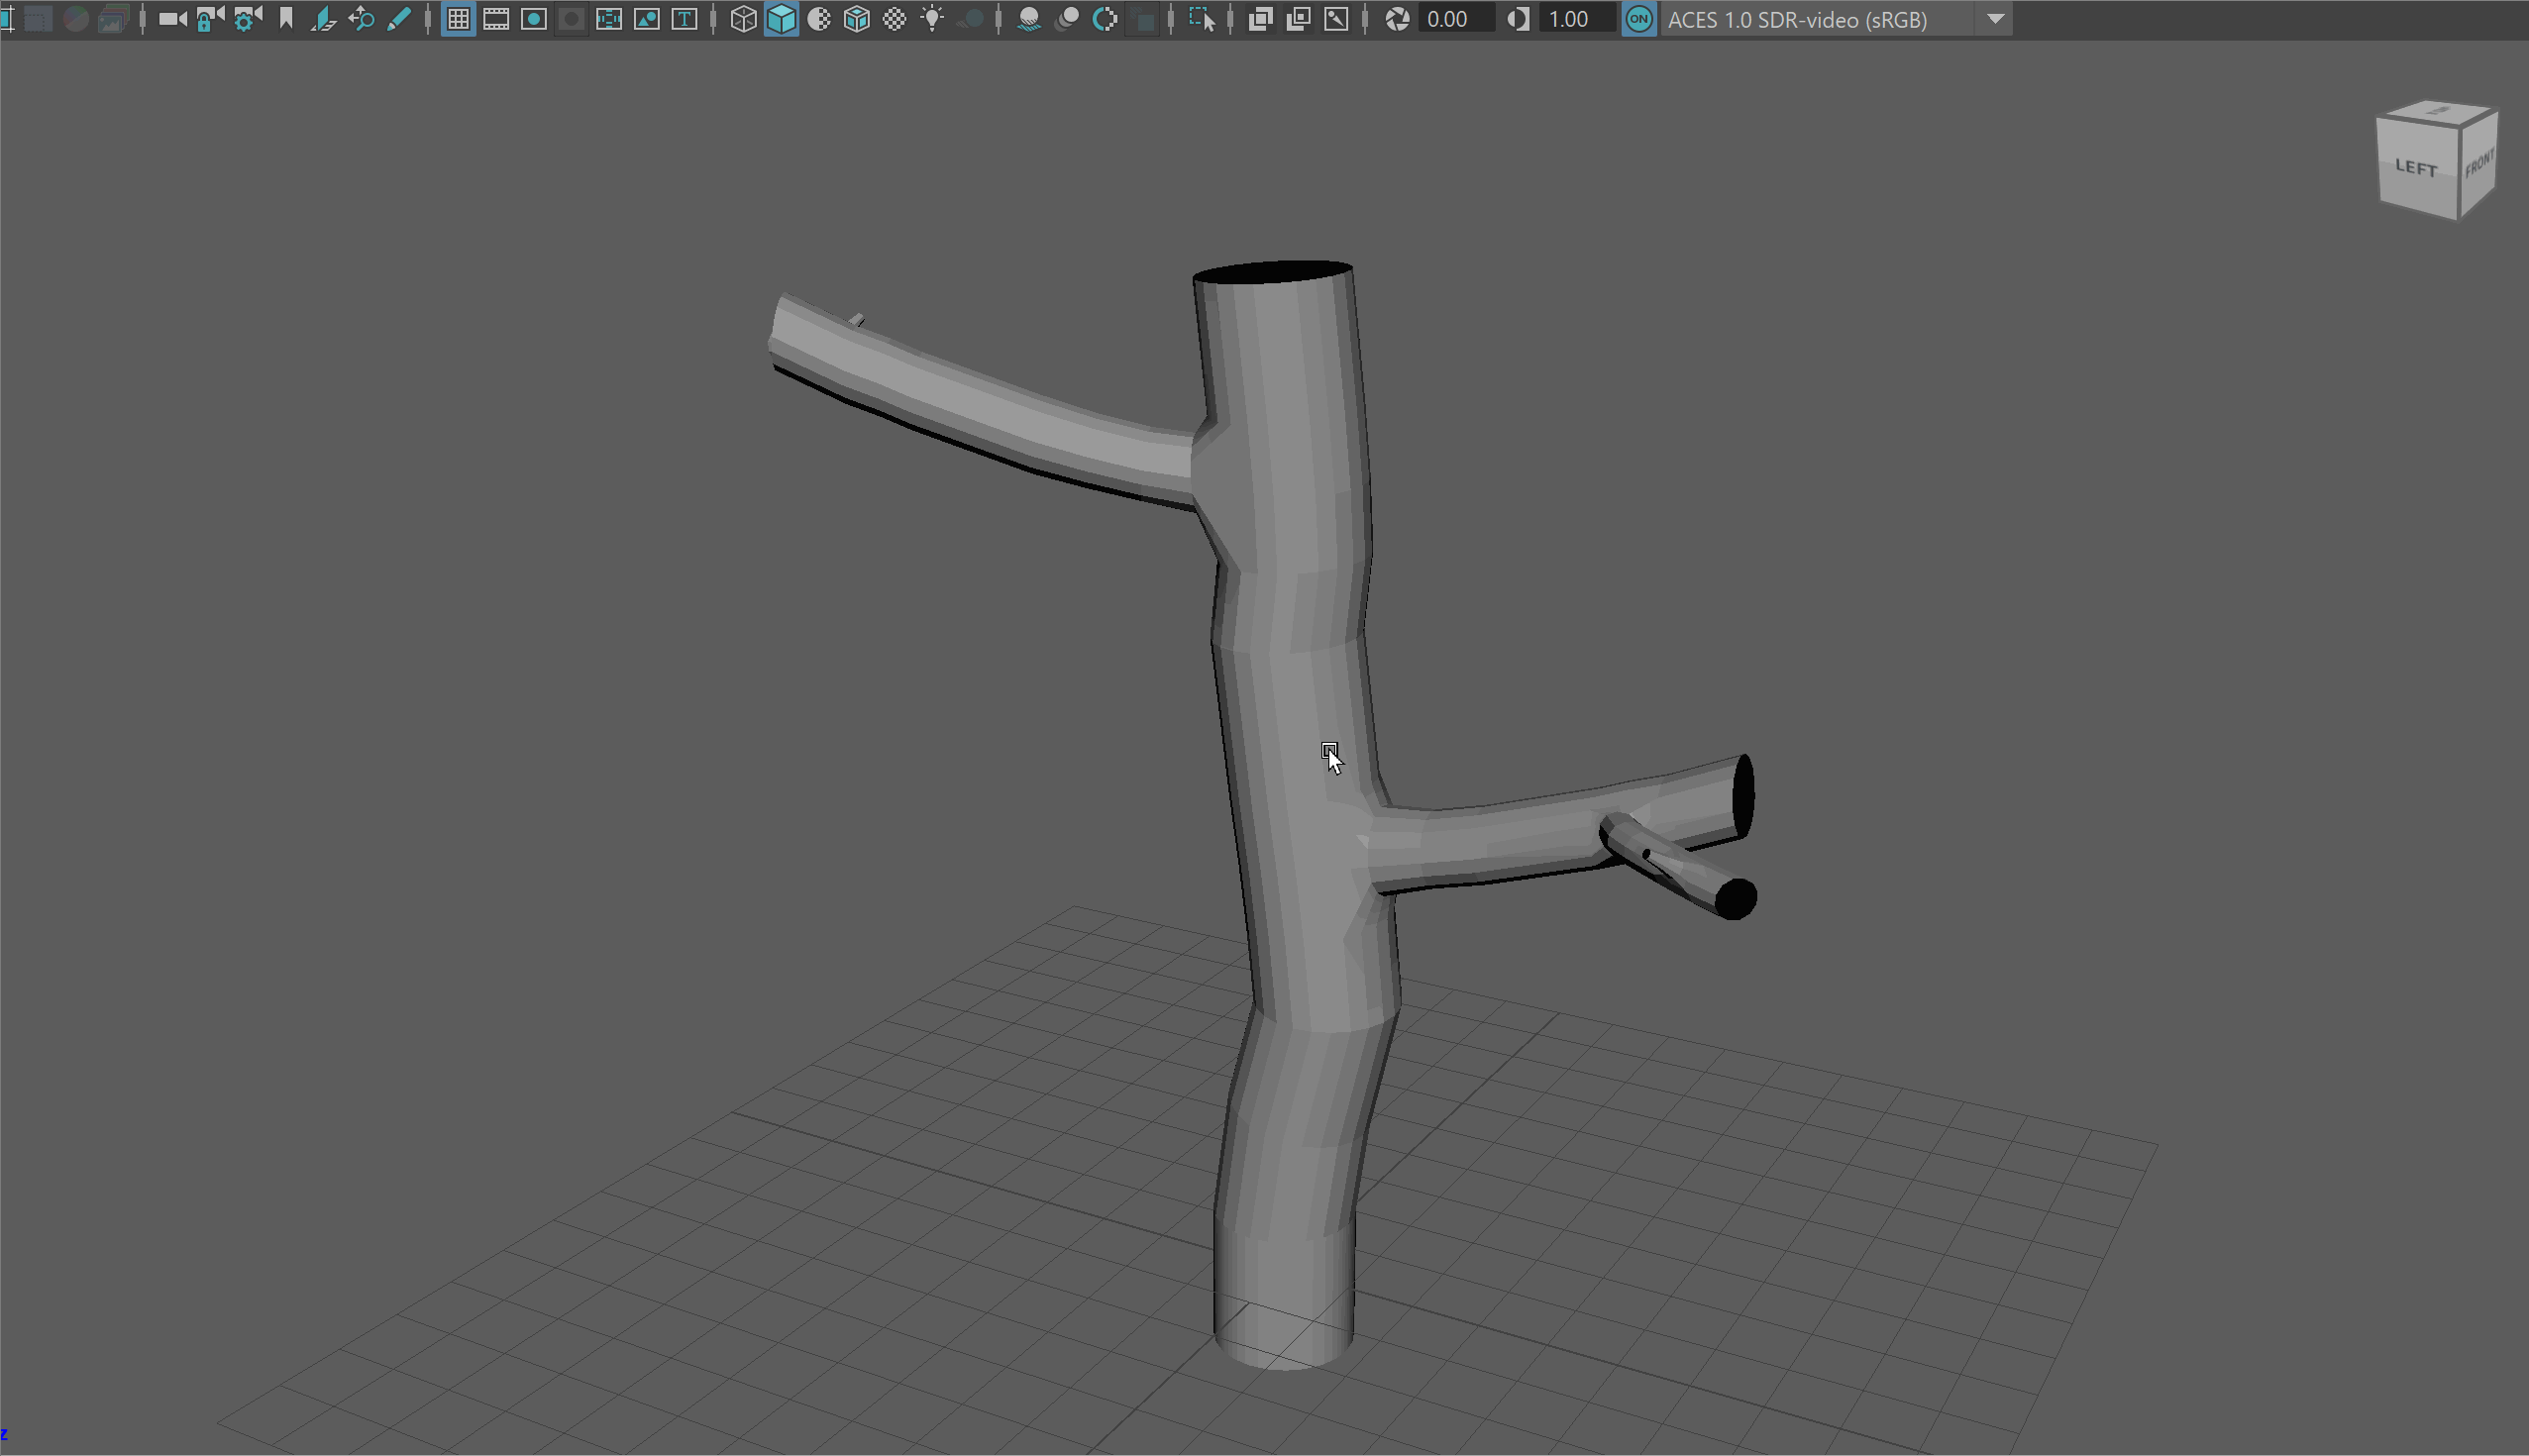
This tutorial will only demonstrate the fundamentals of creating a simple tree. Use what you learn in this tutorial to make a tree with a number of primary, secondary and tertiary branches.
You can use a tree on campus for inspiration!
Submit
- Submit three screen shots of you tree to Discord
- Upload a new Tree project to your folder on the Server
Getting Started
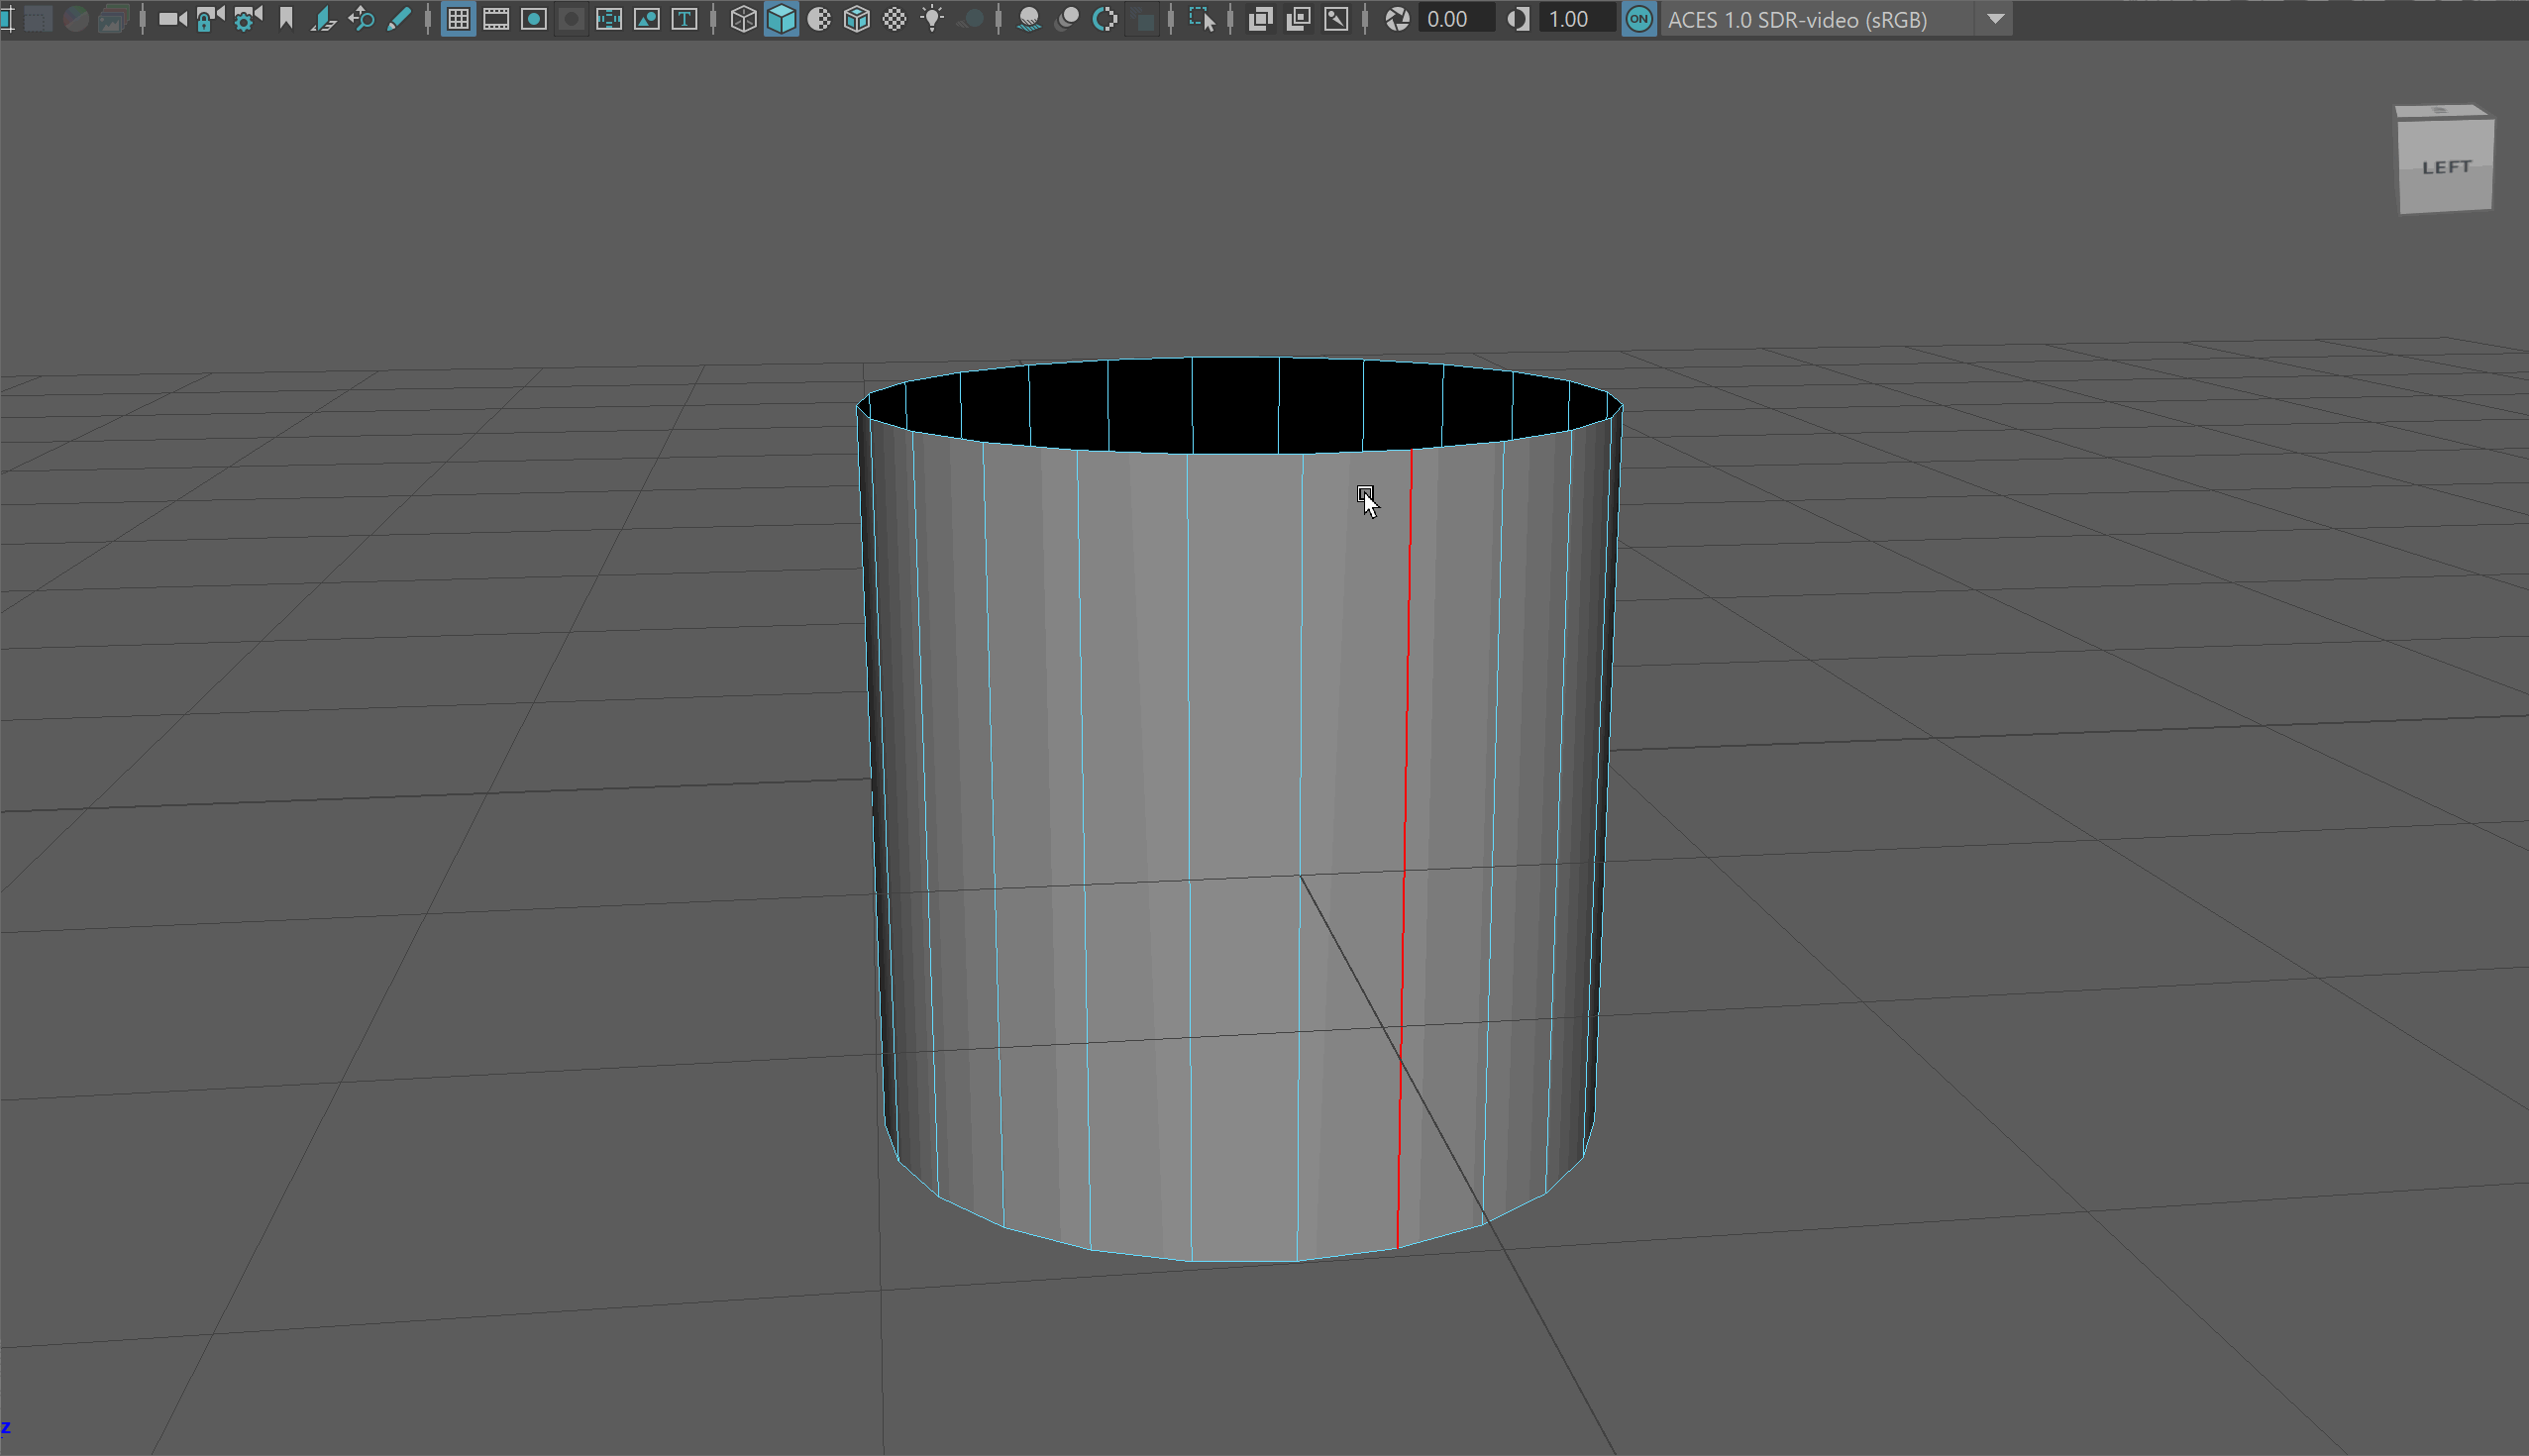
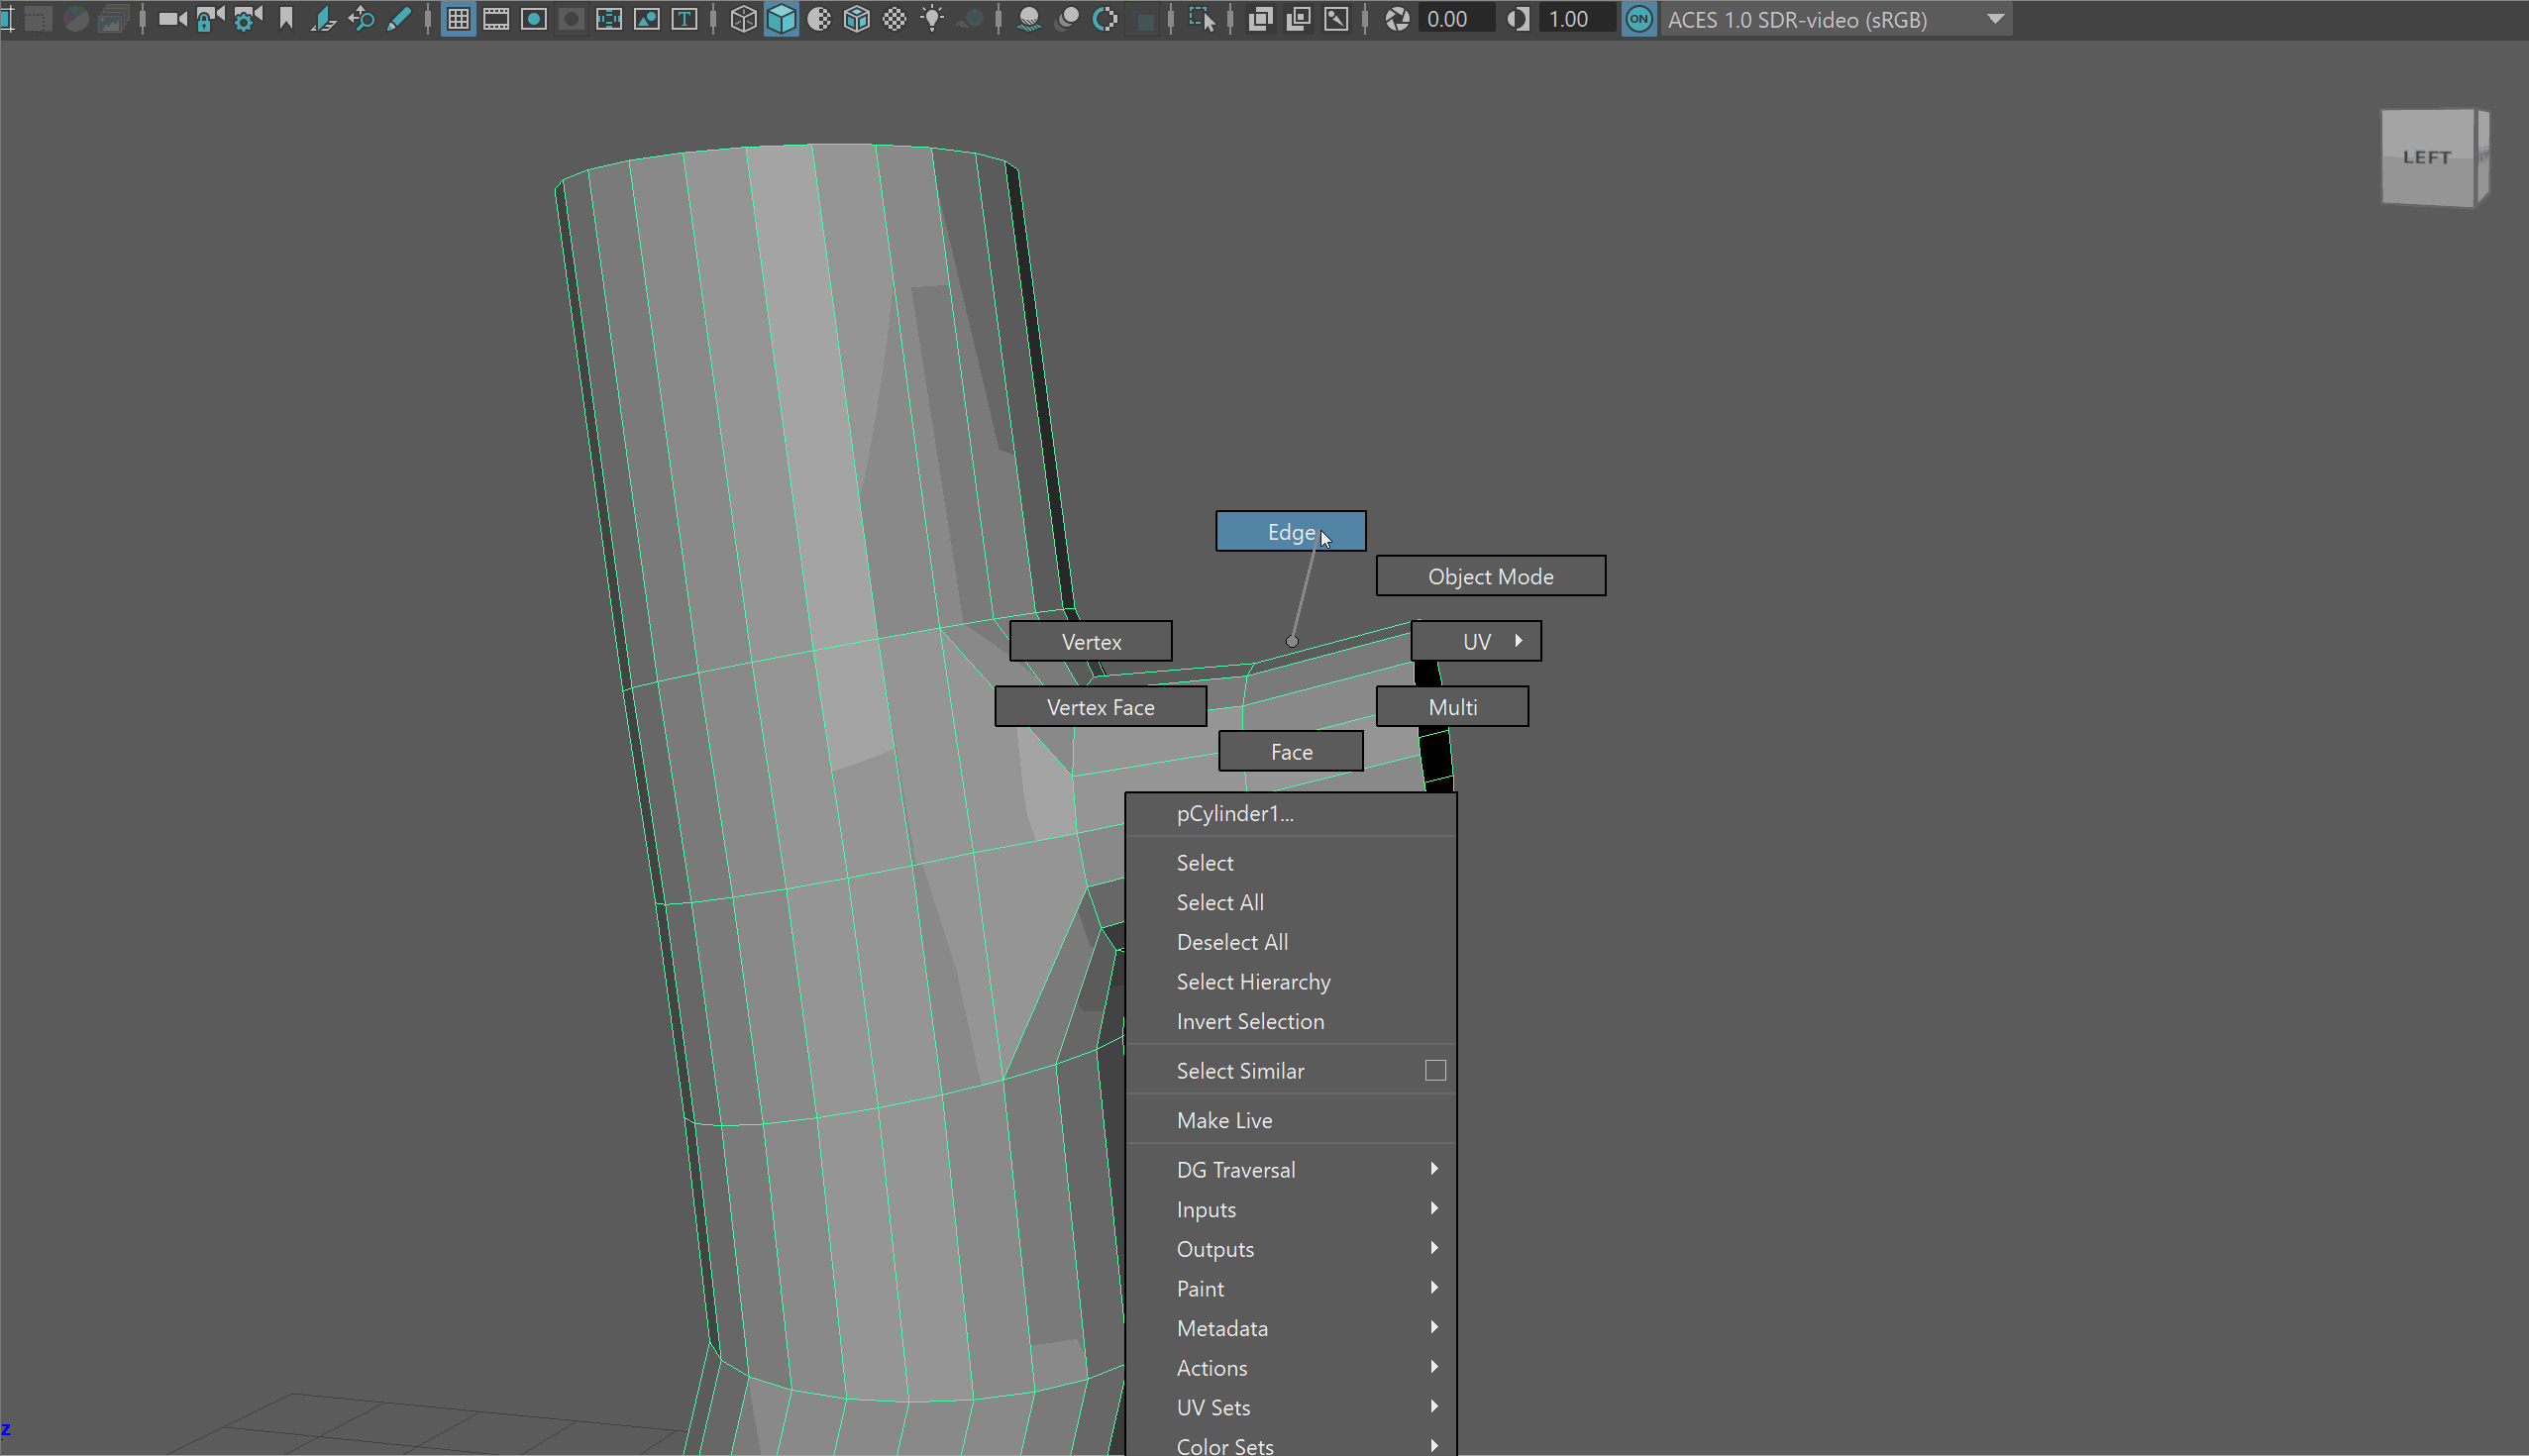
- Start by creating a cylinder with 24 sides. The reason we are starting with 24 sides is so we have enough room to create branches.
- This will be our trunk. Let's delete the top and bottom faces.

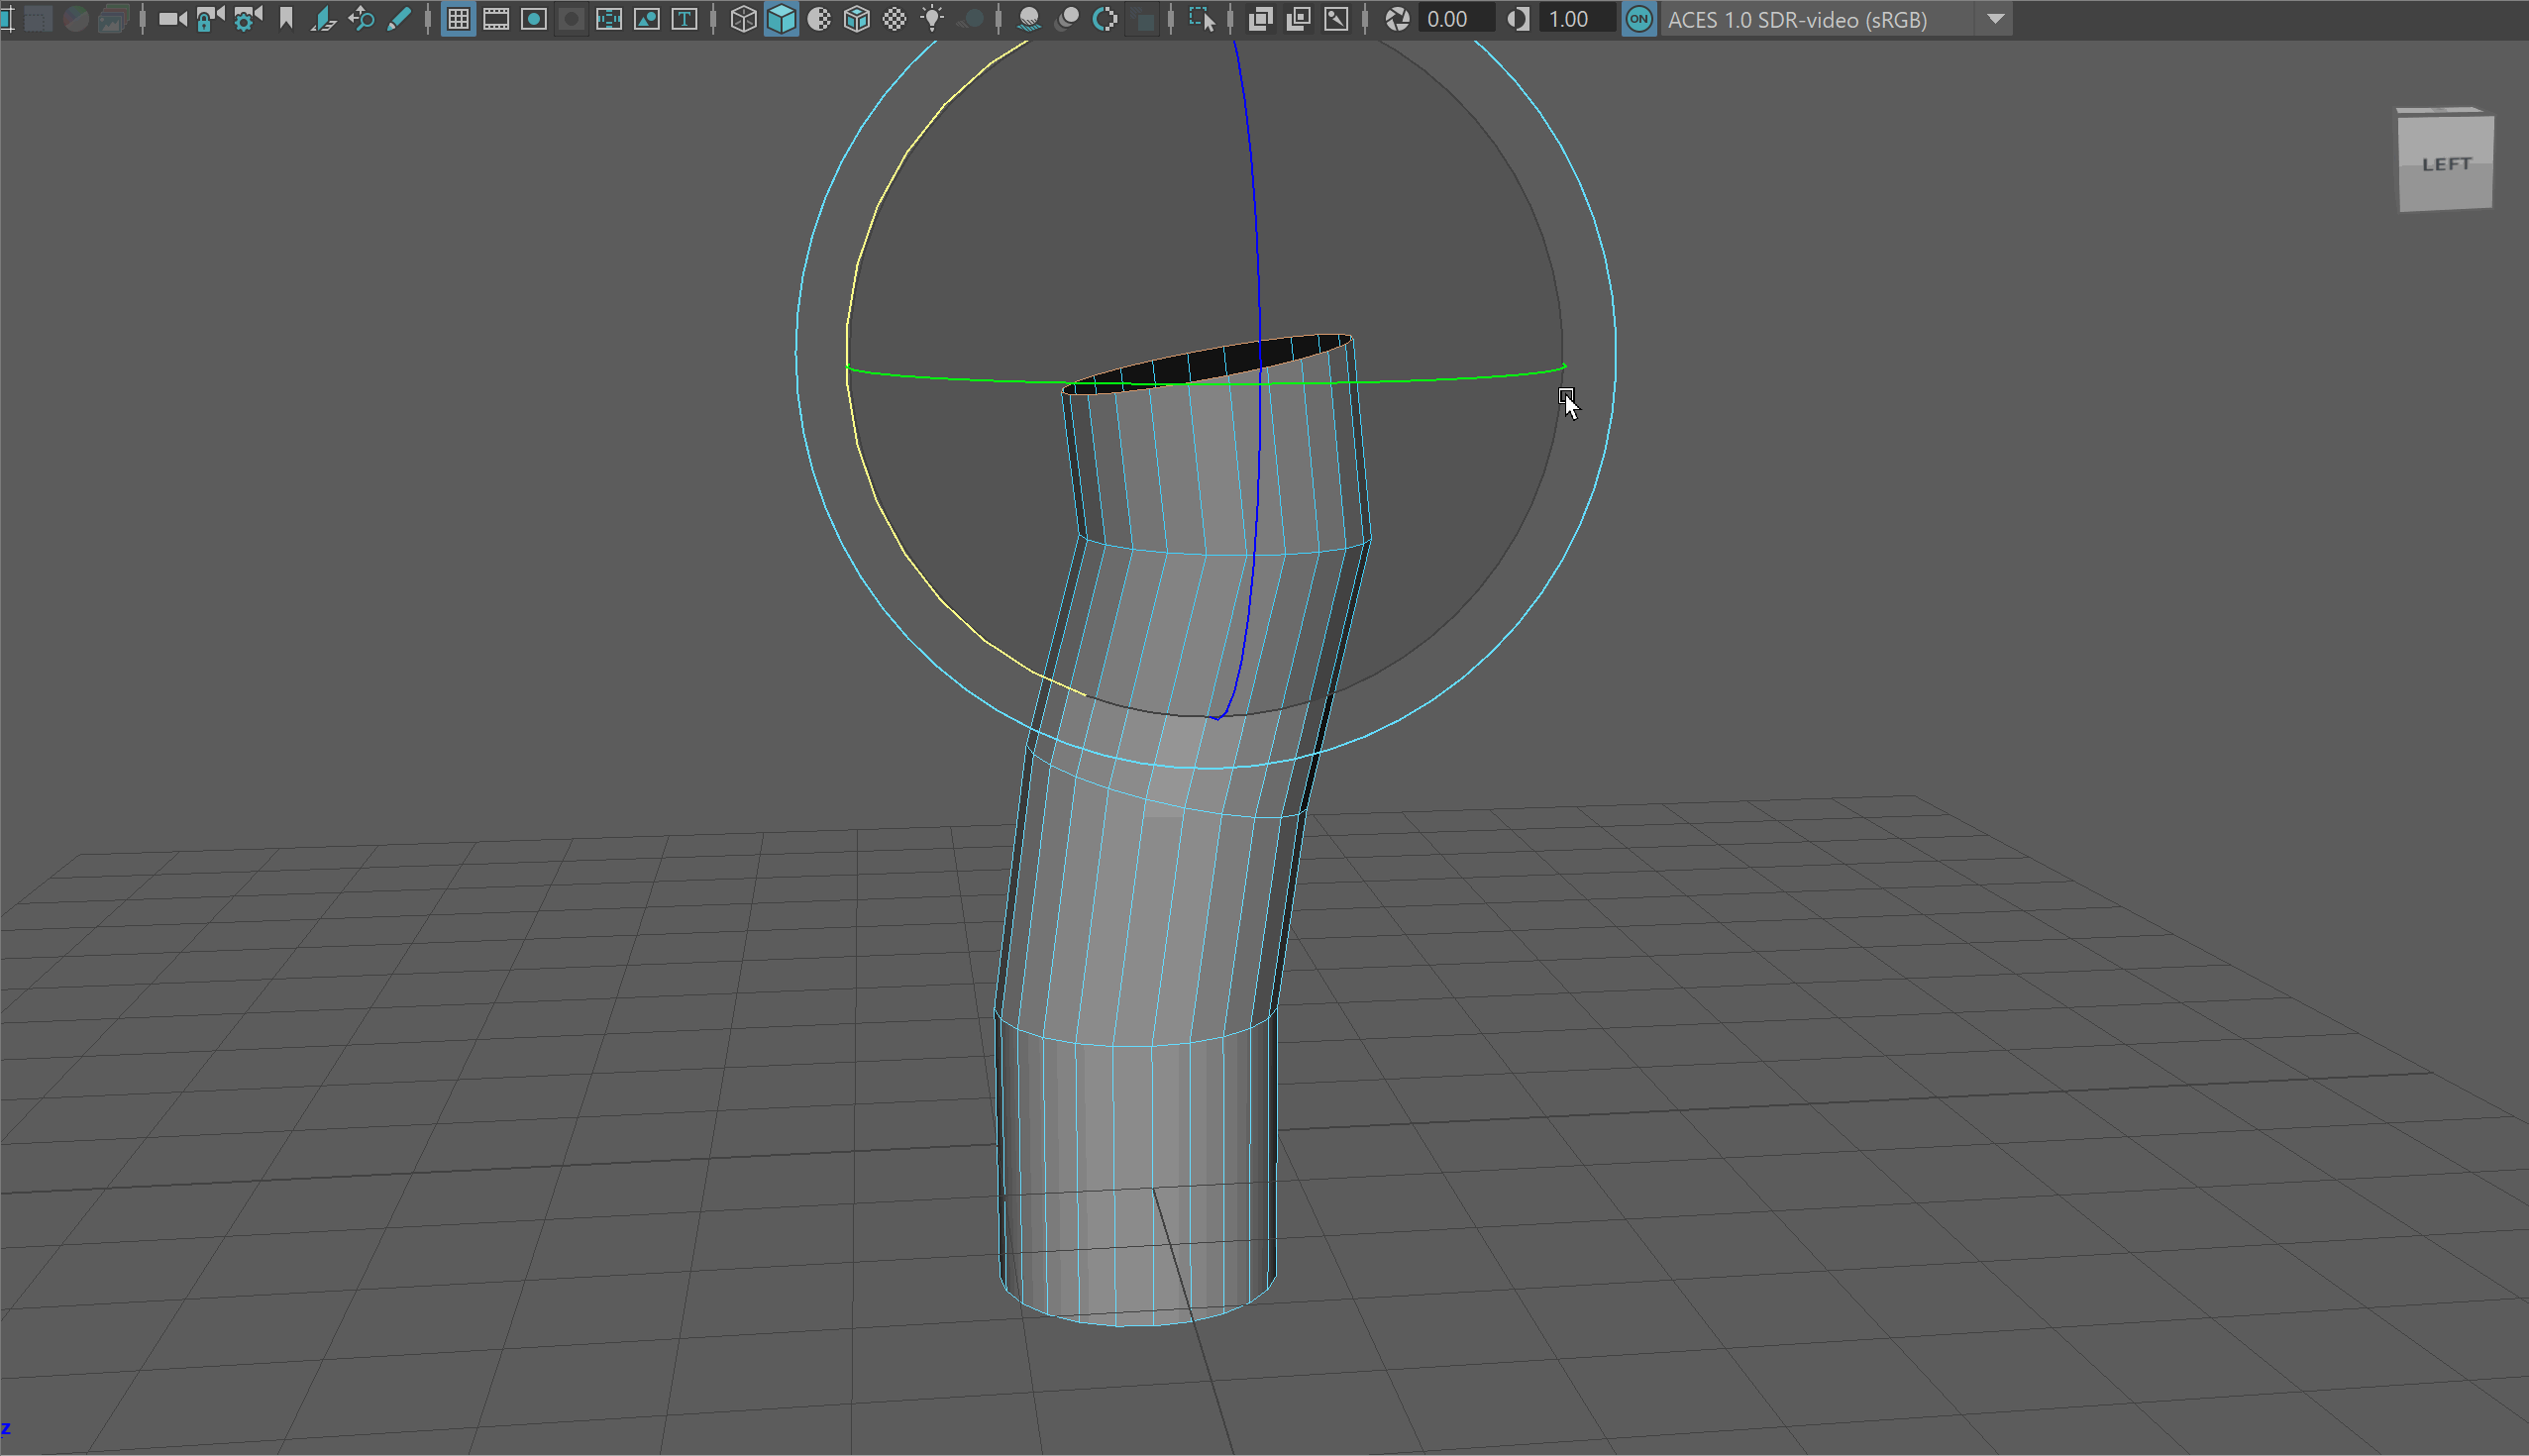
- Select the top edge loop and begin to extrude your model upward - scaling and rotating to give it some interesting shapes.
Making Primary Branches
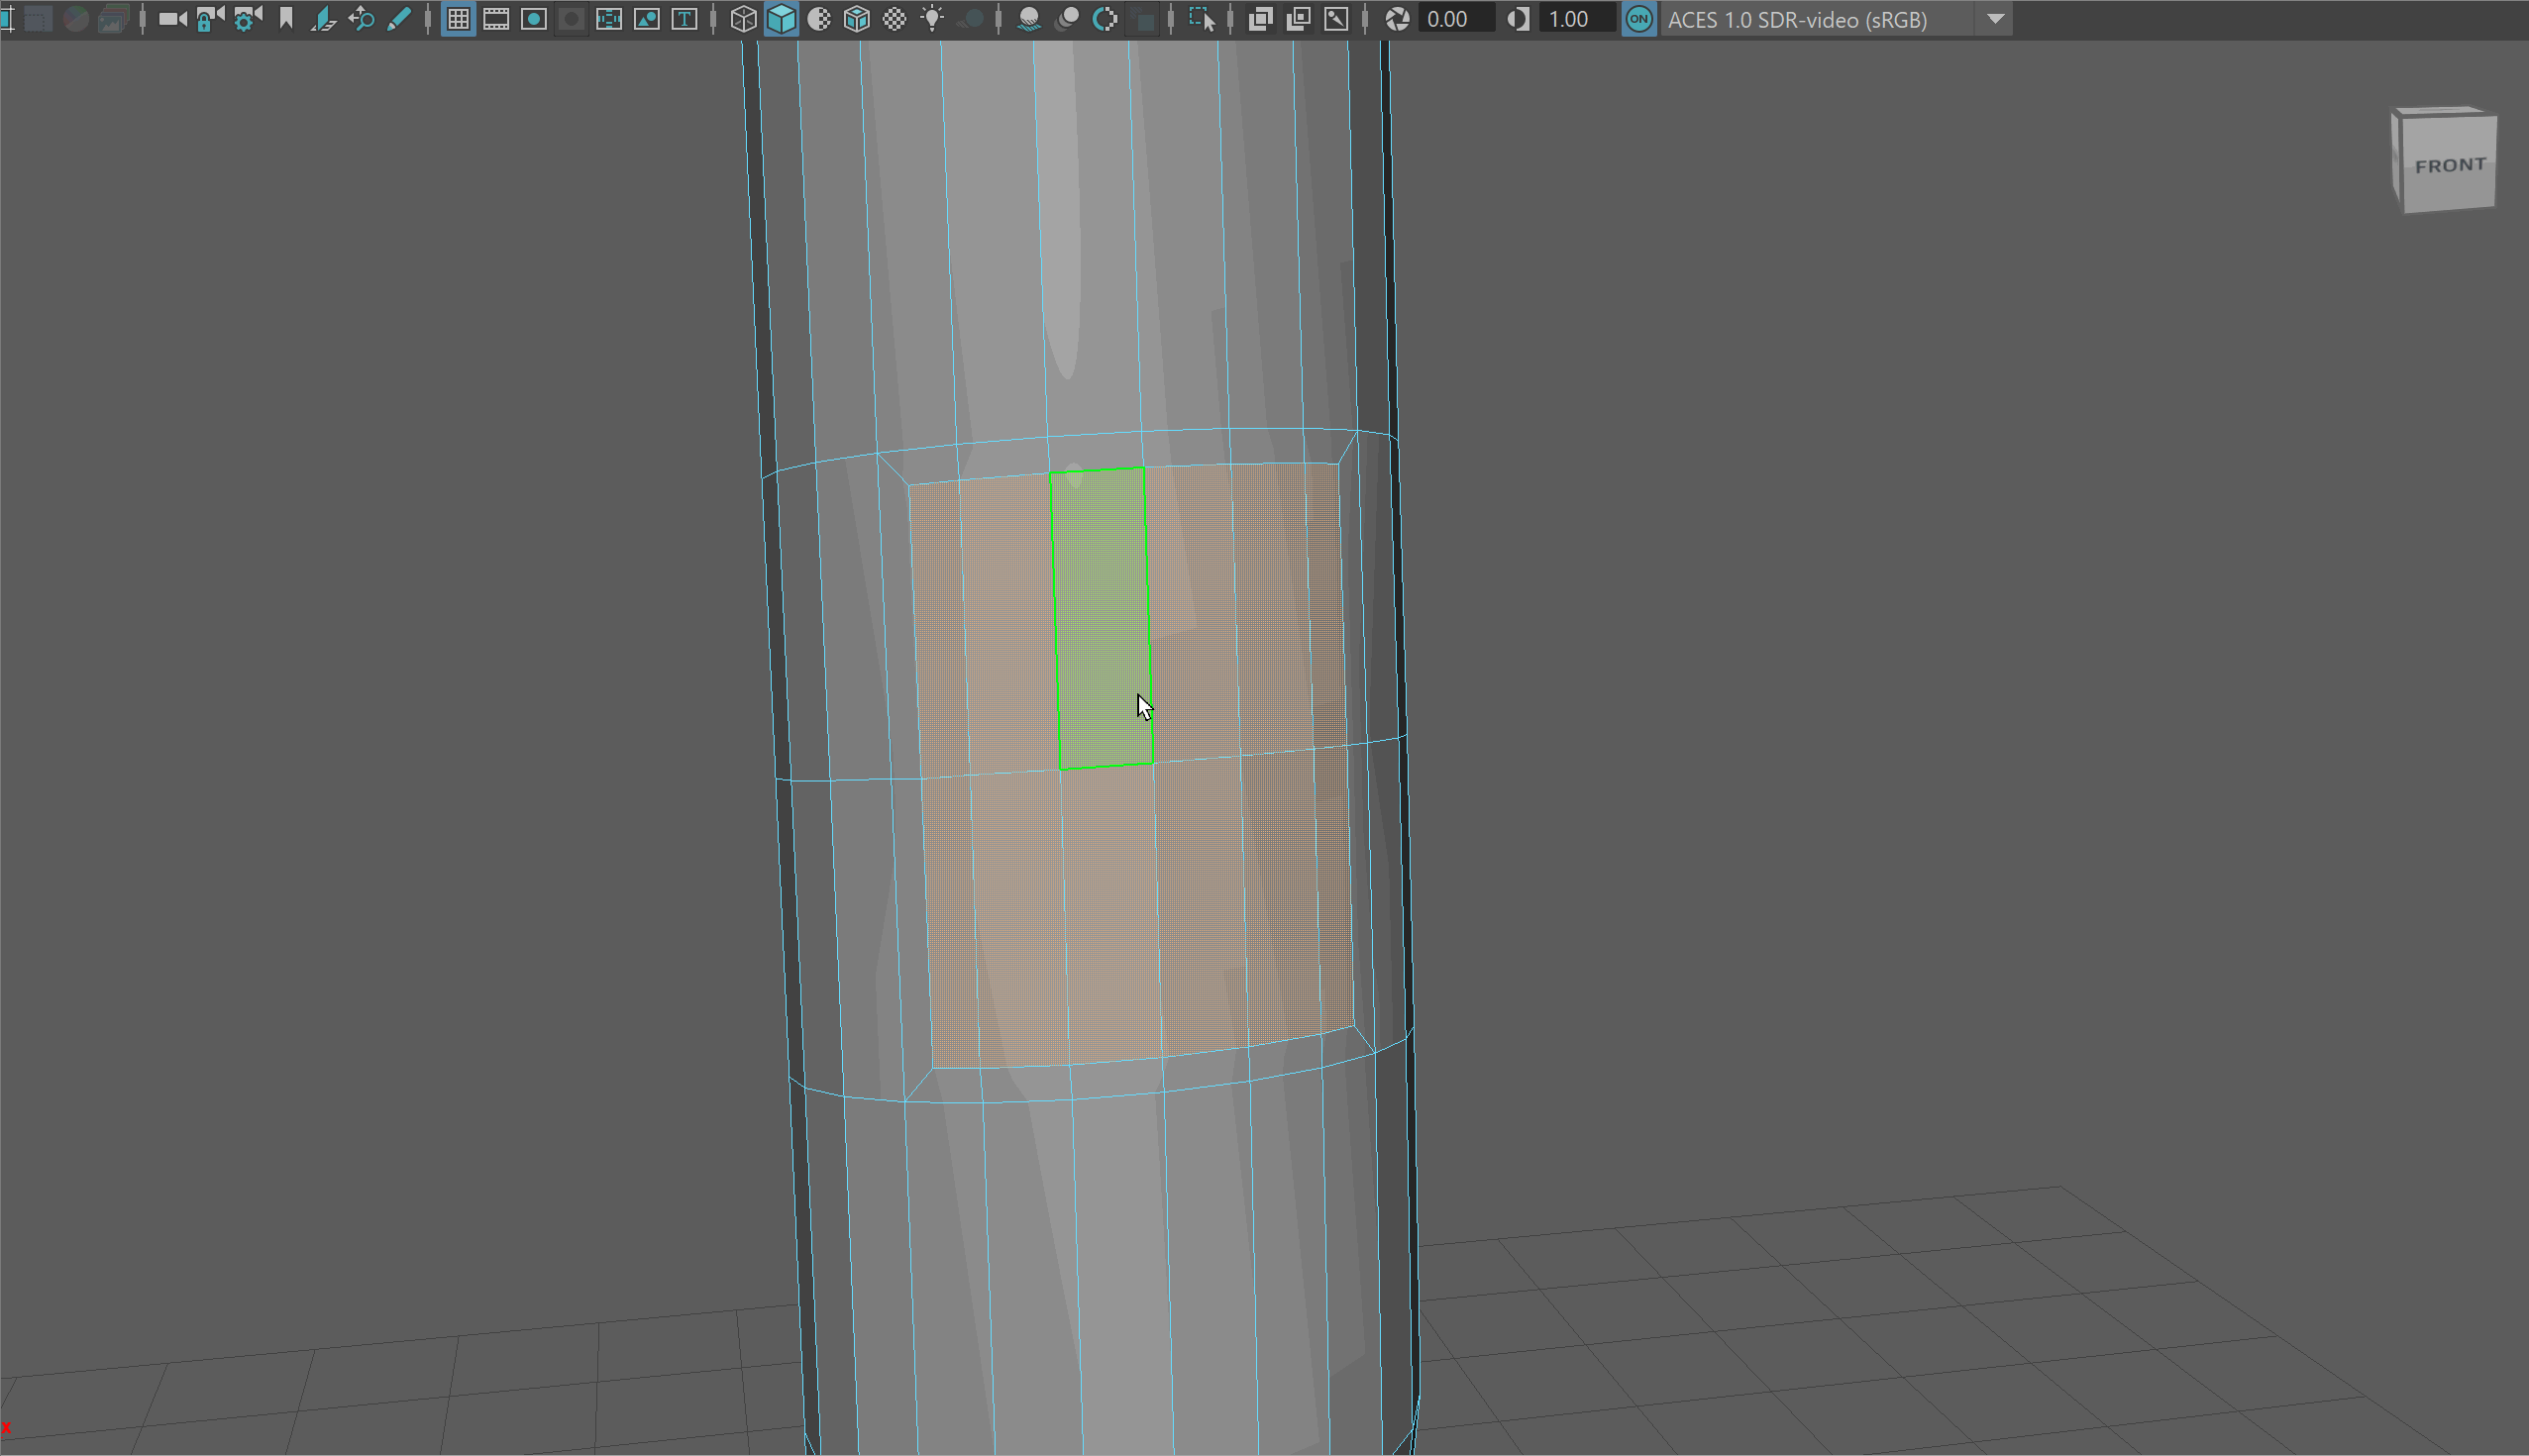
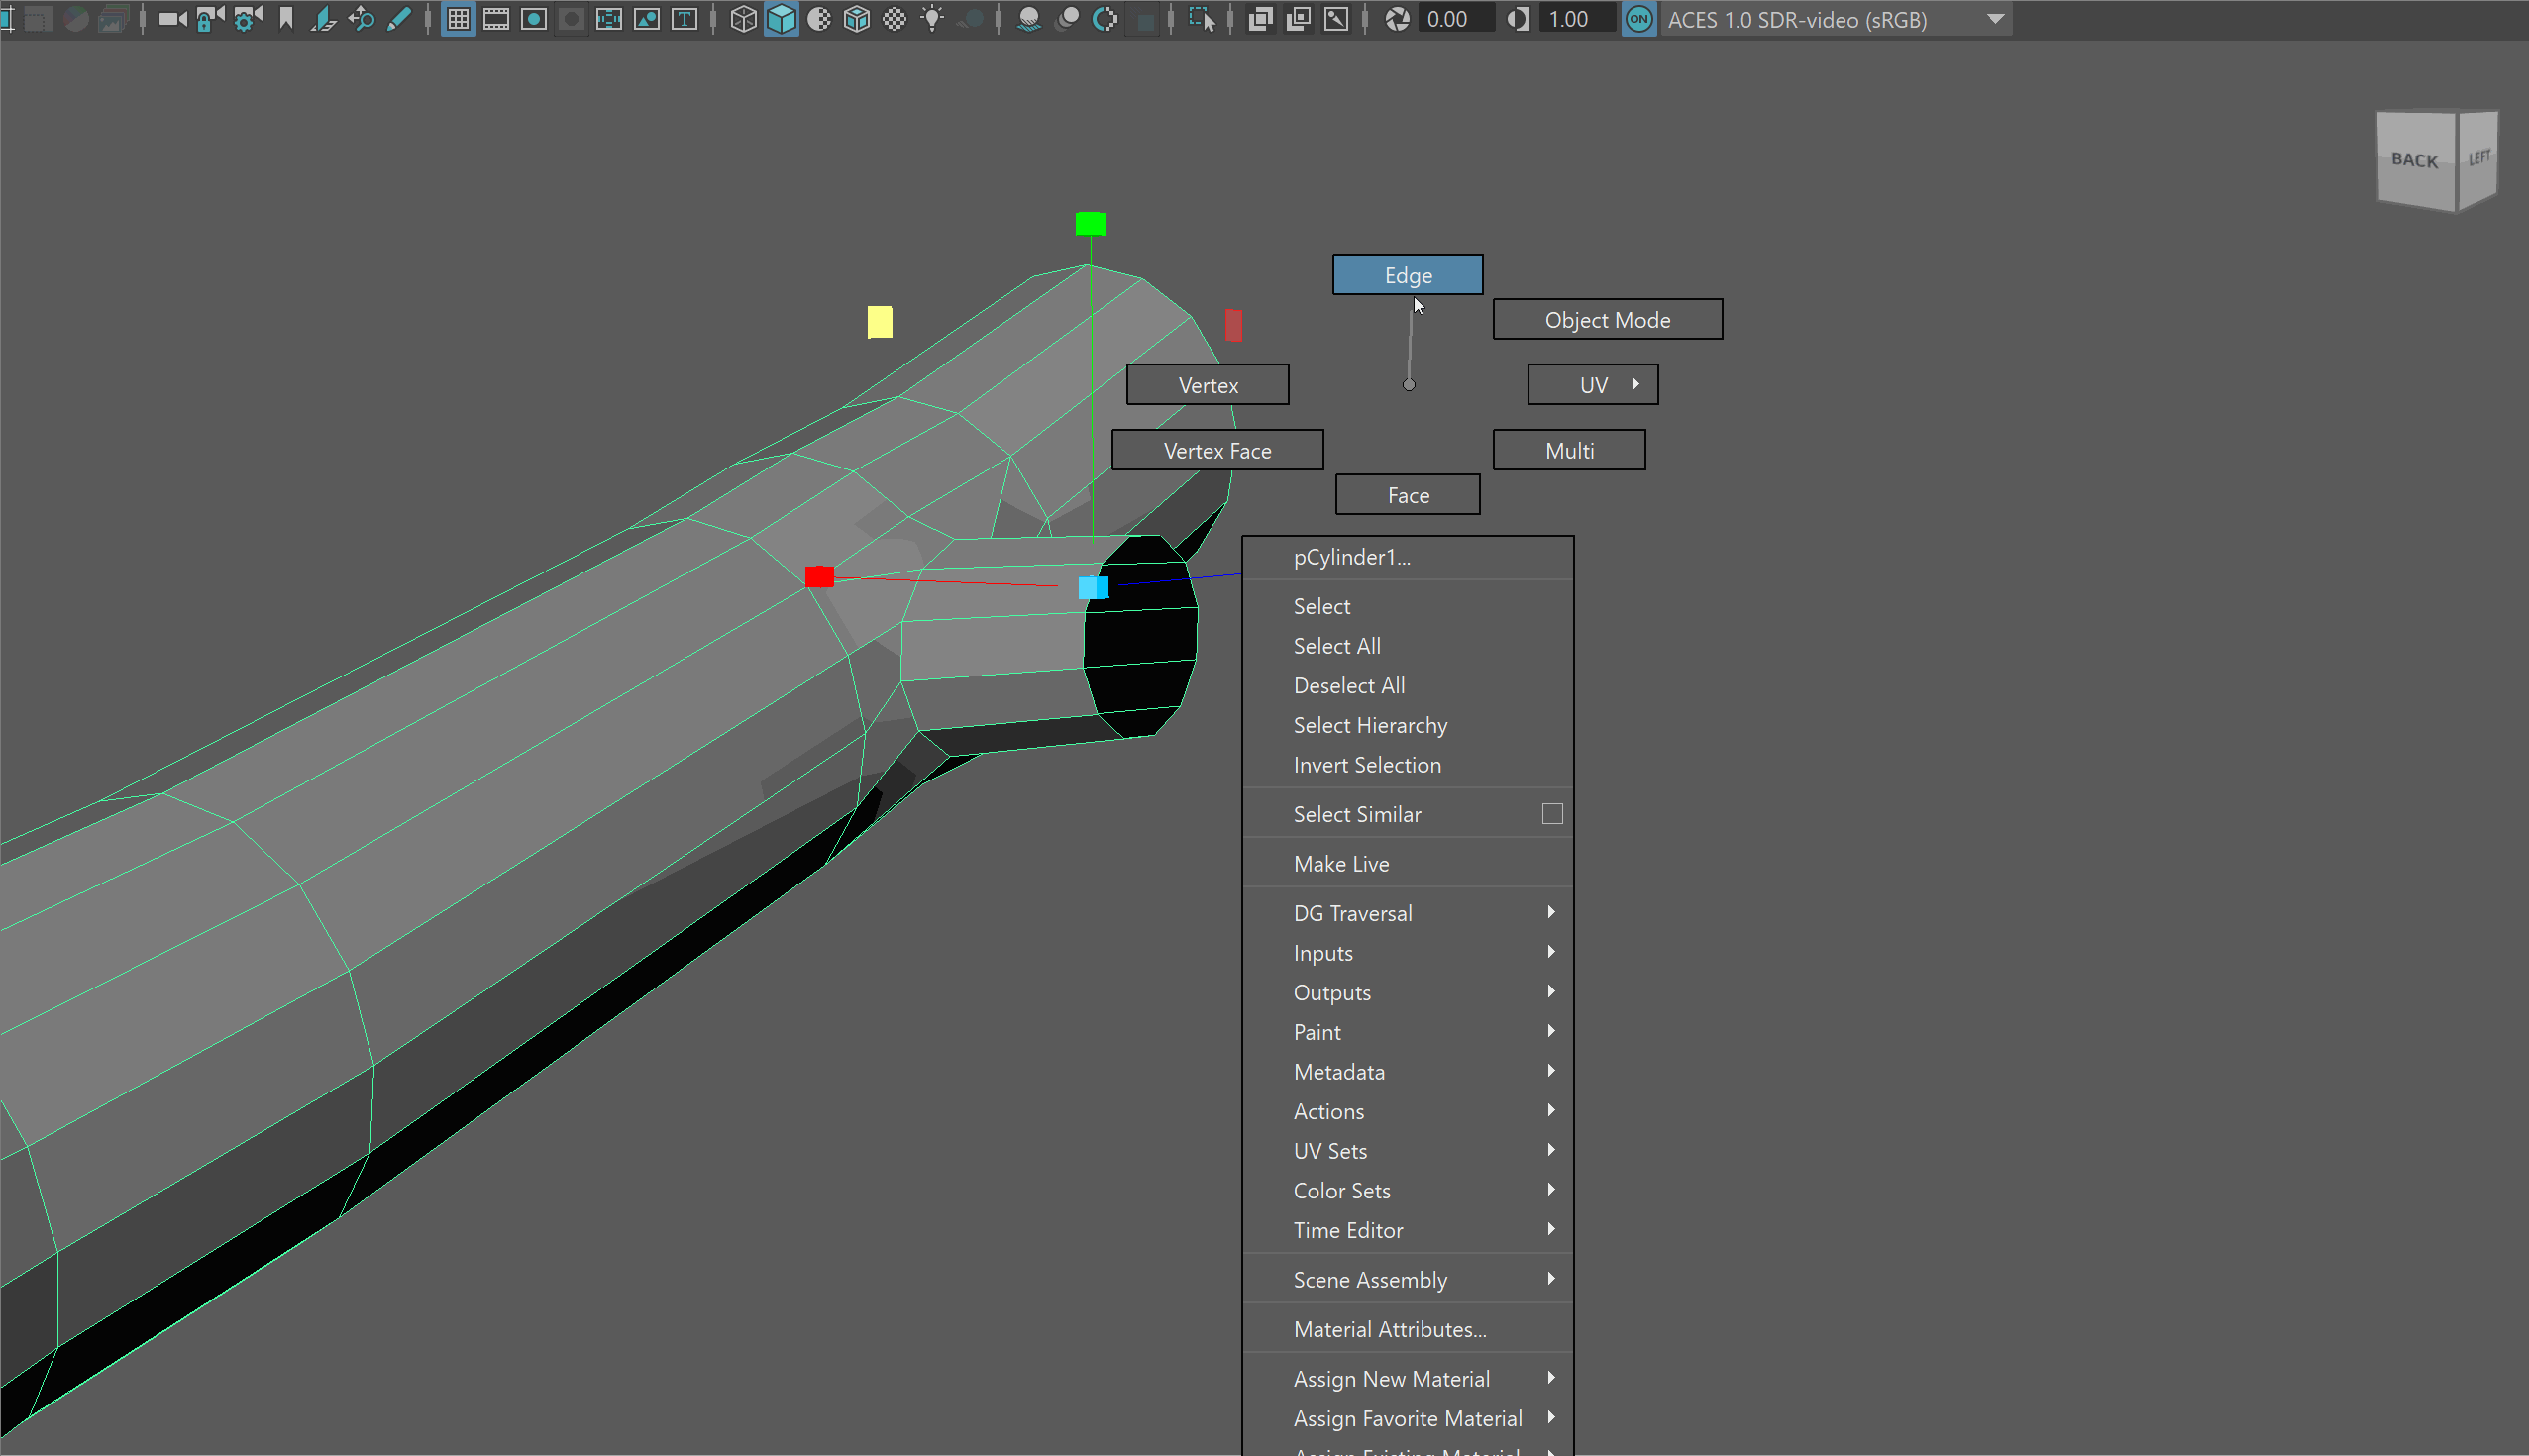
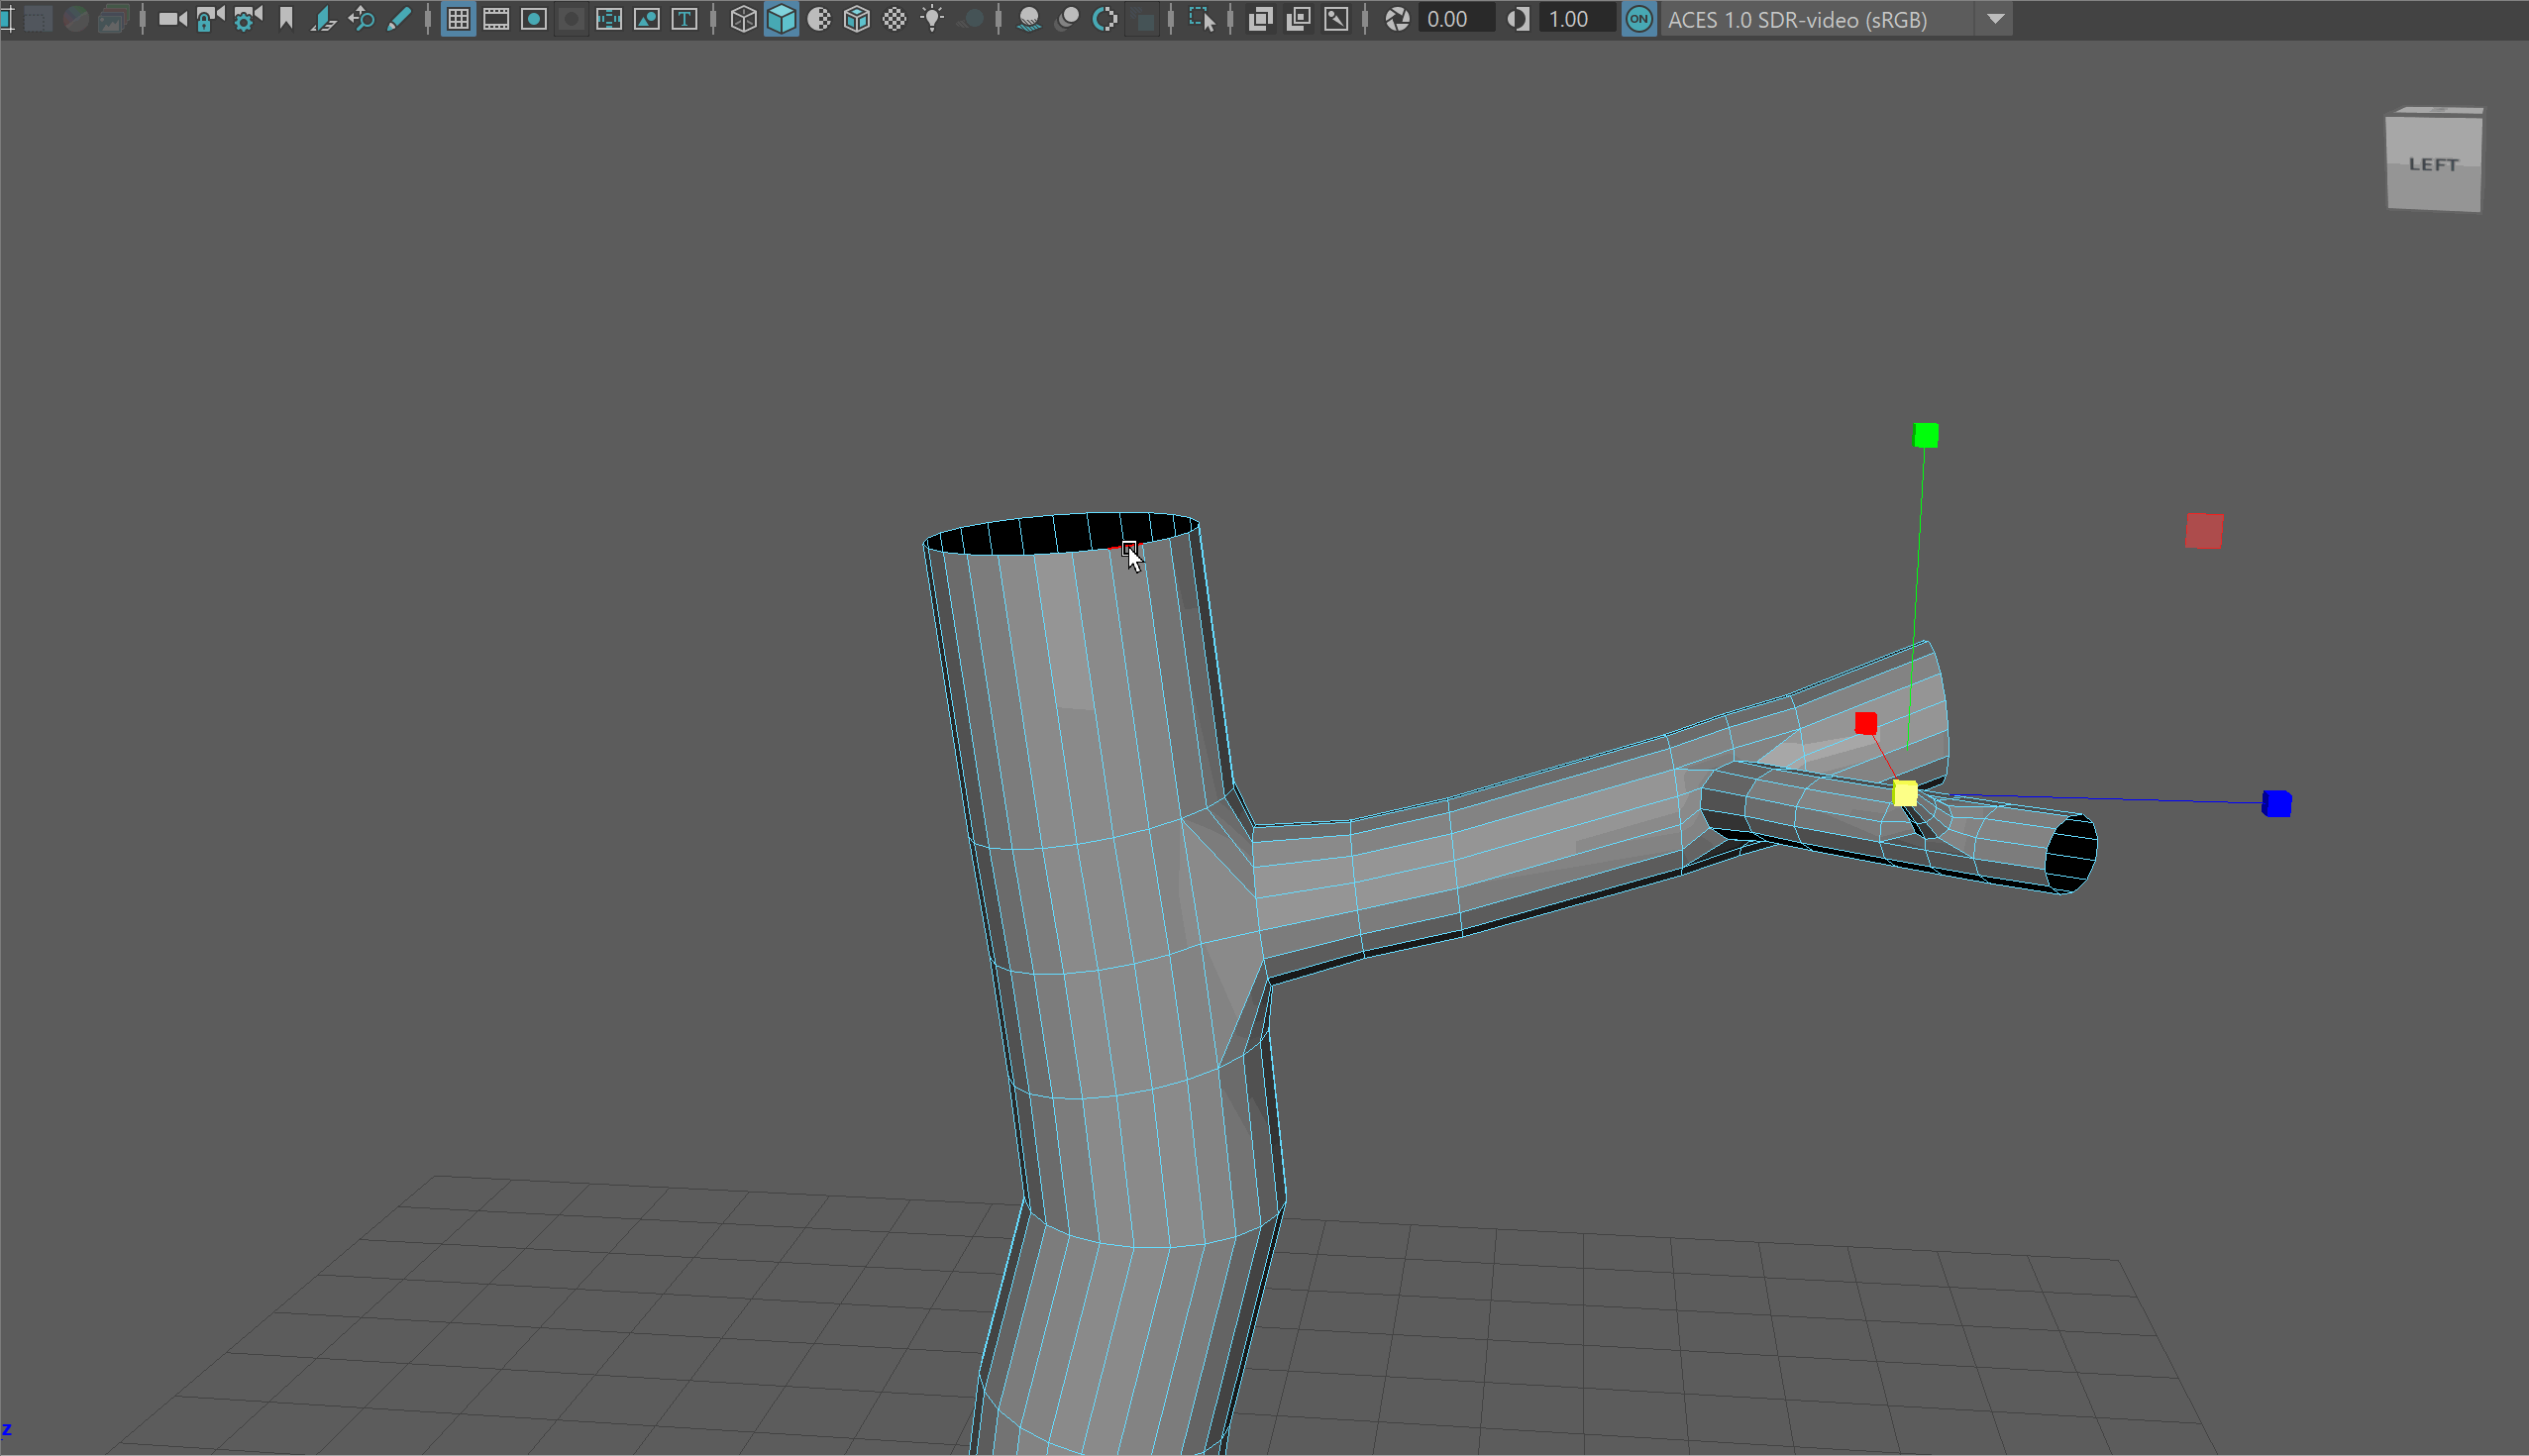
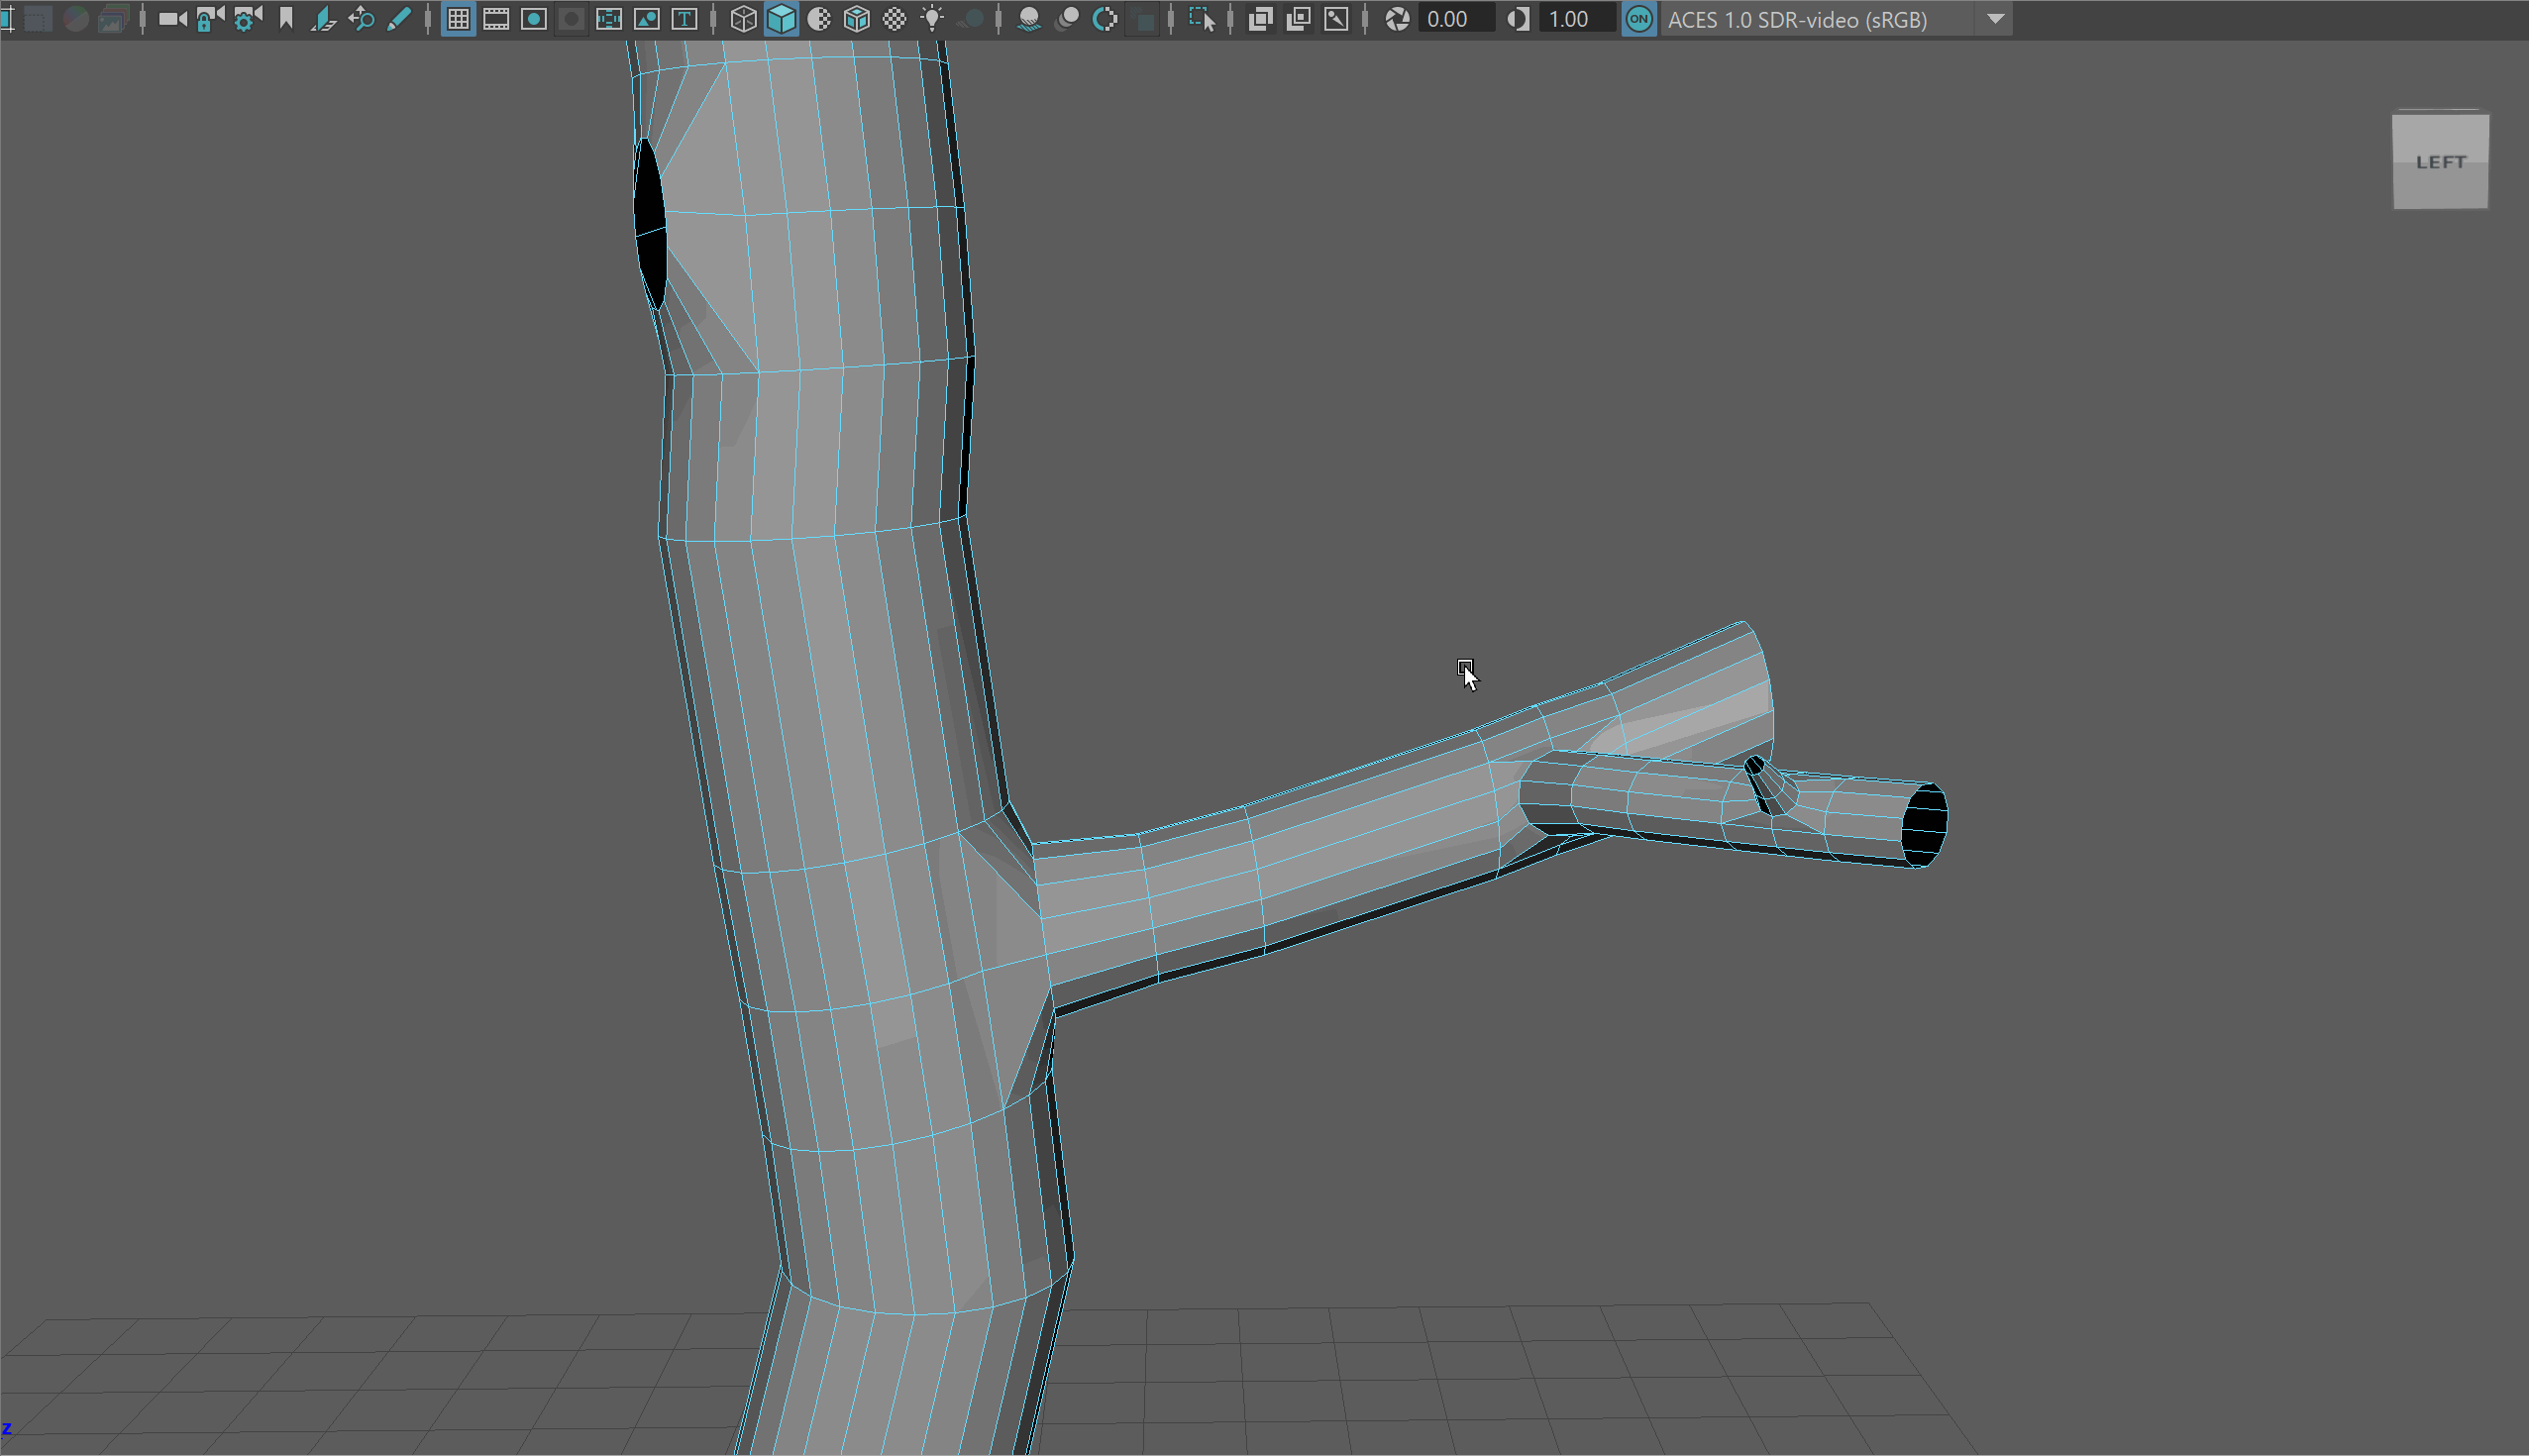
- Extrude 2 segments that are around the same size and will be equal to the diameter of your new branch. Extrude once more to continue the trunk.
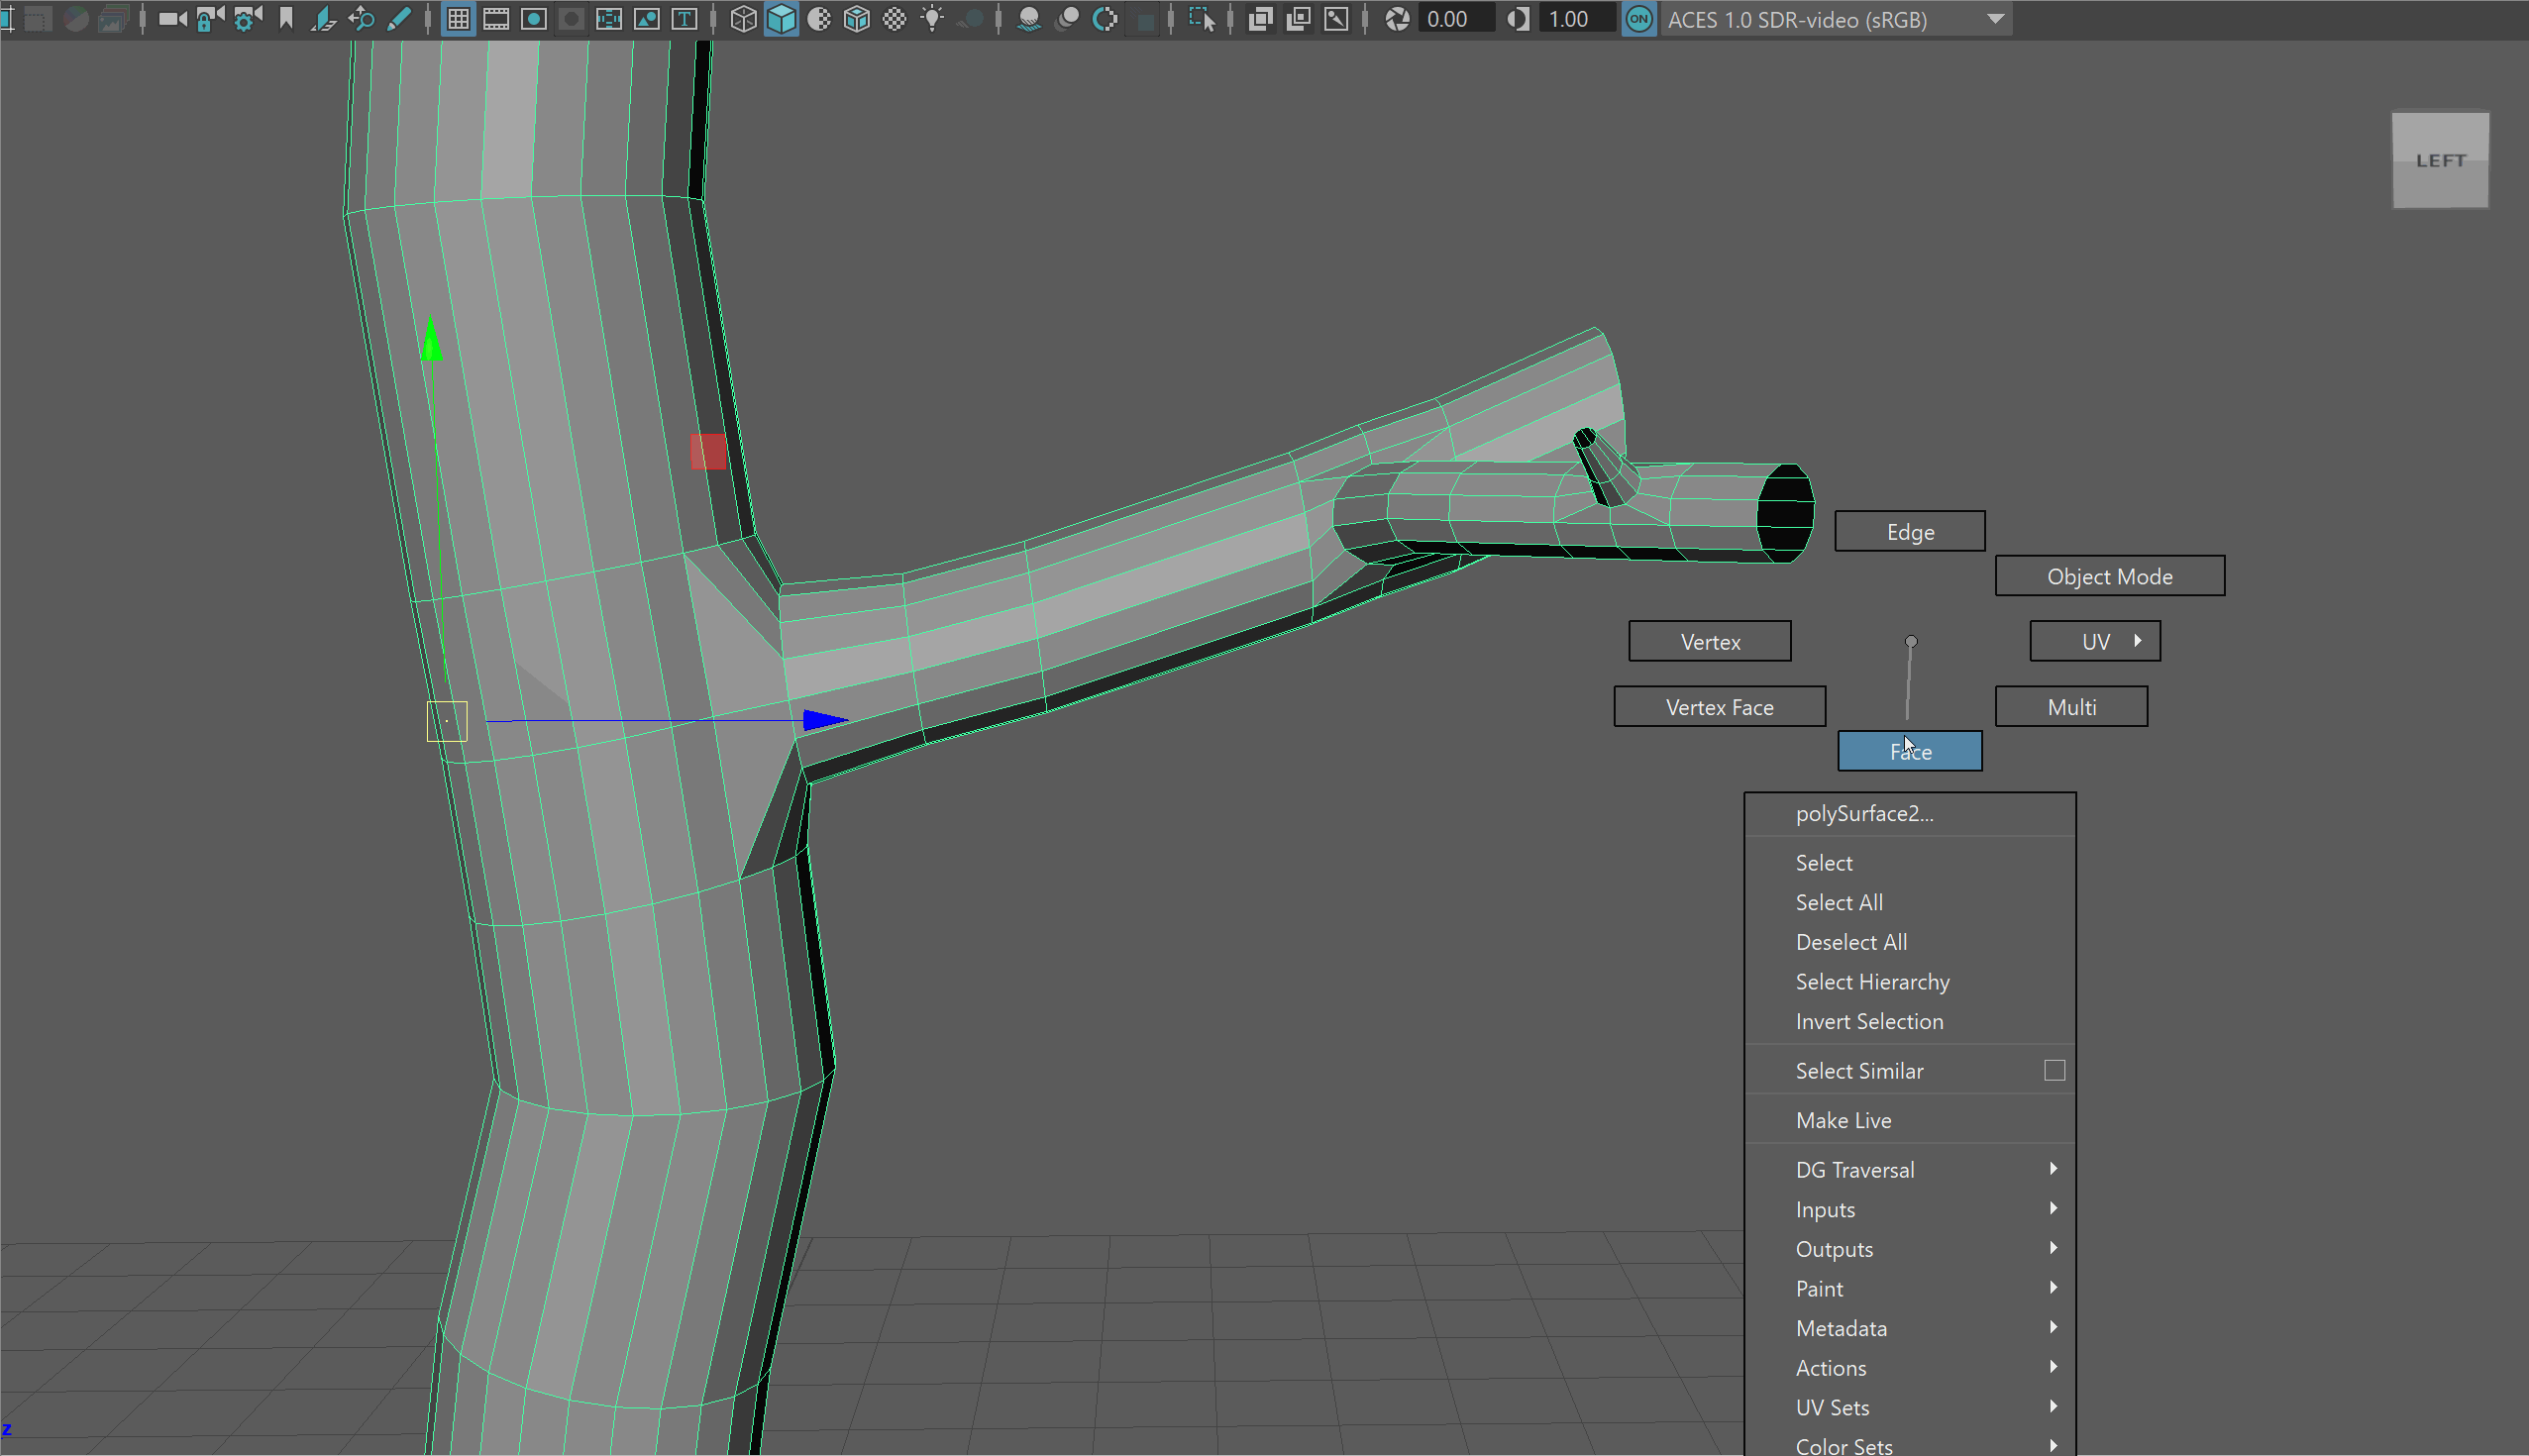
- In the 2 segments we extruded, we want to extrude a new branch that has 16 sides. To do this we will select 12 faces: 6 on the top and 6 on the bottom. You can notice that the border of these selected faces has 16 sides.
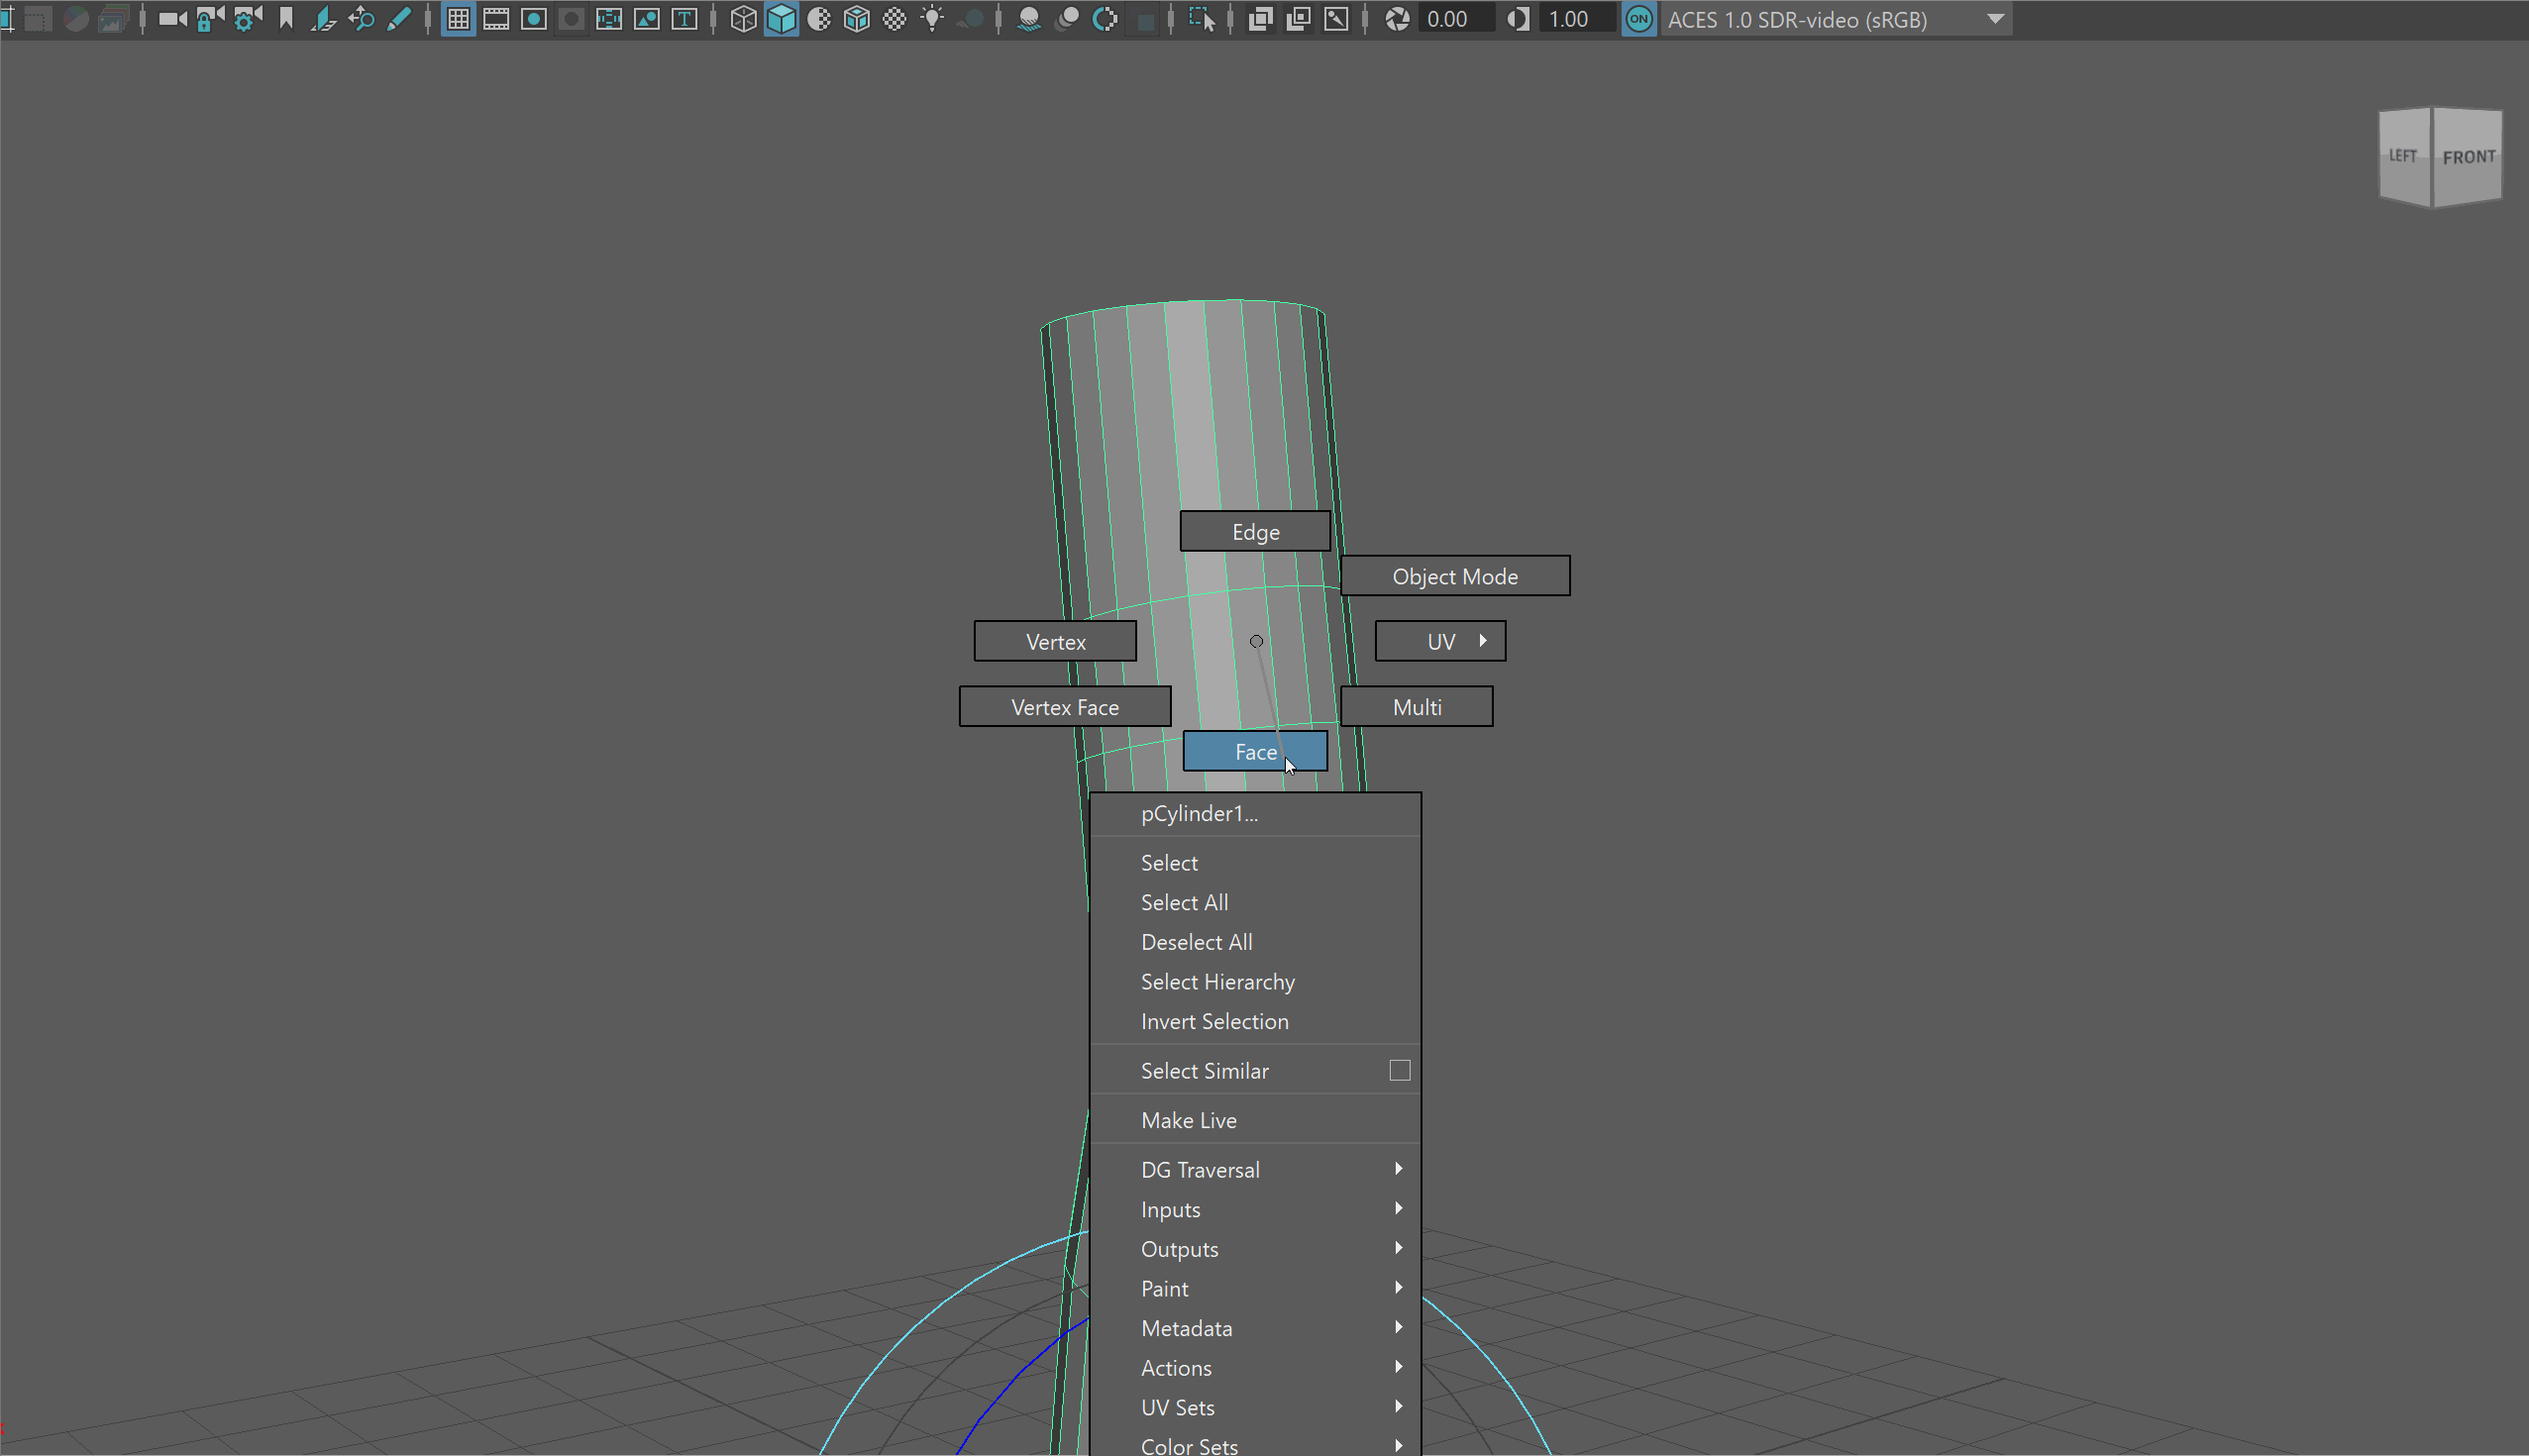
- Use the extrude tool to offset the faces by around .1.
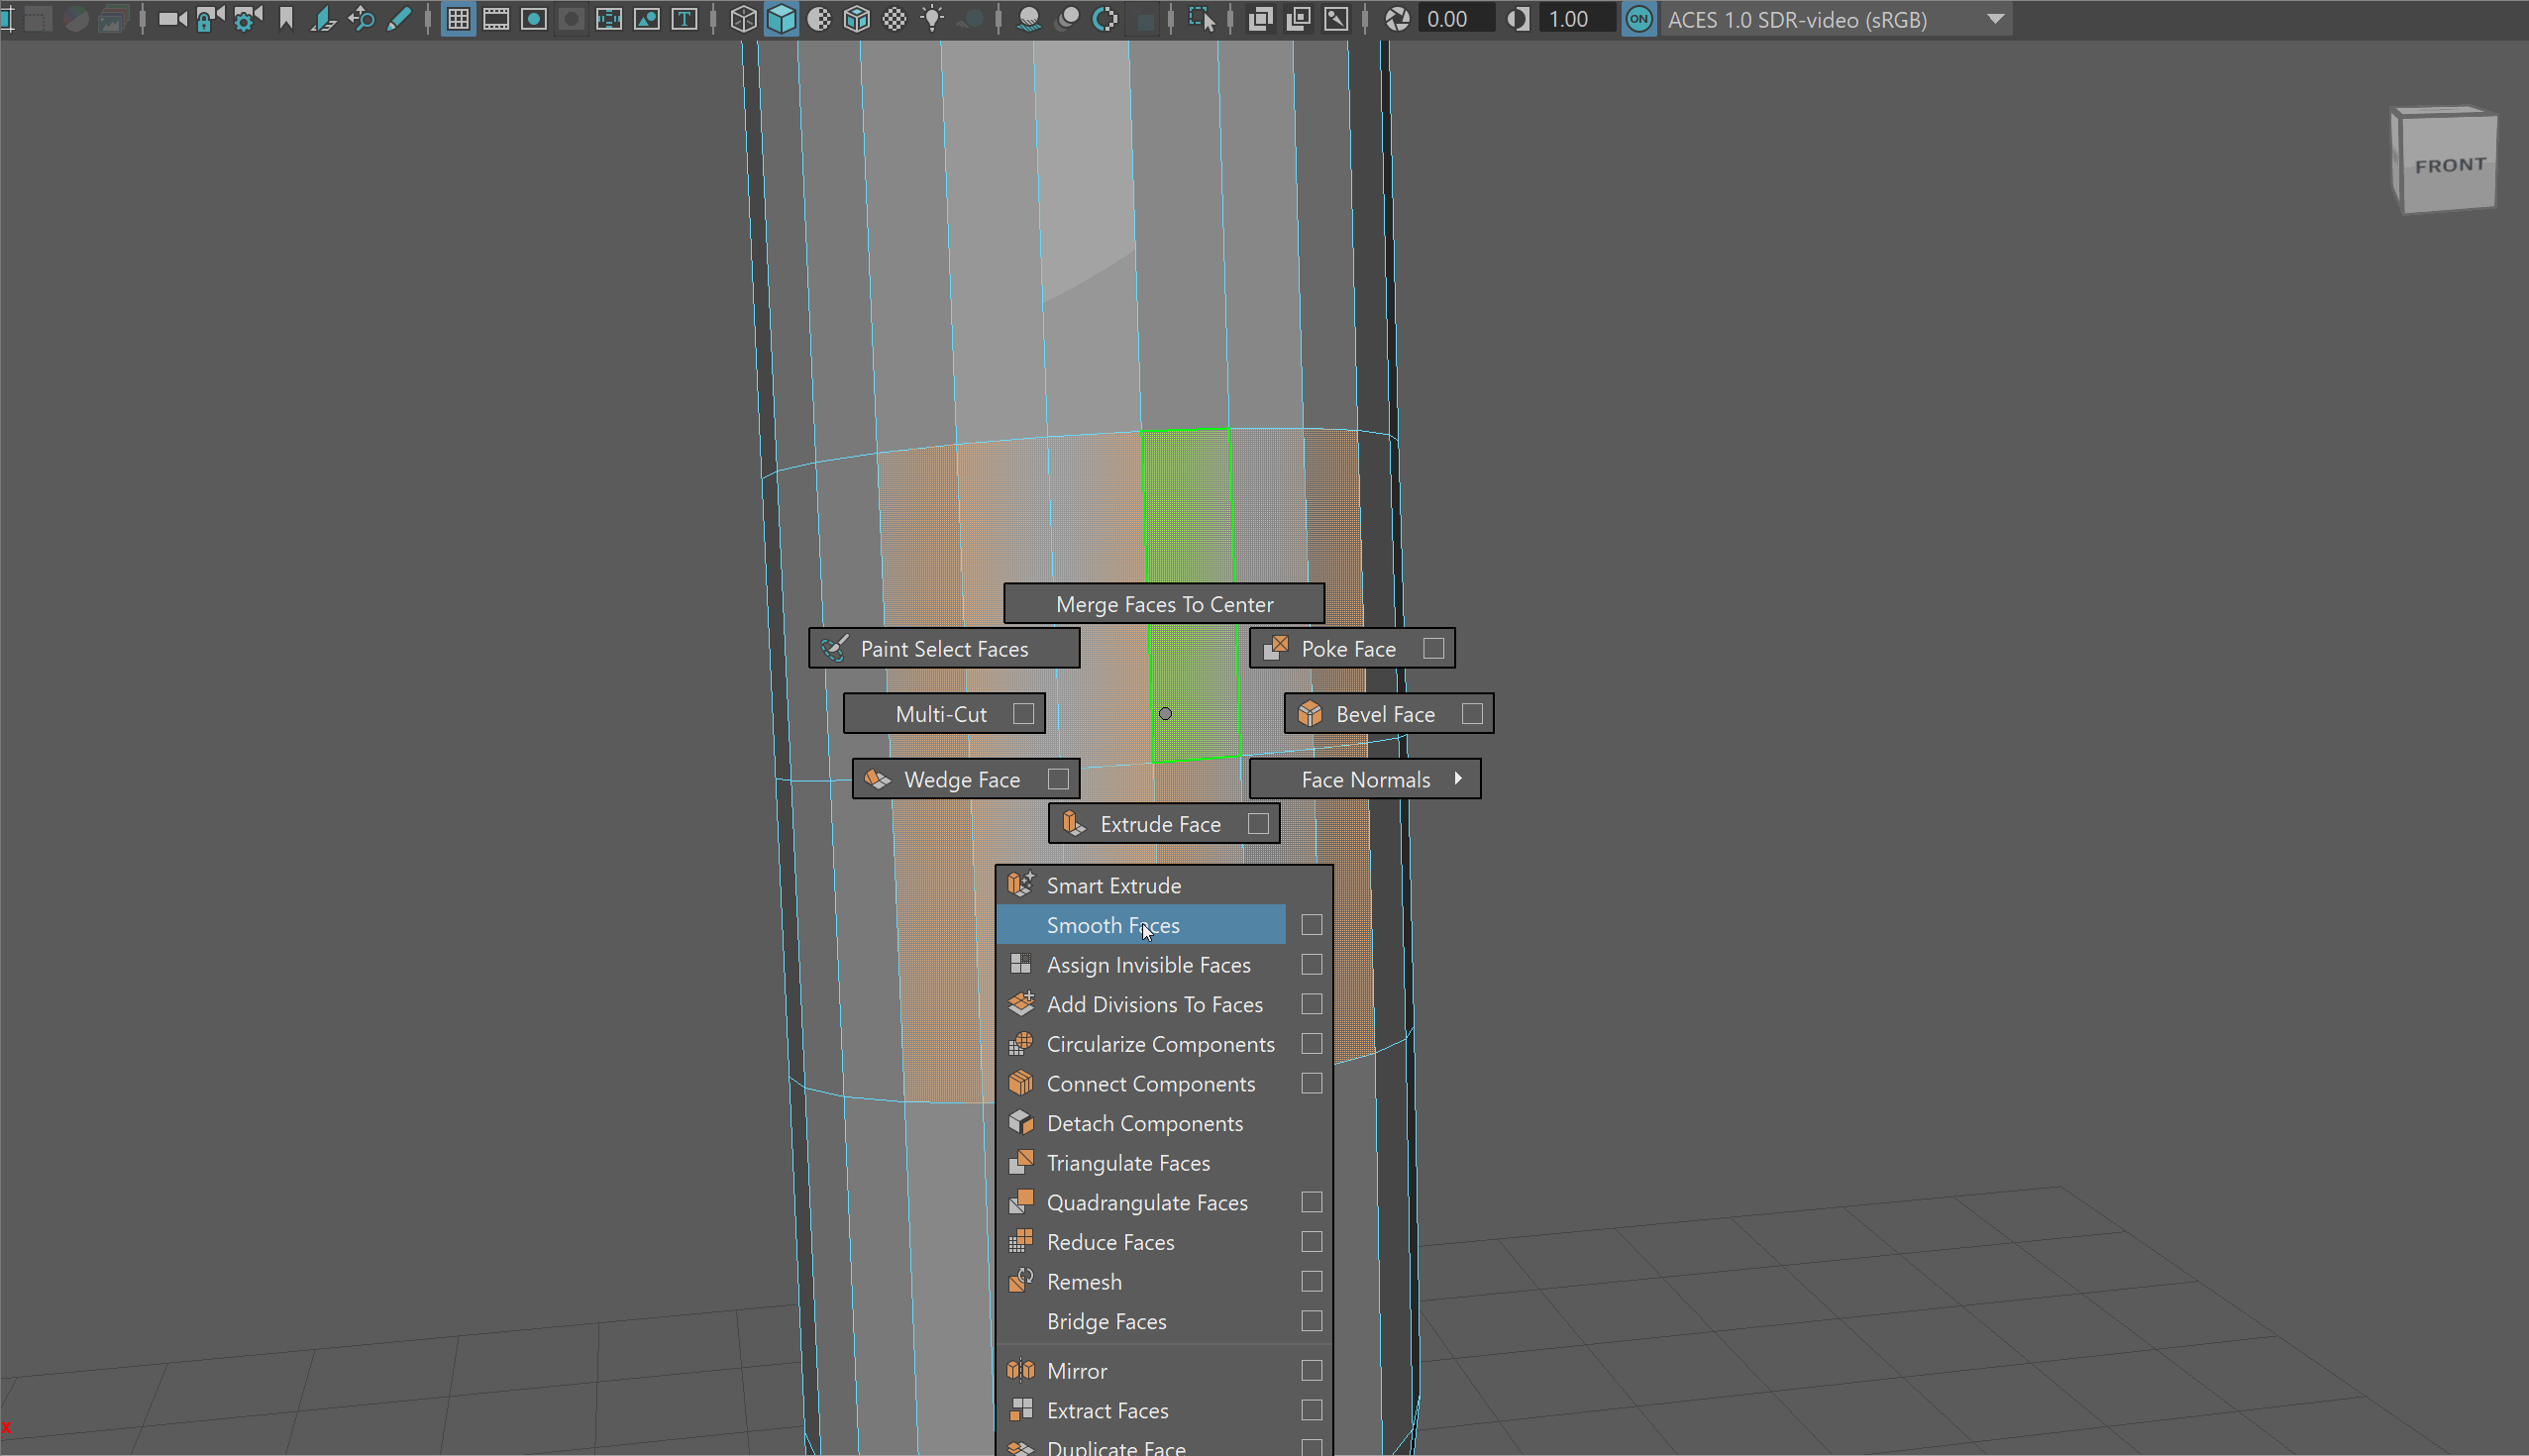
Circularize Components
Circularize components is a very helpful tool with Maya. It allows us to take any components and average their shape into a circle. This is especially helpful for making our tree branches.
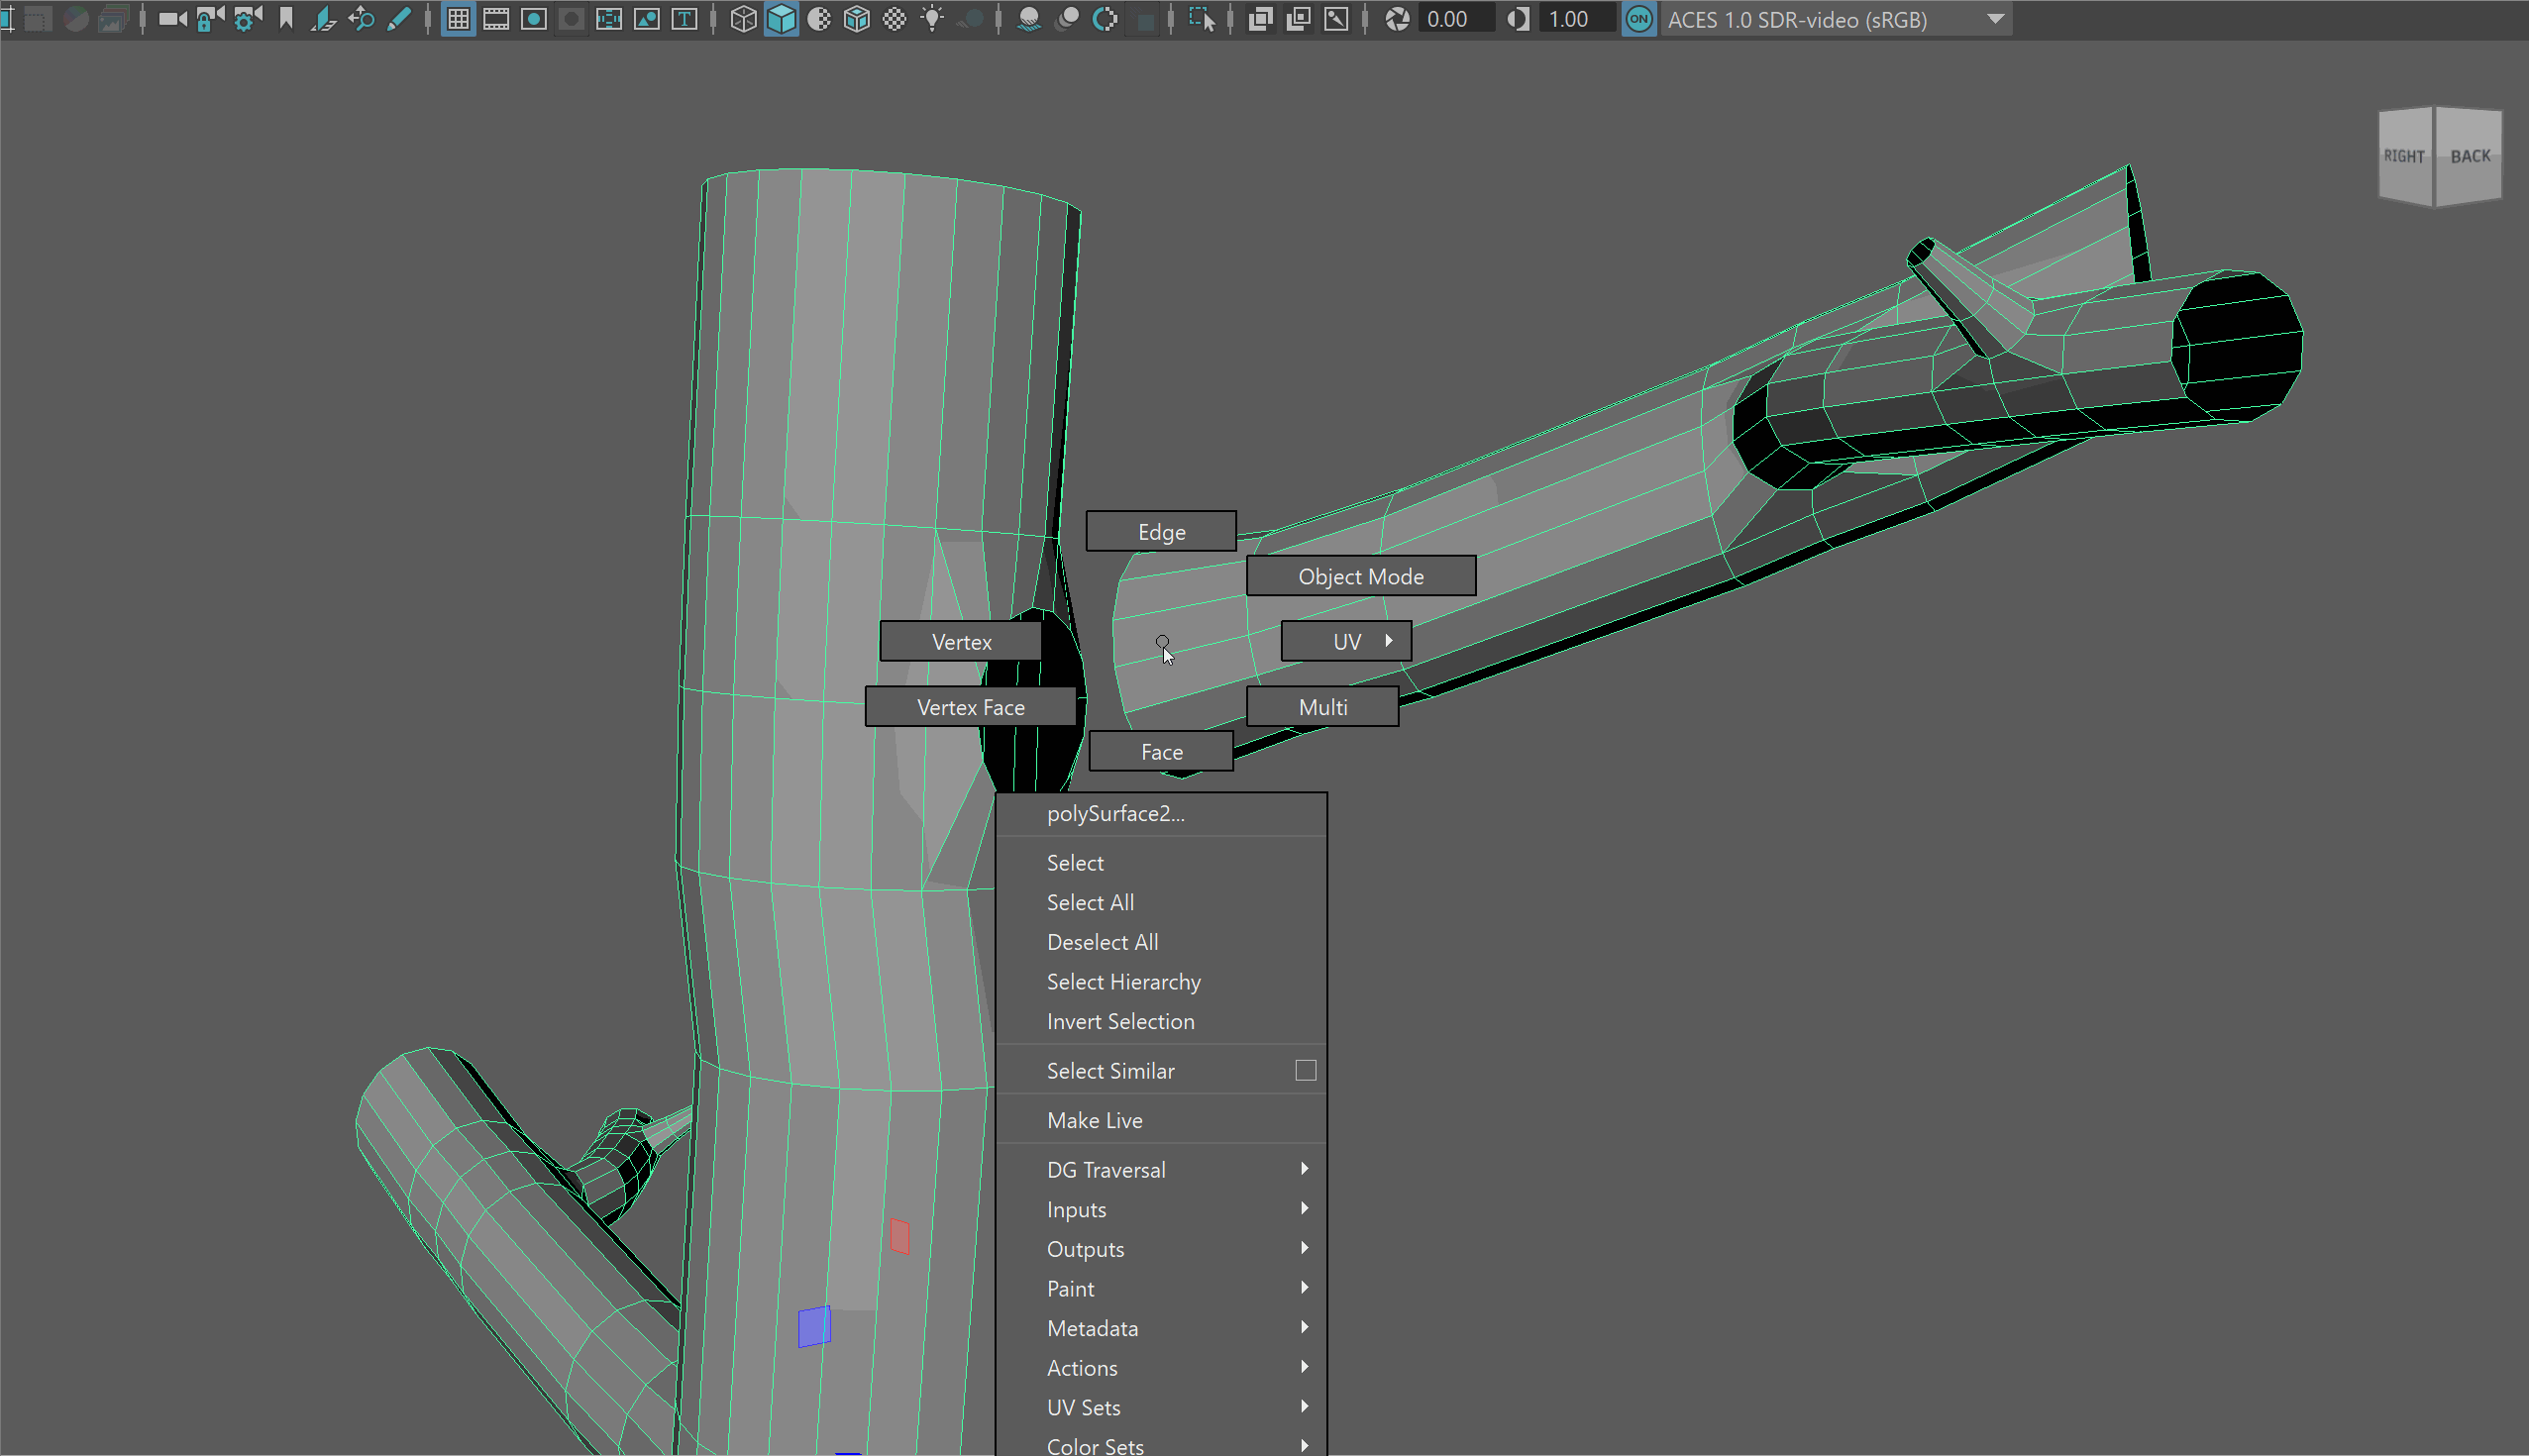
- With the offset faces selected, navigate holding Shift+RMB to Circularize Components.
- You'll notice this will make somewhat of a mess. However, don't worry, we have learned the tools to clean it up!
Begin by opening up the Scale tool, and scaling the faces down using the center Gizmo.
Then use the Rotate tool to match the edges beyond the circle to flow with the rest of our topology.
Finally, use the Move tool to pull out the circle slightly.
NOTE: You may need to be in Component Space for the Move, Rotate, and Scale tool to have the intended effects.
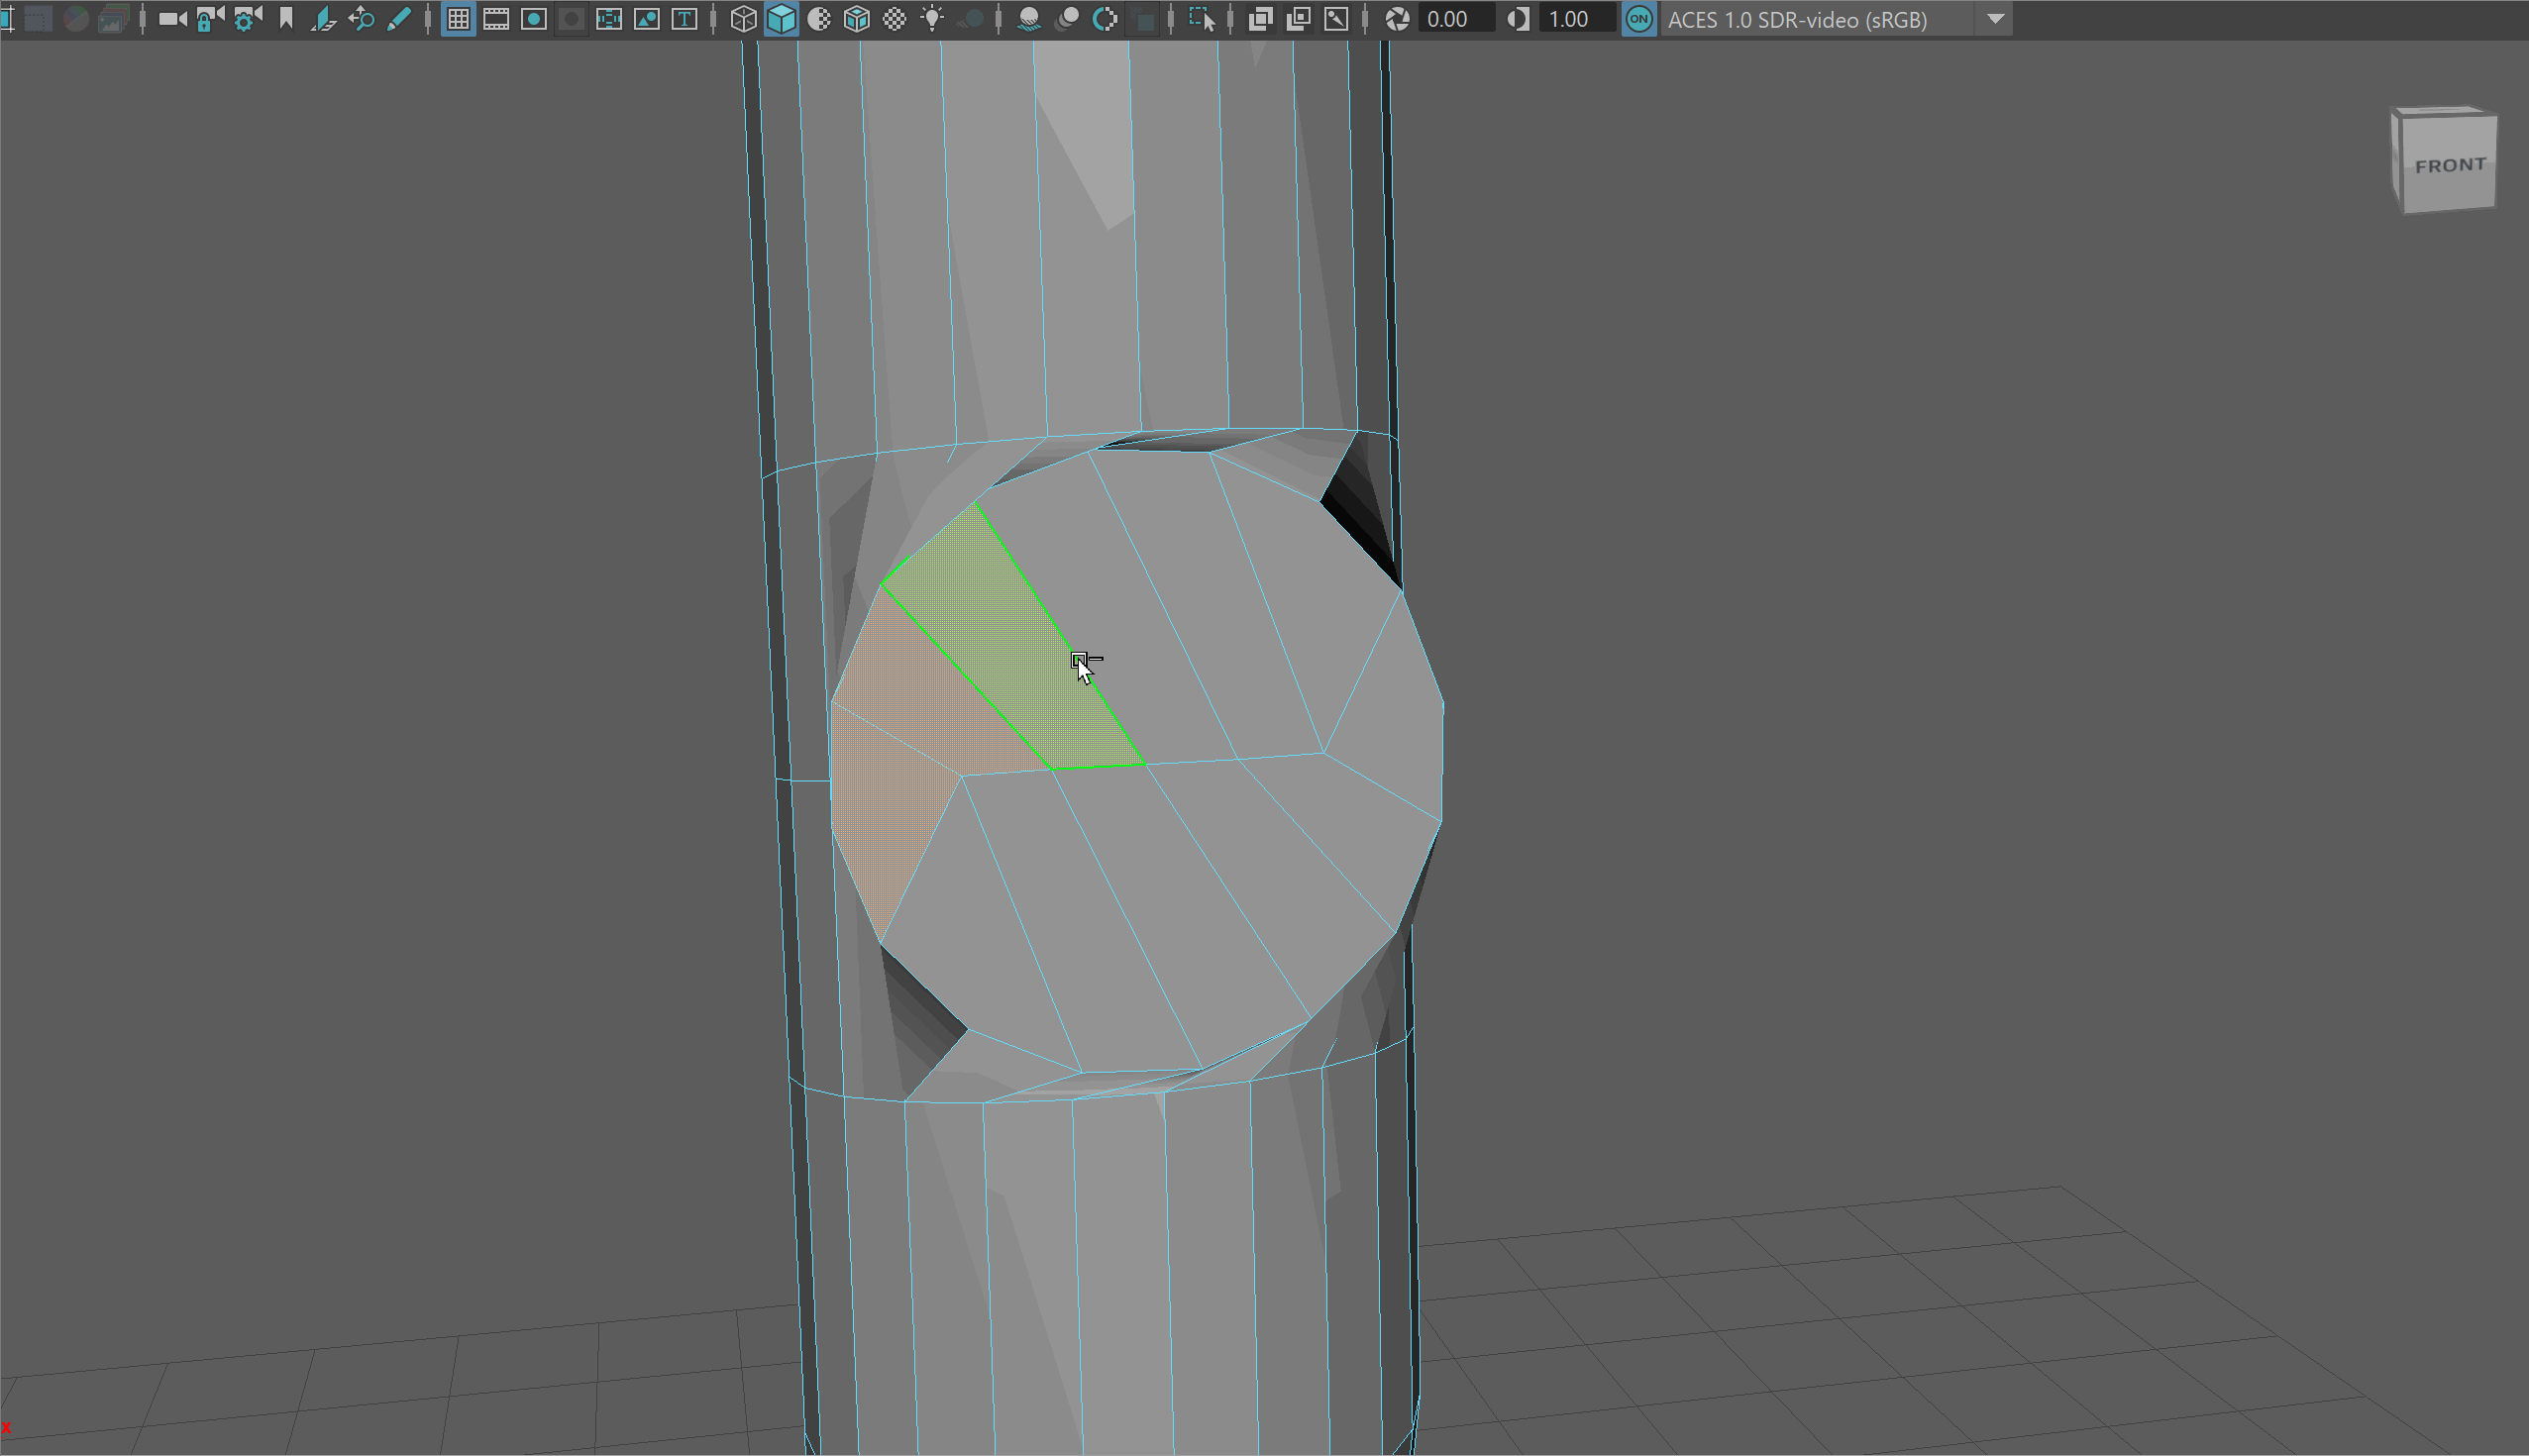
- Delete the faces and begin extruding out the edge loop to make a new branch. You may notice you need to adjust the scale of your edge loops.

Making Secondary Branches
- To make secondary branches, we can repeat the same process of using primary branches. However, instead of selecting 12 faces to make a branch with 16 sides, we will instead select 8 polygons to make a branch with 12 Sides.
Making Tertiary Branches
- To make tertiary branches, we'll repeat the same process, except we will only select 6 faces to make branches with 8 sides.
Duplicating Branches
Since we are doing all this work to make a single branch, it would be great to learn how to duplicate this work to other parts of our model.
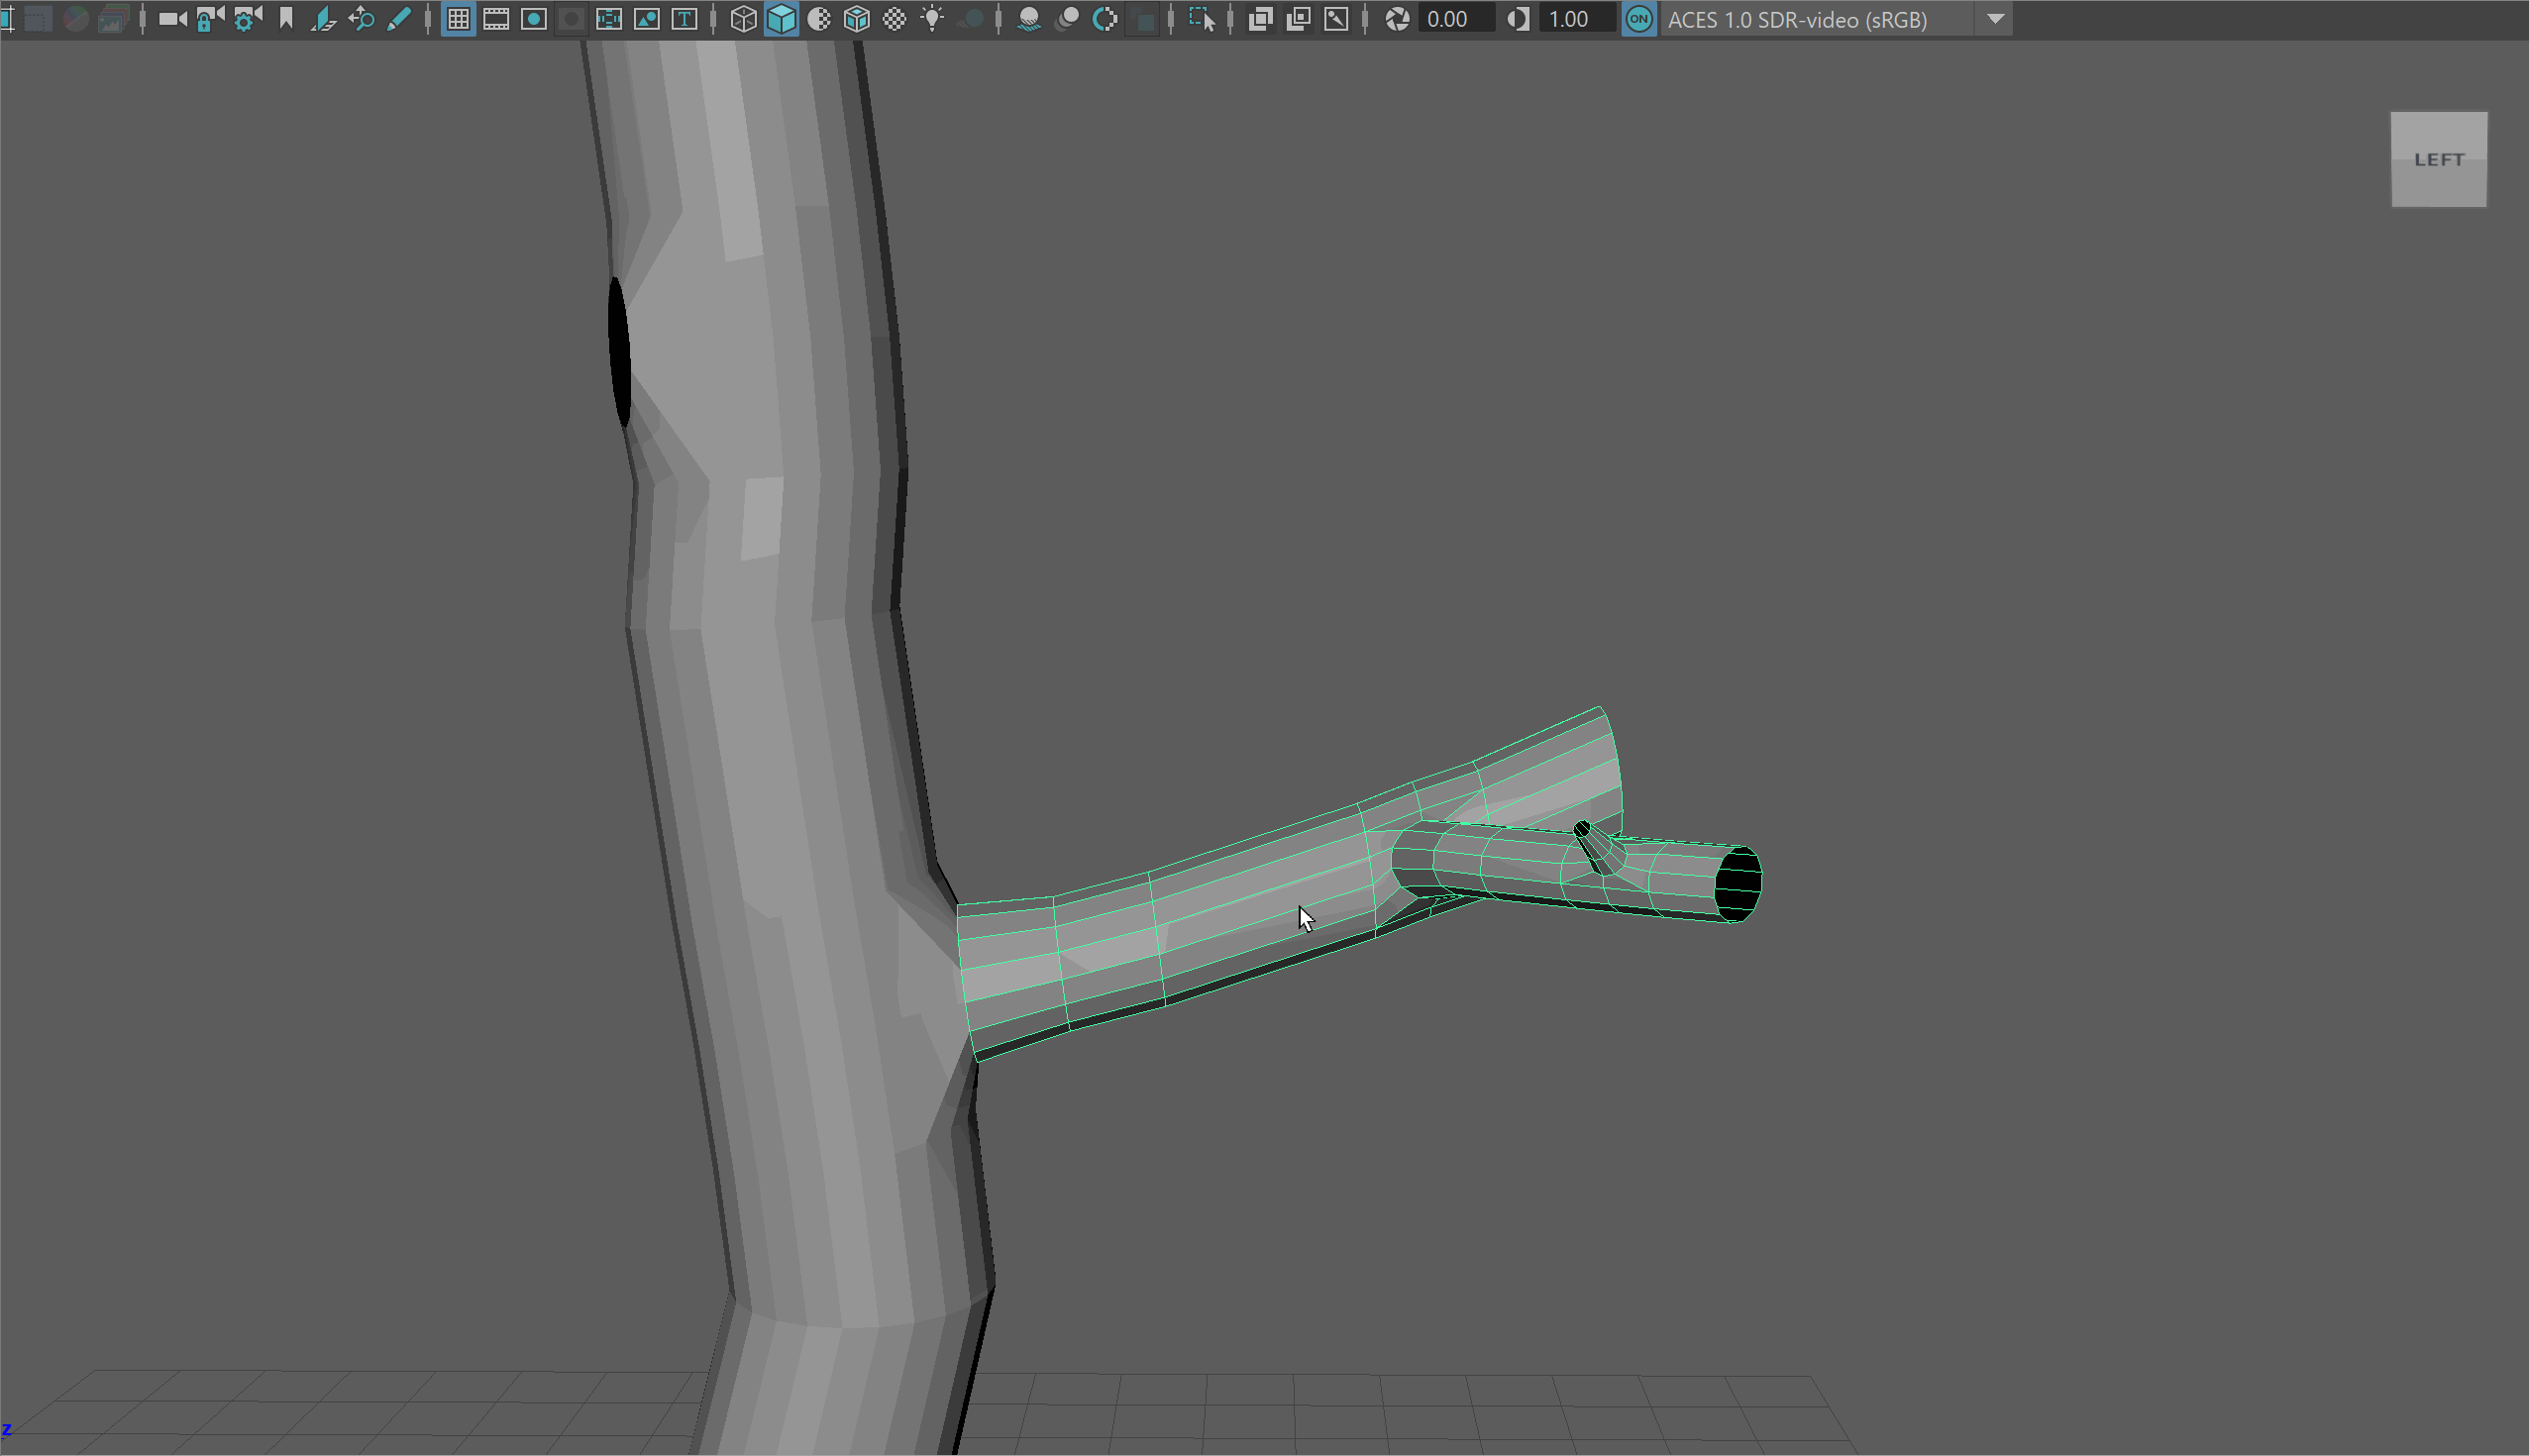
- Begin by creating a new hole in our model, similar to the size of the branch we want to duplicate.
- Select all the faces of the branch we want to duplicate.
- With the faces selected, navigate holding Shift+RMB to Duplicate Face. This will make a new object based on the faces we selected.
- Select our new object and move it up. If you select our original model first, double click on the model to select our new object. Double clicking will swap between models that are on top of each other.
- Snap the pivot point of our new model to be on a vertex on the base of our branch.
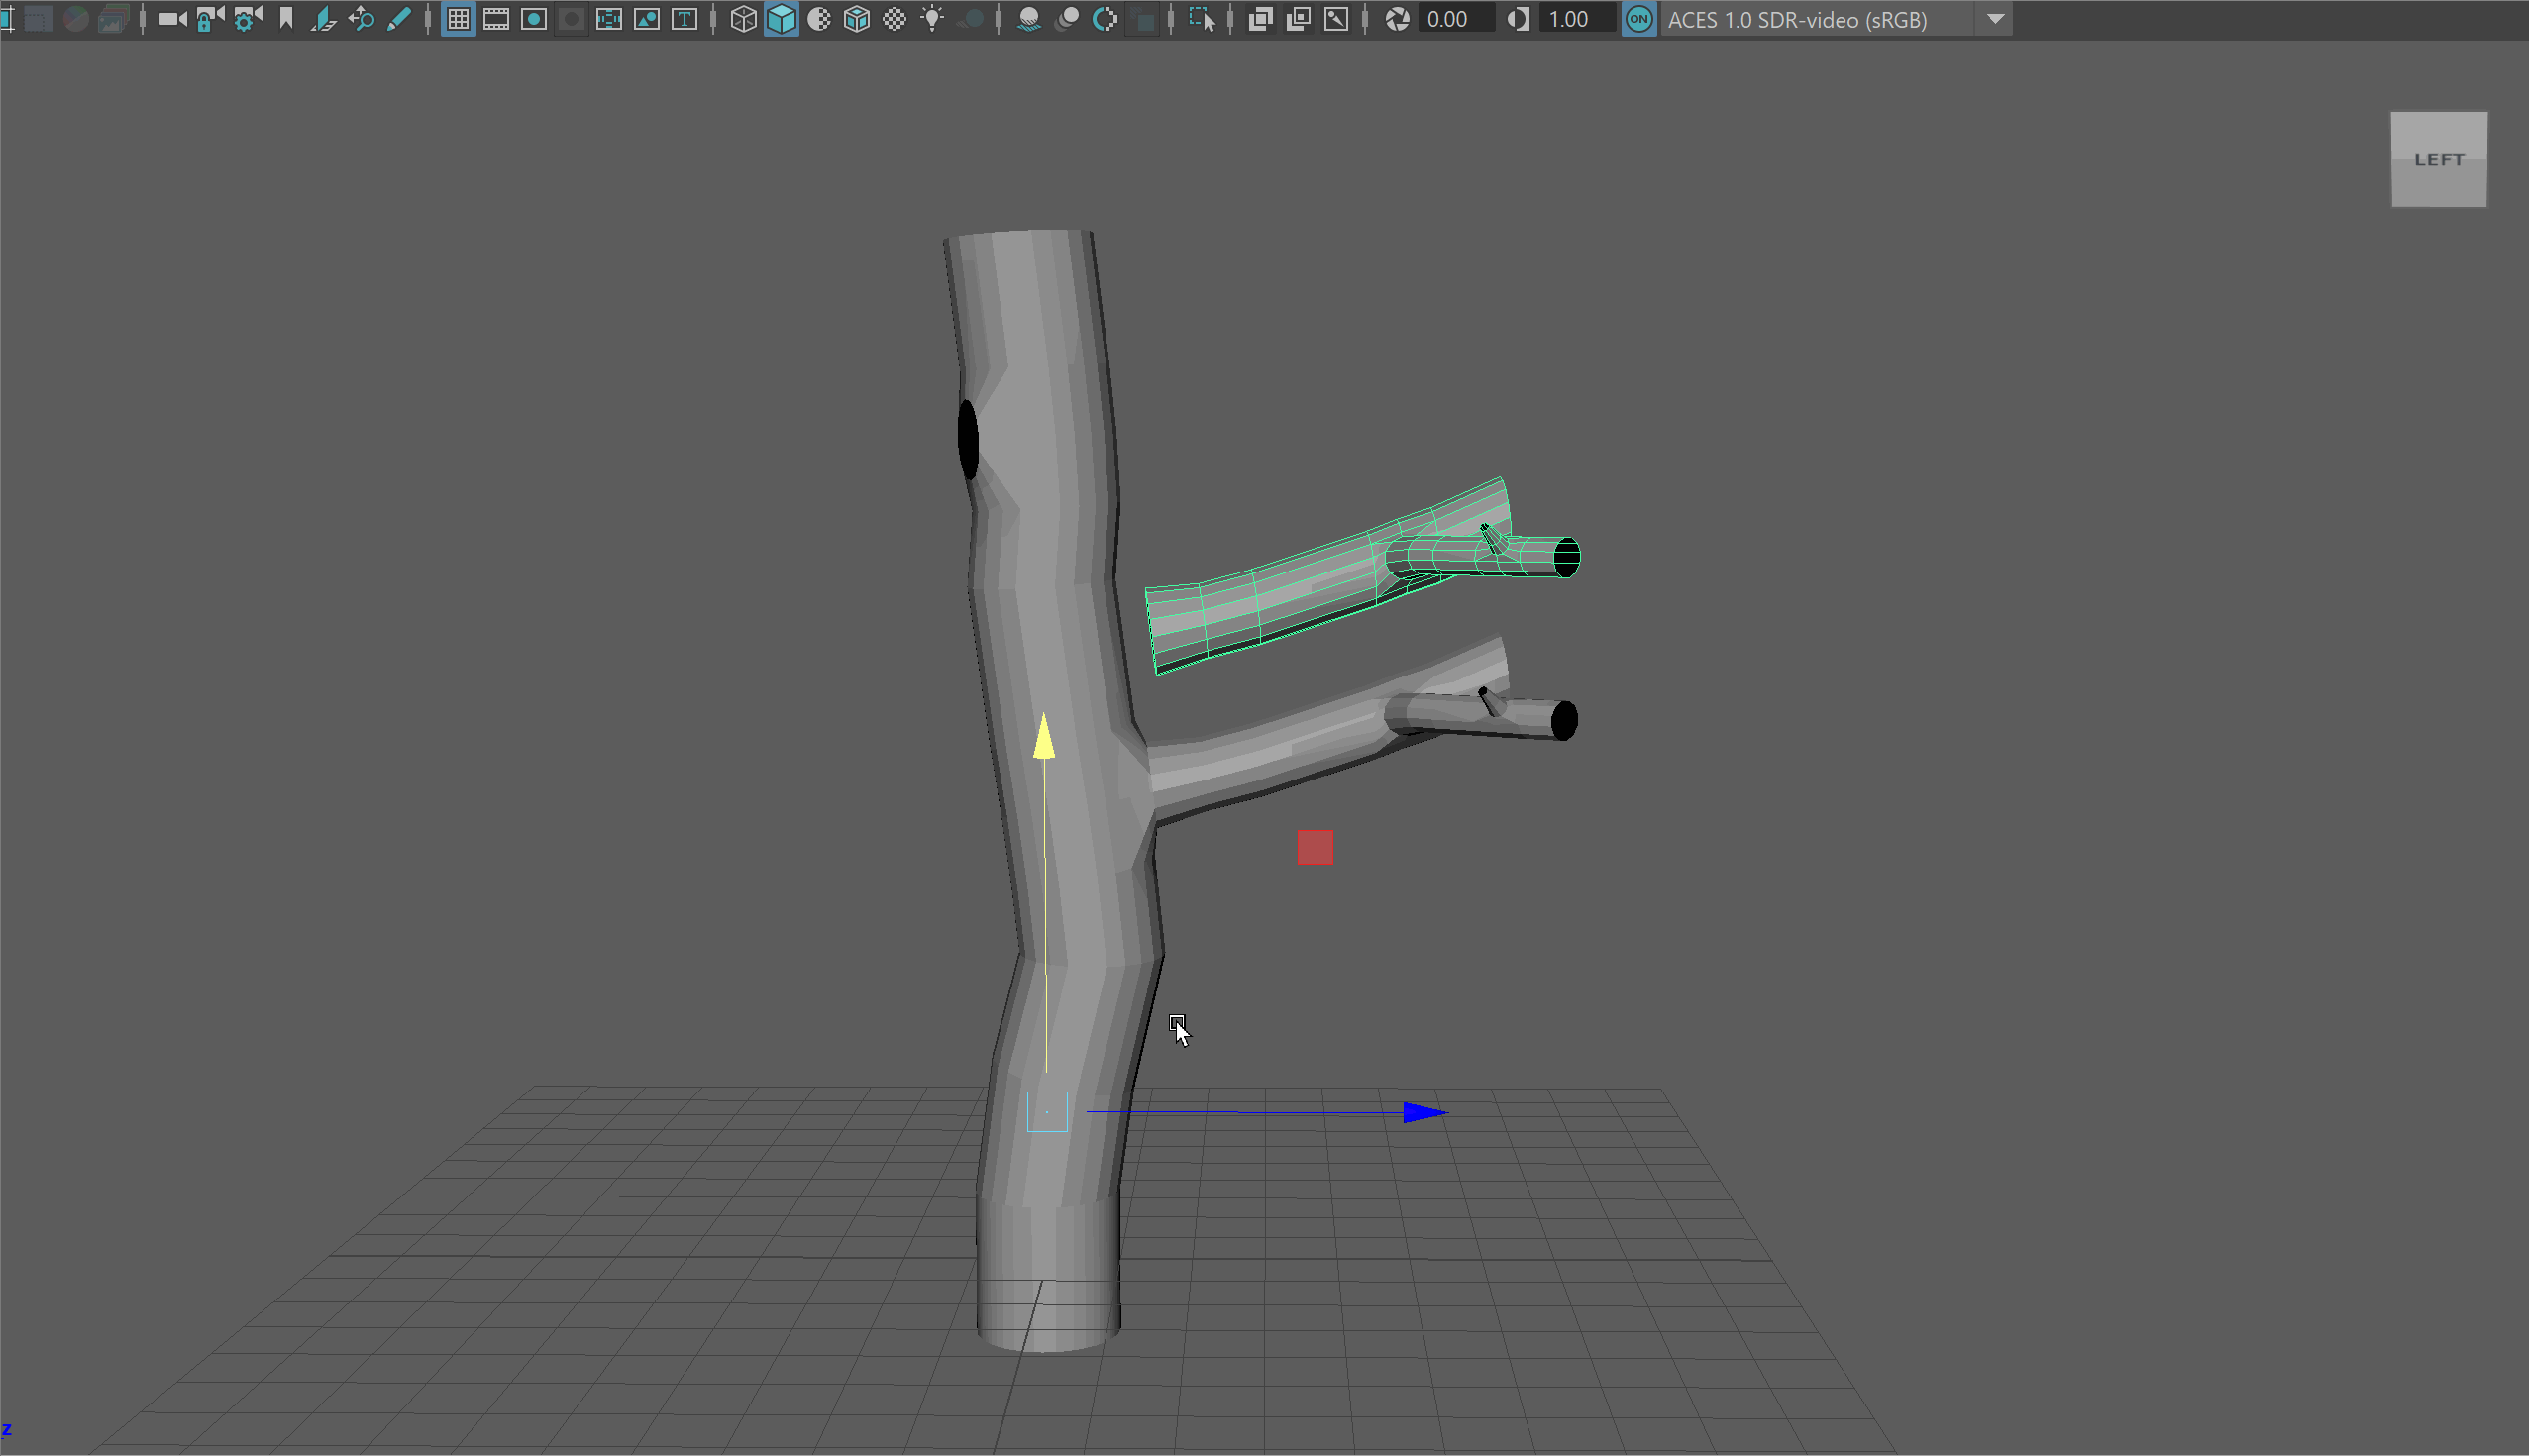
- Move our new branch to be aligned with the new hole we created.
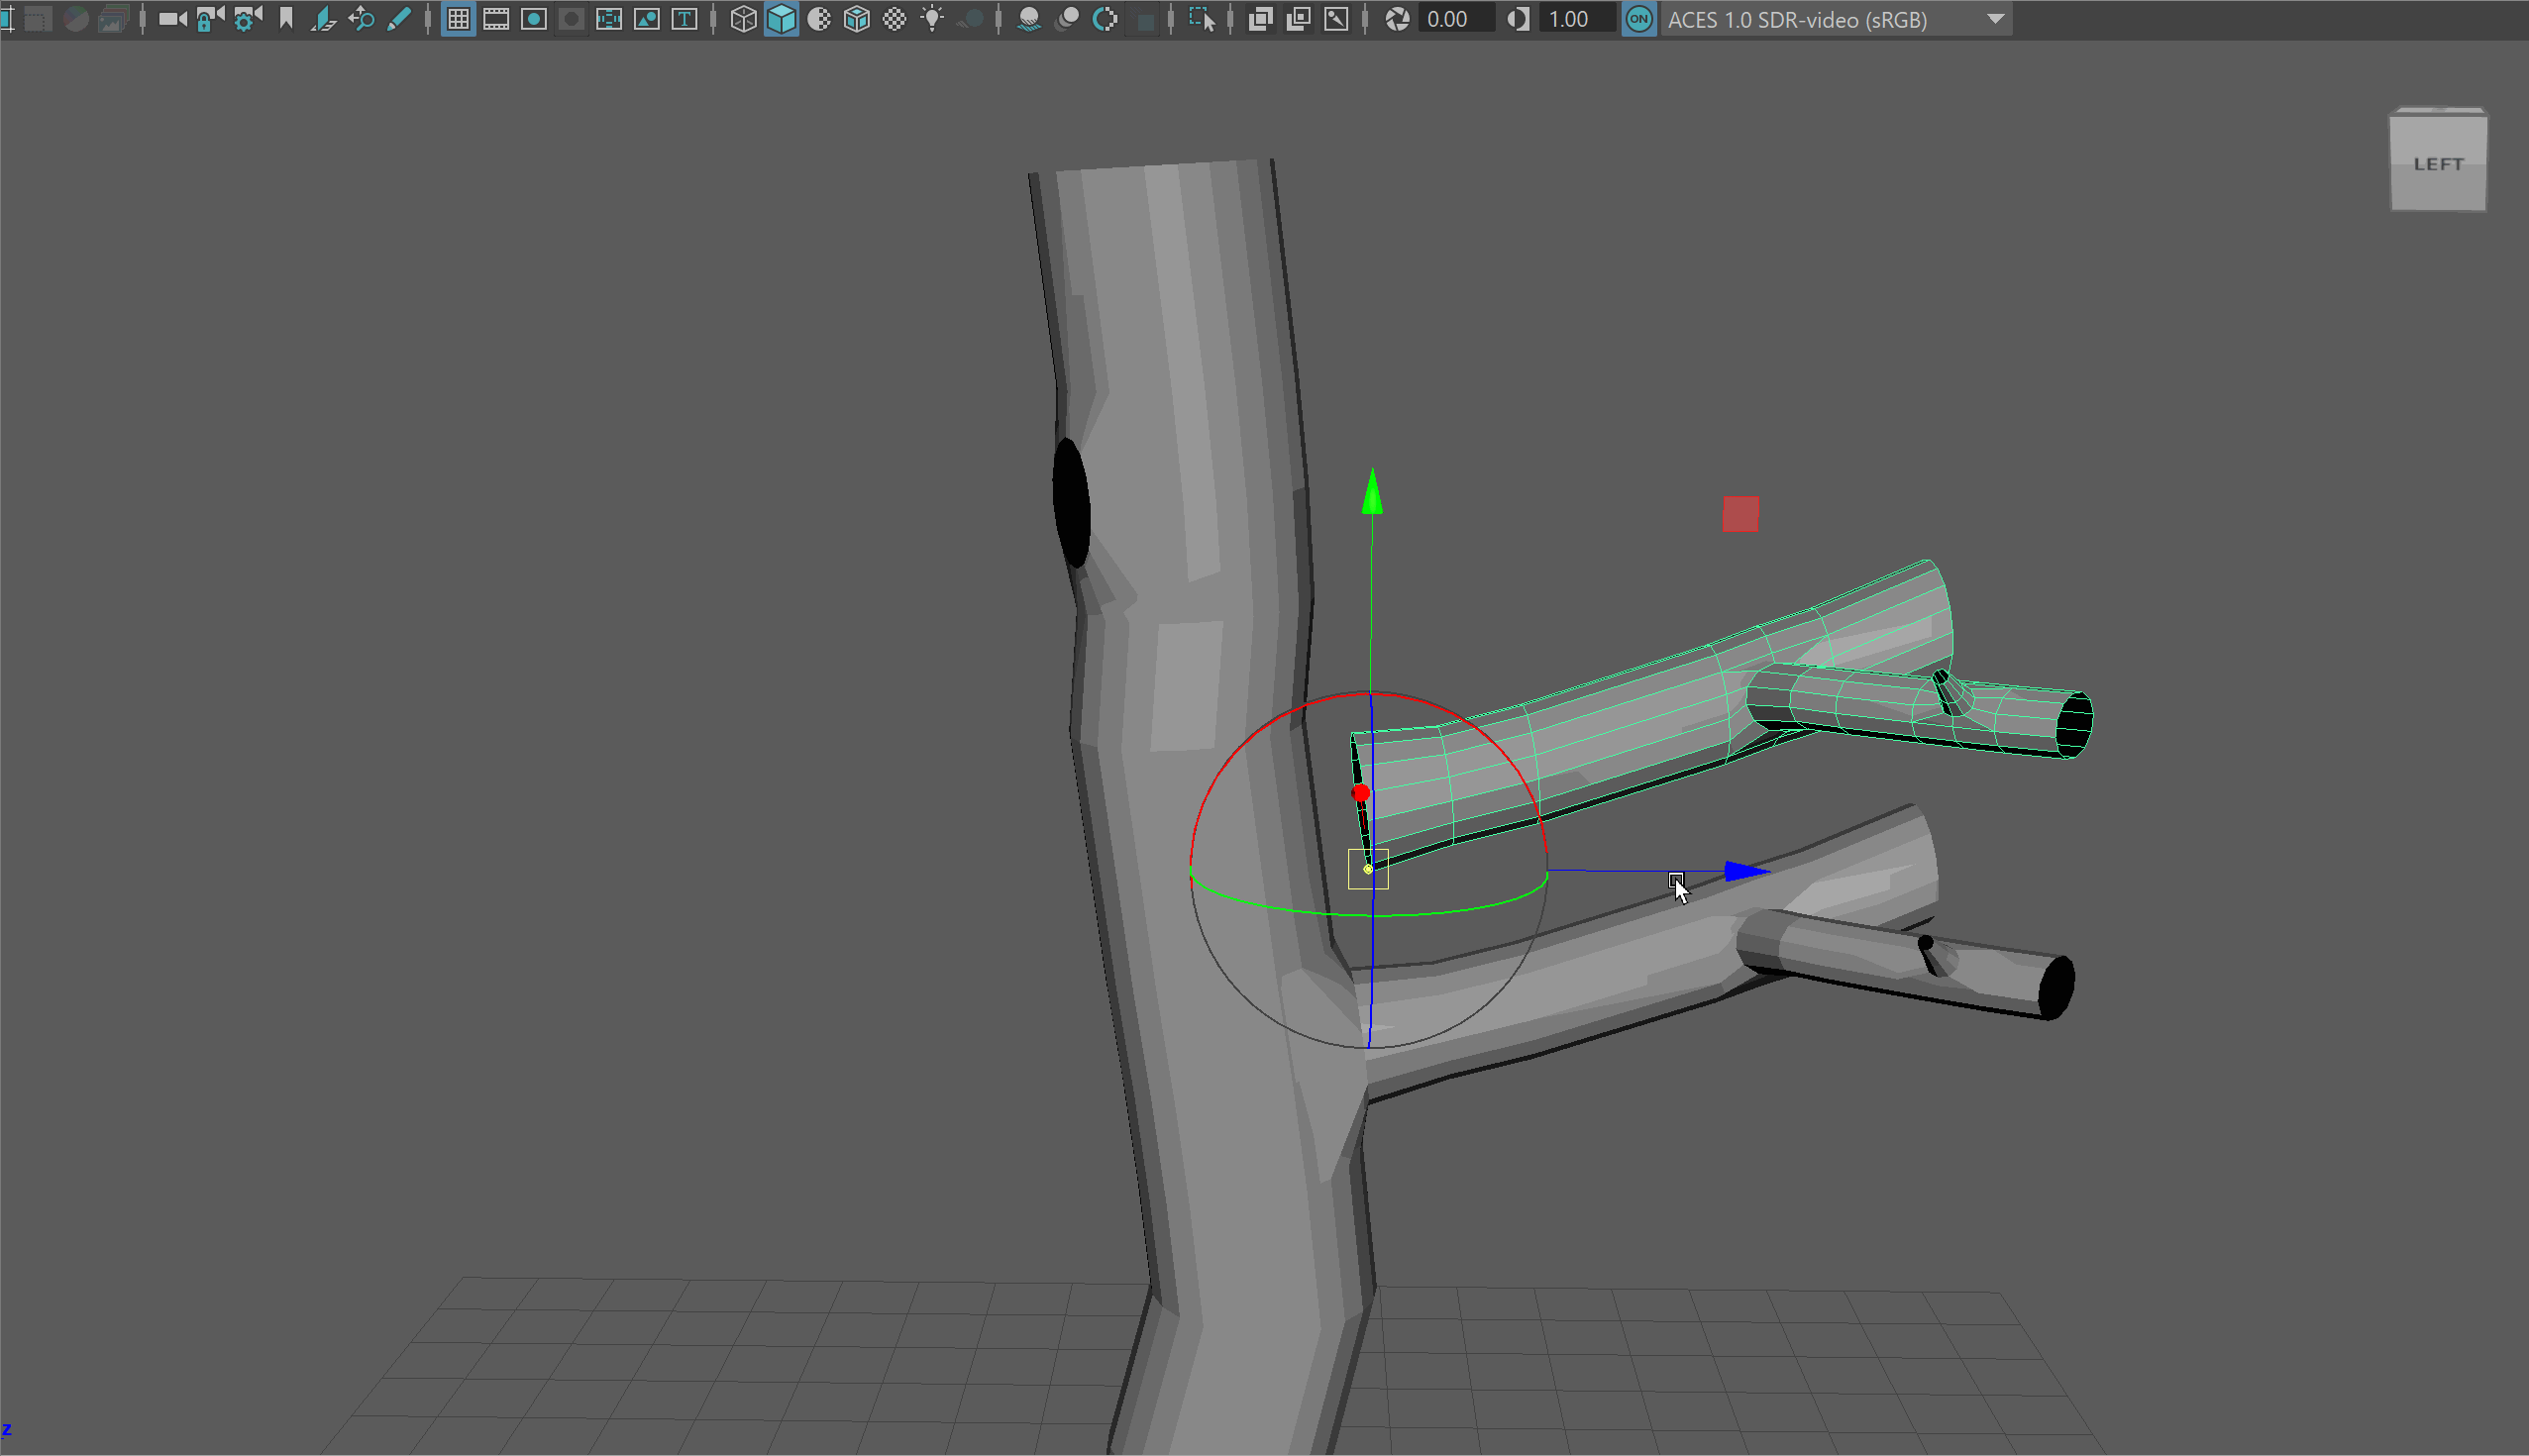
- Combine the two objects together.
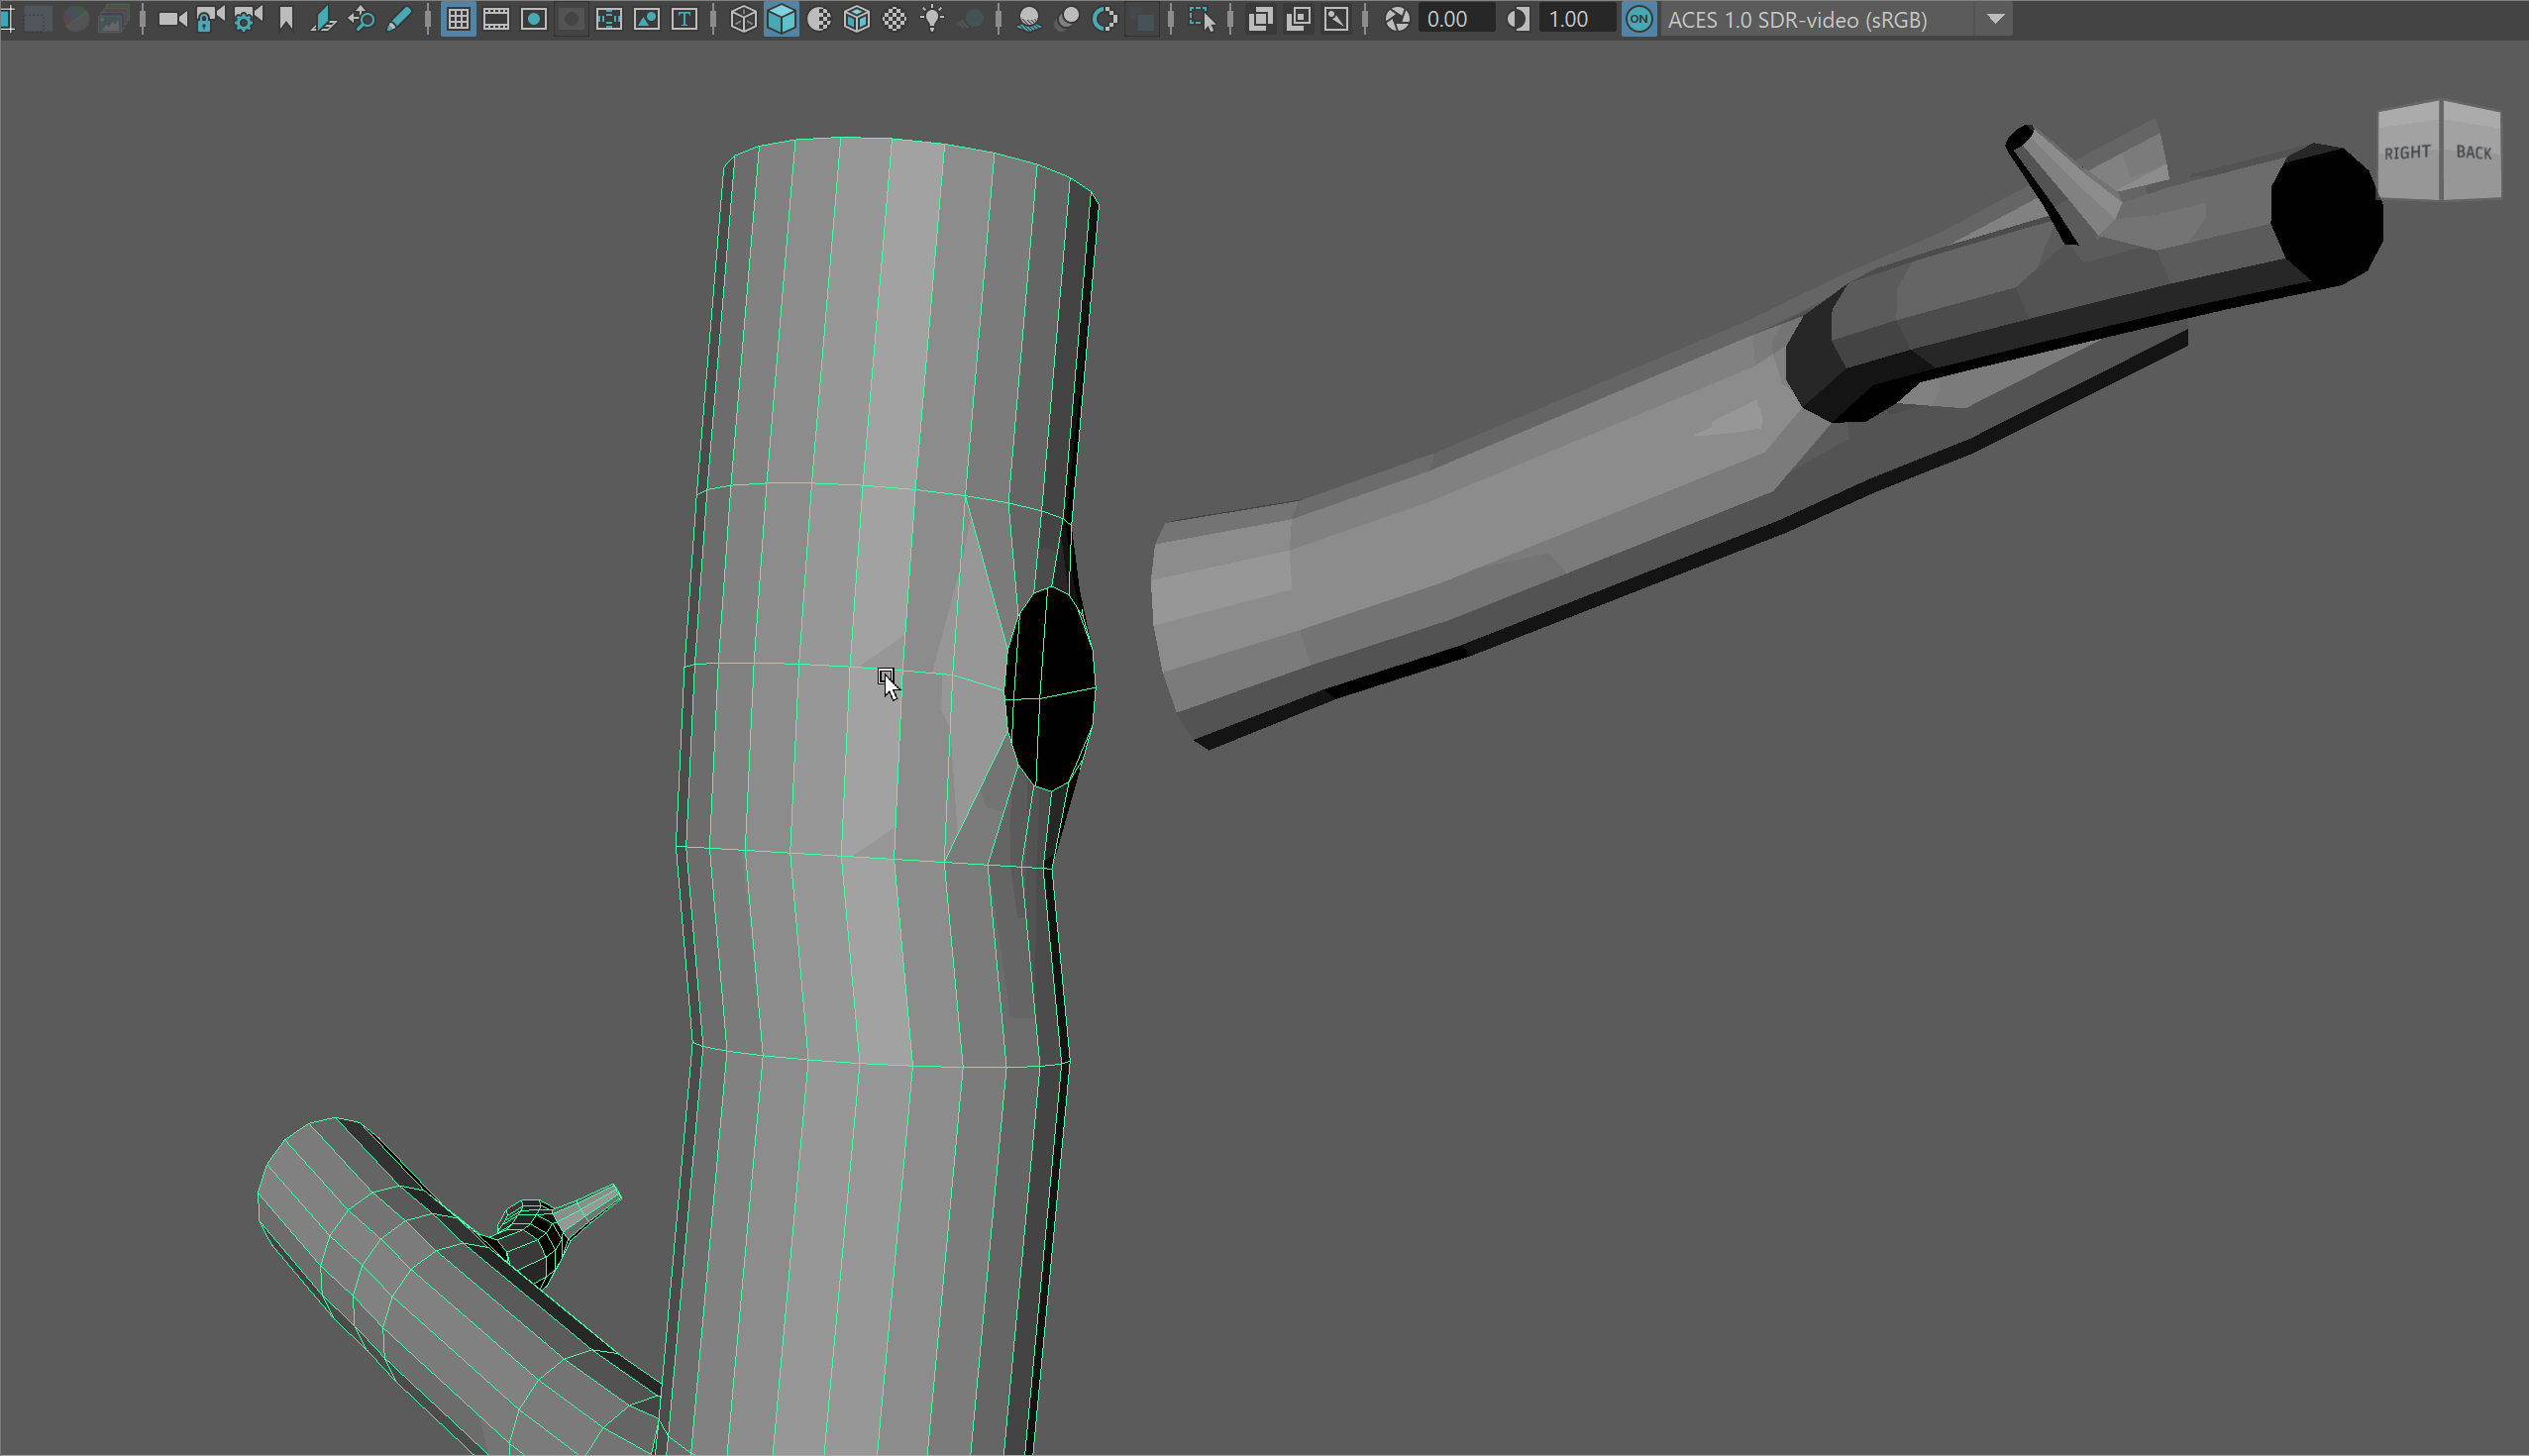
- Either using the bridge tool or the move vertices tool, join the two branches together.
Smooth Shading
You might notice that we can see all the edges of our model. This makes our model look less like a tree. We can make our model appear smoother by softening the edges on our model. This will smooth the transition between different faces of our model.
- To soften our edges, in object mode navigate holding Shift + RMB to Soften/Harden Edges -> Soften Edge.